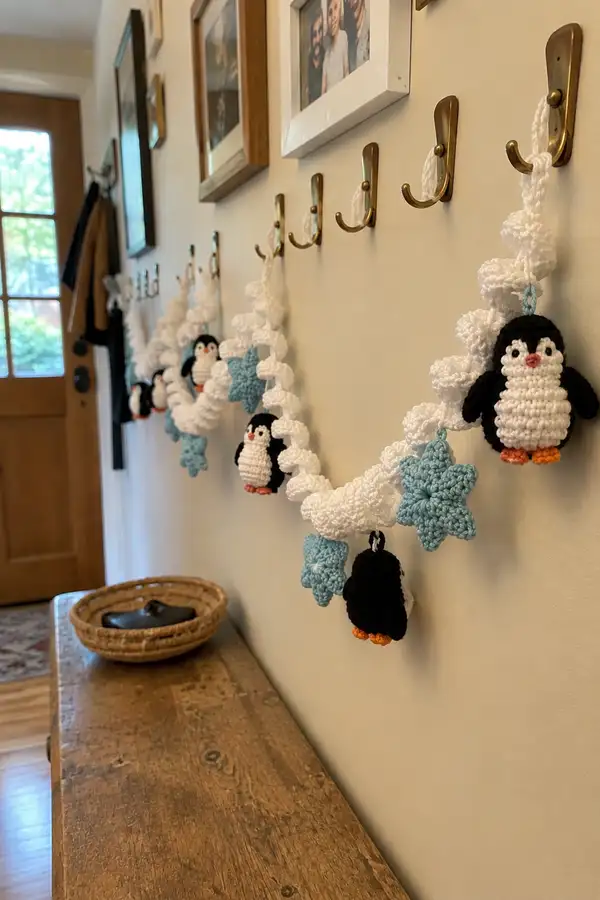
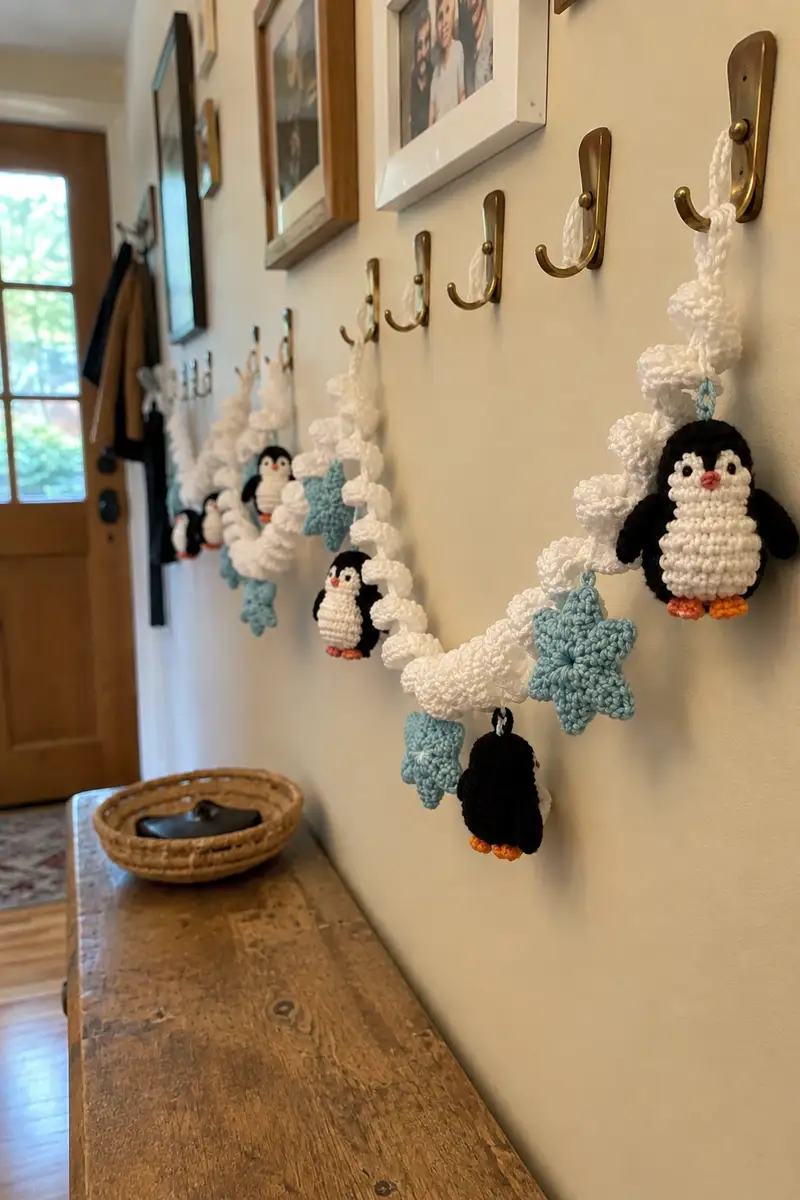
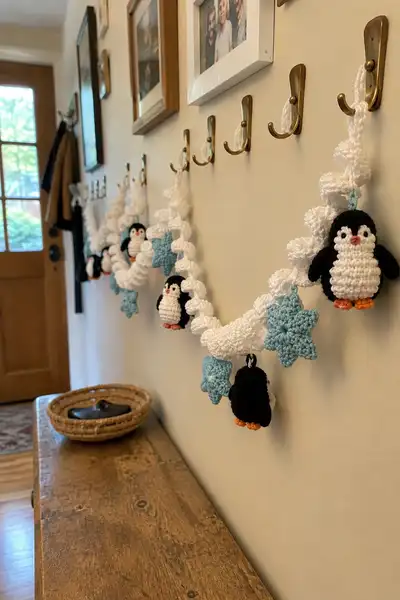
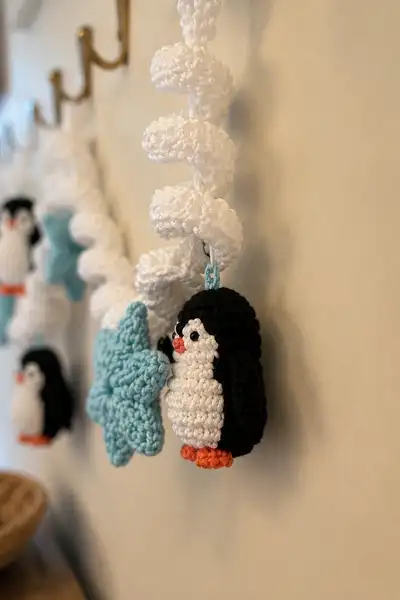
Create a charming snowy spiral garland decorated with tiny amigurumi penguins and ice-blue stars. This pattern recreates the soft white spiral rope, sweet black-and-white penguins with orange feet and beaks, and textured sky-blue stars—perfect for holiday entryways or winter decor. Detailed step-by-step instructions guide you through each part: spiraled rope, hanging loop, stars, and multiple little penguins ready to dangle along the garland. A delightful handmade accent for gifts and seasonal decorating.
Progress Tracker
0% Complete
— Notes & Overview :
Info :
This pattern is written in continuous rounds unless noted; I recommend a stitch marker to mark the beginning of each round. Work tightly for amigurumi so stuffing does not show through. Use worsted weight yarn and a 3.5mm hook for a similar finished size as photographed. The garland is modular: you will make multiple penguins, multiple stars, and a long spiraled rope which is constructed as repeating spiral modules connected into one continuous garland.
Info :
Gauge is not essential for this project, but a small amigurumi penguin should measure roughly 6-7 cm (2.5" to 3") tall when completed. The spiral rope sections are each about 20-25 cm (8-10") before assembly; join as many sections as you need to reach your desired length.
— Penguin Head & Body (Make 6) :
Round 1 :
6 sc in magic ring (6)
Round 3 :
(1 sc, 1 inc) x 6 (18)
Round 4 :
(2 sc, 1 inc) x 6 (24)
Round 5 :
(3 sc, 1 inc) x 6 (30)
Info :
Switch to white yarn at end of this round if making a white belly panel that begins lower on the head. If you prefer an embroidered belly, continue black for now and change later.
Round 6 :
(4 sc, 1 inc) x 6 (36)
Round 7 :
(5 sc, 1 inc) x 6 (42)
Round 8 :
(6 sc, 1 inc) x 6 (48)
Info :
At this point the piece is the widest part of the penguin. For the penguins pictured the white belly occupies the front same rounds as the body; change to white to work the belly rounds while continuing in the round in continuous spirals. Mark front center stitch for reference for eye placement.
Round 9 :
1 sc in each st (48)
Round 10 :
1 sc in each st (48)
Round 11 :
1 sc in each st (48)
Info :
Place safety eyes between rounds 11 and 12, approximately 8-10 stitches apart depending on the face width you prefer. If using 6mm eyes, space them closer; for 8mm, space slightly wider. Mark positions with pins before securing eyes.
Round 12 :
1 sc in each st (48)
Round 13 :
1 sc in each st (48)
Round 14 :
1 sc in each st (48)
Info :
Begin to define the belly by switching to white yarn on the first stitch at the front center you marked. Work in white for the next 6 rounds to build a textured belly panel; carry black behind if desired or fasten off and rejoin later.
Round 15 :
Change to white yarn. 1 sc in each st (48)
Round 16 :
1 sc in each st (48)
Round 17 :
1 sc in each st (48)
Round 18 :
1 sc in each st (48)
Info :
If you want a ribbed belly detail like the photo, work Round 16 in BLO (48) to create a subtle ridge. Use a tapestry needle to embroider a small smile two rounds below the eyes if desired.
Round 19 :
1 sc in each st (48)
Round 20 :
1 sc in each st (48)
Round 21 :
(6 sc, 1 dec) x 6 (42)
Round 22 :
(5 sc, 1 dec) x 6 (36)
Info :
Begin stuffing the head/body mixture lightly now. Keep the stuffing firmer in the head area to maintain rounded features; allow the lower body to be slightly softer so penguins dangle naturally.
Round 23 :
(4 sc, 1 dec) x 6 (30)
Round 24 :
(3 sc, 1 dec) x 6 (24)
Round 25 :
(2 sc, 1 dec) x 6 (18)
Info :
Stop stuffing when the penguin has a firm but slightly squeezable feel; overstuffing makes sewing on the feet and wings difficult. Leave a tail of yarn ~25 cm for sewing to the garland loop later.
Round 26 :
(1 sc, 1 dec) x 6 (12)
Round 28 :
Fasten off leaving long tail for sewing. Weave tail through remaining 6 sts and pull tight to close. Secure and hide tail inside the body (6)
Info :
At this stage the penguin body is a single oval. You will stitch on wings and feet afterwards. If you prefer separate head and body pieces, create two small halves and sew them together, but continuous rounds yield a neater result for hanging ornaments.
— Penguin Wings (Make 6, Left and Right) :
Round 1 :
6 sc in magic ring (6)
Round 3 :
(1 sc, 1 inc) x 6 (18)
Round 4 :
(2 sc, 1 inc) x 6 (24)
Round 5 :
1 sc in each st (24)
Info :
For a slightly flat wing like the pictured design, work Rnd 6 in BLO to create a defined ridge at the wing base. Wings should be small and slightly curved when sewn to the body.
Round 6 :
1 sc in each st BLO (24)
Round 7 :
(3 sc, 1 dec) x 6 (18)
Round 8 :
(2 sc, 1 dec) x 6 (12)
Round 9 :
(1 sc, 1 dec) x 6 (6)
Round 10 :
Fasten off leaving long tail for sewing. Flatten wing and whip stitch tail to secure the tip if needed (6)
Info :
Sew each wing to the side of the penguin body around rounds 12-16 of the body to approximate the look in the photos. Slightly curve the wing forward when attaching to give a natural pose.
— Penguin Feet (Make 6, 2 pieces per penguin) :
Round 1 :
6 sc in magic ring with orange yarn (6)
Round 3 :
(1 sc, 1 inc) x 6 (18)
Round 4 :
1 sc in each st (18)
Round 5 :
Work 3 sc, sl st to next 3 sts to create two toe lobes across the front; finish remainder sc (18)
Info :
Flatten the piece so the toes are at the front and sew the feet to the bottom front of the penguin body around the lowest rounds for a stable hang. Stuff feet with very small amount of fiberfill if you want them rounded.
Round 6 :
Fasten off leaving long tail for sewing. Position and stitch feet to the bottom center of the penguin. Repeat for each penguin (18)
— Penguin Beak (Make 6) :
Round 1 :
4 sc in magic ring with orange yarn (4)
Round 2 :
1 sc in each st (4)
Round 3 :
Fasten off leaving tail for sewing. Sew beak between eyes approximately on round 12-13 of the body. Optionally add a tiny stitch of pink to the center of the beak for a highlight.
— Tiny Star (Make 6) :
Round 1 :
5 sc in magic ring with ice-blue yarn (5)
Round 2 :
(ch 3, sl st in next st) x 5 to form five small points; finish with sl st into first sc (5)
Round 3 :
Join ice-blue. *Sl st in next ch-3 loop, ch 2, (2 dc, ch 1, 2 dc) in same loop, ch 2, sl st in next sc; rep from * around to form puffed points. Finish with sl st into first st (5 puff points; work will measure approx 3.5-4 cm)
Round 4 :
Fasten off leaving long tail for sewing. Block gently if desired to encourage star points to sit nicely.
Info :
I used a textured puff appearance: the round 3 sequence gives a fuller star. If you prefer flat stars, replace round 3 with simple (dc, ch 1, dc) in each ch-3 loop.
— Hanging Loop for Each Ornament :
Round 1 :
With ice-blue or white, ch 12 (12)
Round 2 :
Sl st in 2nd ch from hook and in each ch back to start; do not fasten off. Fold to create a loop and sl st into base to secure; leave tail for sewing to top of ornament
Info :
Make hanging loops for each penguin and star so they can be attached to the spiral rope. Adjust chain length shorter or longer depending on hang depth you want.
— Spiral Rope Module (Make 10 modules; join to desired length) :
Info :
The spiral rope in the photos is created by making a long chain and crocheting multiple stitches into each chain stitch to force a tight curl. Each module makes approximately 20-25 cm of curly rope.
Round 1 :
With white yarn ch 40 (40)
Round 2 :
3 sc in 2nd ch from hook, 3 sc in each ch across to end (120)
Info :
This creates a tight spiral: the triple stitches force the chain to curl into a wide spiral. You can adjust ch length per module to make longer or shorter spirals. Carry ends cleanly to join modules.
Round 3 :
Ch 1, turn and 1 sc in each st across the curled rope if you want to secure the ridges and smooth the spiral (120)
Round 4 :
Fasten off leaving long tail for joining. Make 10 identical modules or more; join by whip stitching tail-to-tail to create a continuous garland rope approximately 2 m long when 10 modules are used.
Info :
If you prefer a thicker spiral, make 3 sc per chain as above and then work one more row of 1 sc in each st to bulk up the rope. For a looser curl, use 2 sc in each ch instead of 3 sc.
— Garland Assembly & Spacing :
Info :
Lay your spiral rope modules out in order and join them with slip stitches along ends or sew them securely with a yarn needle. Space penguins and stars evenly: in the photographed example spacing is approx every 20-25 cm with alternating penguin and star.
Round 1 :
Decide layout: Starting at one end, measure 10 cm and pin the first hanging loop to the rope. Use the tail left on each penguin/star loop to sew through the spiral rope and secure on the inside of the spiral so the ornament hangs outward.
Info :
Attach each ornament by weaving the loop tail through a gap in the spiral and whip stitching securely to the rope. Make sure ornaments face outward and are evenly spaced. Use pins to preview placement before final sewing.
— Alternative Detail: Star Edge Puffing (Optional) :
Round 1 :
To add texture, single crochet around each star's outer points in contrasting white to mimic icy frost. Join white at a point and sc, ch 1, sc in next outer loop around then fasten off.
Info :
Adding a white edge gives stars a frosted look similar to the photos where stars appear slightly edged and textured against the white spiral rope.
— Hanging & Final Finishing :
Info :
Once all ornaments are attached, check balance and spacing. If one side droops, move the attachment point slightly. Tidy ends by weaving tails into the spiral rope; trim close to work. Add an extra loop at each garland end for hanging on hooks.
Round 1 :
Optional: lightly steam block the stars and rope on low heat to relax the yarn and set the spiral shape. Be cautious with synthetic yarns and use a pressing cloth.
Info :
For safety eyes: ensure they are secured before assembly. For baby-safe garlands, embroider eyes and small details and avoid safety eyes altogether.
— Troubleshooting & Tips :
Info :
If your spiral is not curling enough, increase to 4 sc in each chain for the curl. If it curls too tightly and kinks, reduce to 2 sc per chain. Always test one module before committing to many.
Info :
To vary penguin height slightly, change the number of rounds worked before decreasing in the main body. Two extra rounds add a tad more length and weight for different hanging dynamics.
Info :
To create a continuous look like the photo, use the same white yarn throughout the rope and finish joining seams invisibly by sewing tails inside the spiral so joins are hidden.
This snowy spiral garland and tiny penguin family will bring instant winter charm to your home. Each curly rope module and little amigurumi penguin is satisfying to stitch and even more delightful to hang. I hope stitching this brings you cozy moments and sweet smiles each time you pass it by. 🧶❄️ Display with pride and share the joy of handmade decor! 🎁