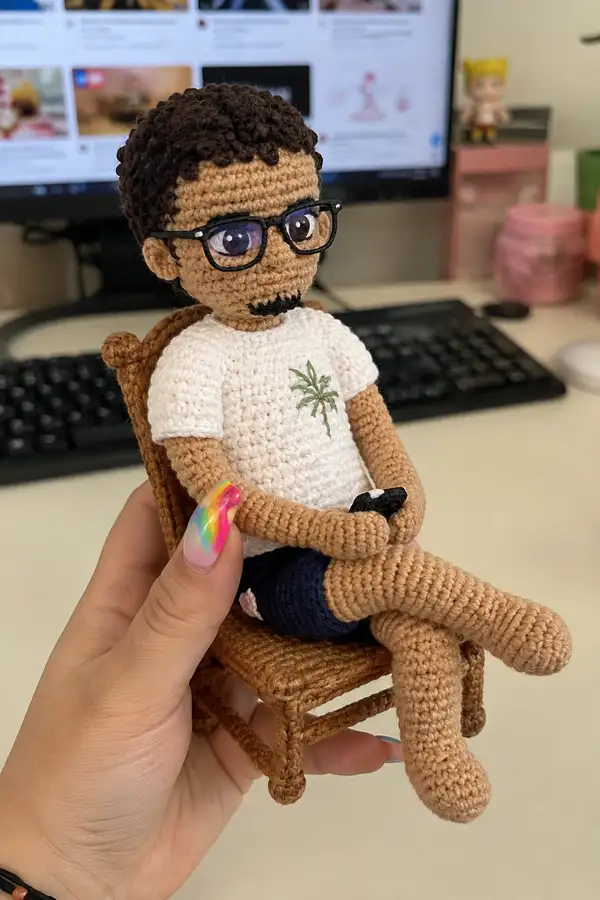
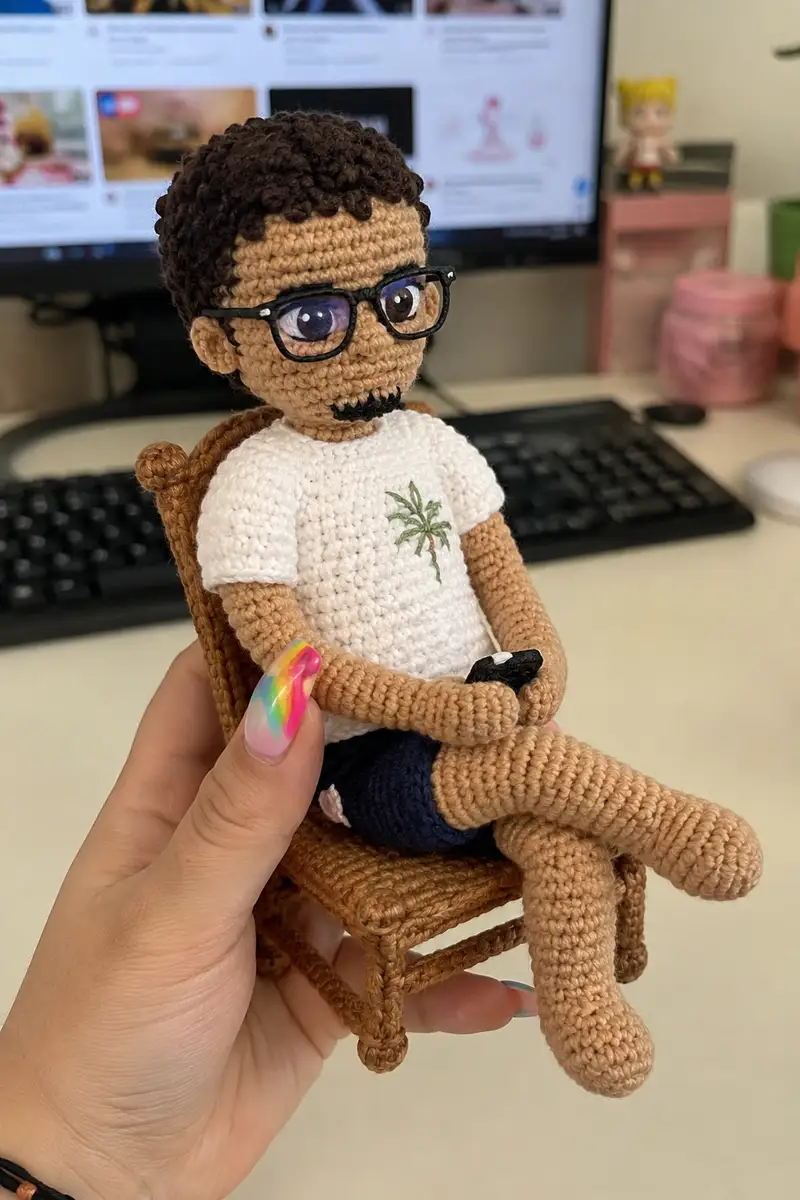
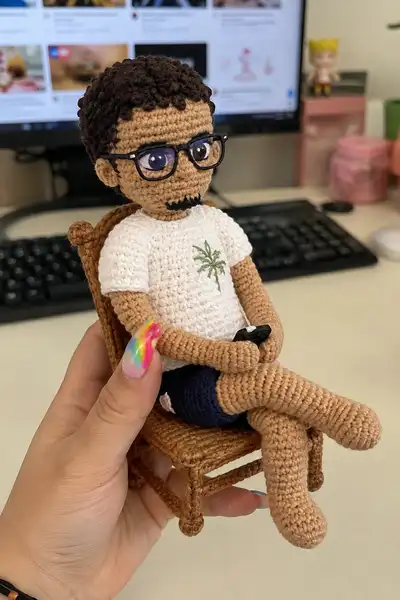
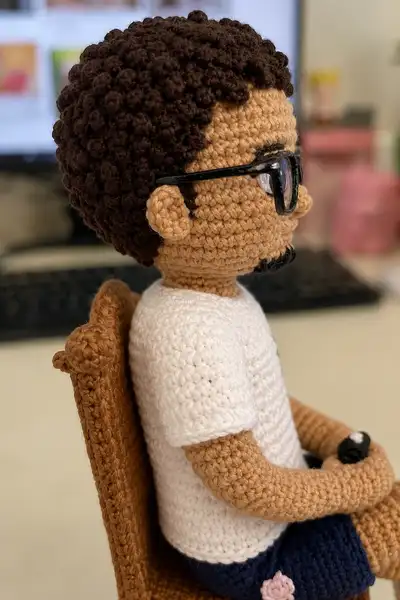
This detailed amigurumi pattern recreates a seated, modern character with curly hair, glasses, a white tee with a tiny palm-tree embroidery, navy shorts and a small phone in his hands. The design includes textured curly hair, a shaped head with goatee, expressive eyes and a realistic seated posture on a crocheted chair. Clear round-by-round instructions and assembly guidance make this a satisfying project for intermediate crocheters looking to create a character full of personality.
Progress Tracker
0% Complete
— Head :
Round 1 :
6 sc in magic ring (6)
Round 3 :
(1 sc, inc) x 6 (18)
Round 4 :
(2 sc, inc) x 6 (24)
Round 5 :
(3 sc, inc) x 6 (30)
Round 6 :
(4 sc, inc) x 6 (36)
Round 7 :
(5 sc, inc) x 6 (42)
Round 8 :
(6 sc, inc) x 6 (48)
Round 9 :
(7 sc, inc) x 6 (54)
Round 10-14 :
1 sc in each st (54)
Info :
Place safety eyes between rounds 13 and 14 (or between 12 and 13 depending on desired forehead height). For this face, place eyes approximately 12-14 stitches apart (center to center) for a proportion similar to the sample. If using 10-12mm eyes, they will sit well on 54 stitches circumference.
Round 15-18 :
1 sc in each st (54)
Info :
Work the eye whites and pupils before closing the head if you are embroidering or applying felt. If using safety eyes, lock washers now. Leave enough space for nose placement between rounds 16-17.
Round 19 :
(7 sc, dec) x 6 (48)
Round 20 :
(6 sc, dec) x 6 (42)
Round 21 :
(5 sc, dec) x 6 (36)
Info :
Begin stuffing head firmly but not overstuffed; use small tufts of fiberfill to keep the face flat at the eye level and gradually round the back of the head. Continue stuffing as you decrease to avoid lumps.
Round 22 :
(4 sc, dec) x 6 (30)
Round 23 :
(3 sc, dec) x 6 (24)
Round 24 :
(2 sc, dec) x 6 (18)
Round 25 :
(1 sc, dec) x 6 (12)
Info :
Fasten off leaving a long tail for sewing or continue to form neck tube now. For better neck shaping and to attach the head to the body, do not close completely; instead continue with neck rounds to create a neck tube.
Round 27 :
Join yarn at base of head, ch 1, 1 sc in each st around (6) - begin neck tube (if you closed earlier, re-open by sewing a narrow neck ring).
Round 28 :
1 sc in each st (6)
Round 29 :
1 sc in each st (6)
Round 30 :
1 sc in each st (6)
Info :
Neck length here is short: 4 rounds of 6 stitches create a stout neck to join to the body. If you want a longer neck, repeat additional even rounds until desired length. Stuff the neck lightly; too much stuffing will make sewing to the body bulky.
Round 31 :
1 sc in each st (6)
Round 32 :
Fasten off leaving long tail for sewing the head to the body. Use whip stitch to attach to body opening ensuring center front aligns with facial center.
— Face details & Ears :
Info :
Before attaching hair, add small mouth/goatee embroidery. The goatee is a small set of French knots or short surface embroidery in black yarn placed under the mouth between rounds 15-18. The nose is formed by 2-3 sc sewn into position or surface-embroidered as a small horizontal ridge between rounds 15 and 16.
Round 1 (Ear - make 2) :
6 sc in magic ring (6)
Round 3 :
1 sc in each st (12)
Round 4 :
(1 sc, dec) x 4 then 4 sc (8) - shape cup slightly (8)
Round 5 :
Fasten off leaving long tail for sewing. Fold slightly and sew to head at rounds 16-18 on either side, about 8-9 stitches back from the eye line for correct placement.
— Hair (Curly Bobble Texture) :
Info :
Use dark chocolate brown yarn. The hair in the sample is created using small bobble/popcorn stitches worked in rounds over a full cap. You will work a smooth cap first in skin color transitions if necessary, then add bobbles in the outer rounds or work bobbles directly into a dark brown cap. Here we create a separate hair cap to sew on for cleaner edges.
Hair Round 1 :
Make hair cap: 6 sc in magic ring (6)
Hair Round 3 :
(1 sc, inc) x 6 (18)
Hair Round 4 :
(2 sc, inc) x 6 (24)
Hair Round 5 :
(3 sc, inc) x 6 (30)
Hair Round 6 :
(4 sc, inc) x 6 (36)
Hair Round 7 :
(5 sc, inc) x 6 (42)
Hair Round 8 :
(6 sc, inc) x 6 (48)
Hair Round 9-11 :
1 sc in each st (48)
Info :
Now we will add bobbles to create the curly texture. Bobbles are worked by making 4-5 partial dc clusters in the same stitch, finishing the last yarn-over and pulling through all loops, then securing. You can also use small popcorn stitches: (5 dc in same st, remove hook, insert into first dc, pull loop through, sl st to secure). Practice on scrap yarn first.
Hair Round 12 :
(1 sc, bobble) x 24 (48 elements total where half are bobbles)
Hair Round 13 :
1 sc in each st (48)
Hair Round 14 :
(bobble, 1 sc) x 24 (48)
Hair Round 15 :
1 sc in each st (48)
Hair Round 16 :
Fasten off leaving long tail. Sew hair cap to head aligning front edge at forehead between rounds 10-12 and back edge at head base. Use mattress stitch to hide seam. Add extra bobbles to cover any visible skin by sewing small individual bobbles where needed.
— Body :
Round 1 :
6 sc in magic ring (6)
Round 3 :
(1 sc, inc) x 6 (18)
Round 4 :
(2 sc, inc) x 6 (24)
Round 5 :
(3 sc, inc) x 6 (30)
Round 6-11 :
1 sc in each st (30)
Info :
If adding the white t-shirt as a separate piece, change to White yarn now and work the t-shirt body as described in the Shirt section. For an integrated look, work the next rounds in BLO so the top edge creates a subtle shoulder ridge.
Round 12 :
(3 sc, dec) x 6 (24)
Round 13-17 :
1 sc in each st (24)
Info :
Begin stuffing the body lightly now; you want a firm lower body but leave flexibility around the neck opening. If making seated pose, slightly flatter the lower back with extra stuffing at the base so the doll sits steadily.
Round 18 :
(2 sc, dec) x 6 (18)
Round 19-22 :
1 sc in each st (18)
Round 23 :
(1 sc, dec) x 6 (12)
Round 24 :
1 sc in each st (12)
Round 25 :
Fasten off leaving long tail for sewing to head. Do not close completely; leave neck opening wide enough to insert neck tube from head then sew evenly around to attach.
— Shirt (Make 1) :
Info :
We will make the white t-shirt separately and sew onto the body. This allows easier changing of clothing later. The shirt is worked from the bottom up in White yarn with a simple set-in sleeve-style cap.
Round 1 :
6 sc in magic ring (6)
Round 3 :
(1 sc, inc) x 6 (18)
Round 4 :
(2 sc, inc) x 6 (24)
Round 5 :
(3 sc, inc) x 6 (30)
Round 6-12 :
1 sc in each st (30) - Work even to shirt waist
Info :
For the embroidered palm-tree motif, wait until shirt is complete or embroider directly onto the shirt as shown in the photo. Use surface embroidery with green shades and tiny brown trunk stitches after shirt is sewn to the body.
Round 13 :
(3 sc, dec) x 6 (24)
Round 14-15 :
1 sc in each st (24)
Round 16 :
Make sleeve openings: ch 6, skip 6 sts, sc in next 12 sts, join to other side of chain and work around chain to create a sleeve tube. This creates a neat short sleeve—adjust chain length to desired sleeve width.
Round 17-19 :
1 sc in each st around including sleeve tube (24)
Round 20 :
Fasten off leaving long tails for sewing. Attach shirt to body by sewing neck and hem onto body with hidden stitches. Embroider palm tree on left chest: small trunk of 3 vertical stitches in brown and 4-5 small slanted green stitches for fronds.
— Arms (Make 2) :
Round 1 :
6 sc in magic ring (6)
Round 3-4 :
1 sc in each st (12) - palm/hand base rounds
Info :
Stuff the hand area firmly to create a rounded palm. The hand in the sample is simple and rounded; no separate fingers. For a little thumb, add a small short tube later and sew to palm side.
Round 5 :
(2 sc, inc) x 4 + 4 sc (16)
Round 6-12 :
1 sc in each st (16) - wrist to lower arm
Info :
Change to White yarn for sleeve cuff at Round 10 if you prefer the shirt to cover a small portion of the arm; otherwise keep skin color and sew shirt over tube later.
Round 13-17 :
1 sc in each st (16) - upper arm length
Round 18 :
(2 sc, dec) x 4 (12)
Round 19 :
1 sc in each st (12)
Round 20 :
Fasten off leaving long tail. Stuff hands firmly and arms lightly. Sew arms to body between rounds 7-9 on body (measure so arms sit on sides naturally). For the seated pose, angle the arms slightly forward.
— Hands (Thumb & Phone) :
Round 1 :
Make small thumb: ch 2, 3 sc in 2nd ch from hook (3)
Round 2 :
1 sc in each st (3)
Round 3 :
Fasten off leaving tail and sew to side of palm while positioning arms folded in lap as shown.
Phone :
3 sc in magic ring (3), inc round to 6, 2-3 rounds even (6), flatten and sew black yarn edges. Add a tiny white stitch for screen highlight. Sew into hands so it sits like he is holding a phone.
— Legs (Make 2) :
Foot Round 1 :
6 sc in magic ring (6)
Round 3 :
(1 sc, inc) x 6 (18)
Round 4 :
(2 sc, inc) x 6 (24)
Round 5-6 :
1 sc in each st (24) - shape foot length
Info :
Flatten the foot slightly when stuffing to get a defined sole. Add a small bit of fiberfill firmly but keep the toe area rounded and not overstuffed so it bends at the ankle when posed.
Round 7 :
(3 sc, inc) x 6 (30)
Round 8-16 :
1 sc in each st (30) - lower leg
Info :
At round 10-12, change to Navy yarn to begin shorts if you want integrated shorts. Alternatively, make shorts separately and sew after legs are complete. The sample has shorts starting at about round 10.
Round 17 :
(3 sc, dec) x 6 (24)
Round 18-20 :
1 sc in each st (24)
Round 21 :
(2 sc, dec) x 6 (18)
Round 22-24 :
1 sc in each st (18)
Round 25 :
Fasten off leaving long tail for sewing into hip area. Stuff foot firmly and leg moderately - the feet should be firmer so the doll can maintain a seated pose.
— Shorts (Make 1 around both legs or 2 halves) :
Round 1 :
With Navy yarn, join at top of one leg and sc around leg top edge to join both legs: if working as shorts, sc around both leg tops joining across the gap to make a tube (calculate code to match your leg spacing; aim for 54-60 sts around both legs combined).
Round 2-8 :
1 sc in each st (approx 54-60) - work even for shorts length (about 6 rounds as sample)
Round 9 :
Work (3 sc, dec) repeat to shape leg openings if desired or simply fasten off and finish hem neat with slip stitch round.
Info :
Sew a small pink flower patch on the left thigh using a 5-st petal embroidery or crocheted small flower (5 ch ring, 5 sc petal rounds) and attach with a few stitches as in photo.
— Chair (Seat, Back & Legs) :
Seat - Panel Round 1 :
With Brown yarn and 2.5-3mm hook, ch 21, sc in 2nd ch from hook and across (20)
Seat - Round 2-10 :
Ch1, turn, sc across 20 (20) - work even to create a firm flat seat panel about 9 rows tall
Seat Edge :
Work single crochet around entire rectangle, placing 3 sc in corners to round. Fasten off leaving tail for joining.
Legs (Make 4) Round 1 :
6 sc in magic ring (6)
Legs Round 2-10 :
1 sc in each st (6) - work tube length ~9 rounds for small chair legs
Info :
Sew legs to each corner of seat panel, making sure right-angled placement yields a stable seat. For a stronger structure, insert cut pieces of thick cardboard or small dowel into leg tubes before sewing closed and attaching to seat.
Back Panel :
Ch 21, sc across (20), ch1 turn work 15-18 rows depending on desired back height; finish by sc around edges and attach to seat back edge with whip stitch. Add small rolled top detail by crocheting a small tube and sewing it across the top as seen in the sample.
Info :
The sample chair has a small rolled top and slightly textured woven seat. If you want woven look, make an extra thinner panel of ch stitches and weave thin yarn over the seat surface then secure ends underneath before attaching legs.
— Backpack Loop (optional) :
Round 1 :
Ch 15, sc in 2nd ch from hook and across (14)
Round 2-3 :
1 sc in each st (14)
Round 4 :
Fold and sc through both layers to make strap, fasten off leaving long tail to sew to back of chair at two points matching the photo loop on the top of the chair back.
— Glasses and Extra Features :
Info :
For the glasses, either purchase miniature doll glasses or make frames with thin black craft wire or plastic. Bend wire into rectangular shapes slightly larger than the chosen eyes (approx 1.4-1.8cm x 1.0cm), and twist ends into small ear hooks that slip behind the ears. Seal with a dab of clear glue where wire meets to avoid poking.
Alternative :
Create frames from thin black embroidery plastic or pre-made tiny eyeglass frames; fix in place with a small dab of glue at the temples or stitch through head behind ears for security.
— Final Assembly :
Info :
Before final sewing, block pieces lightly by pinning and steam or shape with hands so surfaces align. Pin head to body and adjust orientation so eyes look forward. The head sits centered on top of the torso with chin just above the collar of the shirt.
Step :
Sew head to body using long tail from head neck tube with mattress stitch, picking up both neck and body loops evenly. Use about 20-24 evenly spaced whip stitches for a neat seam and weave in tail through a few rounds internally.
Step :
Sew arms to sides of body between rounds 8-10, pinning and checking symmetry. Sew legs into lower body opening; if your shorts are integrated, they will help disguise the seam. Make sure the legs are positioned for a seated / crossed-leg pose if desired - you can bend them slightly before final sewing to lock angle in place.
Info :
Place the doll onto the chair, pin feet and seat points, then glue or stitch the bottom of the body to the seat to keep the pose permanent if you want a display piece. For toy safe, avoid glue and sew through body and seat several times to anchor it.
Step :
Sew on shirt and shorts if made separately. Add palm tree embroidery using surface stitches and attach the tiny pink flower patch to the shorts with a few securing stitches. Sew thumb to palm area and position phone in hands with a few hidden stitches through the phone and palm to hold it securely.
Final Info :
Weave in all loose ends, trim close to fabric and poke them inside with a yarn needle. Add final facial details: a small embroidered eyebrow line above each eye, a couple of short stitches for the goatee under the mouth, and tiny white highlights on the black phone to mimic a screen reflection.
This seated character brings personality to any shelf—curly hair, glasses, and a tiny embroidered palm tree make him instantly lovable. Each carefully crocheted section fits together to create a charming, thoughtful figure that reads perfectly at a small scale. Enjoy the process of stitching and assembling every little detail, and be proud of your finished model—it's a perfect gift or a cute decorative piece. 🧶✨😊