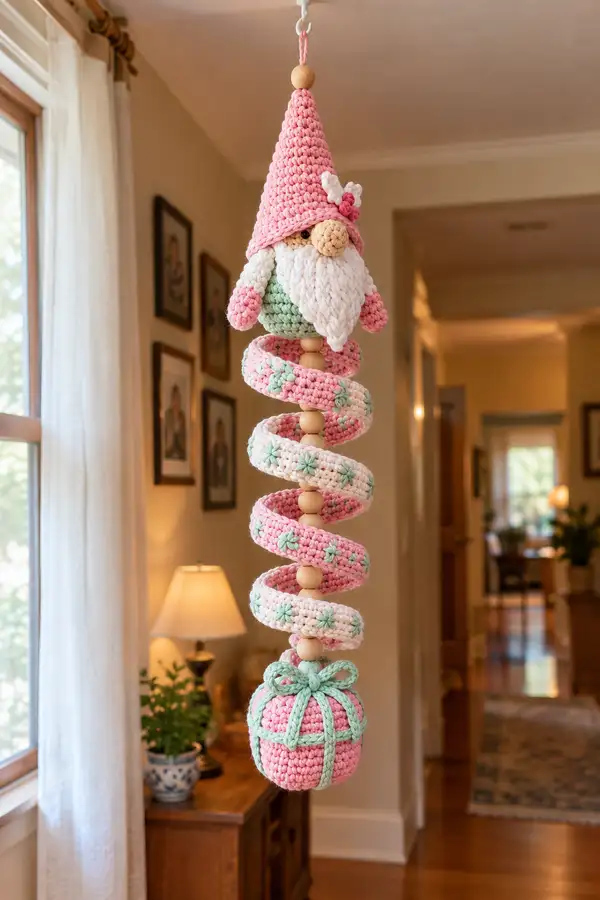
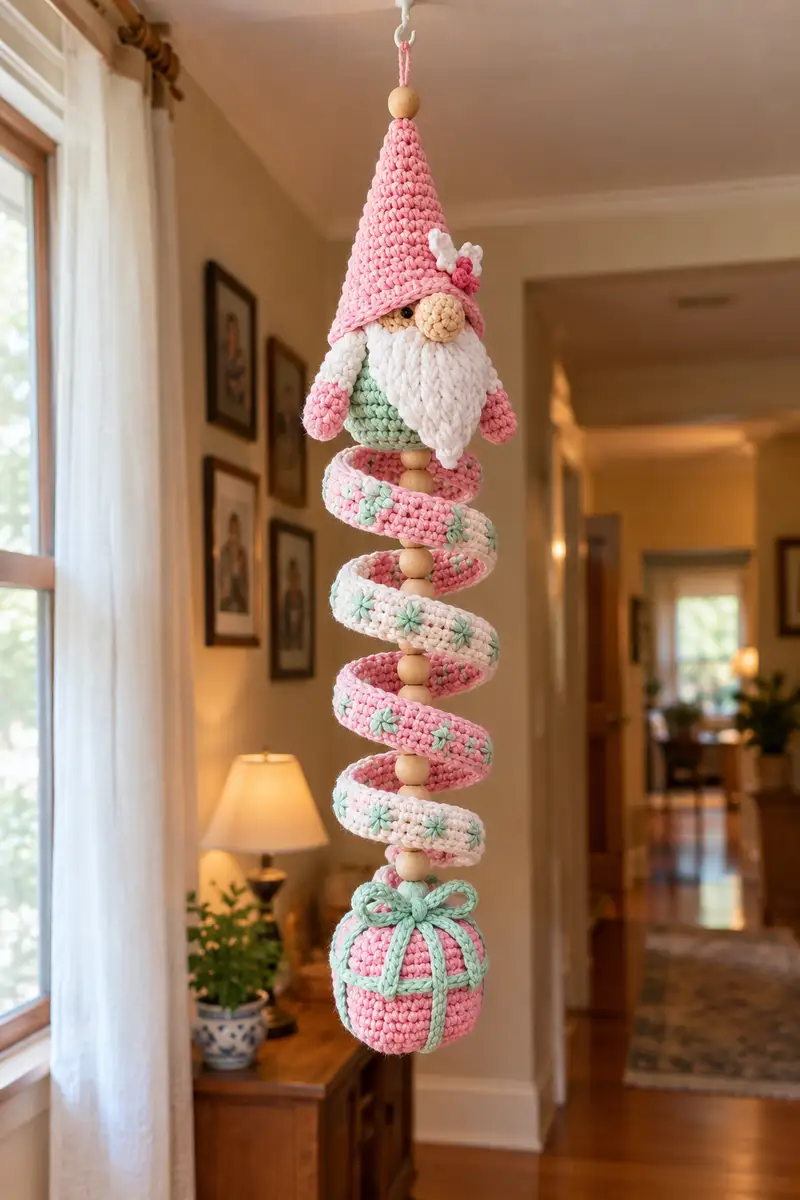
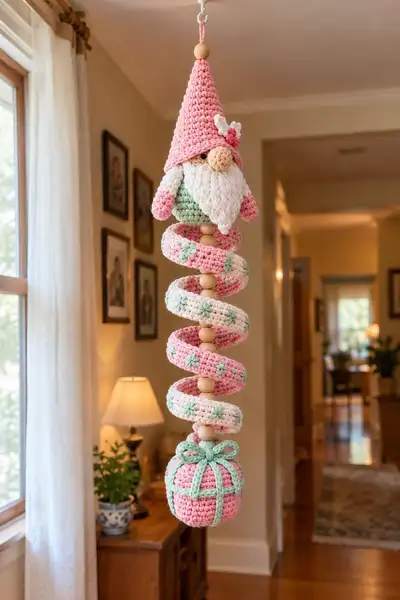
Create a whimsical hanging gnome garland with spiraled crochet coils, wooden beads and a wrapped gift ornament. This pattern shows how to crochet a sweet gnome head with a tall cone hat, a chunky spiral tube garland with embroidered star accents, and a tied gift ball at the base. The finished hanger is decorative, lightweight and perfect for nurseries or seasonal displays. Uses chunky yarn and simple stitches for a cozy, tactile result.
Progress Tracker
0% Complete
— Materials & Gauge :
Info :
Gauge is not critical for this decorative hanger. Using super-bulky yarn and 8mm hook gives the pictured scale. The finished hanging length shown is approximately 50-60cm (20-24") from top loop to bottom of gift ornament. Maintain tight tension so stuffing does not show through.
— Head :
Round 1 :
6 sc in magic ring (6)
Round 3 :
(1 sc, inc) x 6 (18)
Round 4 :
(2 sc, inc) x 6 (24)
Round 5 :
(3 sc, inc) x 6 (30)
Round 6 :
(4 sc, inc) x 6 (36)
Round 7 :
(5 sc, inc) x 6 (42)
Round 8 :
(6 sc, inc) x 6 (48)
Round 9-14 :
1 sc in each st around (48)
Info :
Place safety eyes between rounds 12-13, 8-10 stitches apart for a gentle expression. If embroidering eyes, mark placement now and skip safety eyes. Leave room for nose and beard at the lower center of the face.
Round 15 :
(6 sc, dec) x 6 (42)
Round 16 :
(5 sc, dec) x 6 (36)
Round 17 :
(4 sc, dec) x 6 (30)
Info :
Begin stuffing head firmly but not overstuffed. Use small tufts to shape the cheeks and forehead area. Continue to stuff gradually as you shape the neck opening.
Round 18 :
(3 sc, dec) x 6 (24)
Round 19 :
(2 sc, dec) x 6 (18)
Round 20 :
(1 sc, dec) x 6 (12)
Info :
Fasten off leaving long tail for sewing to body. Finish stuffing so the top of the head is domed and the face area is smooth. For a flatter neck, leave hole slightly open to stitch into the body opening.
— Nose :
Round 1 :
6 sc in magic ring (6)
Round 3 :
1 sc in each st (12)
Round 4 :
(1 sc, dec) x 4 (8)
Round 5 :
1 sc in each st (8)
Round 6 :
Dec x4 (4) - Stuff lightly and fasten off leaving long tail for sewing
Info :
Sew nose onto face centered between eyes and just beneath hat brim. Use remnant yarn to tack nose in place making sure it sits slightly over the beard for a classic gnome look.
— Beard (Make 1) :
Info :
The beard is created as a layered triangular panel worked in rows and then trimmed to shape. Use a bulky white/cream yarn and work loosely so the beard looks soft and full.
Row 1 :
Ch 7, sc in 2nd ch from hook and across (6)
Row 2 :
Ch 1, turn, sc in each st across (6)
Row 3 :
Ch 1, turn, dec, sc in next 2, dec (4)
Row 4 :
Ch 1, turn, sc in each st (4)
Row 5 :
Ch 1, turn, dec, dec (2)
Row 6 :
Ch 1, turn, sc across (2) - Fasten off leaving long tail
Info :
Optionally add texture by brushing the beard with a pet brush or teasing the fibers; alternatively use looped strands attached in rows for a fuller look. Sew the top of the beard under the hat brim and around the nose to shape the face.
— Body :
Round 1 :
6 sc in magic ring (6)
Round 3 :
(1 sc, inc) x 6 (18)
Round 4 :
(2 sc, inc) x 6 (24)
Round 5 :
(3 sc, inc) x 6 (30)
Round 6-10 :
1 sc in each st (30)
Info :
Change to mint-green accent at the end of round 10 if you want a band of color for the torso. Carry unused yarn inside the body where possible to avoid many ends. Work rounds 6-10 in the back loops only (BLO) if you want a defined waist ridge.
Round 11 :
(3 sc, dec) x 6 (24)
Round 12 :
(2 sc, dec) x 6 (18)
Round 13 :
(1 sc, dec) x 6 (12)
Round 14 :
6 dec (6) - Leave this top opening to sew the head on; do not fasten off until head is attached
Info :
Stuff the body firmly through the top opening to create a stable base for the spiral coils. Use small bits of stuffing near the top so the head seam sits flat when sewn. If you prefer a firmer base for hanging, stuff extra in the bottom 40% of the body.
— Arms (Make 2) :
Round 1 :
6 sc in magic ring (6)
Round 3 :
1 sc in each st (12)
Round 4 :
(3 sc, inc) x 3 (15)
Round 5-8 :
1 sc in each st (15)
Info :
Change to pink for mitten tips if desired. Stuff hand tip firmly and arm lightly. For a sewn-down mitten look, add a short thumb nub by sewing a few stitches inward and anchoring with thread.
Round 9 :
(3 sc, dec) x 3 (12)
Round 10-12 :
1 sc in each st (12)
Round 13 :
(2 sc, dec) x 3 (9)
Round 14-16 :
1 sc in each st (9)
Round 17 :
(1 sc, dec) x 3 (6)
Round 18 :
Fasten off leaving long tail for sewing. Make second arm to match.
Info :
Sew arms to body at approx rounds 6-8 of the torso, slightly forward for a hugging pose. Reinforce with extra stitches to secure for hanging weight.
— Hat :
Round 1 :
6 sc in magic ring (6)
Round 3 :
(1 sc, inc) x 6 (18)
Round 4 :
(2 sc, inc) x 6 (24)
Round 5 :
(3 sc, inc) x 6 (30)
Round 6 :
(4 sc, inc) x 6 (36)
Round 7-10 :
1 sc in each st (36)
Info :
To create the tall cone shape, continue working even rounds until height matches head, then work a few decrease rounds or simply taper by skipping increases. The pictured hat is tall and slightly floppy; block lightly over a cone form to shape.
Round 11 :
(5 sc, dec) x 6 (30)
Round 12-14 :
1 sc in each st (30)
Round 15 :
(4 sc, dec) x 6 (24)
Round 16-17 :
1 sc in each st (24)
Round 18 :
(3 sc, dec) x 6 (18)
Round 19-20 :
1 sc in each st (18)
Round 21 :
(2 sc, dec) x 6 (12)
Round 22 :
1 sc in each st (12)
Round 23 :
(1 sc, dec) x 4 (8)
Round 24 :
Sl st around if desired and fasten off leaving long tail to sew. Fold brim up slightly and sew in place along head to create a brim that rests over the eyes.
Info :
Add small flower or leaf embellishment by crocheting tiny 5-loop petals or using an I-cord. Attach flower to hat side with a few stitches.
— Spiral Coil Tubes (Make 6 coils) :
Info :
Each coil is a short tubular ring crocheted in the round and then slid onto the central cord and coiled. You will make alternating color coils (pink and cream) as shown. Each tube is worked to a circumference of 24 sts and about 10-12 rounds tall which produces a chunky coil that holds shape. Use 24 sts for consistent mathematics across rounds.
Coil 1 - Round 1 :
6 sc in magic ring (6)
Coil 1 - Round 2 :
6 inc (12)
Coil 1 - Round 3 :
(1 sc, inc) x 6 (18)
Coil 1 - Round 4 :
(2 sc, inc) x 6 (24)
Coil 1 - Round 5-12 :
1 sc in each st (24)
Info :
Make 6 coils in total. For coils that will appear wider, add an extra round of sc (24)
Coil 2 - Rounds 1-12 :
Work as Coil 1 but change to alternate color on Round 1 or Round 5 depending on striped effect desired (24)
Coil 3 - Rounds 1-12 :
Repeat Coil 1 color pattern (24)
Coil 4 - Rounds 1-12 :
Repeat Coil 1 color pattern (24)
Coil 5 - Rounds 1-12 :
Repeat Coil 1 color pattern (24)
Coil 6 - Rounds 1-12 :
Repeat Coil 1 color pattern (24)
Info :
After making each coil, block over a cylindrical form (bottle or dowel) to open the tube slightly so it slips over the cord. Slide into position with wooden beads between coils as pictured. Embroider star motif on exterior of each coil before sliding them on for easier access.
— Star Embroidery Detail (on coils) :
Info :
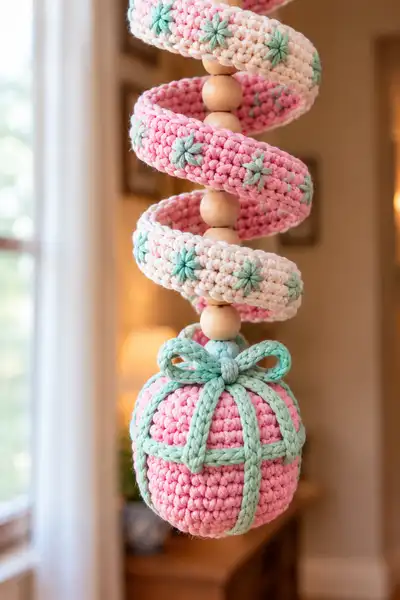
Use a contrasting mint-green yarn and a yarn needle to create small star stitches (margarita star or elongated star) around the tube surface. Make 6-8 evenly spaced stars per coil depending on coil circumference. Each star uses 6 points.
Star Step 1 :
Bring yarn through one stitch on coil exterior, *yarn over and pull up a long loop through a stitch approx 6-8mm high, repeat in next stitch until 6 loops are on hook, pull yarn through all loops to form star center* Repeat for each star position and secure by wrapping yarn around center then knotting on WS and weaving tail inside coil.
Info :
Space stars evenly by counting 24 sts around coil. Place a star every 3-4 stitches (e.g., stitch positions 2, 6, 10, 14, 18, 22) to achieve six stars around each coil.
— Wooden Beads & Central Cord :
Info :
Cut a length of strong cord approx. 70-90cm depending on desired hanging length. Thread a knot at one end to prevent beads falling off. Slide beads and coils onto cord in this order from top: top loop/eyelet, bead, coil1, bead, coil2, bead, coil3, bead, coil4, bead, coil5, bead, coil6, bead, present ornament. Space beads roughly 1-2cm inside each coil so coils sit evenly on the cord. Secure beads with a dab of hot glue or small knots if needed.
— Present Ornament (Bottom Ball) :
Round 1 :
6 sc in magic ring (6)
Round 3 :
(1 sc, inc) x 6 (18)
Round 4 :
(2 sc, inc) x 6 (24)
Round 5 :
(3 sc, inc) x 6 (30)
Round 6 :
(4 sc, inc) x 6 (36)
Round 7-10 :
1 sc in each st (36)
Info :
Start stuffing from round 7 onward to build a full round shape. Stuff firmly but not so firm as to push through stitches. This will become the gift ornament wrapped with mint straps.
Round 11 :
(4 sc, dec) x 6 (30)
Round 12 :
(3 sc, dec) x 6 (24)
Round 13 :
(2 sc, dec) x 6 (18)
Round 14 :
(1 sc, dec) x 6 (12)
Info :
Fasten off leaving long tail. Finish stuffing and close opening by weaving tail through remaining stitches and pulling tight. Weave tail inside and trim.
Present Straps :
Using mint-green yarn, work a thin i-cord or ch rope approx. 4 pieces long enough to go around the ball and tie: ch 40, sl st back along chain to make thick cord or use 4mm hook to sc in back loops to create tube. Sew/knot two pieces crossing on top and two crossing around sides. Secure and sew ends together under a small bow.
Bow :
Make a small looped bow by forming two loops with the i-cord, wrap center with a short piece of yarn and sew to top of present. Trim neatly and secure knot inside the ball with a few stitches.
Info :
Attach present ornament at bottom of cord with a secure knot or by threading cord through the center of the ball before final closing so it cannot slip off. Use a bead between coil and ornament for spacing if desired.
— Final Assembly :
Info :
Sew the head to the body opening left at rounds 13-14 of the torso using a long yarn tail and whip stitch. Use even spacing and pin head in place before sewing. Attach beard under hat and around nose area, then sew on nose in final position. Attach arms to sides at rounds 6-8. Slide wooden beads and coils onto cord in order, and place the head at the top section above the first bead so it sits above the spirals. Tie the top cord in a secure knot and hide tail inside top bead.
Info :
For extra security, dab a small amount of fabric glue inside wooden beads to hold cord steady, or tie a second smaller knot above and below bead to lock positions. If you want the gnome to sit directly above the first coil, position the head just above the top bead and secure with a couple of extra stitches to the cord.
Info :
Use matching yarn to hide all seams and weave in ends at least 4cm into work for a neat finish. Block coils gently if needed and shape the hat by folding and tack-stitching the brim loop.
— Finishing Touches :
Info :
Add any painted wooden bead accents or varnish beads for durability. Use a tiny bit of blush on cheeks with fabric-safe pigment if desired. Ensure all small parts are secured if you will place the hanger within reach of children.
Info :
Congratulations! Hang your spiral gnome garland from a hook or curtain rod. Over time you can adjust coil spacing and bead positions for the best visual balance.
This whimsical Spiral Gnome Hanging Garland brings pastel charm and handmade warmth to any room. Each coil, bead and little wrapped present adds a touch of crafted personality — a perfect gift or home accent. The pattern is designed to be rewarding to make and delightful to display, with details that invite customization. Happy crocheting and enjoy hanging your new gnome creation! 🧶🎀