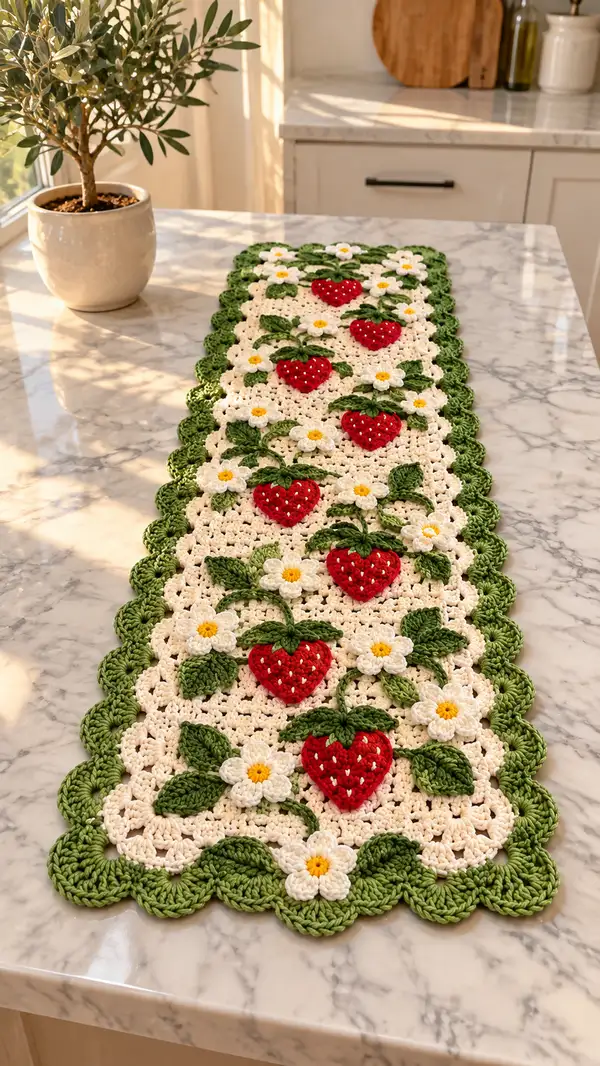
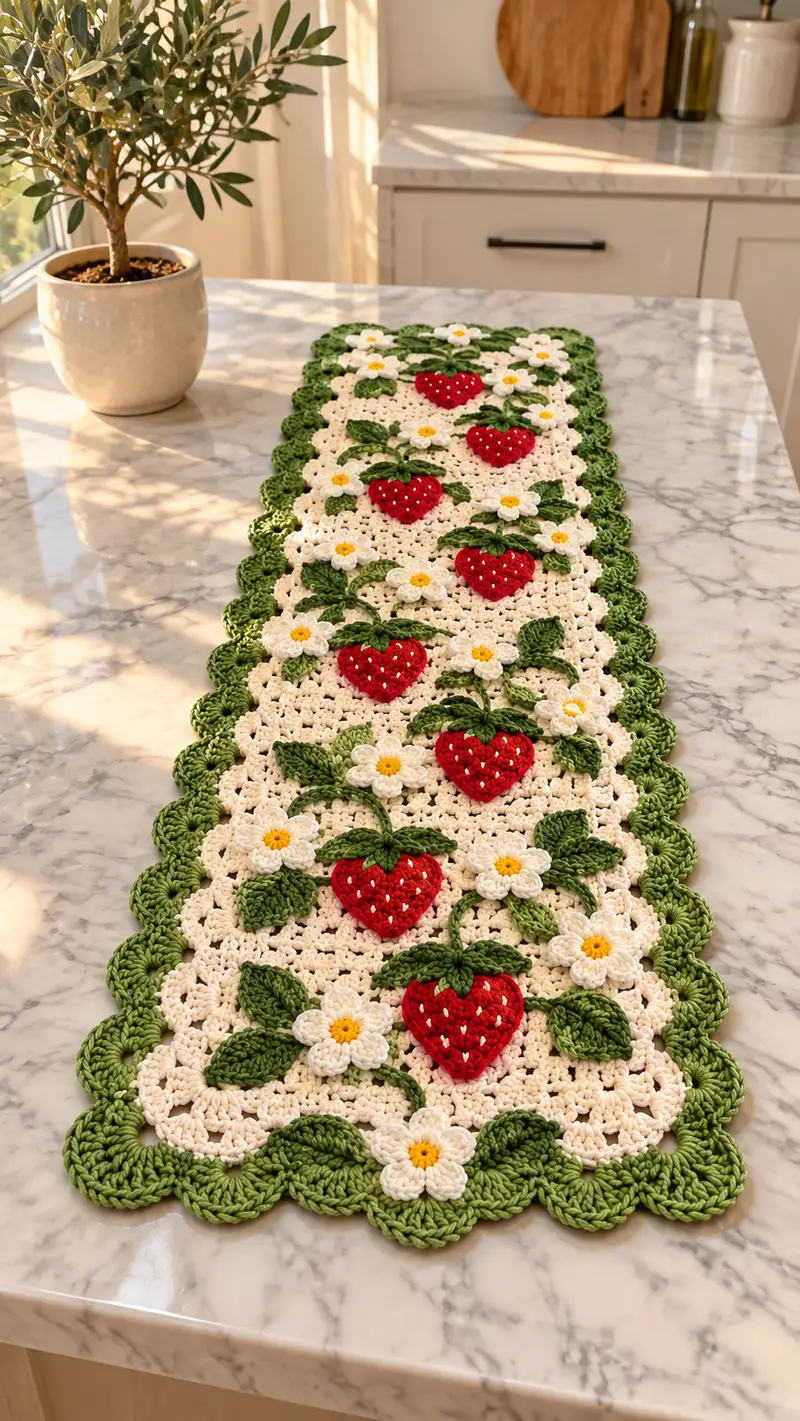
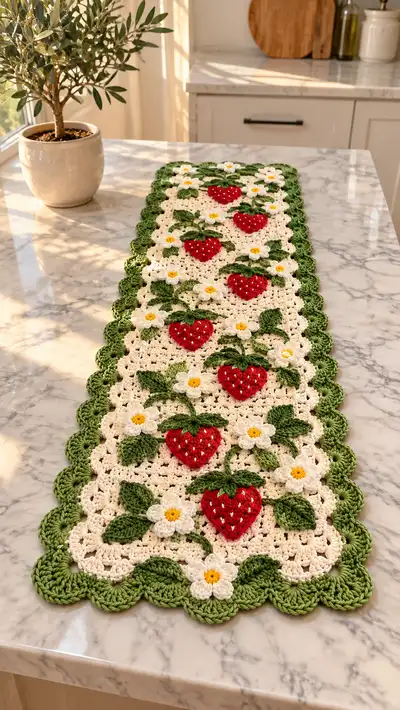
A charming strawberry-and-daisy table runner worked in soft cotton yarn with a lacy cream background, bright red 3D strawberries, crisp white daisies with yellow centers, and a scalloped green border. The design features raised appliqued strawberries and leaves connected by delicate green vines for a dimensional, vintage-fresh look. Perfect for a sunny kitchen table, farmhouse decor, or a bright seasonal centerpiece.
Progress Tracker
0% Complete
— Base Panel :
Round 1 :
Using cream yarn and 4.0mm hook, ch 120 (foundation chain length can be adjusted for runner width; this pattern uses ch 120 for a narrow table runner approximately 10-11 inches wide). Join with sl st to first ch to form a loose loop, being careful not to twist ch chain. (120 ch)
Round 2 :
Ch 3 (counts as first dc), *sk 2 ch, 3 dc in next ch (shell made), sk 2 ch, dc in next ch; rep from * across to end, ending with dc in last ch. Join with sl st to top of beg ch-3. This creates a lacy shell layout that will form the base grid for applique9 placement. (approx. 40 shell clusters + interspersed dc)
Round 3 :
Ch 3, turn to work in rows now instead of working in continuous rounds if you prefer, or continue to work in joined rounds. For joined rounds: in each shell space work [3 dc] into top of shell, dc into single dc spaces between shells. Join. This round evens the cluster heights and begins establishing a steady grid (same number of shells as previous round).
Round 4 :
Rep Round 3. Maintain even tension. The panel now looks like staggered shell clusters with small dc columns between them. (same stitch count as previous round)
Round 5 :
Ch 3, * [3 dc] in each shell sp, dc into single dc spaces; rep to end. Join. This begins building the lacy fabric that will take applique9s. (same stitch count)
Info :
Work in joined rounds (sl st join / ch 3 turn) to keep the runner edges even. Place a removable stitch marker at the first ch-3 at the beginning of each round to track round starts and ensure symmetry when placing applique9s later.
Round 6 :
Repeat Round 5. At this stage you should have a flat, stable fabric with consistent shell clusters. Count shells across and divide by the number of strawberry rows you plan to make; in my sample there are 10 vertical shell columns which accommodate 6 strawberry placements lengthwise.
Round 7 :
1 dc in each dc or central stitch, 3 dc in each shell space; join. The height of the panel increases slightly. (stitch count equal to previous rounds)
Round 8-12 :
Repeat Round 7 for 5 rounds total. This builds the background such that each shell becomes a small square pocket used to anchor applique9s. (maintain consistent stitch count)
Info :
Measure width now: target 10-11" wide using ch 120. If your gauge differs, adjust the foundation chain by increments of 6 chains to keep pattern repeats even. Blocking later will adjust minor sizing differences.
Round 13 :
Change nothing; work 1 dc in each stitch and 3 dc in each shell. This round is used to ensure all motifs sit centered in the shell grid. Join. (same stitch count)
Round 14 :
Rep Round 13. Now the ground is ready to receive applique9s. You will attach 6 strawberry rows spaced evenly along the runner in a single central column and smaller daisies between and to the sides for balance. Mark the shell centers that will receive applique9s with thread or washable marker: mark every 8th shell along the length for strawberries.
Round 15-20 :
Work 6 rounds even: 1 dc in each dc and 3 dc in each shell. These rounds form a slightly raised mattress area for applique9s and add stability when sewing. (stitch count unchanged; keep markers in place)
Info :
If you prefer a firmer base for heavy applique9s, use BLO on one of the rounds here: Work 1 dc in each st BLO and 3 dc in each shell BLO to form a faint ridge where the border will sit later.
Round 21-28 :
Continue 8 rounds even (1 dc each, shells remain as 3 dc). These rounds grow the length of the runner; keep measuring for desired length. In the sample runner there are 40 rounds total in the base panel before the scalloped border begins. (maintain stitch count)
Info :
When your base panel reaches the desired length (mine is 36" long in finished form), stop increasing rows and prepare for border rounds. If you need a different overall length, add or subtract sets of 4-8 rounds, keeping applique9 spacing in mind.
Round 29 :
To prepare for the scalloped border, work 1 sc in each st across, placing 3 sc in each shell top to round the shells' tops. This evens the edge for the upcoming scallops. (stitch count similar to previous rounds but now working sc)
Round 30 :
Ch 1, turn, 1 sc in each sc around the perimeter (work 3 sc in shell tops). Join with sl st. This neatens the edges and creates a scaffold for the scalloped border stitches. (same count)
Info :
Fasten off cream yarn leaving a long tail for weaving along the border if desired. The base panel is now complete and ready for applique9 attachment and final edging. Block the panel flat before attaching any applique9s so placement is accurate.
— Strawberry Applique9 (make 6) :
Round 1 :
With red yarn and 3.5mm or 4.0mm hook, make a magic ring, ch 1, 6 sc into ring. (6)
Round 2 :
Inc in each st around (12). (6 inc = 12)
Round 3 :
(1 sc, inc) x 6 (18). This begins to make a small dome base for the heart-shaped strawberry.
Round 4 :
(2 sc, inc) x 6 (24). Continue forming a round, slightly flattening as you go to allow shaping into a heart in later rounds.
Round 5 :
(3 sc, inc) x 6 (30). The overall diameter is now about 1.5"; this is the base for forming the heart lobes.
Info :
Lightly stuff the small dome with a tiny pinch of fiberfill to keep the applique9 slightly raised. Do not overstuff — we want a gentle puff only.
Round 6 :
(4 sc, inc) x 6 (36). Increase evenly to give enough surface for heart shaping in the next rounds.
Round 7 :
Work 1 sc in next 6 sts (6), then leave next 12 sts unworked for the heart cleft shaping — you will form 2 lobes by working over the first 6 sts and the last 6 sts creating slight point at bottom. For this pattern we convert the round into 2 small lobes: attach a marker at st 1, then in next 6 sts work 2 sc in each (12), skip 6 sts, join by working 2 sc in following 6 sts (12), skip the middle 6 sts and sl st to first of this mini-round. The math results in 24 sts worked in two lobes visible on the front. (24 worked sts)
Info :
The heart shape is achieved by changing working order and using strategic skips and decreases. Don't worry about exact stitch counts in this creative step; use the photo as reference to shape the lobes: two rounded bumps at top and a tapered point at bottom.
Round 8 :
Work in rounds over the lobe sections: in each lobe work [sc around the lobe edge to round it and connect at the center bottom]. For numerical guidance: in each lobe work 12 sc around, then join the lobes at the bottom by working 6 sc across the bottom seam to create the point. Final count ~30 sc around entire heart shape. (approx. 30)
Round 9 :
(1 sc in each st) around to even the edges (30). Fasten off leaving a long tail for sewing to base panel. Lightly flatten and adjust shaping with your fingers.
Round 10 :
Optional: With white embroidery yarn and tapestry needle, add small seed stitches: work a single vertical small sl st or a tiny surface stitch every 4-5 sts on the strawberry surface to emulate seeds. Space them evenly across each strawberry front. Secure and weave ends. (no stitch count change)
Info :
If you prefer a slightly larger strawberry, work one more increase round before shaping into lobes: (5 sc, inc) x 6 = 42 sts and then adapt the lobe shaping across more sts. This pattern describes the mid-sized version.
— Strawberry Leaf Cluster (make 12 leaves per strawberry set, approximately 72 leaves total) :
Round 1 :
With green yarn and 3.5mm hook, ch 6, 1 sc in 2nd ch from hook, 1 hdc in next, 2 dc in next, 1 hdc in next, 1 sc in last ch. Turn to work on opposite side of foundation chain: 1 sc in first ch, 1 hdc in next, 2 dc in next, 1 hdc in next, sl st to first sc to close leaf. Fasten off leaving long tail for sewing. This creates a small pointed leaf approx. 1.25" long. (no numeric round-based count, leaf is worked flat)
Info :
For a fuller leaf, after completing the flat leaf, work 1 sc around the edge in BLO to create a slight rib and body. If you like more definition, use FLO on the final round to create a raised midrib when you later fold and sew the leaf in half along its center for dimension.
Round 3 :
Make 2-3 leaves per strawberry placement: one larger leaf and one or two smaller leaves. Vary scale by using ch 8 for larger leaves and ch 5 for tiny accent leaves. Fasten off and block flat before assembly.
— Daisy Flower (make 12) :
Round 1 :
With yellow yarn and 3.5mm hook, make a magic ring, ch 1, 8 sc into ring; pull tight and join with sl st to first sc. (8)
Round 2 :
Change to white yarn, ch 2 (counts as hdc), *work [ch 2, slip stitch into same sc], ch 2, hdc into next sc* rep around to create petal loops— you will have 8 little petal loops around the yellow center. Fasten off white leaving long tail for sewing petals down. (8 petal loops)
Round 3 :
For each petal, work into the loop: sl st, ch 1, (sc, hdc, 2 dc, hdc, sc) into loop to form a rounded petal. Sl st into base and move to next loop. Repeat for all 8 petals. Fasten off leaving long tail for sewing. The daisy should be about 1" across when finished.
Info :
Sew the yellow center slightly to the petals' bases to keep flowers compact. Block or steam set petals so they are flat and uniform before attaching to base panel. Light shaping makes daisies look crisp and hand-crafted.
— Vine Connector (make enough to link strawberries and daisies) :
Round 1 :
With green yarn and 3.5mm hook, ch 30 (or desired vine length between motifs), sl st back along the chain using the tail to make a firm cord (or use i-cord technique): ch 30, turn and work 1 sc in each ch back to the start to create a thick vine. Fasten off leaving long tail for sewing. Each vine length will vary; for a natural look make vine lengths 20-40 ch long depending on spacing.
Info :
For curved vines, work ch 20 and then join into the base panel with a sl st, or use surface slip stitch to embroider a vine path on the base after applique9s are sewn. The i-cord technique gives a raised vine that matches the dimensional look in the photo.
— Scalloped Border (rounds 1-6) :
Round 1 :
With green yarn and 4.0mm hook, rejoin yarn at any sc on the base panel edge. Work 1 sc in each sc around the entire perimeter, placing 3 sc in each shell top or corner as needed to keep the edge flat. Join with sl st to first sc. (stitch count similar to base perimeter)
Round 2 :
Ch 3, *sk 2 sc, 7 dc in next sc (large scallop), sk 2 sc, sl st into next sc; rep from * around. End with sl st to top of beg ch-3. This forms pronounced scallops around the runner. Adjust the number of dc per scallop to make scallops tighter or looser; 7 dc gives a rounded, deep scallop as in the photo.
Round 3 :
Sl st into the center dc of each scallop, ch 1, work 1 sc in center dc, ch 3, 1 sc in center dc again to create a picot-like raised center on each scallop. This accentuates the scalloped look and echoes the vintage style. Fasten off and weave ends. (scaffold count equal to number of scallops)
Info :
If your scallops pucker or flare, adjust by adding or removing one dc from each scallop or changing ch spacing between scallops. Test 4-6 scallops first and adjust for best drape.
Round 4 :
Optional second decorative round: with green yarn, join at the outer edge of each scallop and work 3 sc, ch 2, 3 sc across the scallop outer edge to create a shell within a shell for a deeper layered finish. Fasten off and weave ends. (cosmetic, no overall stitch count change)
Round 5 :
Block the scalloped border with damp cloth and pins to set shape; allow to dry fully before final assembly. This keeps scallops uniform and table-runner flat.
Info :
If attaching garland-style vines to the scallops, leave long tail threads at regular scallop centers so you can anchor vine ends and create drooping connectors between strawberry rows as in the image.
— Detailed Assembly & Placement :
Info :
Lay blocked base panel on a flat surface RS up. Using your marked shells (from base panel layout), position strawberries evenly down the center column. In my sample there are 6 strawberries spaced approximately every 6 rows. Place daisies between and to the sides of the strawberries so each strawberry is accompanied by 2-3 daisies and several leaves. Use pins to secure all applique9 pieces in place before sewing.
Round 2 :
Sew strawberries down using the long tail and a yarn needle. Use small whip stitches through the back loops at the edge of the strawberry and into the underlying shell spaces on the base panel. Sew around the perimeter and secure with multiple small stitches at the bottom point so the strawberry keeps its heart shape. Weave in ends. (no numeric stitch count)
Round 3 :
Attach leaves grouped around each strawberry base: use the long tails to sew along the leaf center, pulling the leaf slightly to cup and create dimensionality. Use a few tiny stitches at leaf tips to secure curvature. Layer leaves under and slightly over the strawberry to mimic natural placement. (no numeric count)
Round 4 :
Sew daisies to their pre-marked positions: place the yellow centers directly onto the base panel first (slightly overlap the petals over shell spaces), then stitch around the yellow center base to anchor the petals. Use small invisible stitches to secure petals to the background so they appear to sit naturally above the shells. (no numeric count)
Round 5 :
Attach vine connectors between motifs by sewing the ends of short i-cords to strawberry bases and daisies or by surface stitching a vine path with green yarn. Use a whip stitch to secure vine ends and small catch stitches along the vine length as needed to hold it down without flattening the cord. (no numeric count)
Info :
Step back periodically and assess balance: ensure motifs are mirrored along the central axis so the runner reads symmetrically from both ends. If a strawberry or daisy looks off, unpin and reposition before sewing permanently.
— Finishing Touches :
Round 1 :
Embroider tiny white seed stitches on each strawberry if you like: using white yarn and a tapestry needle, bring a small loop up through the surface and secure with a tiny stitch on the underside. Repeat seeds consistently for a charming dotted effect. (no stitch count)
Round 2 :
Weave in all remaining tails on the WS of the panel. Use a yarn needle to bury ends through multiple fabric layers and trim flush. Lightly steam-block again if applique9s have any small bumps, being careful not to flatten the slight puff in strawberries.
Round 3 :
Final inspection: check all seams for security. For heavy usage, add a few reinforcing stitches across the underside of each strawberry and at vine attachment points. Trim stray fibers and fluff any petals gently.
Info :
Optional: To make the runner washable, hand-wash gently in cool water with mild detergent and reshape on a flat surface while damp. Avoid hot wash or tumble dry which can distort cotton and applique shapes.
This strawberry patch and white blossom table runner is a delightful blend of dimensional applique9s and lacy background texture, ideal for brightening a kitchen or dining table. Each carefully sewn strawberry, leaf, and daisy adds character and a handmade charm that feels both vintage and fresh. The scalloped green border frames the runner beautifully and gives a polished finish. 🧶🍓🌼 Enjoy the slow, satisfying process of building motif by motif, then watching it all come together into a centerpiece you'll treasure. Happy stitching and share your finished work with pride! ✨