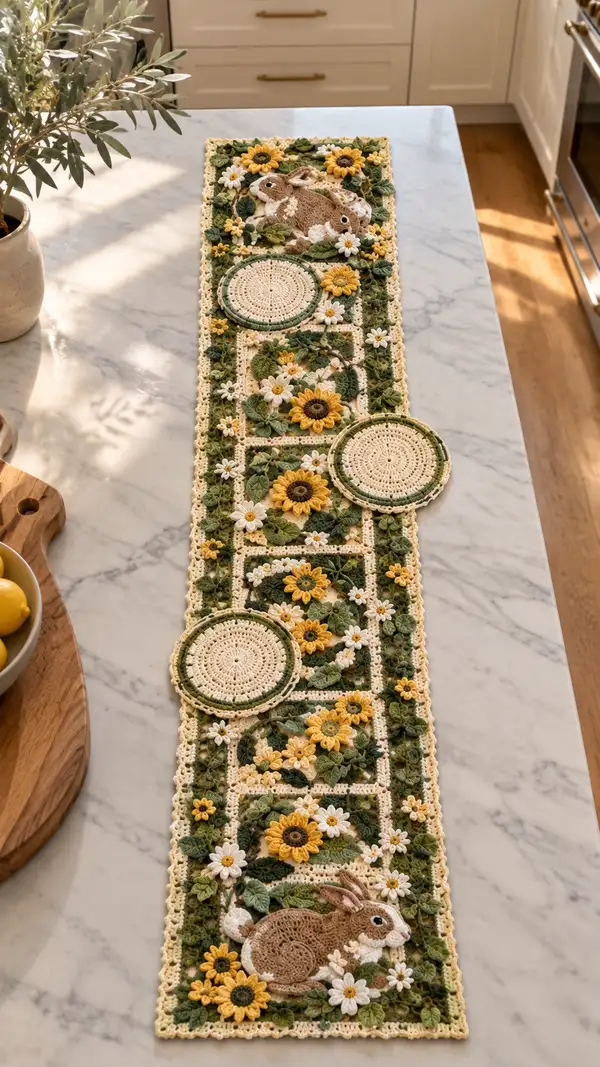
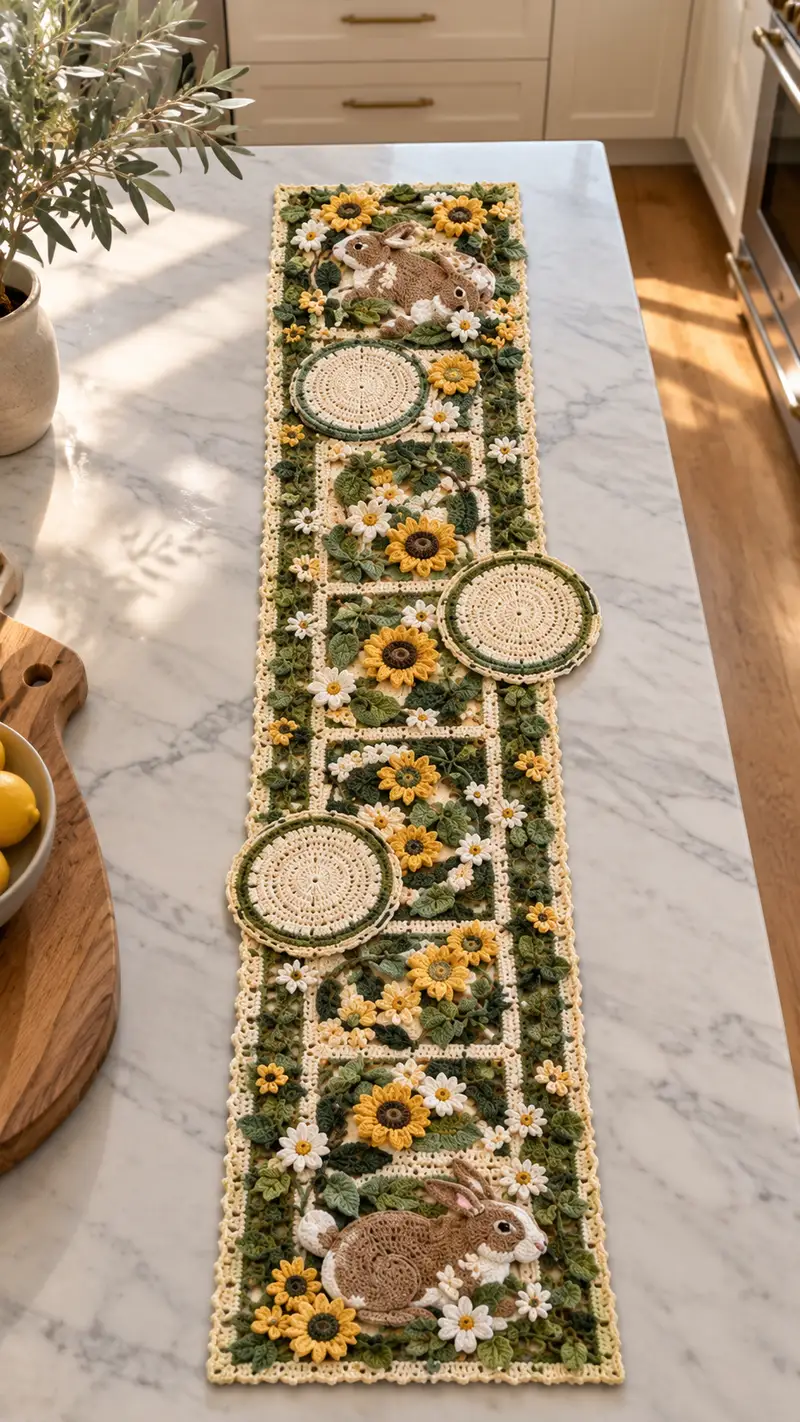
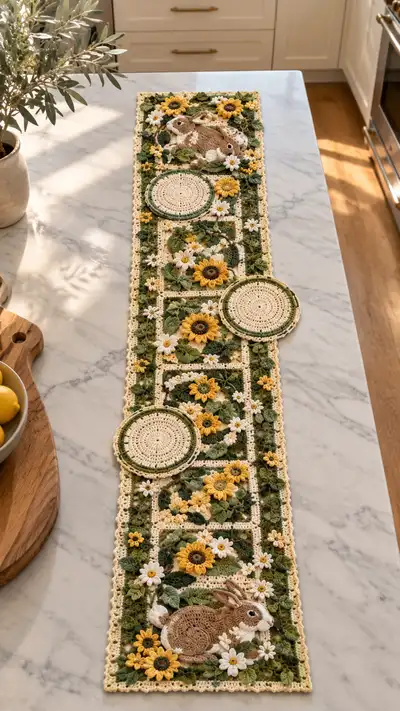
A long, elegant table runner featuring layered crochet squares, three circular coaster medallions, abundant textured leaves and daisies, and a charming applique bunny nestled among sunflowers. This pattern uses warm cream, golden yellow, olive and brown tones to create a cozy spring-to-summer centerpiece. The design builds modular motifs and joins them into a continuous runner with a delicate scalloped border. Detailed stitch-by-stitch instructions and assembly notes guide you through every motif, leaf, flower and applique.
Progress Tracker
0% Complete
— Base Square Panels (Make 6) :
Round 2 :
6 inc around (12)
Round 3 :
(1 sc, inc) x 6 (18)
Round 4 :
(2 sc, inc) x 6 (24)
Round 5 :
(3 sc, inc) x 6 (30)
Round 6 :
(4 sc, inc) x 6 (36)
Round 7 :
(5 sc, inc) x 6 (42)
Round 8 :
(6 sc, inc) x 6 (48)
Info :
These rounds build a circular medallion as the panel core. Work tightly; use 3.5mm hook for the main body so motifs block to consistent size.
Round 9 :
Ch3 (counts as dc), *2 dc in next 4 sts, ch2 (corner), 2 dc in next 12 sts, ch2 (corner), 2 dc in next 12 sts, ch2 (corner), 2 dc in next 12 sts, ch2 (corner); join with sl st in top of ch3 (approx 56 dc plus 4 ch2 corners).
Info :
Round 9 converts the round medallion toward a square by creating four ch2 corners. Depending on tension, the exact stitch count may vary slightly—aim for four even sides.
Round 10 :
Ch1, sc in same st and around working 3 sc in each corner ch2 space, sc across each dc from previous round (estimate 64 sc total)
Round 11 :
Ch3 (counts as dc), dc in next 2 sts, (dc, ch1, dc) in corner ch2, dc across each sc to next corner, (dc, ch1, dc) in corner x4; join (approx 64-68 dc)
Round 12 :
Ch1, sc in each st and 3 sc in each corner ch1 space (flat square surface) (approx 68 sc)
Round 13 :
Work 1 sc BLO in each st around to create a subtle ridge (68)
Round 14 :
Ch4, *sk 1 st, dc in next st, ch1; rep to corner; in corner ch1 work (dc, ch2, dc); rep around to form openwork grid; join (grid opening)
Round 15 :
Return to cream sc: ch1, sc in each st and 3 sc in each corner ch2 (keep counts even) (approx 68 sc)
Round 16 :
Edging round: *sc, ch2, sc in same st to create little picot corner accent; sc along edge spacing evenly; join and fasten off. Block square to 14cm x 14cm (approx).
Info :
Make six of these panels. Block each square to the same size. If your size varies, adjust edging tension or swap hook by 0.25mm to match sizes.
— Connector Grid Motifs (Make 10 for filler panels) :
Round 1 :
Make a small round start: mr, 6 sc (6)
Round 3 :
(1 sc, inc) x 6 (18)
Round 4 :
(2 sc, inc) x 6 (24)
Round 5 :
Ch4, *sk 1, dc in next, ch1; rep to create openwork spokes; join (24)
Info :
These connector motifs provide lattice gaps between squares—make as many as needed to mirror picture placement. They are intentionally airy to let leaves overlap.
Round 6 :
Ch1, sc into each st and sc3 in each corner ch-space to create a small framed square (24 sc)
Round 7 :
(sc in each st BLO) around to make a defined border ridge (24)
Round 8 :
Edging: 1 sc, ch2, sk1 along edges to create airy join points; fasten off and block flat.
Round 9-10 :
Reserve for additional decorative picots or to change color to green for a frame if desired; if changing color, switch to green now and work 2 rounds sc to anchor future leaves.
— Circular Coaster Medallion (Make 3) :
Round 3 :
(1 sc, inc) x 6 (18)
Round 4 :
(2 sc, inc) x 6 (24)
Round 5 :
(3 sc, inc) x 6 (30)
Round 6 :
(4 sc, inc) x 6 (36)
Info :
These coasters sit on top of the runner as decorative plates—work flat and block. Use cream for center then round in green for an outer edge as pictured.
Round 7 :
Ch1, sc in each st around (36)
Round 8 :
Change to green: sc in each st (36)
Round 9 :
Ch3, (dc, ch1, dc) in every 6th stitch to create decorative lacy edge; join (approx 40 dc shells)
Round 10 :
Switch to cream and work 1 sc around inside edge, then sl st to finish. Fasten off and block to 11-12cm diameter.
Round 11-12 :
Optional: Add surface slip-stitch spiral or a second green round for a thicker rim (add 1-2 rounds evenly spaced)
— Small Daisy Flower (Make 24) :
Round 3 :
(1 sc, inc) x 6 (18)
Round 4 :
Switch to white: ch1, sc in next st, *ch3, sl st into same st to form petal; rep around to make 6 petals; (6 petals)
Round 5 :
Weave in center: join small yellow dot in center with a small French-knot-like surface stitch or add a tiny round of yellow (mr, 6 sc, fasten) and sew onto center
Info :
Small daisies are layered over leaves and panels. Make many—place them in clusters for realistic effect. Leave long tails for sewing.
— Sunflower Motif (Make 6 Sunflower Heads) :
Round 1 :
mr, 8 sc in brown (8)
Round 3 :
(1 sc, inc) x 8 (24)
Round 4 :
(2 sc, inc) x 8 (32)
Round 5 :
Leave center; fasten off brown. Join golden yellow in back loop only of round 4: make petals by repeating: *ch6, sl st in second ch from hook, hdc in next ch, dc in next 2 ch, hdc in last ch; sl st to base; rep around to create 12 petals (12 petals)
Round 6 :
Turn to front and work a second layer of petals between the first layer: join yarn at base between petals, ch4, (dc, ch1, dc) in space; rep to form fuller bloom; fasten off
Info :
Sew sunflower center to a small cream backing disc (mr, 12 sc rounds to create a base) to make a robust motif that can be layered onto leaf clusters.
— Leaf (Make Many; pictured many sizes) :
Round 1 :
ch11, sc in 2nd ch from hook, hdc in next, dc in next 3, tr in next 2, dc in next, hdc in next, sc in last (9 sts shaping) (do not join)
Round 2 :
Turn and work along underside: sc in each st back to start; sl st to join to create a leaf shape (9)
Round 3 :
Work edge picot: *sc, ch3, sl st in 3rd ch to form serrated edge; repeat along one side; repeat along second side; fasten off (leaf with decorative edge)
Round 4-8 :
Info : For larger leaves, start ch15 and use additional dc/tr combination; for small filler leaves use ch7 and fewer treble stitches. Block leaves with slight steam to flatten and shape midrib.
Info :
Make 40-60 leaves in two or three sizes and two green shades to replicate the dense foliage in the photo. Vary direction, curl the tips slightly with a warm iron and pins.
— Bunny Applique - Body :
Round 1 :
Using warm tan: mr, 6 sc (6)
Round 3 :
(1 sc, inc) x 6 (18)
Round 4 :
(2 sc, inc) x 6 (24)
Round 5 :
(3 sc, inc) x 6 (30)
Round 6 :
(4 sc, inc) x 6 (36)
Round 7 :
(5 sc, inc) x 6 (42)
Round 8 :
Switch to working an oval increase to shape body: next round work inc unevenly to elongate: sc next 6, (inc in next 2), sc next 12, (inc in next 2), sc next 12, (inc in next 2) sc remaining (approx 48)
Round 9 :
1 sc in each st around (48)
Round 10 :
(6 sc, inc) x 6 (54)
Info :
These rounds elongate the base to form an oval rabbit body. Work slowly; check your shaping against the photo: body is slightly flattened and oval, not round.
Round 11 :
1 sc around (54)
Round 12 :
(7 sc, inc) x 6 (60)
Round 13-16 :
1 sc in each st around for 4 rounds to build body height (60)
Round 17 :
(7 sc, dec) x 6 (54)
Round 18 :
(6 sc, dec) x 6 (48)
Round 19 :
(5 sc, dec) x 6 (42)
Info :
Begin lightly stuffing the body as you decrease to get the flattened oval shape. Use small amounts of fiberfill and press flat with your palm as you go to mimic the low profile of the rabbit in picture.
Round 20 :
(4 sc, dec) x 6 (36)
Round 21 :
(3 sc, dec) x 6 (30)
Round 22 :
(2 sc, dec) x 6 (24)
Round 23 :
(1 sc, dec) x 6 (18)
Info :
Fasten off leaving a long tail for sewing the body to the runner. Flatten the body slightly and do not overstuff; the rabbit in the photo is more appliqué style lounging low on the runner.
— Bunny Applique - Head :
Round 1 :
mr, 6 sc in beige (6)
Round 3 :
(1 sc, inc) x 6 (18)
Round 4 :
(2 sc, inc) x 6 (24)
Round 5 :
(3 sc, inc) x 6 (30)
Round 6 :
Work 2 rounds even sc (30)
Round 7 :
(3 sc, dec) x 6 (24)
Round 8 :
(2 sc, dec) x 6 (18)
Round 9 :
(1 sc, dec) x 6 (12)
Round 10 :
6 dec (6) - fasten off leaving long tail for sewing
Info :
Stuff lightly and sew head onto the front top of the body. Position slightly forward to create a natural lounging profile.
— Bunny Applique - Ears (Make 2) :
Round 1 :
ch6, sc in 2nd ch from hook, hdc, dc, hdc, sc (5 sts) (ear base)
Round 2 :
Turn and sc back along chain for a flat ear; sl st to finish; make one slightly smaller inner ear in cream or pink for lining and sew inside ear (ear 1)
Round 3 :
Repeat for second ear; leave long tails for sewing. Slightly shape ears by folding and sewing base to give a curved appearance.
Info :
Make inner ear in lighter cream or pink, sew to outer ear, then attach to head at rounds 3-4 placement. Slight forward curve matches the photographed pose.
— Bunny Applique - Tail :
Round 1 :
Using white: mr, 6 sc (6)
Round 3 :
sc around (12) - lightly stuff and close with invisible decrease; fasten off leaving tail for sewing
Info :
Sew tail to back of bunny body at position near round 10 on body motif. Fluff slightly to get puffy look.
— Bunny Applique - Facial & Detail Embroidery :
Info :
Use small black yarn or embroidery thread to stitch eyes (tiny French knots or tiny satin stitch). For nose use pink satin stitch and mouth with a small v-stitch in brown. Add white highlight dots with a tiny bit of white yarn or paint.
Round 1 :
Embroider an eye at head round 5 on each side, approx 5 stitches apart (tiny satin stitch)
Round 2 :
Sew inner ear pink using small whipstitches; add a few surface slip stitches for fur texture along bunny body with lighter beige to achieve mottled tone
Info :
Attach small cream daisies and a tiny yellow sunflower near the bunny head as shown in photograph to integrate the applique into the surrounding garden.
— Large Leaf Sprays and Tendrils :
Round 1 :
Create a base vine: ch 40 (or desired length for spray), sl st back along chain to make a rope-like vine; fasten off leaving tail for sewing
Round 2 :
Sew leaves along vine at intervals: attach small leaf by sewing through base and wrapping vine with sl st to secure; repeat to create realistic spray lengths
Info :
Vine sprigs connect motifs and create depth. Use two shades of green alternately to mimic photo. Pin sprays in place before finishing sewing to adjust spacing.
— Assembly & Joining Motifs :
Info :
Layout: Arrange six framed square panels lengthwise with connector motifs and three circular coaster medallions positioned across the centerline as in the photo. Place bunny applique at one end panel, opposite end mirror some bloom placement for balance.
Step 1 :
Place panels on a blocking board and pin them in the desired arrangement with 1cm gap between motifs. This gap will be filled with vine connectors and leaves.
Step 2 :
Join panels with whipstitch or slip-stitch join: hold two panel edges RS together, and use cream yarn to whip around edge stitches evenly. For a more decorative join, use sc through both loops across seams creating a raised seam (approx stitch every 3-4 sts).
Step 3 :
Sew connector motifs into gaps using long tails; reinforce joins with small hidden stitches to prevent shifting. Weave in all ends as you go to keep assembly tidy.
Info :
Place leaves and flowers last; arrange them overlapping seams to hide any imperfections and create a natural collage. Use pins liberally to preview placement.
— Final Scalloped Border :
Round 1 :
With cream, ch1, sc evenly around entire runner perimeter, placing 3 sc in each corner to keep shape (approx count varies with runner length)
Round 2 :
Ch3, *skip 2, 5 dc in next st (shell), skip 2, sl st in next; rep around to create shell scallop; adjust spacing at corners with (5 dc, ch2, 5 dc) in corner spaces
Round 3 :
Ch1, sc across shells placing 3 sc in center dc of each shell to anchor; fasten off and weave ends
Info :
Block final assembled runner. Pin scallops carefully and steam-block (or wet-block) to set scallops evenly. Press lightly from wrong side to avoid flattening 3D flowers.
Round 4 :
Optional: Add a second narrow picot edge by joining yellow in sc rounds and working (sc, ch3, sl st in 3rd ch) for delicate detail.
Info :
Final trimming: hide or sew down any stray leaf tips. Optional: lightly starch or fabric spray to stabilize for table use.
This blooming table runner turns every meal into a celebration of handmade charm. Layered flowers, sprigs of leaves and the sweet bunny applique create a miniature garden on your table. The modular construction means you can adapt size, colors or motif placement to match your home. Take your time—each little petal and leaf is a joy to make. 🧶🌼🐇