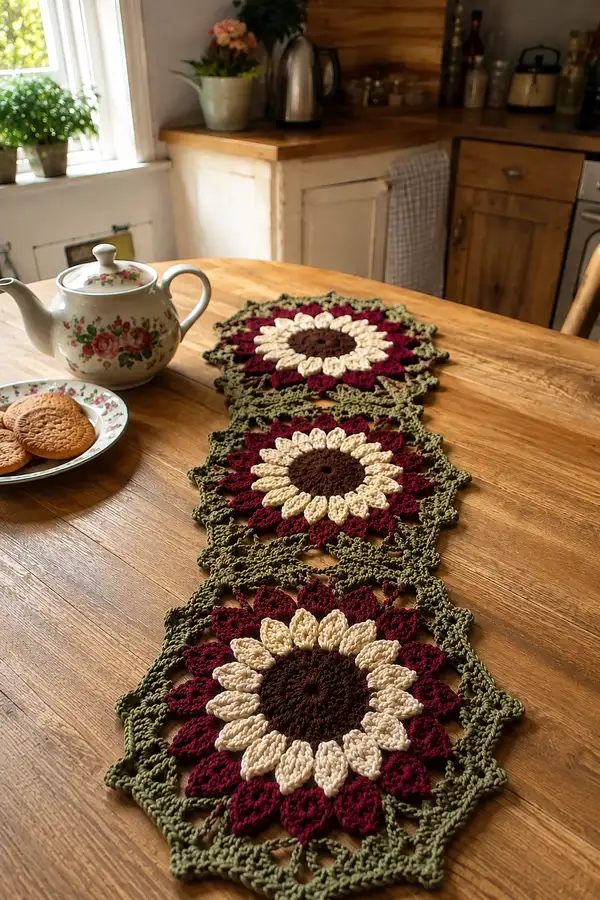
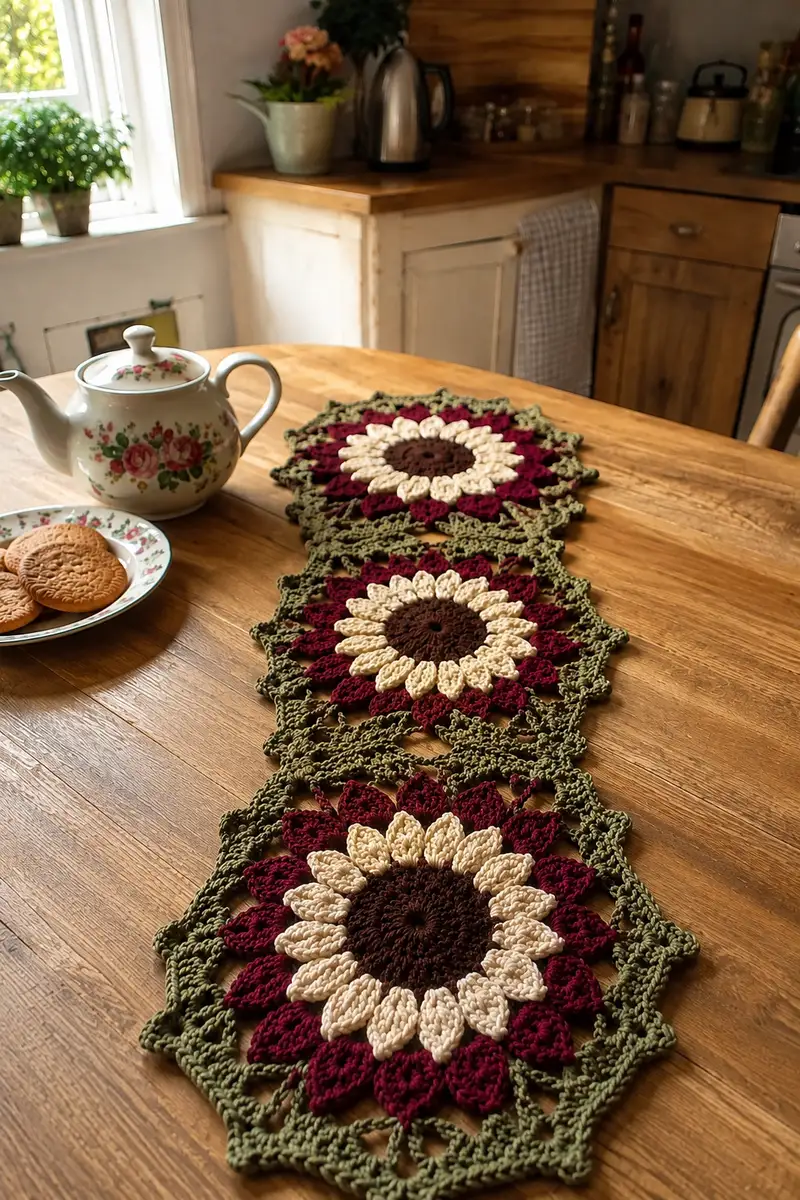
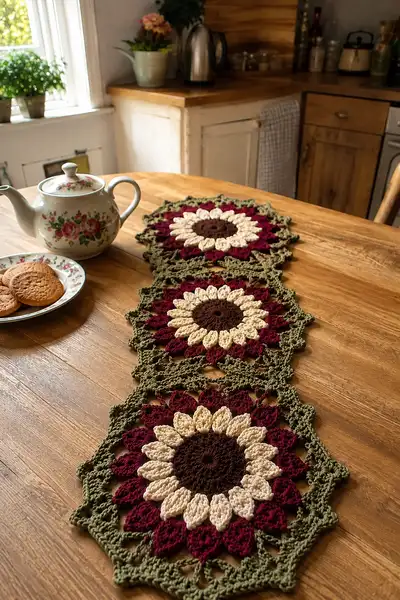
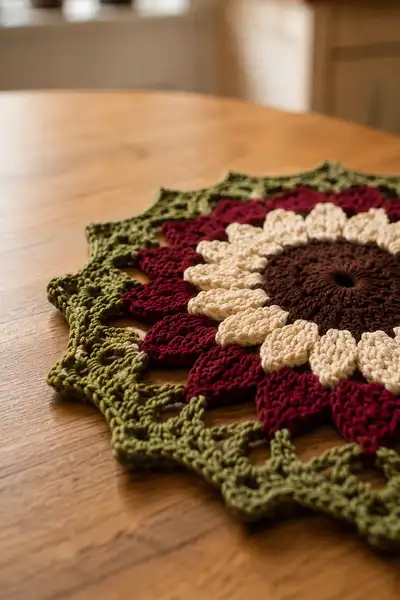
A warm, vintage-inspired sunflower chain table runner worked in rich burgundy, creamy petals and olive green lace. This pattern creates linked sunflower motifs that form a decorative runner perfect for dining tables or sideboards. Each motif has a textured brown center, two layered petals, and a lacy hexagonal border that joins neatly to its neighbors. The instructions include full motif rounds, joining method, and a scalloped finishing edge.
Progress Tracker
0% Complete
— Notes & Gauge :
Info :
Gauge is not critical for style, but consistent tension ensures motifs sit flat and join evenly. With worsted cotton and 4.0mm hook, one completed motif (from center to outer point) should measure approximately 8.5-9.5 inches across. For a tighter fabric, use 3.75mm; for a looser, open look try 4.5mm.
Info :
Make an initial sample motif to practice puff stitch size and placement. Keep a stitch marker at the beginning of each round during motif work. This pattern describes counts for a single motif; make as many as needed for your runner length, then join with the provided joining rounds.
— Sunflower Motif (Make 3 or more) :
Round 1 :
6 sc in magic ring (6)
Round 3 :
(1 sc, inc) x 6 (18)
Round 4 :
(2 sc, inc) x 6 (24)
Round 5 :
(3 sc, inc) x 6 (30)
Round 6 :
(4 sc, inc) x 6 (36)
Round 7 :
(5 sc, inc) x 6 (42)
Round 8 :
(6 sc, inc) x 6 (48)
Info :
Fasten off brown color or carry it if you prefer. The brown center is now a flat disc approximately 48 stitches around. If using cotton, keep stitches firm but not tight so the center lies flat.
Round 9 :
With brown or switch to same brown and work 1 sc in each st BLO around to create a slightly raised ridge if desired (48)
Info :
Change to cream yarn for the first petal layer. The next round will form anchor chain spaces for 12 petals. We’ll create 12 evenly spaced ch4 loops by working groups of 3 sc between loops.
Round 10 :
*(3 sc, ch4) in next 3 sts* x12 — work so you form 12 ch4 loops around the disc (48 sc groups, 12 loop spaces). (48)
Info :
Ensure your ch4 loops are consistent size. These loops will anchor the cream puff petals. Place a stitch marker at the first loop to identify the round start before you work petals.
Round 11 :
Change to cream. Into each ch4 loop: work (sl st into loop, ch1, puff stitch made as follows: yarn over, insert hook in center of loop, yarn over, pull up a long loop; repeat total of 4 times so there are 9 loops on hook, yarn over and pull through all loops, ch1, sl st to secure). Repeat in each ch4 loop around to make 12 puff petals. Join with sl st to first puff base. (12 puff petals anchored to 48 base points)
Info :
Puff stitch detail: For this pattern puff = yo, insert, pull up loop; repeat yo+insert 4 times (5 pulls total), yo and draw through all loops, ch1 to close puff and secure. Adjust the number of yarn-over/insert repeats to make larger or smaller petals. Keep each puff consistent in height.
Round 12 :
Working behind the cream petals in the same foundation ch4 loop area, sl st into the base space, ch3 (counts as dc), (2 dc, ch2, 3 dc) into same ch4 loop to form a small fan if you wish to reinforce petal base. Repeat in each loop around, join with sl st. (12 fans, 48 base anchors)
Info :
If you prefer cleaner backs, you can work Round 12 in BLO on the base round rather than behind the petals. This gives a neat underside for placing a table runner on a sensitive surface.
Round 13 :
Fasten off cream or carry yarn up for next round. Insert burgundy in the round between cream petals: *ch5, skip ahead to the space between cream petals, sl st into gap*—work around to create 12 ch5 arches between petals. Adjust spacing so there are 12 arches between cream petals. (48 base anchor points)
Round 14 :
Change to burgundy. In each ch5 arch work petal cluster: (ch1, puff stitch worked the same as for cream but made slightly taller: 6 pulls instead of 5, ch1, sl st into arch) to form 12 outer burgundy petals. Join with sl st. (12 puff petals)
Info :
Make burgundy puffs slightly taller to sit behind the cream petals; this creates layered depth. Keep tension consistent; if a petal stands too tall, undo and redo with one fewer puff repeat.
Round 15 :
To anchor burgundy petals, work a round of sc around the foundation (work 1 sc between each burgundy petal base into the previous round’s sc groups). Aim for 48 sc evenly distributed. (48)
Round 16 :
(1 sc, ch3, skip next sc) x16 — this creates 16 ch3 loop spaces for the lace border (48)
Info :
We are preparing for a decorative olive border that gives the motif a hexagonal, lacy frame and provides points to join motifs together. The next several rounds in olive will build triangular sections that form six broader points around the motif.
Round 17 :
Change to olive. Into each ch3 space: (sc, ch6, sc) to form long chain arches — repeat across the 16 loops to create extended arches for the lacework. Focus on spacing so arches will meet symmetrically. (48 sc points remain)
Round 18 :
Working into the ch6 arches: in each arch make (sc, 2 dc, 2 tr, ch3, 2 tr, 2 dc, sc) to form a pointed fan. This will create 16 small points—these will be arranged to form 6 larger outer points across rounds to come. (48 anchor points)
Info :
The outer frame requires you to shape groups together so they create a hexagonal silhouette instead of a round. We will combine the 16 points created into six groups over the next rounds, using chain bridges and clusters to draw the edges straight.
Round 19 :
*sc in next 3 anchor points, ch4, skip 2 fans* repeat around to draw the lace inward, forming groups that will be joined into larger points (48)
Round 20 :
*(sc, ch2, 3 dc cluster, ch2, sc) into each ch4 space* - this creates robust triangles which will become the large points of the hexagon. You should now perceive six triangular lobes with small gaps between them. (48)
Info :
At this stage, hold your motif flat and count the lobes. If your tension created more or fewer lobes than six, slightly adjust by making one or two extra ch2 spaces across the next odd/even placement so motif becomes symmetrical.
Round 21 :
Work (sc into each dc and st along the triangular lobes) returning to 48 sc distribution, with small chain loops bridging the lobes: *sc x5, ch5, sc x5* x6 around. This draws the shape into six broad sides. (48)
Round 22 :
Edge refinement round: In each ch5 bridge make (sc, ch4, sc) to make loops that will pick up in final point shaping (48)
Info :
Keep the motif flat on your blocking mat. Use pins to arrange the six sides evenly spaced and symmetrical. If needed, lightly steam-block cotton to set the shape (follow yarn manufacturer heat/safety guidance).
Round 23 :
Working into the bridge loops: *sl st, ch3, (2 dc, ch2, 2 dc) in loop, ch3, sl st into next foundation* — create pronounced outer points. Repeat to form 6 large outer points. (48)
Round 24 :
*sc x3, (sc, ch2, sc) into tip of each large point, sc x3* around to tidy edges and create small anchor points for joining. (48)
Info :
Fasten off and weave in ends for single motif completion if you plan to make many before joining. If you prefer, do not fasten off: keep olive yarn attached and proceed to joining rounds described below to connect motifs as you go.
Round 25 :
Optional stabilization round: With olive, work 1 sc in each st around the outer edge to create a stable border for joining (48)
Info :
Measure motif now. If it is significantly smaller or larger than desired, adjust hook size and rework a sample motif. For a longer runner you will need additional motifs; plan yarn quantities accordingly.
Round 26 :
Decorative picot round: *sc x2, picot (ch3, sl st into first ch), sc x3* around the edge at each side of the 6 points for added lace detail. This gives the motif its delicate scalloped look. (48)
Round 27 :
Finishing detail: Use sl st to tidy joins between picots and ends. Fasten off and weave in ends or leave tail for seaming. (no change in count)
Info :
At this point you have completed one full sunflower motif with two petal layers and a lacy border. Repeat Rounds 1-27 to make as many motifs as needed for your runner. For a narrow runner you might make 3 motifs, for a longer table make 5 or more.
Round 28 :
Optional heavy border (if you want thicker joining edges): Reattach olive and work (ch1, sc in each st) x2 rounds to provide more weight for joining. (48)
Info :
If working several motifs then join as you go, work the join rounds as soon as a motif is finished. Joining later can be more cumbersome if motifs are blocked and stiff.
— Joining Motifs into a Runner :
Info :
We use a crocheted join that maintains the lacy aesthetic. Align motifs so that the flat edges of adjacent hexagonal lobes meet—typically two lobes meet between motifs (one on each motif). The joining method below uses slip-stitch bridges and single crochet reinforcement. Work with olive yarn to make the join visually seamless.
Join Round 1 :
With two motifs side-by-side, place them right sides up and align corresponding ch-bridge loops from the outer olive rounds. Insert hook through loop on Motif A then through matching loop on Motif B, yo and sl st through both loops — repeat across the edge at every matching loop to form a chain of sl sts joining the two motifs. Count that you make the same number of joins across the seam to avoid puckering. (number of joins will match the number of bridge loops between the two motifs)
Info :
Typically there will be 8–12 small loops to join between two adjacent motifs depending on how you shaped the lacy frame; join at evenly spaced loops. Use pins to hold motifs together before joining to ensure even seam.
Join Round 2 :
After slip-joining, work through both edges: *sc in next st on Motif A, sc through corresponding st on Motif B* across the seam — this tightens and stabilizes the join. Aim for 1 sc pair per sl st join. Fasten off and weave tails. (number of paired sc equals join points)
Info :
For a neater look, sew over the backside with a yarn needle and mattress stitch after the sc pairs, especially if the runner will be handled often. If you want a looser chain effect, skip the sc pairs and leave only the slip-stitch chain join.
Join Round 3 :
Continue joining motifs in a straight chain: join motif 2 to motif 3 using same technique. For three motifs, you will have two joins. For longer runners, continue joining motifs sequentially. Keep motifs oriented the same direction so the sunflower centers align.
Info :
If your motifs are slightly different sizes, choose the larger motif as the base and work additional sc increases into the smaller motif edge to remove slack before slip-joining.
Reinforcement Round :
With olive, work 1 round of sc across the join seam by inserting hook through both joined edges and working 1 sc through both layers across the entire seam. This neatens the join and provides stability for table use. (joined seam will have same number of sc pairs as join points)
Info :
Weave in tails on the underside so the top face of the runner is tidy. If you want a decorative seam, you can work a contrasting color slip-stitch over the seam instead of olive to create a visible braid between motifs.
— Decorative Edging & Final Scallop :
Edge Round 1 :
With olive yarn and motifs joined into desired length, work along the long edges of the runner to unify the piece. Start at one end, attach yarn with a sl st, *ch2, skip 2 sts, sc into next st* repeat along the edge to create a uniform set of ch2 arches. Space your arches evenly between motif points. (arch count depends on runner length)
Info :
Keep runner flat and pinned while adding edges. Work gently and check progress frequently to keep a straight edge. If the edge pulls in, add an extra chain in every third arch to lengthen the row slightly.
Edge Round 2 :
Into each ch2 arch along the long edge: (sl st, ch3, 3 dc, ch3, sl st into arch) to form a scallop. Repeat along both long sides. This creates a decorative scalloped edge that echoes the motif points. (scallop count equals arch count)
Edge Round 3 :
For ends: Work 3–4 additional scallops across each short end so the runner’s ends are rounded and match the long edges. Finish with a tidy sc round around the entire runner edge, working evenly spaced sc across short ends to match counts. Fasten off and weave ends. (no stitch count change)
Info :
Blocking after joining and edging is highly recommended. Pin runner flat, gently steam or wet-block per yarn instructions to set scallops and motif points. Allow to dry completely before use.
— Alternative Join: Crochet Join-As-You-Go (JAYG) :
Round 1 :
Work your first motif completely and do not fasten off from the olive edge. When you begin the corresponding round on Motif 2, align edges and, at each join point, work: *sc in motif 2 loop, sl st into motif 1 matching loop, continue* — this forms a tight JAYG seam as you construct the second motif. Continue until motifs are joined. (join points equal the number of matching loops)
Info :
JAYG is faster and yields a clean seam that is integrated into the motif edge. Use this method to assemble multiple motifs while maintaining tension and symmetry between joined edges.
— Finishing Touches :
Info :
Weave in all ends with a yarn needle, trimming close to the fabric. If desired, add small felt pads under the runner to protect delicate surfaces from dye transfer of cotton yarns. Use a soft, lint-free cloth for light pressing.
Info :
For a polished look, starching is optional — test a small scrap first. Store runner folded or rolled to avoid flattening scallops; if transporting, place between tissue or muslin to protect texture.
This sunflower chain table runner brings a cozy, handmade accent to any table — warm tones, textured petals and a delicate lacy frame come together beautifully. I loved making each layered petal and seeing the motifs link into a charming runner. Whether for seasonal decor or everyday charm, this pattern yields a piece with personality and vintage appeal. 🧶🌻✨