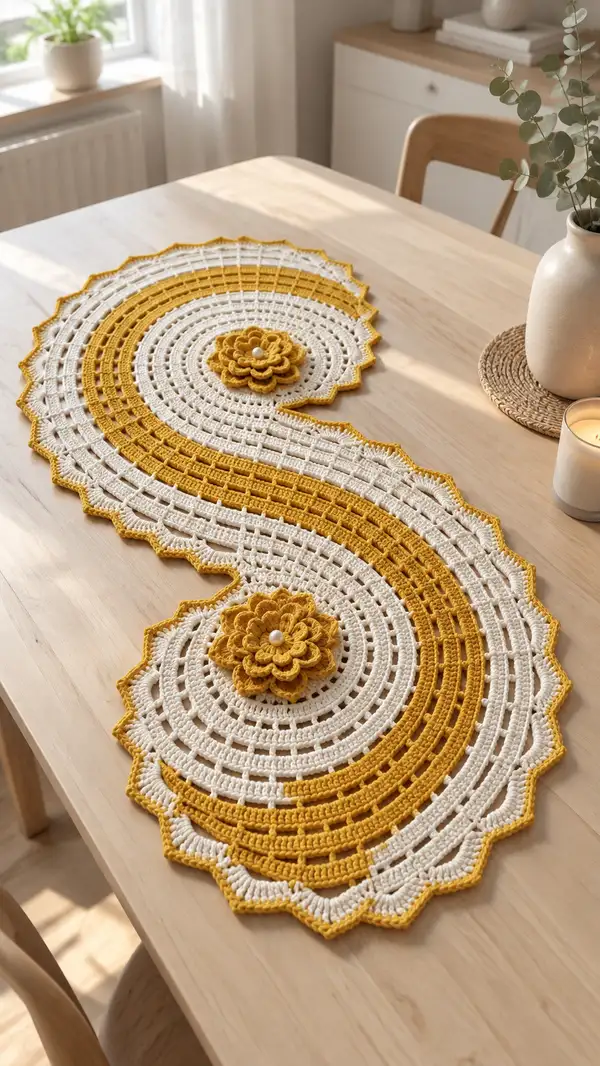
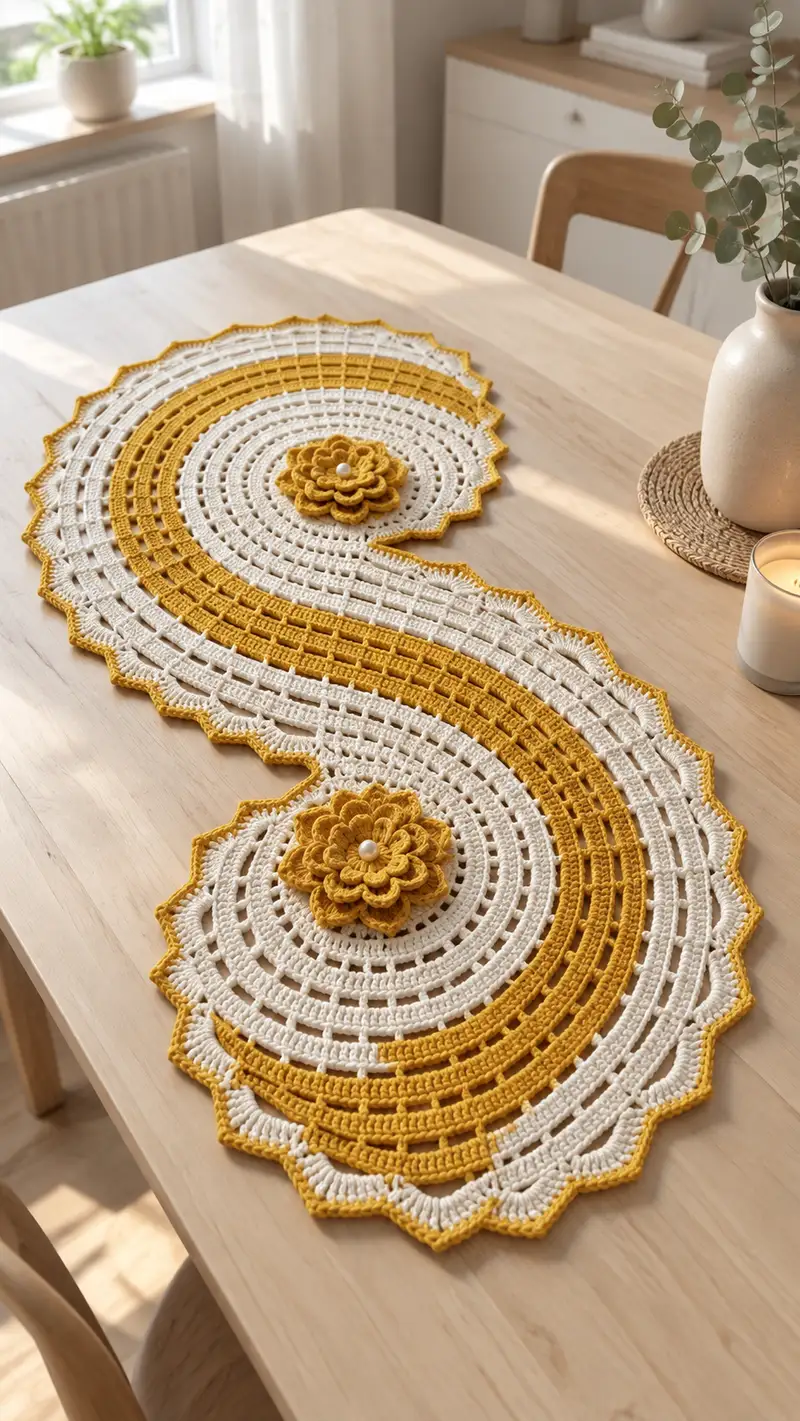
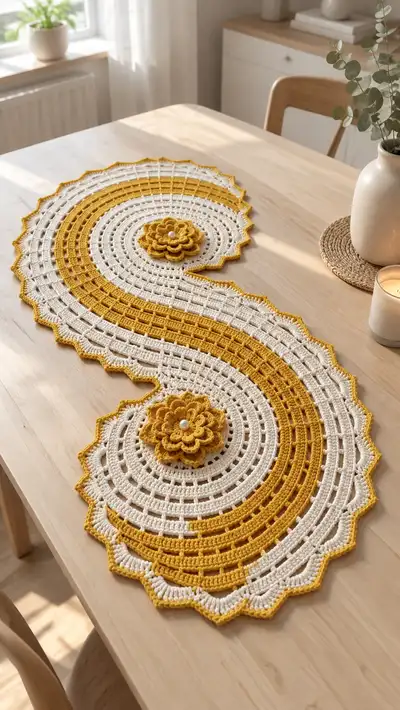
Create a graceful S-shaped crochet table runner featuring alternating warm mustard and creamy white bands, openwork columns, scalloped edges and two layered 3D flowers with pearl centers. This elegant runner lays flat and is designed to drape beautifully down a dining table center. The pattern uses simple stitch families (sc, dc, ch) combined with open grid rounds and a decorative scalloped border for a modern handmade accent.
Progress Tracker
0% Complete
— Pattern Overview :
Info :
This runner is worked in separate modular sections: Make 2 Circular Centers, work one long connecting S-shaped Panel (worked flat in rows joined to centers), then add the Outer Band and a Scalloped Edging. Finish with two layered 3D flowers sewn to the center of each circle. The pattern uses worsted cotton yarn, 3.5mm hook. Tension should yield a firm but drapey fabric. All rounds/rows are worked in continuous spiral for circular motifs and in joined rounds or straight rows for panels as noted.
— Center Circle (Make 2 identical) :
Round 1 :
6 sc in magic ring (6)
Round 3 :
(1 sc, inc) x 6 (18)
Round 4 :
(2 sc, inc) x 6 (24)
Round 5 :
(3 sc, inc) x 6 (30)
Info :
Change to Cream color if starting centers in Cream or keep Mustard based on your preference. The two centers here are worked in alternating bands later, so choose which color will appear on the inner ring.
Round 6 :
(4 sc, inc) x 6 (36)
Round 7 :
(5 sc, inc) x 6 (42)
Round 8 :
(6 sc, inc) x 6 (48)
Round 9 :
1 sc in each st (48)
Round 10 :
1 sc in each st (48)
Info :
These even rounds set your base diameter. If you need a slightly larger circle, add one additional even round here before converting to openwork.
Round 11 :
Switch to Mustard. *Ch3 (counts as dc), sk 1 st, dc in next st; rep around working 1 dc in every other st placing ch1 spaces as needed. You should make 24 dc spaces plus chain spaces roughly forming an open grid (48 sts counted as dc rows). End with sl st to top of beginning ch3. (48)
Round 12 :
Join cream if alternating: Ch1, sc in same st, *ch3, sk next 2 dc, sc in next dc; rep around creating a ring of ch3-lace; sl st to first sc. Count spaces visually to ensure 24 ch3 spaces (24).
Info :
Work this openwork for the circular center; these chain spaces will help the connecting panel join cleanly. Keep tension consistent so the circle stays flat; if ruffling occurs, block later to flatten.
Round 13 :
Switch to Mustard: Into each ch3 space work (dc, ch1, dc) to create small arches, sc between arches on top of prior sc. This round gives a textured ring and increases visual width without changing circumference significantly. Maintain 24 arch repeats (approx 48 dc total including pairs) (48)
Round 14 :
1 sc in each st and sc across tops and in arch centers to tidy the ring (48)
Round 15 :
Ch3, dc in same st, *ch2, sk next 2 sc, 3 dc in next sc; rep around to create wider spokes. Aim for 12 sets of 3-dc clusters interspersed with ch2 spaces. End sl st to top of beginning ch3.
Info :
These spokes will later connect to the S-panel. Count the number of ch2 spaces—these are your anchor points for joining rows of the connecting panel; mark them with pins or stitch markers for alignment.
Round 16 :
Switch to Cream: Ch1, sc into same st, *ch4, sk cluster, sc into top of next cluster; rep around forming longer chain loops (12 ch4 spaces). Sl st to first sc (12).
Round 17 :
Work into each ch4 space: (2 dc, ch1, 2 dc), sc in between clusters. This creates a raised ridge and broadens the disc. Maintain 12 repeats, count total dc accordingly (approx 48 dc plus 12 ch1 spaces) (48)
Round 18 :
1 sc in each st around to stabilize round (48)
Round 19 :
In Mustard: Ch3, 2 dc in same st, *sk 3 sts, 3 dc in next st; rep around making an outer band of 3-dc groups separated by 3-st sk spaces. Adjust so you have 12 groups evenly spaced (36 dc grouped in 12 clusters).
Round 20 :
Ch1, sc in same st, *ch5, sc in center dc of each 3-dc group; rep around creating 12 ch5 spaces for the eventual joining to the connecting panel (12)
Info :
Finish center circle with one or two sc tidy rounds if necessary so the edge is stable. Fasten off leaving a long tail for sewing if attaching later. Make a second identical center. Wet-block both centers flat, pinning into a slight convex shape if desired.
— Connecting S-Panel (Worked flat; number your rows) :
Info :
The S-panel is worked as a long rectangular panel then shaped into an S curve by strategic decrease/increase rows and joining to the circular centers via the ch-spaces prepared in each center. Work flat in rows, turning. Starting width is based on the number of repeats to match the centers; this sample uses 24 dc columns across the panel width to mirror the center spokes.
Row 1 :
With Mustard, ch62. Row foundation counts will include 62 foundation chains or an equivalent foundation row to produce 60-62 base points. Starting at 2nd ch from hook: sc in next ch, *ch3, sk 2 ch, sc in next; rep across to make 20 ch3 openwork columns across. End with sc in last ch. Turn. (approx 62)
Row 2 :
Ch3 (counts as dc), dc in same st, *dc in next sc, dc in next ch3 space (work dc into loop formed by chain-3), dc in next sc; rep across forming a solid row of dc worked into sc and ch3-space alternately. End ch1, turn. Maintain same stitch count across (approx 62 dc).
Row 3 :
Ch1, sc across making 1 sc in top of each dc to compress the row slightly and form a ridge. End, turn. (62)
Info :
These 3-row sequences create the visual bands of solid texture that echo the centers. For the S-curve shaping, you will perform gradual decreases on one edge and increases on the opposite edge across several row repeats; mark both edges with scrap yarn to remind you which side to shape.
Row 4 :
Switch to Cream: Ch3, dc across working 1 dc in each sc from previous row to produce a solid dc band. Turn. (62)
Row 5 :
Ch1, sc in each dc across to flatten (62)
Row 6 :
Mustard: Ch3, *dc in next 2 sc, ch2, sk 2 sc; rep across to create an alternating solid and open column look. End with dc in final sc. Turn. (maintain 62 foundation points)
Row 7 :
Ch1, sc in top of each dc and sc into each ch2 space to tidy; turn (62)
Info :
Begin shaping the S: For the first 6 rows of shaping, decrease 2 stitches at the left edge every 3rd row to curve inward. Use a decrease method suitable for rows: skip first sc at start of row and work remaining sts; when increasing on the opposite side, work two sc in the last stitch of the row to add width there. Track the edge stitch counts carefully—use markers at both edges.
Row 8 :
Shape row - LEFT EDGE DEC: Ch1, sc in next 58 sts only (skip last 2 sts on left edge intentionally) to reduce panel width by 2 sts, maintain pattern of dc/ch as before across the sc placements. Turn. (60)
Row 9 :
Follow Row 2 pattern across 60 sts in dc; turn (60)
Row 10 :
Ch1, sc across 60; turn (60)
Row 11 :
RIGHT EDGE INC: Ch1, sc in first st, then work pattern across until final st, 2 sc in last st to increase by 1 at right edge (61)
Row 12 :
Continue pattern row in dc across 61; turn (61)
Info :
Repeat this shaping rhythm across the length of the panel: perform a subtle curve by decreasing slightly on one side and increasing on the other in staggered rows to create an S curve that will nest into the circular centers. Keep counts accurate; the sample sequence uses decreases of 2 every third shaping cycle and compensating increases on the opposite edge.
Rows 13-34 :
Continue alternating textured bands and openwork rows following the established 3-row band rhythm (Row types 2,3,4 repeated), while applying edge shaping every 3-4 rows: decrease 2 sts on the left edge on shaping rows and increase 1-2 sts on the right edge on alternate shaping rows. By Row 34 you should have achieved the gentle S curvature across approximately 22-24 cm of panel length and the panel width will vary from approximately 58-64 stitches depending on shaping. Maintain color changes every 3-4 rows to form wide stripes. (variable stitch counts as shaped)
Info :
Anchor Points :
At the ends where the panel will attach to each circular center, count and mark 12 ch-space anchor points spaced evenly across the panel end to match the 12 ch5 or ch4 spaces on the center circle. You will attach by slip-stitching or sewing through these chain spaces to create a smooth joined seam. Place temporary markers to line up locations.
Rows 35-50 :
Work straight bands without further shaping to produce the long mid S-section. Alternate 3 rows Mustard bands then 3 rows Cream bands following the established dc/sc/openwork rhythm. These rows build the length between centers. Keep edge counts constant here so your joining edges remain wide enough to match center anchors. (stitch count consistent per row after shaping completed)
Info :
Trial-fit the panel next to the centers now: lay the panel in an S curve and place the center discs at the points where they will be joined. Trim or add 1-2 extra rows to the connecting panel to ensure the curve sits naturally. Blocking may be helpful before joining for best alignment.
Row 51 :
Prepare for joining to the circle center: Work one final tidy round in single crochet across the last row to create a firm edge with evenly spaced sc posts. Count sc posts to match the number of anchor loops on the center (12 ch5 arches or 12 ch4 spaces). Adjust with increases/decreases evenly spaced if needed to make counts match exactly. Fasten off leaving long tail for joining (stitch count matched to center anchors).
— Joining Centers to Panel :
Info :
With both center discs blocked and the central panel laid in S alignment, pin the center to the panel so the 12 anchor ch-spaces on the circle match 12 anchor points on the panel edge. Use a tapestry needle and the working yarn tail to sew around each ch-space using a whip stitch or slip-stitch join. Attach centers with the decorated face up. Work evenly so the joins are flat and invisible from the right side.
Join Step :
Start at one anchor point: Insert needle through panel edge sc and into the chain space of center disc, then back through next panel sc; pull snug. Repeat around all 12 anchor points. Tie off with a secure knot on the back side and weave in tails. Repeat for the second center on the opposite end of the S-panel so the two discs mirror each other in position.
Info :
If the seam puckers, loosen a few stitches and re-distribute tension, or insert a small running stitch between anchor joins to smooth fabric. After both centers are sewn, block entire runner flat to even out the joins and set the S-curve.
— Outer Band & Grid Refinement :
Round 1 :
With Cream and working around the assembled runner from the right-side edge, join with sl st to any sc along the panel edge. Ch1, sc evenly around working 2 sc in corner areas where curve flares to maintain a flat edge. Work sc around entire perimeter making sure to keep count of increases at pronounced curves. Aim for even edging increments such that the final perimeter stabilizes—expect approx 320-380 sc total depending on shaping and size (variable).
Info :
This sc round creates a base for the final scalloped edging, evening out any irregular edges and making it easier to place the decorative scallops. Use smaller hook (3.0mm) here if you prefer a tighter, more defined edging.
Round 2 :
Switch to Mustard: Ch3, dc in same st, *ch2, sk 2 sc, 3 dc in next sc; rep around to create groups of 3-dc clusters separated by ch2 spaces. Work clusters into flatter edges and use extra increases (3 dc in one sc) in concave sections to avoid puckers. End with sl st to top of ch3. Count clusters—aim for approx 80 groups depending on perimeter length. (variable cluster count)
Round 3 :
Ch1, sc into top of each cluster and into each ch2 space to stabilize. This produces an even locked band to accept the scallops. Fasten off if you prefer two-tone outer band. (cluster-count matched)
Info :
If your runner has wider curves in some areas, place 2 clusters into the same sc there to expand circumference locally. Conversely, skip one cluster placement in very taut areas to pull in slightly. The outer band is forgiving and can be adapted by eye; preserve symmetry left-to-right.
— Scalloped Picot Edging :
Round 1 :
With Mustard (or contrast), join in any sc at outer band: *Ch1, sl st in next st, (5 dc, ch3, sl st to first dc) into the same st to form a shell with picot, sl st into next 3 sc to move to next shell position; rep around for shell picot edging. Aim for 1 scallop per cluster from previous round so counts align. This creates pronounced scallops with a little picot crown finishing each shell. Count scallops and adjust in corners by adding or skipping as needed. (variable)
Info :
Use BLO or a smaller hook if you want a sharper scallop ridge. Pin the scalloped edge to the blocking mat immediately and steam or wet-block to set shape if needed. The picots hold shape better when blocked gently.
Round 2 :
Ch1, sc in top of each shell to tidy and define scallop base. Add an optional reverse picot chain between some shells for extra lacy effect in larger curve areas. Fasten off and weave in ends securely. (sc count equals scallop count)
— Layered 3D Flower (Make 2) :
Round 1 :
With Mustard, Ch4, sl st to join into ring. Ch1, 10 sc into ring, join with sl st (10)
Round 2 :
Ch2 (counts as hdc), hdc inc in same st, *hdc in next st, hdc inc in next st; rep around (15) Adjust to make petal base even. Join with sl st.
Round 3 :
Change to Cream: Ch3, *in next st work (dc, ch2, dc) to form picot-like petal point, sl st in next st; rep around to make 5 larger loop petals. Join with sl st. (5 petals)
Info :
These first two rounds create a small central base for the layered petals. Keep tension soft so petals sit up off the disc rather than flattening completely. Block each flower layer lightly to open the petals.
Round 4 :
Make first petal layer: With Mustard, attach in back loop of a petal base: *Ch1, 7 dc in petal base, sl st to next petal base; rep for 5 petals. Fasten off layer. This creates thicker textured petals (5 larger petals).
Round 5 :
Make second, smaller petal layer: Join Mustard to front of first layer between two petals: *Ch1, 5 dc in petal foundation space, sl st to next; rep for 5 smaller petals that sit on top of the larger layer. Fasten off and weave in tails.
Round 6 :
Center finishing: Sew a small pearl bead to the center using a few passes with thread or yarn end to secure it. Use small dab of fabric glue inside bead for extra hold if desired. Repeat for second flower.
Info :
Stitch each flower to the center of its corresponding circular disc using long tails, sew tightly through the disc anchor area and back through the flower base so the flower is secured without gaps. Tuck in ends and weave to the wrong side of the runner.
— Final Finishing Rounds :
Round 1 :
Weave in all tails from joins and flowers using yarn needle; use small neat stitches to hide ends within the runner. Trim excess closely.
Round 2 :
Block the entire runner: dampen slightly, pin onto blocking surface in S-shape and shape scallops evenly. Allow to dry fully. This step is critical to flatten and set the openwork so the runner lies flat on your table.
Info :
Final pressing/steaming at low heat can open up decorative stitches further. If you used cotton yarn, press carefully with a cloth between iron and crochet to avoid shine. Once fully dry, the runner will keep its shape well.
Round 3 :
Inspect right-side for any loose loops or uneven scallops and adjust by sewing down high points with invisible ladder stitch. Your runner is complete and ready to style on a dining table or console.
Finishing this runner brings such satisfaction—watch the openwork and scallops come to life after a careful block! The dual centers and layered flowers lend an artisan feel while the mustard and cream palette keeps it modern and warm. This piece makes a thoughtful handmade gift or a signature item on your table. 🧶🌼