🧢 Beautiful ✨ Detailed πŸ’ Adorable

Superman Amigurumi Pattern

Superman Amigurumi Pattern
4.0β˜… Rating
5-7 Hours Time Needed
1.3K Made This
βœ‚οΈ

Intermediate Level

Ideal for those with basic crochet experience, featuring slightly more advanced stitches and techniques to expand your skills.

⏱️

Weekend Treat

Takes 5-7 hours, making it an enjoyable project to finish over a couple of days.

🧸

Cute Companion

An adorable friend to cherish, handcrafted with love to bring comfort and joy for years to come.

About This Superman Amigurumi Pattern

This pattern creates a small Superman-inspired amigurumi complete with boots, a removable cloak, embroidered crest, and hair. You will crochet separate parts (legs, body, head, arms, hair, logo, cloak) and join them for a finished toy. The instructions are written round-by-round with tips for stuffing and assembly to help you achieve a neat result.

Superman Amigurumi Pattern crochet pattern - detailed view of completed project

Includes a materials list, US abbreviations, and clear assembly directions for attaching the hair, sleeves, and crest. Finished size is listed so you know what to expect when using the recommended hook.

Why You'll Love This Superman Amigurumi Pattern

I absolutely love this pattern because it turns simple crochet rounds into a delightful little superhero with character and charm. I enjoy the combination of shaping for the limbs and body with finishing details like the embossed crest and hair piece, which really bring the doll to life. The pattern is satisfying to work through and offers little moments to personalize the character, like eye placement and embroidered details. Making this has become one of my favorite quick projects to gift, since it balances speed with rewarding detail.

Superman Amigurumi Pattern step 1 - construction progress Superman Amigurumi Pattern step 2 - assembly progress Superman Amigurumi Pattern step 3 - details and accessories Superman Amigurumi Pattern step 4 - final assembly and finishing

Switch Things Up

I love how easy it is to customize this pattern by changing colors; try pastel shades for a soft, whimsical superhero or bold primary colors for a classic look.

I often make size changes by swapping yarn weight and hook size; use a bulkier yarn and larger hook for a chunky cuddly version or finer yarn for a mini pocket-sized friend.

I sometimes replace safety eyes with embroidered eyes for a fully child-safe toy, which also gives a gentle, handmade expression to the face.

Try adding wire into the arms or legs for posability if you want the doll to hold poses for display or playβ€”just use thin, flexible wire and wrap it before inserting.

Mix and match the crest details: embroider an initial, use contrasting yarn for a border, or add surface slip stitch texture for a different look.

I enjoy making themed outfit variations like capes with stripes, hoods, or buttoned collars to create a whole collection of heroic looks.

Experiment with different boot shapes by adjusting increases and rounds to make pointy boots, rounded toes, or taller cuffs.

For a softer texture, use an acrylic/wool blend; for easy care, use 100% acrylic so the doll is machine-washable on gentle cycles.

If you prefer a different hairstyle, crochet a larger hair cap or tiny curly locks and stitch them on individually to change the personality of the doll.

I also like to create matching accessories like a tiny mask, mini belt pouch, or a stand-up cardboard backdrop to make the toy part of a playful scene.

Common Mistakes & How to Fix Them

βœ— Skipping stitch markers during round work can lead to losing track of the beginning of rounds; place a marker at the start of each round to stay aligned. βœ— Not stuffing gradually causes lumps and misshapen limbs; stuff a little at a time while shaping to maintain smooth curves and correct firmness. βœ— Failing to count increases and decreases often will create uneven shaping; count your stitches at the end of each round, especially after increases or decreases. βœ— Sewing parts without pinning first leads to misaligned features; pin or use T-pins to check placement before permanently sewing pieces together.

Superman Amigurumi Pattern

Create a charming handmade Superman amigurumi with this complete crochet pattern. You will make a cuddly, poseable little hero with a removable cloak, embroidered crest, and cute facial details. The pattern includes full round-by-round instructions, materials, and assembly notes so you can follow along easily. Perfect as a gift or a fun project to expand your amigurumi skills.

Intermediate 5-7 Hours

Materials Needed for Superman Amigurumi Pattern

β€” Main Fabric

  • 01
    Yarn - main/foundation yarn (Cream for head and hands)
  • 02
    Color A: Blue - body and legs (B COLOR in pattern)
  • 03
    Color B: Red - boots, cape trim and crest edging (B and D listed as Red in pattern)
  • 04
    Color C: Yellow - logo triangle and belt detail
  • 05
    Color D: Red (hair trim/crest details listed as Red in pattern)

β€” Tools Required

  • 01
    Crochet hook size 2.5 mm (or a size that fits your yarn)
  • 02
    Safety eyes (2 pieces)
  • 03
    Scissors
  • 04
    Polyester stuffing
  • 05
    Tapestry needle for sewing
  • 06
    Stitch markers
  • 07
    Pins for assembly
  • 08
    Awl (for straightening sleeve layers during finishing)

Progress Tracker

0% Complete

β€” Legs & Body :

Round 1-6 :

Rnd 1-6 sc in a mr

Round 2-6 :

Rnd 2-6 sc inc(12)

Round 3 :

Rnd 3-(6 times)1 sc into sc next inc(18)

Round 4 :

Rnd 4-6 sc into sc(6 sc inc)6 sc into sc(24)

Round 5-7 :

Rnd 5-7-(3 ring)sc into sc(24)

Round 8-6 :

Rnd 8-6 sc into sc(6 sc dec)6 sc into sc(18)

Round 9-7 :

Rnd 9-7 sc into sc(4 sc dec)7 sc into sc(14)

Info :

Stuff the legs. keep stuffing as you go.Fill the legs. Keep filling as you go.

Round 10-14 :

Rnd 10-14(5 ring)sc into sc(14)

Round 15 :

Rnd 15-in blo sc into sc(14) A color-

Round 16 :

Rnd 16-in flo sc into sc(14)

Round 17-23 :

Rnd 17-23-(7 ring)sc into sc(14)

Round 24 :

Rnd 24-Bring the legs together. sc into sc(28)

Round 25-29 :

Rnd 25-29-(5 ring)sc into sc(28)

Round 30-31 :

Rnd 30-31-(2ring)sc into sc(28)

Round 32 :

Rnd 32-2 sc inc sc into sc(30)

Round 33-42 :

Rnd 33-42-(10 ring)sc into sc(30)

Round 43 :

Rnd 43-(6 times)3 sc into sc next dec(24)

Round 44 :

Rnd 44-sc into sc(24)

Round 45 :

Rnd 45-(6 times)2 sc into sc next dec(18)

Info :

Stuff the body tightly. Keep filling as you go.

Round 46-47 :

Rnd 46-47-(2 ring)sc into sc(18)

Round 48 :

Rnd 48-(6 times)1 sc into sc next dec(12)

Round 49-51 :

Rnd 49-51-(3 ring)sc into sc(12)

β€” Head :

Round 52 :

Rnd 52-(6 times)1 sc into sc next inc(18)

Round 53 :

Rnd 53-(6 times)2 sc into sc next inc(24)

Round 54 :

Rnd 54-(6 times)3 sc into sc next inc(30)

Round 55 :

Rnd 55-(6 times)4 sc into sc next inc(36)

Round 56 :

Rnd 56-(6 times)5 sc into sc next inc(42)

Round 57 :

Rnd 57-(6 times)6 sc into sc next inc(48)

Round 58-65 :

Rnd 58-65-(8 ring)sc into sc(48)Install the safety eyes between rnd 14-15. there should be 8 sc between them.

Round 66 :

Rnd 66-(6 times)6 sc into sc next dec(42)

Round 67 :

Rnd 67-(6 times)5 sc into sc next dec(36)

Round 68 :

Rnd 68-(6 times)4 sc into sc next dec(30)

Round 69 :

Rnd 69-(6 times)3 sc into sc next dec(24)

Round 70 :

Rnd 70-(6 times)2 sc into sc next dec(18)

Round 71 :

Rnd 71-(6 times)1 sc into sc next dec(12)

Round 72 :

Rnd 72-6 sc dec fo.

β€” Arms :

Round 1-6 :

Rnd 1-6 sc in a mr

Round 2-6 :

Rnd 2-6 sc inc(12)

Round 3 :

Rnd 3-6(4 ring)sc into (12)

Round 7 :

Rnd 7-(4 times)1 sc into sc next dec(8)

Round 8 :

Rnd 8-2 ch turn 2 ch into sc sc into sc(8)

Round 9 :

Rnd 9-(4 times)1 sc into sc next inc(12)

Info :

A color-fill the sleeves

Round 10-24 :

Rnd 10-24-(15 ring)sc into sc(12)

Round 25 :

Rnd 25-Straighten it. Dip the awl into both layers. 6 sc fo. Leave a long thread end to sew.

β€” Logo :

Round 1-3 :

Rnd 1-3 ch turn ch into sc(2 sc)

Round 2 :

Rnd 2-1 sc inc sc into sc(3)turn

Round 3 :

Rnd 3-1 sc inc sc into sc(4)turn

Round 4 :

Rnd 4-1 sc inc sc into sc(5)turn

Round 5 :

Rnd 5-1 sc inc sc into sc(6)turn

Round 6 :

Rnd 6-1 sc inc sc into sc(7)turn

Round 7 :

Rnd 7-1 sc inc sc into sc(8)turn

Round 8 :

Rnd 8-1 sc inc sc into sc(9)turn

Round 9 :

Rnd 9-1 sc inc sc into sc(10)turn

Round 10 :

Rnd 10-1 sc inc sc into sc(11)turn

Round 11 :

Rnd 11-1 sc inc sc into sc(12)fo.

Info :

B color-Make 35 sc around the triangle. Leave a long thread end to sew. 16 ch for the letter S.

β€” Hair :

Round 1-6 :

Rnd 1-6 sc in a mr

Round 2 :

Rnd 2-6 sc inc(12)

Round 3 :

Rnd 3-(6 times)1 sc into sc next inc(18)

Round 4 :

Rnd 4-(6 times)2 sc into sc next inc(24)

Round 5 :

Rnd 5-(6 times)3 sc into sc next inc(30)

Round 6 :

Rnd 6-(6 times)4 sc into sc next inc(36)

Round 7 :

Rnd 7-(6 times)5 sc into sc next inc(42)

Round 8 :

Rnd 8-(6 times)6 sc into sc next inc(48)

Round 9-13 :

Rnd 9-13-(5 ring)sc into sc(48)

Round 14 :

Rnd 14-7 ch turn 7 ch into 6 sc.sc into sc(48)fo.Leave a long thread end to sew.

β€” Cloak :

Round 1-22 :

Rnd 1-22 ch turn ch into sc(22)1 ch turn

Round 2 :

Rnd 2-sc into cr(22)1 ch turn

Round 3 :

Rnd 3-cr into cr(22)1 ch turn

Round 4 :

Rnd 4-1 cr inc cr into cr(23)1 ch turn

Round 5 :

Rnd 5-1 cr inc cr into cr(24)1 ch turn

Round 6 :

Rnd 6-1 cr inc cr into cr(25)1 ch turn

Round 7 :

Rnd 7-1 cr inc cr into cr(26)1 ch turn

Round 8 :

Rnd 8-1 cr inc cr into cr(27)1 ch turn

Round 9 :

Rnd 9-1 cr inc cr into cr(28)1 ch turn

Round 10 :

Rnd 10-1 cr inc cr into cr(29)1 ch turn

Round 11 :

Rnd 11-1 cr inc cr into cr(30)fo.Clean the thread end.

β€” Joining Parts :

Info :

sew the hair to the head

Info :

rnd 50-sew the sleeves sideways

Info :

Sew the crest to the superman's chest.
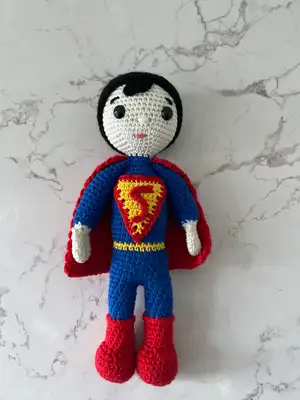
β€” Final Photos :

Info :

Final photos shown for reference of finished assembly and placement of details.

Assembly Instructions

  • Sew the hair to the head using the long thread tail left when fastening off the hair piece, positioning the hair over the top of the head and securing evenly around the edge.
  • Rnd 50 - sew the sleeves sideways to the body by matching the sleeve opening to the armhole and stitching through both layers so the sleeve sits naturally.
  • Sew the crest (logo triangle) to the superman's chest using the long tail left after finishing the logo and whipstitching it centered on the torso.
  • Use the long thread ends left on the arms, logo, and cloak to hand-sew each piece in place and weave in ends neatly after securing.

Important Notes

  • πŸ’‘Install safety eyes between rounds 14-15 of the head with 8 single crochet between them before continuing to stuff and close the head.
  • πŸ’‘Leave long thread ends on pieces like the arms, logo, and hair so you have enough yarn to sew parts securely in place.
  • πŸ’‘Stuff limbs and the body gradually as you crochet to maintain smooth shaping and avoid lumps during assembly.

This delightful Superman amigurumi brings a tiny hero to life with a bright crest, removable cloak, and classic boots. 🧢 Perfect for gifting, play, or display, it combines simple shaping with playful details that make each doll unique. ✨ Happy crocheting β€” may your little hero spark big smiles and handmade joy! 🧡

You ask,

we answer.

FAQs

What size will the finished piece be?

The finished amigurumi measures around 20 cm in circumference and about 10 cm in length using the recommended hook and yarn.

Can I use different yarn weights for this pattern?

Yes, you can use different yarn weights, but the final size will change; choose a suitable hook for your yarn and expect adjustments in stitch counts if changing weight significantly.

Do I need prior crochet experience for this pattern?

This pattern is rated intermediate, so familiarity with single crochet, increases, decreases, and working in rounds is recommended for best results.

How long does this project typically take to complete?

Most crocheters finish this pattern in about 5-7 hours, though time will vary based on experience, stitching speed, and how much time you spend on assembly and finishing.