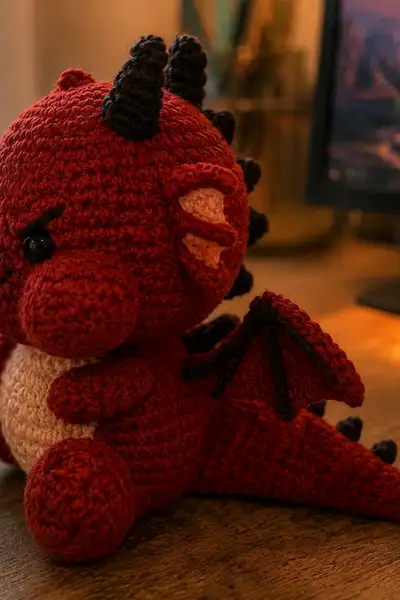
🧶 Beautiful ✨ Detailed 💝 Adorable

Tiny Angry Devil Dragon Amigurumi Pattern

Tiny Angry Devil Dragon Amigurumi Pattern
4.7★ Rating
5-7 Hours Time Needed
1.3K Made This
✂️

Intermediate Level

Ideal for those with basic crochet experience, featuring slightly more advanced stitches and techniques to expand your skills.

⏱️

Weekend Treat

Takes 5-7 hours, making it an enjoyable project to finish over a couple of days.

🎁

Tiny Treasure

Small, sweet, and gift-worthy creations that fit perfectly in the palm of your hand with detailed charm.

🧶 Jump to Pattern ↓

About This Tiny Angry Devil Dragon Amigurumi Pattern

This pattern recreates a tiny angry devil dragon with puffed cheeks and a lovable scowl. The finished toy is worked mainly in deep red with a contrasting cream belly and black accents for horns, spikes and wing veins. Key features include rounded puffed cheeks, a sewn-on protruding muzzle, expressive embroidered brows, three tapered horns and articulated wing membranes with embroidered ribs. The scale is small and palm-friendly, perfect as a desk companion or baby of a larger plush collection.
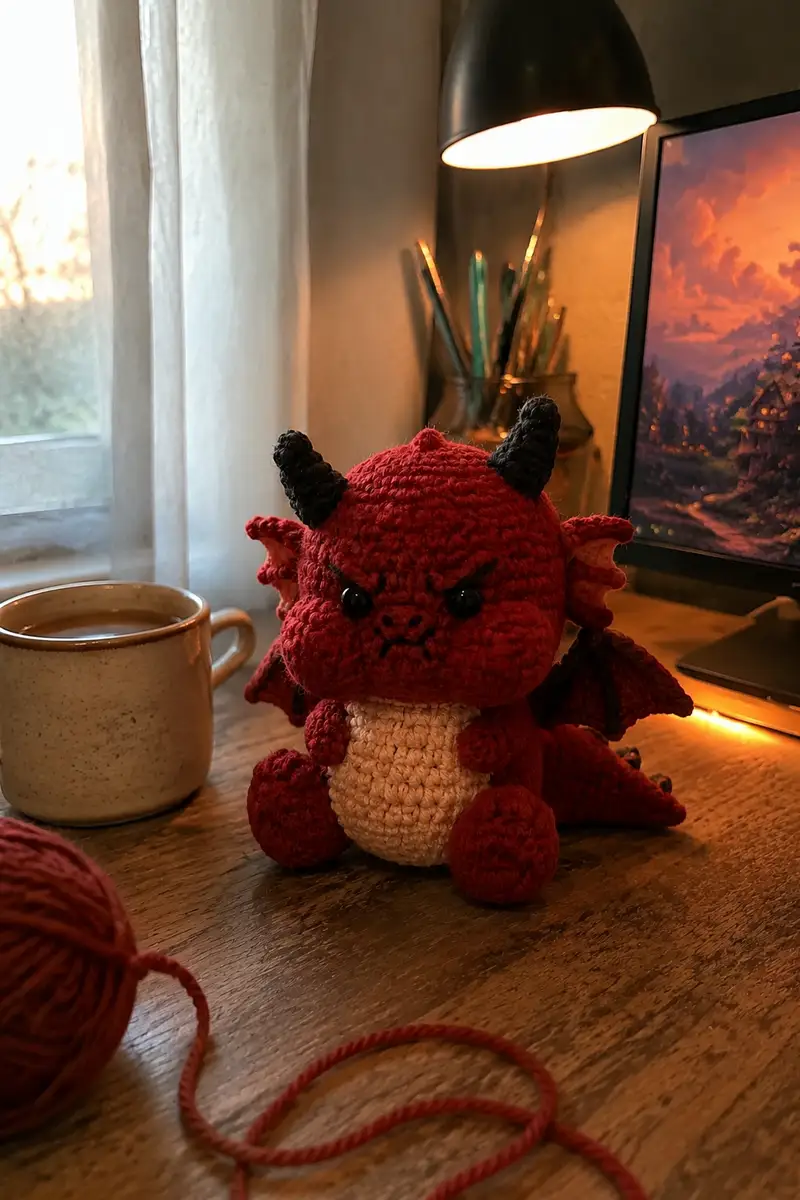
Tiny Angry Devil Dragon Amigurumi Pattern crochet pattern - detailed view of completed project

The pattern focuses on small sculpted features to capture personality: separate cheeks, a sculpted snout, and layered wings. Everything is constructed in pieces and sewn for strong, neat shaping and easy customization.

Why You'll Love This Tiny Angry Devil Dragon Amigurumi Pattern

I love this pattern because it packs so much personality into a tiny package. The puffed cheeks and furrowed brows give it character, and the layered wings and horns add playful complexity. I also enjoy how forgiving the modular construction is — you can tweak sizes and colors to create your own grumpy little dragon variations.

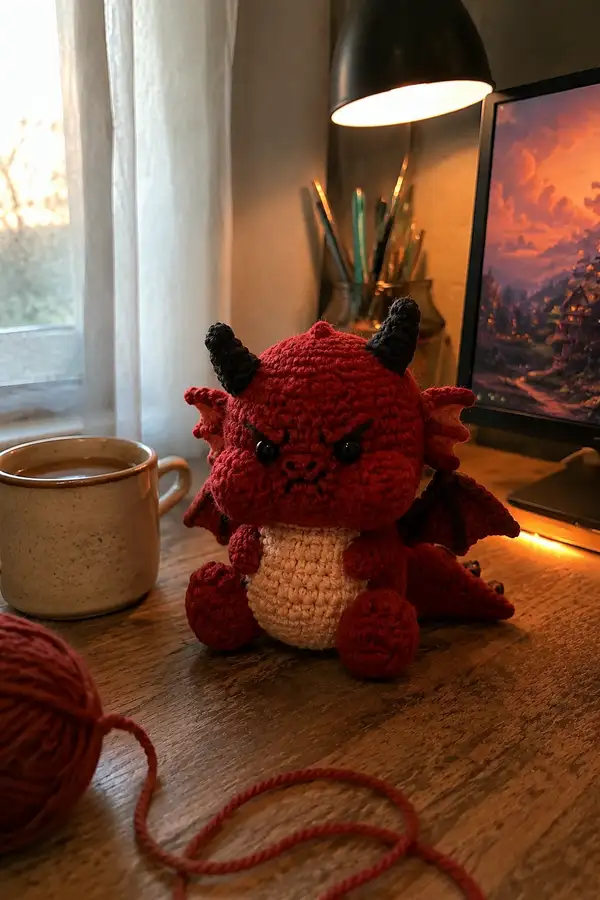
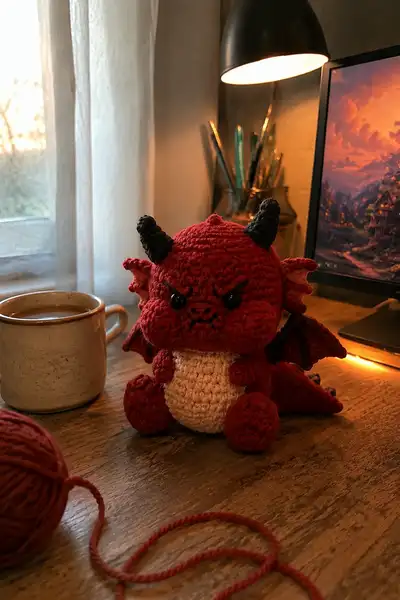
Tiny Angry Devil Dragon Amigurumi Pattern step 1 - construction progress Tiny Angry Devil Dragon Amigurumi Pattern step 2 - assembly progress Tiny Angry Devil Dragon Amigurumi Pattern step 3 - details and accessories Tiny Angry Devil Dragon Amigurumi Pattern step 4 - final assembly and finishing

Switch Things Up

I absolutely loved designing this pattern because it offers so many opportunities for creative customization while maintaining a structure that's fun and manageable to crochet. The modular construction means you can change horns, wings, or cheek sizes without reworking the whole pattern.

If I were making this again I'd try a softer pink or coral for a playful pastel dragon, or switch to dark green and gold for a more traditional fantasy look. You can also change the eye size or embroider sleepy brows to shift expression from angry to mischievous.

I often adjust the tail length and wing span for different personalities — a longer tail makes a regal pose while shorter wings create a compact, squishy sitter. Don't be afraid to improvise small accessories like a tiny scarf or a stitched heart to make each dragon uniquely yours.

Common Mistakes & How to Fix Them

✗ Skipping stitch markers at round starts can cause misaligned features and uneven shaping; always mark your first stitch of each round ✗ Inconsistent tension between rounds creates lumpy or uneven surfaces; practice maintaining steady, even tension throughout the entire project ✗ Not stuffing gradually as you work causes difficulty reaching inside later; stuff sections as you complete them for best results ✗ Attaching pieces without pinning first can result in asymmetry; pin and check placement before sewing ✗ Forgetting to secure safety eyes before final stuffing risks breakage; place and fasten them early and double-check position ✗ Changing color without weaving in ends securely can cause loose loops later; knot and weave ends into seams for a clean finish ✗ Missing a decrease/increase round will change circumference and make seams misalign; recount stitches after each round to verify ✗ Using too large a hook will create holes where stuffing shows; use a hook slightly smaller than yarn label for tight amigurumi fabric
Tiny Angry Devil Dragon Amigurumi Pattern

This tiny angry devil dragon is a palm-sized amigurumi with puffed cheeks, stubby limbs, curled horns and detailed wings. Worked in deep red with a cream belly and black accents, it features expressive embroidered brows, shiny black safety eyes, and textured wing veins. The pattern includes step-by-step round-by-round instructions for every piece — head, snout, cheeks, body, arms, legs, ears, horns, spikes, tail and wings — plus assembly and finishing tips to help you make a perfectly grumpy little dragon.

Intermediate 5-7 Hours

Materials Needed for Tiny Angry Devil Dragon Amigurumi Pattern

— Main Fabric

  • 01
    Worsted weight yarn (#4), approximately 120g in deep red (main body color)
  • 02
    50-60g in cream/beige for belly and inner ear
  • 03
    30-40g in black for horns, wing veins and spikes
  • 04
    Small amounts (10-15g) in pale peach or light cream for inner ear highlights and cheek lining

— Tools Required

  • 01
    3.5mm (E) crochet hook for main work (adjust if using different yarn)
  • 02
    3.0mm (D) hook for tighter detail pieces (horns, spikes)
  • 03
    2.5mm (C) hook optional for very tight horns or spikes
  • 04
    Safety eyes 10mm black (2) or 8mm if preferred (position per head instructions)
  • 05
    Polyester fiberfill stuffing
  • 06
    Yarn needle for sewing pieces and embroidery
  • 07
    Stitch markers (at least 3-4)
  • 08
    Scissors
  • 09
    Pins for assembly and placement
  • 10
    Optional: Thin floral wire or pipe cleaner for poseable tail/wings
  • 11
    Optional: Fabric glue for securing knot ends on small parts

Progress Tracker

0% Complete

— Head :

Round 1 :

6 sc in magic ring (6)

Round 2 :

6 inc (12)

Round 3 :

(1 sc, 1 inc) x 6 (18)

Round 4 :

(2 sc, 1 inc) x 6 (24)

Round 5 :

(3 sc, 1 inc) x 6 (30)

Round 6 :

(4 sc, 1 inc) x 6 (36)

Round 7 :

(5 sc, 1 inc) x 6 (42)

Round 8 :

(6 sc, 1 inc) x 6 (48)

Round 9-12 :

1 sc in each st (48)

Info :

Place stitch marker at beginning of each round. Eyes will be placed between rounds 13-14; do not stuff before securing eyes. Use safety eyes 10mm placed approximately 7-8 sts apart as measured across round 13 (adjust spacing for expression)

Round 13 :

1 sc in each st (48)

Info :

Insert safety eyes between rounds 13 and 14, approximately 6-8 stitches apart. For this angry expression, place them slightly lower and closer together than neutral placement, about 6 stitches apart center-to-center on a 48-st round

Round 14 :

1 sc in each st (48)

Round 15 :

(6 sc, 1 inc) x 6 (54)

Round 16-18 :

1 sc in each st (54)

Info :

The puffed cheeks will be attached later. If you want a slightly rounder head, keep rounds 16-18 even. Make a small stitch count sample if needed to confirm sizing. Begin stuffing lightly from round 18 onward to maintain head shape but do NOT fully stuff yet

Round 19 :

(6 sc, 1 dec) x 6 (48)

Round 20 :

(5 sc, 1 dec) x 6 (42)

Round 21 :

(4 sc, 1 dec) x 6 (36)

Info :

Begin stuffing head more firmly now, focusing on the crown and sides to support cheek pieces. Use small pinches of fiberfill to shape the cheek areas from the inside where you will attach the puffed cheeks later

Round 22 :

(3 sc, 1 dec) x 6 (30)

Round 23 :

(2 sc, 1 dec) x 6 (24)

Round 24 :

(1 sc, 1 dec) x 6 (12)

Round 25 :

6 dec (6)

Info :

Fasten off leaving a long tail for sewing to the neck/body later. Finish stuffing and close the hole with whip stitch if you intend to attach a separate neck piece. If you are going to sew the muzzle on, leave an opening for insertion and finishing after attaching facial pieces

— Muzzle / Snout :

Round 1 :

6 sc in magic ring (6)

Round 2 :

6 inc (12)

Round 3 :

(1 sc, 1 inc) x 6 (18)

Round 4 :

(2 sc, 1 inc) x 6 (24)

Round 5-7 :

1 sc in each st (24)

Info :

Work the muzzle in rows of rounds to create a long oval—this will be sewn onto the front of the head, centered under the eyes. Stuff firmly so the snout keeps its pronounced shape

Round 8 :

(2 sc, 1 dec) x 6 (18)

Round 9 :

(1 sc, 1 dec) x 6 (12)

Round 10 :

6 dec (6)

Info :

Fasten off leaving a long tail for sewing. Before closing completely, stuff muzzle firmly. Position the muzzle on the head so that the top of the muzzle aligns approximately with round 12 of the head; sew around the base with the tail making small, even stitches to blend the seam

— Puffed Cheeks (Make 2) :

Round 1 :

5 sc in magic ring (5)

Round 2 :

5 inc (10)

Round 3 :

(1 sc, 1 inc) x 5 (15)

Round 4 :

(2 sc, 1 inc) x 5 (20)

Round 5 :

1 sc in each st (20)

Info :

These round puffed cheeks are intended to be slightly stuffed and sewn to the sides of the muzzle just under the eyes to create the characteristic puff. Stuff lightly to maintain a plump look without distorting the head shape

Round 6 :

(2 sc, 1 dec) x 5 (15)

Round 7 :

(1 sc, 1 dec) x 5 (10)

Round 8 :

5 dec (5)

Info :

Fasten off leaving a long tail for sewing. Attach cheeks centered on each side of the muzzle between head rounds 12-14, pinning first to get symmetrical placement. Use small, neat ladder stitches around the base to secure

— Eyebrows & Facial Embroidery :

Info :

Using black yarn and a yarn needle, tack on the lowered angry eyebrows above the eyes. Use two or three straight stitches per eyebrow pulled slightly to give a furrowed look. Embroider nostrils with two small French knots or short straight stitches on the muzzle tip, and a small curved mouth with two short stitches to create the downturned pout

— Body :

Round 1 :

6 sc in magic ring (6)

Round 2 :

6 inc (12)

Round 3 :

(1 sc, 1 inc) x 6 (18)

Round 4 :

(2 sc, 1 inc) x 6 (24)

Round 5 :

(3 sc, 1 inc) x 6 (30)

Round 6 :

(4 sc, 1 inc) x 6 (36)

Round 7-9 :

1 sc in each st (36)

Info :

Change to cream/beige yarn now for belly panel if you are working the belly as an inset panel. Alternatively make a separate oval belly and sew it on later. For a seamless change, join cream yarn with an invisible join at the beginning of round 10

Round 10 :

1 sc in each st BLO (36) - creates a slight ridge for belly change

Round 11-16 :

1 sc in each st (36)

Info :

Begin stuffing the body moderately in rounds 13-16 to reach even fullness. Do not overstuff — the body should be firm but squishy so limbs can be sewn in without bulging

Round 17 :

(4 sc, 1 dec) x 6 (30)

Round 18 :

(3 sc, 1 dec) x 6 (24)

Round 19 :

(2 sc, 1 dec) x 6 (18)

Round 20 :

(1 sc, 1 dec) x 6 (12)

Info :

Stop stuffing about round 18; continue filling as you close so the bottom becomes rounded and stable. Leave a longer tail for sewing to the head if you prefer to join directly; otherwise fasten off and leave tail for sewing with whip stitch

Round 21 :

6 dec (6)

Info :

If you want a flat base for sitting, instead of closing completely at round 21, work 1 sc in each st for 2 more rounds to flatten base and then fasten off leaving tail to sew to a small cardboard base or to weave through stitches to stiffen

— Belly Panel (Separate Option) :

Round 1 :

6 sc in magic ring (6)

Round 2 :

6 inc (12)

Round 3 :

(1 sc, 1 inc) x 6 (18)

Round 4 :

(2 sc, 1 inc) x 6 (24)

Round 5-6 :

1 sc in each st (24)

Info :

Fasten off leaving a long tail and center the panel on the front of the body before sewing. Sew with small whip stitches around rim to ensure neat edging and no bulk

— Arms (Make 2) :

Round 1 :

6 sc in magic ring (6)

Round 2 :

6 inc (12)

Round 3 :

(1 sc, 1 inc) x 6 (18)

Round 4-6 :

1 sc in each st (18)

Info :

Stuff the hand region firmly so it keeps a rounded shape. The arm tapers toward the shoulder — adjust stuffing to be firmer in the hand and lighter in the upper arm

Round 7 :

(2 sc, 1 dec) x 6 (12)

Round 8-12 :

1 sc in each st (12)

Round 13 :

(1 sc, 1 dec) x 4, 1 sc in next 4 sts (8)

Round 14-15 :

1 sc in each st (8)

Round 16 :

(1 sc, 1 inc, 1 sc) x 2 (12)

Round 17 :

1 sc in each st (12)

Round 18 :

Fasten off leaving a long tail for sewing; lightly stuff upper arm and leave opening for attachment (12)

Info :

Sew arms to the body at around rounds 13-16 of the body for a natural seated pose. Use ladder stitch or whip stitch and stitch through the base of the arm opening and secure through several stitches in the body for a stable join

— Legs (Make 2) :

Round 1 :

6 sc in magic ring (6)

Round 2 :

6 inc (12)

Round 3 :

(1 sc, 1 inc) x 6 (18)

Round 4 :

(2 sc, 1 inc) x 6 (24)

Round 5-7 :

1 sc in each st (24)

Info :

Work the foot so that rounds 1-7 create a plump toe/foot area. Stuff the foot firmly ensuring it holds shape to support the body when sitting

Round 8 :

(2 sc, 1 dec) x 6 (18)

Round 9-14 :

1 sc in each st (18)

Round 15 :

(1 sc, 1 dec) x 6 (12)

Round 16-18 :

1 sc in each st (12)

Round 19 :

(1 sc, 1 inc) x 4, 1 sc in next 4 sts (16)

Round 20-22 :

1 sc in each st (16)

Round 23 :

Fasten off leaving long tail for sewing to hips; stuff legs moderately (16)

Info :

Attach legs to the bottom front of the body, spacing them approximately 6-8 stitches apart. When sewn in a seated position, the legs should angle slightly outward for stability

— Ears / Ear Fins (Make 2) :

Round 1 :

6 sc in magic ring (6)

Round 2 :

6 inc (12)

Round 3 :

(1 sc, 1 inc) x 6 (18)

Round 4 :

1 sc in next 6 sts, turn and work along edge to create fin shape: ch1, 6 sc along edge

Round 5-6 :

Work slst and sc around to form small winged ear fin shape (18)

Round 7 :

Use contrast cream yarn to embroider inner ear by sewing a teardrop on the inner flat area. Fasten off leaving long tail for sewing to head

Info :

Sew ears to head top-sides between head rounds 8-11 for a flared look. Angle them slightly forward and pin before sewing to ensure symmetry

— Horns (Make 3) :

Round 1 :

4 sc in magic ring (4)

Round 2 :

4 inc (8)

Round 3 :

1 sc in each st (8)

Round 4 :

(2 sc, 1 dec) x 2 (6)

Round 5 :

1 sc in each st (6)

Round 6 :

(1 sc, 1 dec) x 2 (4)

Round 7 :

1 sc in each st (4)

Round 8 :

Fasten off leaving tail for sewing. Stuff lightly to maintain tapered cone shape

Info :

Make three horns; position one central-top and two slightly behind and to the sides. For the darker spiral effect, work horns in black yarn or work them in red then embroider spiral ridges with black yarn using surface crochet

— Back Spikes (Make 6) :

Round 1 :

4 sc in magic ring (4)

Round 2 :

4 inc (8)

Round 3 :

1 sc in each st (8)

Round 4 :

(2 sc, 1 dec) x 2 (6)

Round 5 :

1 sc in each st (6)

Round 6 :

Fasten off leaving tail for sewing and lightly stuff; repeat to make 6 spikes

Info :

Sew spikes down the center of the head and along the tail. Space them evenly; a helpful trick is to count body rounds and mark attachment points with pins before stitching

— Tail :

Round 1 :

6 sc in magic ring (6)

Round 2 :

6 inc (12)

Round 3 :

(1 sc, 1 inc) x 6 (18)

Round 4-8 :

1 sc in each st (18)

Info :

If you prefer a poseable tail, insert thin floral wire after round 6 before stuffing. Continue to stuff lightly as you go; taper the tail by decreasing later rounds

Round 9 :

(2 sc, 1 dec) x 6 (12)

Round 10-12 :

1 sc in each st (12)

Round 13 :

(1 sc, 1 dec) x 4 (8)

Round 14-15 :

1 sc in each st (8)

Round 16 :

(1 sc, 1 dec) x 2 (6)

Round 17-18 :

1 sc in each st (6)

Round 19 :

Fasten off leaving long tail for sewing to body; stuff tail firmly at base and taper towards tip

— Wing (Make 2) :

Round 1 :

6 sc in magic ring (6)

Round 2 :

6 inc (12)

Round 3 :

(1 sc, 1 inc) x 6 (18)

Round 4 :

(2 sc, 1 inc) x 6 (24)

Round 5-8 :

1 sc in each st (24)

Info :

Switch to a slightly smaller hook if you want crisp wing edges. Work a flattened triangular shape by building rounds and then working short rows along one edge to produce a scalloped membrane

Round 9 :

Work in FLO across to create a ridge: 1 sc in each st FLO (24)

Round 10 :

Ch3, turn and work 8 sc across one wing edge to create outward scallop, ch1 turn; repeat for three scallops (24)

Round 11-14 :

1 sc in each st (24)

Round 15 :

Fasten off leaving long tail for sewing. Hold wings against body and mark placement with pins before sewing

Info :

Use black yarn to embroider wing ribs: run a yarn needle with black yarn from wing base to outer edge creating 3 ribs per wing. Sew ribs on top of the wing surface with even tension to create raised veins

— Wing Detail Edging (Optional Surface Crochet) :

Round 1 :

Join black yarn at wing base and surface crochet slip stitches or single crochet along the membrane edges to darken and define shape

— Assembly & Final Shaping :

Info :

Block and steam pieces lightly (if yarn allows) to even stitches. Use pins to confirm placement: head centered on top of body, arms on sides approximately between body rounds 12-16, legs at bottom rounds 1-3 spaced evenly, wings on back between body rounds 6-11, tail centered at back bottom. Sew each piece with mattress or whip stitch and weave tails securely inside the body

Assembly Instructions

  • Attach head to body by inserting the neck portion into the body opening. Pin in place first, then sew securely using whip stitch all around, ensuring even attachment and aligning head so the muzzle sits centered on the belly panel
  • Position arms on sides of body at body rounds 13-16 for a natural seated look. Sew through both arm and body yarn loops using ladder stitch to create an invisible seam; add extra small reinforcement stitches through the body stuffing for stability
  • Attach legs to bottom of body at rounds 1-3, spacing them evenly (leave about 6-8 stitches between inner leg edges). Sew securely, making sure the legs are stuffed firmly to support the figure when seated
  • Sew ears to top of head at head rounds 8-11, spacing them 12-15 stitches apart; angle slightly forward to frame the face and secure with tight whip stitches
  • Center the belly panel on the front of the body and sew with small whip or ladder stitches around the edge; stretch slightly when stitching to avoid puckers
  • Attach wings to back between body rounds 6-11. Use the long tail to sew the wing base securely to the body, then use black yarn to stitch wing ribs in place and to the body for extra support
  • Sew horns to top of head using long tails; position one at the crown and two slightly behind. Add small reinforcing stitches through the head to anchor horns well
  • Sew tail to back center at base of body; position spikes evenly along the spine and tail and sew each spike with a few tight stitches into the body and tail seam
  • Attach puffed cheeks around the muzzle area between head rounds 12-14. Tuck the cheek edges under slightly and sew with tight stitches; add a few interior tucks with needle to keep puffed look
  • Weave in and secure all loose ends by threading tails through several stitches inside the body, trim flush. Optionally add a dab of fabric glue at knot points for extra security

Important Notes

  • 💡Use stitch markers consistently at the beginning of each round to avoid counting errors and maintain proper shaping
  • 💡Stuff body parts gradually as you work rather than waiting until the end, especially for narrow openings like arms and legs
  • 💡For safety eyes, position and secure before stuffing head fully — they cannot be repositioned once locked in place
  • 💡Maintain consistent tension throughout the project; too tight creates stiff, small pieces, too loose creates floppy, holey fabric
  • 💡When sewing pieces together, use yarn slightly thinner than working yarn for neater, less visible seams
  • 💡Pin all pieces in position before final sewing to ensure proper placement and symmetry
  • 💡For amigurumi, work tightly enough that stuffing doesn't show through stitches; switch to a smaller hook if necessary
  • 💡If adding wire for poseable tail or wings, ensure wire ends are twisted and wrapped to avoid poking through stuffing; pad wire with a bit of fiberfill where it meets the seam

This tiny angry devil dragon pattern blends sculpting and sweet detail to create a miniature companion full of personality. From the puffed cheeks to the embroidered brows and layered wings, every element adds charm and character. The step-by-step instructions guide you through crocheting and assembling each piece so you end up with a durable, huggable finished toy. 🧶 Make one for a friend or keep it to brighten your own desk — these tiny dragons are impossible not to love! 🐉

You ask,

we answer.

FAQs

What is the finished size of this amigurumi?

Based on the specified materials and hook size (worsted weight yarn and 3.5mm hook), the finished piece will measure approximately 6-8 inches (15-20 cm) tall when seated. Using different yarn weights will proportionally change the final size.

Can I use different yarn weights for this pattern?

Yes! You can use any yarn weight, but remember to adjust your hook size accordingly (generally 1-2 sizes smaller than yarn recommendation for tight amigurumi fabric). Different weights will change the final size proportionally.

Do I need to use safety eyes or can I embroider them?

Both options work beautifully! Safety eyes give a professional shine and are secure, ideal for adult collectors. Embroidered eyes are safer for toys intended for small children and allow more expression customization.

How much stuffing will I need?

For this size project, approximately 50-80 grams of polyester fiberfill should be sufficient. Stuff firmly but not overly tight, allowing the piece to maintain its shape while still being cuddly.

Can I make the arms and legs poseable?

Absolutely! Insert pipe cleaners or floral wire before stuffing limbs completely. Bend wire to desired shape, ensure ends are folded or wrapped safely, and continue stuffing around the wire for poseable limbs.

What if my stitch count is off?

If you notice a counting error, unravel back to where the count was correct. Trying to compensate later often creates visible distortions. Using a stitch marker at round starts helps prevent counting mistakes.

How do I prevent holes when stuffing?

Work with tight, consistent tension throughout, using a hook slightly smaller than yarn recommendation. When stuffing, distribute fiberfill evenly in small amounts rather than large chunks.

Can I customize colors and details?

Definitely! Use any color combinations you love. Add accessories, change facial expressions, or adjust proportions slightly to make your creation unique while following the basic structure.