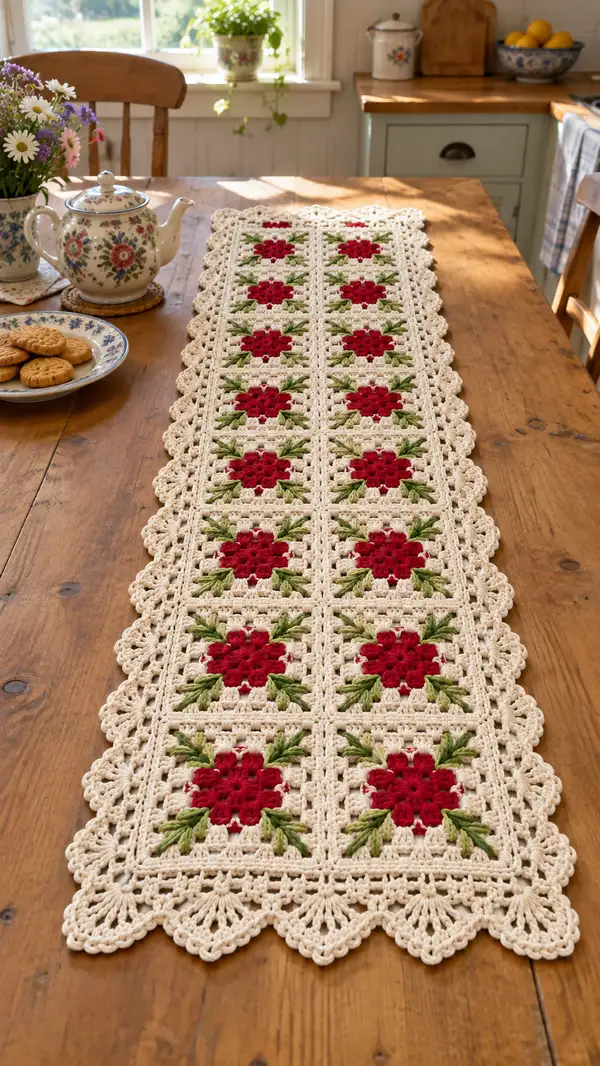
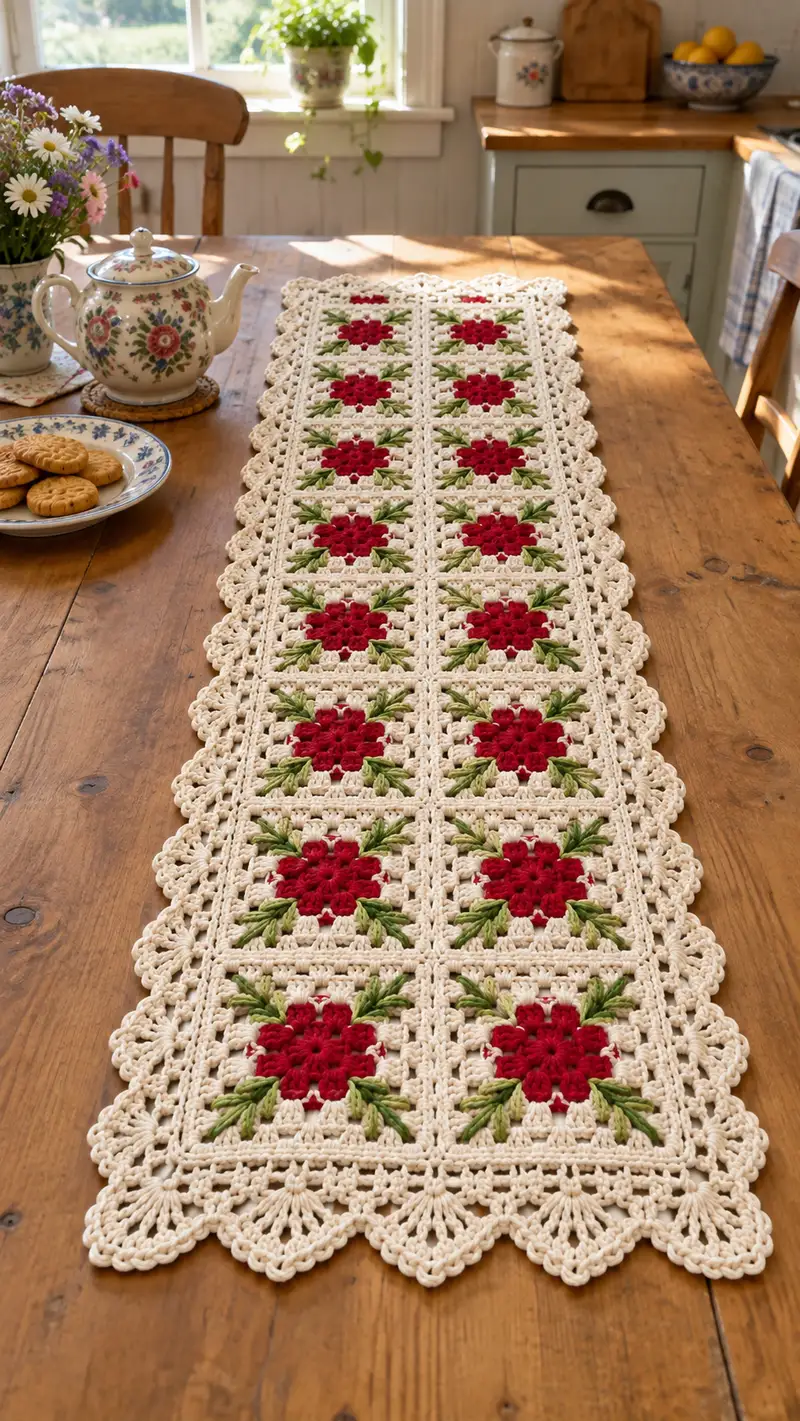
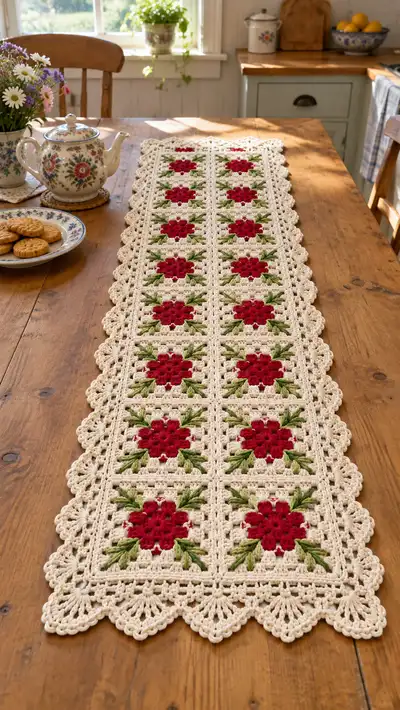
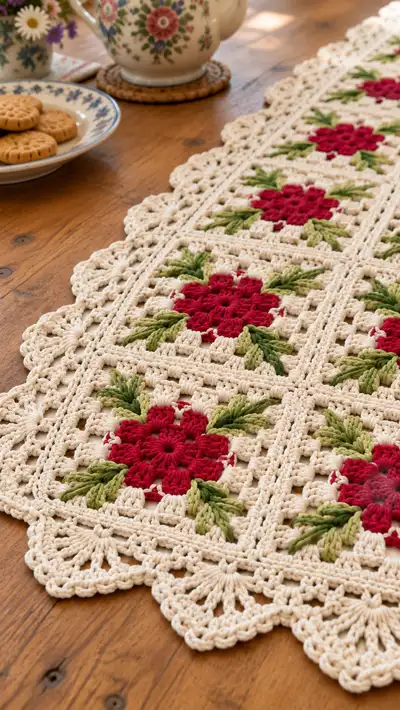
Create a charming vintage-style table runner made from floral granny squares joined together and finished with an elegant scalloped border. The runner features red rosette centers, layered green leaf clusters and a warm cream frame—perfect for an English cottage or farmhouse table. Detailed step-by-step instructions cover each square, join-as-you-go assembly and a decorative lace edge for a polished finish. Suitable for an intermediate crocheter who enjoys texture, color changes and blocking for best results.
Progress Tracker
0% Complete
— Overview :
Info :
This runner is made from 24 floral granny squares arranged in 3 columns x 8 rows forming a long narrow runner approximately 12-14 inches wide by 60-72 inches long depending on yarn, hook and gauge. Each square finishes approximately 3.75"-4.25" (9.5-11 cm) after blocking. Make 24 squares and block them before joining. Use join-as-you-go instructions to assemble into rows of 3, then join rows into the runner before working the inner and outer borders. Work in US terms. Maintain consistent tension. Use a smaller hook for neat, tight join rows if preferred.
Info :
Gauge (after blocking): one completed square = approximately 3.75"-4.25" (9.5-11 cm) across. Adjust yarn/hook if you prefer a larger or smaller square. Blocking is essential for uniform joins and a flat runner.
— Flower Granny Square (make 24) :
Info :
Work each square from the center out. Use deep red for the rosette center, then switch to two shades of green for leaves (light then medium) and finish with cream. The square uses clusters, puff stitches and tall elongated leaf clusters for texture. Carry color tails neatly or fasten off each color depending on preference.
Round 1 :
With red, mr, ch3 (counts as dc), work 11 dc into ring. Join with sl st to top of ch3. (12)
Info :
Tighten the magic ring so the center hole sits small but not puckered. Ch3 counts as dc and provides the height for the first petal row.
Round 2 :
Ch1, sc in same st, *ch3, sk next dc, sc in next dc; rep from * around to create 6 ch3 loops. Join with sl st to first sc. (6 ch-3 loops)
Round 3 :
Switch to red if you fastened off. Sl st into first ch-3 loop, ch2 (counts as hdc), (3 hdc in same ch-3 loop), ch1, (4 hdc in next ch-3 loop), ch1; rep around to form 6 petal clusters. Join with sl st to top of ch2. (6 petals)
Info :
Form each petal gently; do not pull the loops tight—petals should be plump. Keep stitch height consistent for even petals.
Round 4 :
Ch1, sc in same st, *ch3, sc between next two petal clusters; rep from * around to form 6 ch3 spaces. Join with sl st to first sc. (6 ch-3 spaces)
Round 5 :
Change to light green. Sl st into first ch-3 sp, ch3 (counts as dc), work 3 dc into same ch-3 sp, ch2, 4 dc into next ch-3 sp, ch1, *4 dc in next ch-3 sp, ch2, 4 dc in next ch-3 sp, ch1; rep across to create alternating elongated petal foundations for leaf clusters. Join with sl st to top of ch3. (6 leaf foundation groups)
Info :
These rounds begin the leaf texture. The next rounds will transform these Dc groups into raised leaf clusters by using front loop or extended stitches for depth.
Round 6 :
Ch1, sc in same st, *ch3, sc between each 4-dc group; rep around to make 12 ch-3 corners/spaces. Join with sl st to first sc. (12 ch-3 spaces)
Round 7 :
Switch to medium green. Work leaf clusters: sl st into next ch-3 sp, (yo, insert hook into same ch-3 sp, pull up loop) 5 times to form a 6-loop puff, yo and pull through all loops, ch1 to close puff and secure (counts as leaf puff), ch2, sl st into opposite ch-3 sp, ch2, puff cluster in next ch-3 sp; rep around so that leaf puffs radiate in groups of three between petals. Join with sl st. (12 puff leaf elements)
Info :
Puff technique: yarn over, insert hook, pull up a long loop (approx. same height as a dc), repeat to number of loops specified, then yarn over and pull through all loops on hook, ch1 to secure. Keep loops loose enough to finish puff but not so loose that it pulls out.
Round 8 :
Ch1, sc in same st, *ch3, sc between puffs; rep around to create even spacing for the square rounds. Join with sl st. (12 ch-3 spaces)
Round 9 :
Change to cream. Ch4 (counts as tr), tr in same st, ch1, *sk 1, (tr, ch1, tr) in next st to begin corner formation, sk1, ch1; rep to form an initial round of tall stitches framing the motif. Join with sl st. (working tr groups in 4 cardinal directions)
Round 10 :
Ch1, sc in same st, *ch3, sc in next ch-1 space; rep around to square-off the round and prepare for corner formation. Join with sl st. (12 ch-3 spaces)
Round 11 :
Begin true square shaping: ch3 (counts as dc), 2 dc in same sp, ch2, 3 dc in same sp (corner made), *sk next 3 spaces, (3 dc, ch2, 3 dc) in next corner space; rep around to form four corners. Join with sl st to top of ch3. (4 corners, approx 28-32 sts depending on spacing)
Info :
At this stage the square should begin to form. Adjust spacing by using 3-dc groups and ch-2 corners. If the square looks too tight, add 1 extra ch between side groups; too loose, reduce ch sps.
Round 12 :
Ch1, sc across each dc and ch space along the sides, in corners work (sc, ch3, sc) into the ch-2 corner space to retain square shape. Work evenly around. Join with sl st. (match previous stitch count)
Round 13 :
Ch3 (counts as dc), 2 dc in same st, *dc in each st across to next corner, (3 dc, ch2, 3 dc) in corner; rep around. Join with sl st. (This rounds builds side height and evens edges.)
Round 14 :
Ch1, sc in same st, *ch4, sc in the center of side double crochet group; rep around creating even ch-4 spaces along sides. Join with sl st. (Provides openwork frame for join-as-you-go)
Round 15 :
Ch2, hdc in same st, (hdc in next 4 sts), *(3 hdc in side ch-4 space to emphasize side), hdc across side sts; rep around, in corners work (hdc, ch2, hdc) in corner ch-2. Join with sl st. (Creates solid frame for joining)
Info :
If you prefer a more open effect between motifs, omit the extra hdc sets and keep ch-4 spaces. The pictured runner uses a fairly dense cream frame to highlight the floral centers.
Round 16 :
Ch1, sc in same st, work sc evenly across sides and 3 sc into each corner ch-2 space for a neat corner block. Join with sl st. (Neat framed square)
Round 17 :
Ch3, (2 dc, ch1, 3 dc) in corner (creates a larger corner shell), *dc across side to next corner shell, rep around. Join with sl st. (This round readies the square for the final decorative rib that aligns with other squares on join)
Round 18 :
Ch1, sc across each st and in corner spaces, then sl st to join. Fasten off cream, leaving a 6-8" tail for join-as-you-go or to weave in if you will sew later. (Final framed square)
Info :
Fasten off or carry the cream to join squares depending on your joining method. Block each square to exact dimensions now, pinning to a flat square to correct any distortion from the puff/cluster stitches.
— Make and Block All Squares :
Info :
Make 24 floral squares total (3 columns of 8). Block squares individually on a flat mat using rust-proof pins, shaping into perfect 4-sided squares as measured. Allow to fully dry. Blocking helps the scalloped border align and the join-as-you-go work neatly.
— Join-As-You-Go to assemble into rows (Make 8 rows of 3 squares) :
Info :
Join the squares into rows of 3 using the join-as-you-go (JAYG) slip-stitch method along one side of the square so joins are flat and unobtrusive. Work from left to right or your preferred orientation. Join on Round 16/17 edge of squares so stitch patterns align.
Round J1 :
With right sides facing, hold Square A (first of row) and Square B; join cream at corner of Square A, sl st into corner st of A, ch1, *sl st in next 2 sts of A, insert hook into corresponding st of B and sl st through both loops to join; rep across side until corner. Fasten off or continue joining next square. (Join along one full side)
Info :
When joining, keep tension loose enough that squares lie flat but snug enough to avoid gaps. Use a stitch marker at the midpoint to ensure even alignment if needed.
Round J2 :
Repeat J1 to join Square B to Square C to complete one row of 3. Work the join in a continuous round if you prefer fewer ends to weave and keep joining yarn consistent for a seamless join look. Make 8 rows total. (8 joined rows of 3)
Info :
After completing each row, press gently with a steam iron from a safe distance or re-block row to keep joins flat. Place rows in order to check pattern alignment before joining rows together.
— Join Rows Together (assemble runner) :
Round J3 :
Place Row 1 (top) over Row 2 (directly below). With right sides facing, match squares one-over-one. Working along the vertical edge, join using the same JAYG method: sl st through both layers in corresponding sts across each vertical seam. Repeat to join all rows into one long runner - join Row1 to Row2, Row2 to Row3, etc until all 8 rows are joined for a total of 24 squares arranged 3x8.
Info :
Keep the runner flat as you join; pin rows together at corners to maintain straight lines. If your joins pull inward slightly, loosen tension or add a ch-1 space every 8 stitches to relieve strain.
Round J4 :
Once all rows are joined, run a single round of sc in cream around the entire outside edge of the assembled runner to even the perimeter. In corners, work (sc, ch3, sc) to maintain right angles. Join with sl st. (This prepares the runner for inner border rounds)
— Inner Decorative Border (work 8 rounds to frame the runner) :
Info :
The inner border builds a small framed lattice between the squares and the outer scallop. The pictured runner uses two layered inner rounds forming a subtle raised rope and a small openwork row to visually separate motifs from the scalloped edge.
Round B1 :
With cream, ch1, sc evenly around the whole runner working 1 sc in each visible outer st and 3 sc into corner ch-3s. Join with sl st. (This evens the edge after joining)
Round B2 :
Ch2, hdc in same st, *hdc in each st across for three to five sts, (hdc, ch2, hdc) in each corner; rep around to create a low ridge. Join with sl st. (Creates solid ridge)
Info :
If your runner is particularly long, count the number of sts per long edge and divide into even segments before working repeats to ensure symmetrical shell placements later.
Round B3 :
Ch1, sc in each st around to tidy the ridge. Join with sl st. (Tidy round)
Round B4 :
Ch3, *skip 1, (dc, ch1, dc) in next st to form small openwork clusters across the side, skip1, dc in next; rep around, working (dc, ch2, dc) in corners. Join with sl st. (Openwork lattice)
Round B5 :
Ch1, sc in each st and each ch-1 sp around to square the border. Join. (Evening round preparing for scallop)
Round B6 :
Ch1, *sc in next 4 sts, ch3, sc in next 4 sts; rep across sides to create small loops that will anchor the scallops. In corners work (sc in next 4 sts, ch3, sc in next 4 sts, ch3) to keep corner scallop spacing even. Join. (Sets scallop anchor points)
Info :
Check spacing by laying the runner flat and eyeballing scallop anchor points; adjust by adding or subtracting a few sc between anchors to make scallops evenly sized along the long edges.
Round B7 :
Ch1, sc in each st and in each ch-3 space around to tidy anchors. Join. (Final prep round)
Round B8 :
Ch2, hdc in each st around for a clean rope-like finish at the inner border. Join and fasten off. (Inner border completed)
— Outer Scalloped Lace Edge (work 12 rounds for layered scallop) :
Info :
The scalloped edge is worked around the entire runner building layered shells that create the pictured fan-like scallops. Work carefully around corners working full fans into corner ch-3s and partial fans into side anchors as needed.
Round S1 :
With cream, join at a long edge anchor point, ch1, sc in same sp, *skip to next anchor, sc; rep across to form a foundation that follows anchor points. Join with sl st. (Foundation for shells)
Round S2 :
Ch3 (counts as dc), work 2 dc in same st, ch1, *skip 1 foundation st, (3 dc, ch1, 3 dc) in next foundation st to form shell, sk1, rep across; in corners work (3 dc, ch3, 3 dc). Join with sl st. (First shell layer)
Round S3 :
Ch1, sc in each dc and ch-1 space across shells to square shells, sl st to join. (Tidy round)
Round S4 :
Ch4 (counts as tr), (tr, ch1, tr) into center of each shell to create taller fan height, working (tr, ch2, tr) in corners. Join. (Builds fan height)
Round S5 :
Ch1, sc across fans into each space and top of tr to neaten. Join. (Neatening round)
Round S6 :
Ch3, (2 dc, ch2, 3 dc) in every other shell center to add a double-layered shell. In small spaces between shells work a single dc to keep edge smooth. Join. (Adds depth)
Info :
On long edges, maintain consistent shell repeat. At corners, work the full triple-layer shell to fill corners and keep scallops rounded rather than pointed.
Round S7 :
Ch1, sc across each st and into ch-2 spaces around fan work to keep the shells neat. Join. (Tidy)
Round S8 :
Ch3, work 5 dc cluster (shell) into each shell center to form a bold scallop edge. Work (5 dc, ch3, 5 dc) in corners. Join. (Bold scallop)
Round S9 :
Ch1, sc evenly across the backs of the bold scallops, working 3 sc into corner ch-3 to anchor. Join. (Stabilizes scallops)
Round S10 :
Ch3, in each bold scallop work (dc, tr, dc) cluster to create a pointed fan texture, ch1 between fans. Join. (Textured fan peaks)
Round S11 :
Ch1, sc around to tidy peaks. Join. (Neaten peaks)
Round S12 :
Final finishing round: with cream, work a round of slip-stitches around the base of scallops, then work a reverse picot round for delicate points: *(ch3, sl st in 3rd ch from hook) into the top of each fan peak; rep around at roughly every 6th stitch to give the delicate shell tip. Fasten off and weave in all ends securely. (Final decorative edging)
Info :
Weave in ends on the back side of the runner using the tapestry needle. If you carried color yarn across squares, tidy carried floats with small whipstitches as desired.
— Final Blocking & Finishing :
Info :
Gently wet-block or steam-block the entire runner, pinning scallops to the exact spacing with rust-proof pins and blocking wires for long edges. Ensure scallop points align and squares sit flush. Allow to dry completely, then press lightly from the wrong side if needed. Trim any stray fibers.
Info :
Optional: For extra durability on tables that see frequent use, lightly top-stitch the first cream inner border along seam-lines with matching cream thread to stabilize joins invisibly on the underside.
Completing this vintage floral runner is such a rewarding finishing touch for any table—every square brings texture, color and charm into a cohesive heirloom piece. The red rosettes and layered green leaves pop against the soft cream border, while the scalloped edge gives it a handcrafted, romantic silhouette. Lay it on your dining table or sideboard for seasonal flair or everyday cozy style. 🧶🌿✨