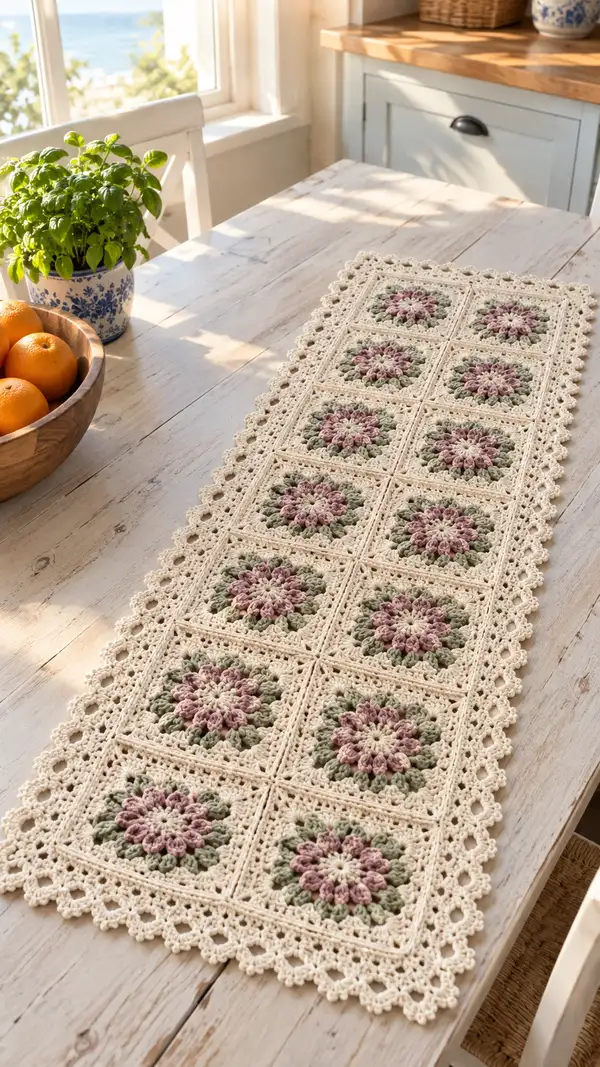
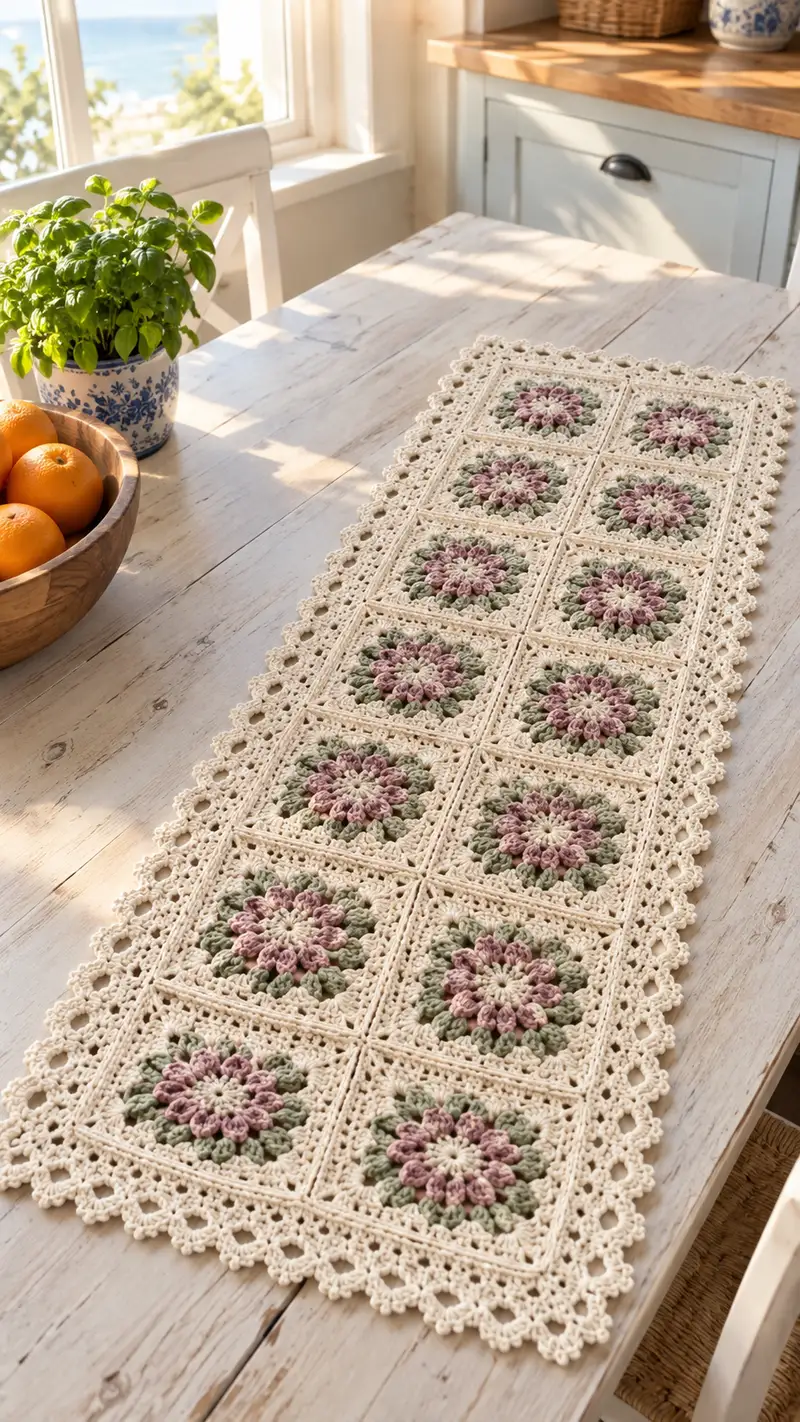
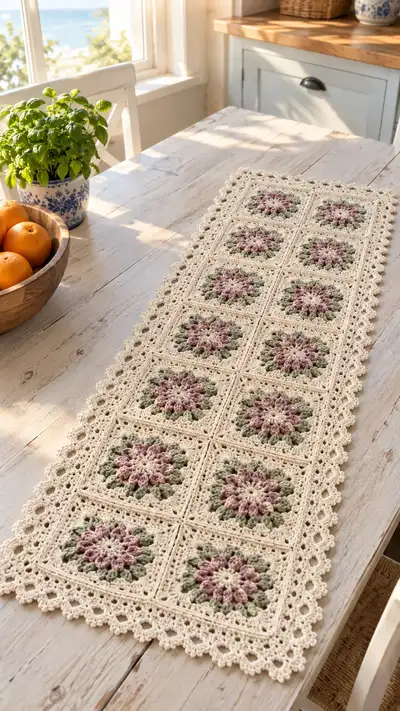
A delicate vintage-inspired table runner composed of 15 floral granny squares joined into a lace-trimmed runner. Soft cream, dusty rose and sage green colors form raised puff-petal medallions framed in a crisp cream square and finished with a scalloped lace border. This pattern gives step-by-step instructions for making each motif, joining them, and creating the decorative edging for a polished cottage-style centerpiece. Perfect for a kitchen table, dresser, or as a gift for someone who loves timeless handmade decor.
Progress Tracker
0% Complete
— Overview :
Info :
This table runner is made from 15 motifs (3 across x 5 down). Each motif is worked individually to round 8 (the floral medallion), then squared with 6 rounds of framing and lacy details. After making all motifs, join them using the join-as-you-go method or flat-seam whipstitch. Once joined, work an outer border of textured rounds and finish with a scalloped picot lace edge. The pattern uses DK weight cotton and a 3.5mm hook for a soft, drapey lace. Gauge: one completed square measures approximately 4.5" (11.5cm) across after blocking; adjust hook size if needed.
Info :
Throughout the pattern I'll refer to rows as Rounds because motifs are worked continuously in rounds. Use stitch markers to mark the first stitch of each round and to mark corners when squaring the motif. Puff stitch: yarn over, insert hook, yarn over, pull up loop (repeat as many times as indicated), yarn over and draw through all loops on hook; ch1 between puff clusters for spacing unless otherwise directed. The pattern gives both counts and placement notes.
— Floral Motif (Make 15) :
Round 1 :
With dusty rose, mr, ch3 (counts as dc), 11 dc into ring, join with sl st to top of ch3 (12 dc) (12)
Round 2 :
Ch1, (puff st in next st, ch1) x 12 around, join with sl st to first puff base. Note: each puff is worked in a single dc from previous round; puff stitch made by yarn over, insert hook into stitch, yarn over and pull up loop 4 times (5 loops on hook), yarn over and pull through all loops, ch1 to anchor. You will have 12 puff petals and 12 ch-1 spaces (12)
Info :
Puff stitch tension matters — keep each puff snug but not overly tight so petals sit up nicely. Place a stitch marker at the start of the round so you can count petal spaces accurately.
Round 3 :
Change to sage green using join-in-next-ch-1 space: sl st into first ch-1 space, ch2 (counts as hdc), 2 hdc in same ch-1 space, *(3 hdc in next ch-1 space) across until round end, join with sl st to top of ch2. You will have 12 groups of 3 hdc (36 hdc total) (36)
Round 4 :
Ch1, sc in same st, *ch3, skip 1 hdc, sc in next hdc; rep from * around to form small lacy arches between petal clusters, join with sl st to first sc (36 active sc/arch points; ch-3 loops act as decorative spaces)
Info :
Round 4 forms a decorative ring that will be the base for the next round of increases; keep ch-3 loops neat and even by making them the same height each time. If ch-3 seems too tall for your yarn, change to ch2 to tighten the look.
Round 5 :
Change to cream. Work into ch-3 loops: join with sl st into any ch-3 loop, ch3 (counts as dc), 2 dc in same ch-3 loop, *3 dc in each ch-3 loop around, join with sl st to top of ch3 (36*3? See note). Instead of counting clusters, work 3 dc into each arch to create a fuller round (36 clusters of 3 dc spaces translating to 108 dc worked across - for practical purposes treat as 12 groups of 9 dc distributed between arches). After this round spread increases evenly to move toward a round of 48 dc next.
Info :
Because we started with 12 petal clusters, working 3 dc into each arch produces a larger circumference. We will now create established stitch counts for square shaping in subsequent rounds. Count your total dc to ensure even distribution for corner placement later.
Round 6 :
Ch1, sc in same st, *(2 sc in next 2 sts, sc in next 4 sts) repeat sequence to spread increases evenly; by the end of the round aim for 48 sc total around (48)
Round 7 :
Ch2 (counts as hdc), 1 hdc in each st around to stabilize the round, join with sl st to top of ch2 (48)
Info :
Round 6-7 prepare the medallion for corner formation. If your stitch count is slightly off (±2 stitches), adjust by doing one fewer or one extra sc in a small section to even out to 48 before proceeding. Use stitch markers to divide the round into four equal quarters (marking every 12th stitch) to help place corners in the next round.
Round 8 :
Begin squaring: Working in cream, divide the round into 4 equal sections (12 sts each). At each quarter point work the following corner sequence: (hdc, ch2, hdc) into the same stitch to create a corner. Between corners work 1 hdc in each remaining stitch. Total after corners: 48 hdc + 4 ch-2 corners (48 primary stitches with 4 corner loops). This begins the illusion of a square (48)
Info :
Mark the corner ch-2 spaces with grip pins or small safety pins — these will be reference points for later square rounds and joining. After Round 8, fasten off and weave ends into the wrong side. Block each motif flat to the target dimension (approximately 4.5" square) before continuing to framing rounds.
— Motif Framing and Square Rounds (per motif) :
Round 1 :
With cream, join yarn in any corner ch-2 space, ch1, (3 sc, ch2, 3 sc) in corner ch-2 space (this forms the corner block), *sc in each hdc across to next corner ch-2 space, (3 sc, ch2, 3 sc) in the corner; rep from * for all 4 corners, join with sl st to first sc. Count should be even and corners clearly defined.
Round 2 :
Ch2, hdc in same st, hdc in next sts across until you reach corner; in each corner ch-2 space work (hdc, ch2, hdc) to maintain corner; continue around and join. This evens the square face and creates a tidy frame (maintain approximately 48-56 hdc depending on your tension).
Info :
If your work becomes slightly rectangular, gently stretch to square shape while blocking. External gauge of the motif after Round 2 of framing should be consistent across all motifs to ensure neat joining.
Round 3 :
Ch1, sc in each stitch across until corner, (sc, ch3, sc) in each corner space to create a larger corner loop for later decorative rounds; join with sl st. This round sets a larger corner space and increases the square by approximately 4 stitches per side due to corner ch-3 loops.
Round 4 :
Work in BLO for a subtle ridge: ch1, sc in each st BLO around, working 3 sc into each ch-3 corner space; join with sl st. Working in BLO creates a defined border line which frames the floral medallion nicely.
Info :
Place a removable marker at the middle stitch of each side after this round to mark exact midpoints; they will help align motifs when joining later.
Round 5 :
Ch2, hdc in next 2 sts, *(ch1, skip 1 st, 3 dc in next st) repeat to create a series of raised arches along the side; in corners work (3 dc, ch3, 3 dc) into corner ch-3 for full rounded corner; join and fasten off if you prefer a crisp edge before joining. This decorative round builds the side texture you'll see in the finished runner.
Round 6 :
Optional final square tidy-up: Join cream and work 1 round sc evenly around in the last worked loop, placing 3 sc in each corner arch to maintain square shape. Fasten off and weave ends. Block flat and ensure all 15 motifs match in size.
Info :
At the end of framing rounds each motif will measure around 4.25–4.75" depending on blocking and tension. Make all motifs before joining for best uniformity; if you prefer join-as-you-go you may stop at Round 4 and join during Round 5 of adjacent motifs (instructions follow).
— Layout and Preparation :
Info :
Arrange your 15 blocked motifs on a flat surface in a 3 x 5 layout. Alternate the orientation of the floral medallion subtly if you want the petals to face a consistent direction along the runner. Use pins to hold motifs in place and check edge alignment. Measure the full runner width and length; use these dimensions to determine whether to add extra framing rounds to widen or lengthen motifs before joining.
Info :
Decide on your joining method: A) Join-as-you-go (JAYG) during the final round of each motif (recommended for a nearly invisible seam and slight flexibility), or B) Flat seam / whipstitch after completing all motifs (recommended for fidget-free finishing and if you prefer to block thoroughly first). Instructions for both methods are provided.
— Join-as-you-go Method (recommended) :
Round 1 :
When working final decorative round on a motif (the round with arches or 3-dc clusters), position the completed adjacent motifs in place. Join in cream at corner of motif A and begin final round as follows: ch1, sc in same corner, *(sc across to next corner but when you get to a stitch that lines up with the corresponding stitch of adjacent motif B, sl st through the edge of motif B and then continue with sc in the next stitch of motif A), continue around joining at each matching stitch or ch-space until you complete the side; at corner join (3 sc, ch3, 3 sc) as usual then proceed to next side. This creates a continuous join with small sl st join points that are almost invisible.
Info :
When joining sides, match the midpoints and corners precisely. Use the side midpoint stitch markers placed earlier to find the exact matching stitch on the adjacent motif. Working slowly and tacking with a few pins before joining will prevent misalignment.
Round 2 :
Complete the final joining round for all motifs in the layout, joining each motif to its neighbors on two or three sides as you go (leave the first motif unjoined on one side until its neighbor is in position). Fasten off and weave in ends as you complete each join to keep the wrong side tidy.
Info :
When joining motifs into rows, join across rows first (joining the motifs left-to-right), then join rows into the runner top-to-bottom. This sequence helps maintain alignment. If a seam appears loose, add one or two additional sl st between motifs for reinforcement.
— Flat Seam (Whipstitch) Method :
Info :
To use the flat seam method, lay two blocked motifs wrong sides together and whipstitch through corresponding edge loops using cream yarn and a yarn needle. Use small, even stitches and pull snug but not tight to prevent puckering. Continue joining motifs into rows, then join rows together matching corner points. Weave in ends neatly into the seam on the wrong side.
Info :
Flat seam gives a slightly firmer runner and a very clean seam line. It is usually faster if you have all motifs blocked and you prefer a hand-sewing finish over join-as-you-go.
— After Joining: Runner Base Rounds :
Round 1 :
Once all motifs are joined into a single runner panel, prepare to work a unified border. With cream yarn and the 3.5mm hook, join anywhere on the outer edge of the runner (preferably at a side midpoint), ch1, sc evenly along the long edges across each motif seam and around corners, placing 3 sc in each corner area to prevent curling. Work evenly so you have consistent stitch counts per side; the total number of sc will vary based on your join tension but should be consistent between long sides (e.g., around 240–300 sc across the entire runner edges depending on motif size).
Info :
This sc round builds a base for the more decorative lace rounds to come. Count stitches along one long side and replicate the count on the opposite side for symmetry. Use pins every 6-8" to hold the runner flat if any edge tends to ripple.
Round 2 :
Ch3 (counts as dc), dc in each sc across the long sides, placing (3 dc, ch2, 3 dc) in each corner point where you placed the 3 sc group; join with sl st. This elevates the border and prepares for the next textured round (keep stitches relaxed for lace drape).
Round 3 :
Ch1, sc in each dc across, *ch5, skip 3 dc, sc in next dc to create open loops around runner; rep across long sides; in corner areas work sc-ch5-sc into corner spaces to maintain shape; join with sl st.
Info :
Round 3 creates open arches that will be used to work the scalloped decorative rounds. Adjust ch-loop length if your yarn is thicker or thinner: use ch4 for tighter loops or ch6 for more open lace. Keep loops consistent for a uniform border.
— Lace Border Rounds :
Round 1 :
With cream, work into each ch-5 arch: join with sl st into first arch, ch3 (counts as dc), (2 dc, ch2, 3 dc) in same arch to form a shell; skip next ch-5 arch and secure with sl st in next arch, repeat this shell-every-other-arch sequence across long sides; in corners work two shells linked with ch2 to wrap the corner; join with sl st.
Info :
Shells create the first scalloped layer and add dimensionality. Make sure shells are centered on each arch to keep spacing even. If shell placement looks crowded, reduce to (2 dc, ch2, 2 dc) shells for a slightly smaller scallop.
Round 2 :
Ch1, sc in top of each shell across, *ch4, sc in center of next shell to make a picot-like rise between shells; rep across; in corners place sc-ch4-sc across the corner shells; join. This round forms the scaffolding for the final picot scallop.
Info :
Keep the ch-4 loops even. These little loops will be the base for final decorative picots which give the runner its delicate vintage lace appearance.
Round 3 :
Using the 3.25mm hook for crispness, join in any ch-4 loop with sl st, (sc, ch3, sc, ch3, sc) into each loop to form stacked small scallops; this creates a double-layer scallop. In corner loops work (sc, ch4, sc, ch4, sc) to give a full rounded corner; join and fasten off if desired. Weave in ends.
Info :
If you prefer an even more delicate edge, change to a 3.0mm hook and work smaller ch-2 picots (ch2, sl st back into top sc) in place of the ch-3 loops. Adjust based on your desired finishing look.
— Final Picot Lace Edge (Optional extra vintage detail) :
Round 1 :
With cream and the 3.25mm hook, join into the top of any small scallop, *ch3, sl st into the top of the scallop (creating a tiny picot), sl st into the next small top to anchor the picot; repeat around so each scallop has a picot centered on it; in corners add a slightly longer ch5 picot to emphasize corners; join and fasten off.
Info :
Picots add a final vintage flourish. Trim stray tails and block the runner one final time to set the scallop shape. Use rust-proof pins and a light steaming/block mist to even out the lace edge — do not over-wet cotton yarn or it may stretch; use a gentle hand and allow to dry fully overnight.
— Finishing Touches :
Info :
Weave in all ends on the wrong side using a tapestry needle, trimming close but making sure knots or ends are secure. Inspect join seams and border edges for any loose loops — add a few securing stitches if needed. Press lightly with a warm iron and a damp cloth if desired to flatten the lace and open the scallops gently.
Info :
If you want a stiffer runner for display, block and then mist with a diluted fabric stiffener or starch spray, shaping the scallops with pins and allowing to dry fully before use.
Info :
To adjust runner size: make additional motifs and join using the same joining rounds; add or subtract motifs in multiples so the runner retains a balanced look (3-column multiples maintain symmetry). For a rectangular placemat use a single row of 3-5 motifs and scale the border rounds to fit.
This vintage floral granny square table runner becomes a treasured addition to any home — the raised petal medallions and delicate scalloped edge bring an heirloom touch to your table. Working through each motif, joining with care, and finishing with a lacy border rewards you with a beautiful handmade centerpiece that looks far more intricate than the stitches it uses. Enjoy the relaxing rhythm of making motifs and the satisfaction of watching them click together into a finished runner. 🧶🌸💛