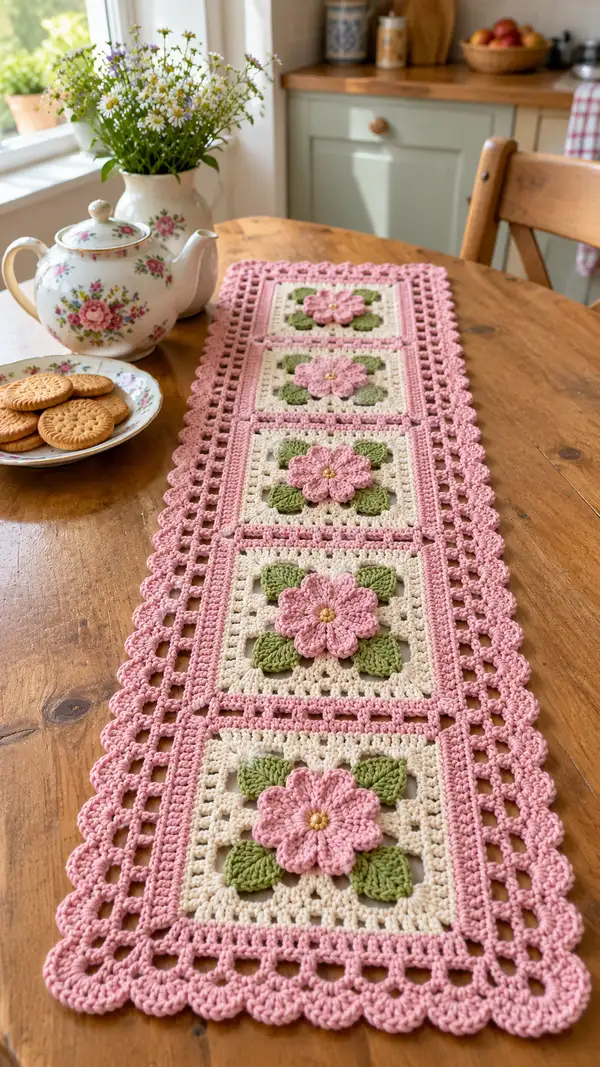
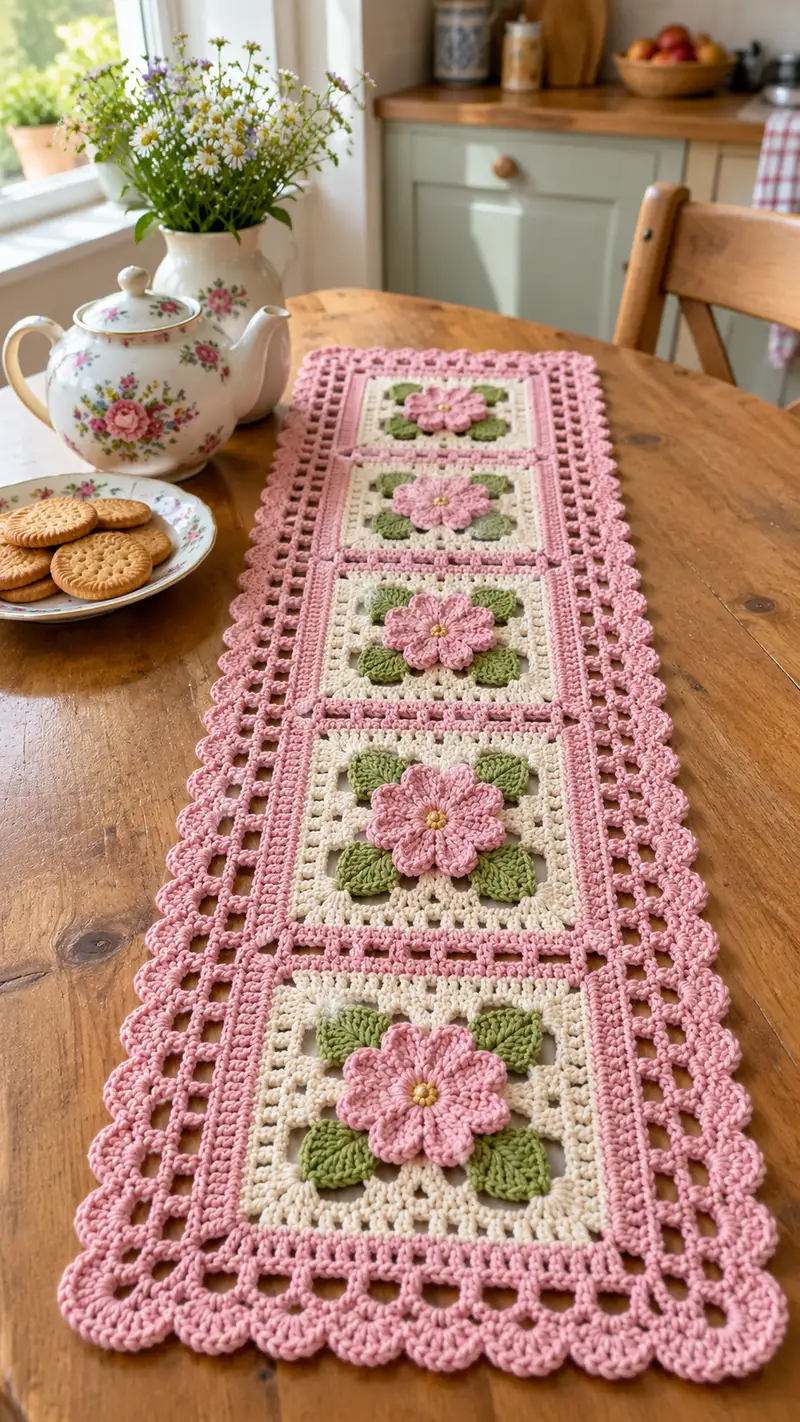
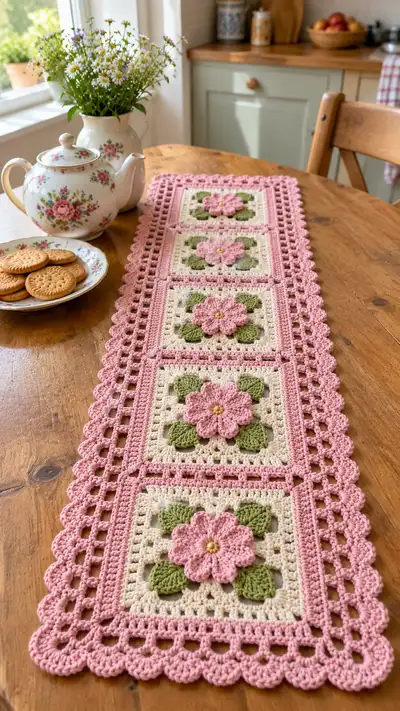
Create a charming vintage-inspired table runner made from four floral granny squares joined into a long runner with a lacy scalloped edge. This pattern features raised 3D flowers, leafy applique9, a soft cream background and dusty pink border, finished with a decorative openwork lattice and scalloped edging — perfect for a sunny kitchen table or as a gift.
Progress Tracker
0% Complete
— Flower (Make 4 petals-cap flowers) :
Round 1 :
Using golden yellow or yellow embroidery thread if embroidering center, create a small central eye: 6 sc in magic ring (6)
Round 2 :
Switch to dusty pink (petal color). Join in a floater loop behind the center. Ch1, 1 sc in same st and in each st around (6)
Info :
This round forms a small base for the petals. Keep the center tight but do not overwork; the petals will be worked around the next round.
Round 3 :
*Ch2, puff in next st, ch2, sl st into same st to anchor* - repeat around to make 6 small puff anchors. At the end sl st to first anchor (6 petal anchors)
Info :
For 'puff' use: yarn over, insert hook, yarn over pull up 5 loops, yarn over pull through all 5 loops, ch1 to close puff. Keep puffs even in height for symmetrical petals.
Round 4 :
Work petals over each anchor: join with sl st to anchor point, (sc, hdc, 3 dc, hdc, sc) all in the anchor sp, sl st to next anchor - repeat x6 to form 6 full petals; fasten off the pink (6 petals)
Round 5 :
Optional: Work a second petal round staggered between first petals to create a fuller flower. Join and repeat (sc, 3 dc, sc) into the middle of each petal, sl st to next petal (6) - this will make an 8-10 petal look depending on spacing. Fasten off and weave tail.
Info :
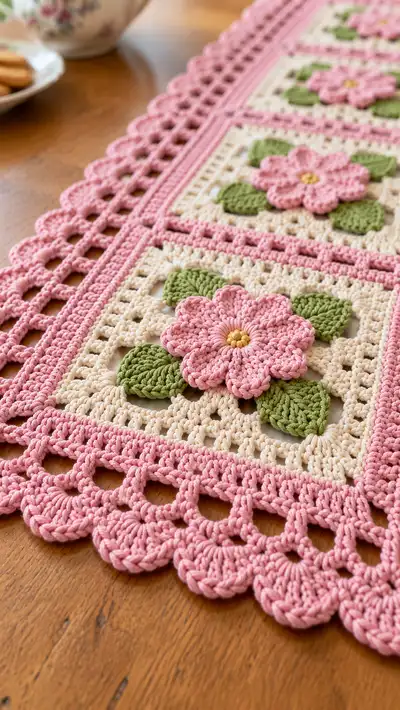
Visual reference shows 8 petals, slightly overlapping. If you prefer 8 petals, make 8 anchors and adjust Round 3 repeats to 8 instead of 6. For this pattern we will keep 6 slightly fuller petals as pictured; both look beautiful.
Round 6 :
Using leftover golden yellow (or embroidery thread) embroider the center: make 6 small French knots or straight stitches radiating from center to resemble a small bead cluster. Alternatively, sew small seed beads or a tiny circle of yellow yarn with a few stitches to secure (center detail)
Info :
Weave ends to the back and trim. Flowers should measure approximately 6 - 7 cm across (depending on hook/yarn). Block slightly by pinning flat to open up petals.
— Flower Alternative (Worked flat with extra petals) :
Round 1 :
MR, ch1, 8 sc in mr, pull ring tight (8)
Round 3 :
(1 sc, inc) x8 (24)
Round 4 :
Ch2, *[5 dc in next st], ch2, sl st in same st as petal anchor*, repeat around to make 8 petals. Fasten off and weave ends.
Info :
This alternative yields 8 petals and is suitable if you want an 8-petal motif as seen in some photos. Use whichever flower method you prefer; both join to the square in the same way.
— Leaves (Make 4 leaves per square - 16 leaves total) :
Round 1 :
Using leaf green, ch9. Row 1: sc in 2nd ch from hook, hdc in next, dc in next 3 ch, hdc in next, sc in last ch. Turn to work along opposite side: sc in first turning ch base, hdc in next, dc in next 3, hdc, sc into last (leaf formed, approx 10 sts)
Round 2 :
Working around: Ch1, sc in back loops only (BLO) of each stitch to make a raised edge around the leaf (approx 10 sc). Fasten off; leave tail for sewing (edge stitches = approx 10)
Info :
Curve the leaf slightly by easing extra tension into one side before blocking. Leaves should measure about 4-5cm long; make 4 for each flower and roughly block to shape before joining.
Round 3 :
Optional vein detail: With contrasting green or same yarn, embroider a central vein down the leaf using running stitch or surface slip stitch; this creates a more lifelike look.
— Square Base (Make 4 squares) :
Round 1 :
With cream yarn, mr, ch1, 8 sc in mr, pull ring tight (8)
Round 2 :
Inc in each st around (16)
Round 3 :
(1 sc, inc) x8 (24)
Round 4 :
(2 sc, inc) x8 (32)
Round 5 :
(3 sc, inc) x8 (40)
Round 6 :
(4 sc, inc) x8 (48)
Info :
At this stage we have a gentle circular square base. We will start to form a square shape by creating four corner chains and working into chain spaces. Keep tension even so each side grows approximately even in length.
Round 7 :
Work as follows to form four corners: *dc in next 10 sts, (2 dc, ch2, 2 dc) in next st (corner)* repeat from * to * around, join with sl st to first dc (This creates 4 corner ch2 spaces - stitch counts will vary by clusters; approximate total dc stitches 48 plus corner clusters)
Info :
Round 7 converts the round into a square by forming 4 distinct corner ch2 spaces. Work evenly along sides to keep each side similar. Count clusters if needed to ensure evenness.
Round 8 :
Ch3 (counts as dc), dc in each dc across to corner, in corner work (2 dc, ch2, 2 dc), continue to next corner. Join to top of ch3. (Approximate total: clusters per side about 12 dc, total dc approx 52 plus corner clusters)
Round 9 :
Ch1, sc into each dc and ch2 space around, placing (sc, ch2, sc) into each corner ch2 to maintain corners. (Total sc counts will be approximately equal to the number of previous dc - view as even round)
Round 10 :
Work openwork: *ch5, skip 4 sc, sc in next sc* repeat along each side. At corners, work ch5, sc into corner sc and continue (this creates small square mesh openings around the central area)
Info :
The openwork here produces the airy squares seen around the flower. Adjust chain lengths if your counts create uneven spacing; repeat stitch pattern evenly along each side for symmetry.
Round 11 :
Ch1, sc into each ch5 space (working 5 sc across each ch5), and sc between as needed to create even frame. Place (sc, ch2, sc) in each corner. (This rounds the open mesh into a stable square frame)
Round 12 :
Work 2 rounds of sc all around (Round 12 and Round 13) to create a tidy square frame and to prepare surface for flower sewing: 1 sc in each st around (maintain corner ch2 with sc, ch2, sc) (Round 12 sc count equals number of sts from previous round)
Round 13 :
1 sc in each st around (even round), sl st to join; fasten off cream and weave ends (square base finished)
Info :
Block each square lightly by pinning to square shape and steaming or wet-blocking to even sizes. Aim each finished square to be approx 12.5cm (5") across but size will vary with yarn/hook.
— Attaching Leaves and Flower to Square :
Round 1 :
Position the flower centered on the square. Using tapestry needle and yarn tail from flower or matching thread, tack flower center down with 6 evenly spaced stitches through the cream background to secure center firmly but allow petals to remain slightly raised.
Info :
Place flower so that petals sit over the open mesh holes and the base sits on the cream 2-round frame. Pin flower lightly before sewing to ensure centered placement.
Round 2 :
Sew four leaves into compass positions around the flower: place each leaf tip under a petal base and sew using small whip stitches through the leaf tail and the square base. Sew 4 small tack stitches per leaf for a secure attachment.
Info :
Arrange leaves so two are slightly overlapped under petals and two sit between petals for the same look as pictured. Weave any visible tails into the back and trim.
— Joining Squares Into Runner (Make 4 squares; join into one long runner 4x1) :
Info :
Squares are joined with a slim lattice strip, creating inhale/exhale open rows between squares, then joined to form a long runner. The runner consists of 4 squares joined horizontally with 3 joining seams.
Round 1 :
To make the joining strip, with dusty pink yarn, attach at side of first square at mid-side with a sl st. Ch5, skip next 5 sts, sl st into square edge to create an open mesh; repeat until you reach the next square edge; leave an equal number of strips between squares. Work second row of sl sts on return for stability. (Make 3 strips connecting squares)
Info :
Use stitch markers at the edges of each square to ensure lattice strips align precisely across squares. Keep tension consistent so joining strips sit flat, not twisted.
Round 2 :
Alternatively use Invisible Join Method: place squares with right sides up, align edges, and using dusty pink, work slip stitch through both loops of corresponding edge stitches along the full side to join, leaving ch-sps open where desired to create the lattice openings (this yields a flat join).
Round 3 :
For a decorative seam, after joining, single crochet around the seam from the wrong side to cover ends and create a neat ridge on the right side: sc through both loops across the seam edge. Repeat for each joint between squares (3 joins).
Info :
Blocking the joined runner at this stage helps the border sit evenly. Pin it to final shape before working the outer border rounds so scallops and lattice align purposefully.
— Outer Lattice Frame (Border foundation rounds) :
Round 1 :
With dusty pink, join at the outside edge middle point of any long side. Ch3 (counts as dc), *dc in next 2 sts, ch3, skip 2 sts* along the side until a corner. At corner: (2 dc, ch3, 2 dc) into corner ch2 space; continue around all sides. Join with sl st to top of ch3. This forms an openwork foundation (repeat again for second foundation round if needed). (Approx numbers depend on your square size; ensure ch3 spaces align across all sides)
Info :
Foundation creates the rectangular open mesh strips seen between the inner frame and outer scallop. Keep the ch3 spaces consistent so scallops later sit evenly across the border.
Round 2 :
Ch1, sc in each dc around and in each ch3 space work (sc, ch3, sc) to hold openwork; place (sc, ch3, sc) in corners to form square corners. Join with sl st. Fasten off and weave ends.
Round 3 :
Work one round of hdc all around into each st and across ch3 spaces (3 hdc in each corner cluster) to create a solid band for the final scalloped rounds. (Total hdc count equals number of stitches on edge plus corner additions)
Info :
At the end of Round 3 the runner should have a wide rectangular band in dusty pink framing the squares. This sets a stable foundation for the decorative scallops that finish the edge.
— Scalloped Edge (Wide lacy scallop — 12 rounds build-up) :
Round 1 :
With dusty pink, ch1, sc into same st, sc in next 3 sts, *(skip 1), in next st work 7 dc (shell) into same st, skip 1 st, sc in next 4 sts*; repeat around. At corners, when you reach a corner ch2 space, work shell into the ch2 space. Join with sl st. (This begins the scalloped shape)
Info :
Shells across the side should be evenly spaced; adjust the number of sc between shells so they finish evenly across each side if necessary.
Round 2 :
Ch3 (counts dc), *dc in each dc of shell across (7 dc), ch1, skip 1 sc between shells, dc into next sc*; this evens the shell and begins stacking shells for a deep scallop look. Join with sl st.
Round 3 :
Ch1, sc in each dc and ch1 sp around to stabilize the work, place 3 sc into the top of each shell to anchor. Join with sl st.
Round 4 :
To accentuate scallops, *into each shell top work (sc, ch2, 5 dc, ch2, sc)*; this increases height and forms rounded scallops. Join with sl st.
Info :
If scallops pull inward, switch to a 4.0mm hook for subsequent shell rounds for a looser, more pronounced scallop. If scallops are flopping, use a 3.25mm hook for a firmer edge.
Round 5 :
Ch3, dc in each dc across shells, placing 2 dc into center of each 5-dc shell to expand and round the scallop; join with sl st.
Round 6 :
Ch1, sc around placing 5 sc across each scallop section to create a solid base for the final decorative picot and lattice row. Join with sl st.
Round 7 :
Picot row: *sc in next 2 sts, ch3, sl st into the base of ch3 to form picot, sc in next 3 sts* - repeat around to give a delicate point between scallops. Join, fasten off and weave ends.
Info :
This scallop progression creates a deep, layered scalloped border as pictured. You may reduce rounds for a subtler edge or increase them for extra drama. Blocking at the end fixes scallop shape beautifully.
— Decorative Lattice Accent Row (Between scallop layers if desired) :
Round 1 :
If you want to replicate the strong open squares just inside the scallop in the photo, re-join dusty pink at mid-side and ch4, *skip 3, sc into next st, ch4* repeat across; corner ch4 to ch4. Join and work one return row of sc across ch4 spaces to give a neat squared grid.
Info :
This accent row sits visually between the scallop and the inner frame; it helps to measure and pin the runner to maintain even spacing before crocheting these openwork rows.
— Finishing Rounds & Final Blocking :
Round 1 :
Weave in all loose tails. With a tapestry needle, secure small hidden stitches to anchor any applique9 edges that still lift. Trim ends carefully after weaving at least 5 cm in.
Round 2 :
Lightly wet-block the entire runner: pin to desired rectangular dimensions on blocking mats and allow to dry thoroughly. Shape scallops and lattice to perfect symmetry while wet.
Info :
Blocking is crucial to achieve the flat frilled border seen in the images. Do not skip blocking even if your piece seems finished; the final look benefits immensely.
Round 3 :
Optional embellishments: Add a line of small French knots or seed beads in the flower center if you prefer additional sparkle. If beads are added, stitch each bead individually and secure with strong thread to resist washing.
Info :
For washing care, hand wash gently in warm water, reshape and dry flat. Cotton yarn will soften and the scallops will relax; re-block if necessary.
Completing this floral granny square table runner is such a satisfying project—each square is like stitching a tiny garden and the final scalloped border gives a lovely vintage finish. The textured petals and leaves create depth that looks beautiful on a wooden or painted table. 🧶 Place it beneath a teapot or vase and enjoy the handcrafted charm every day. Happy crocheting and done28099t forget to share your finished runner! 🌸✨