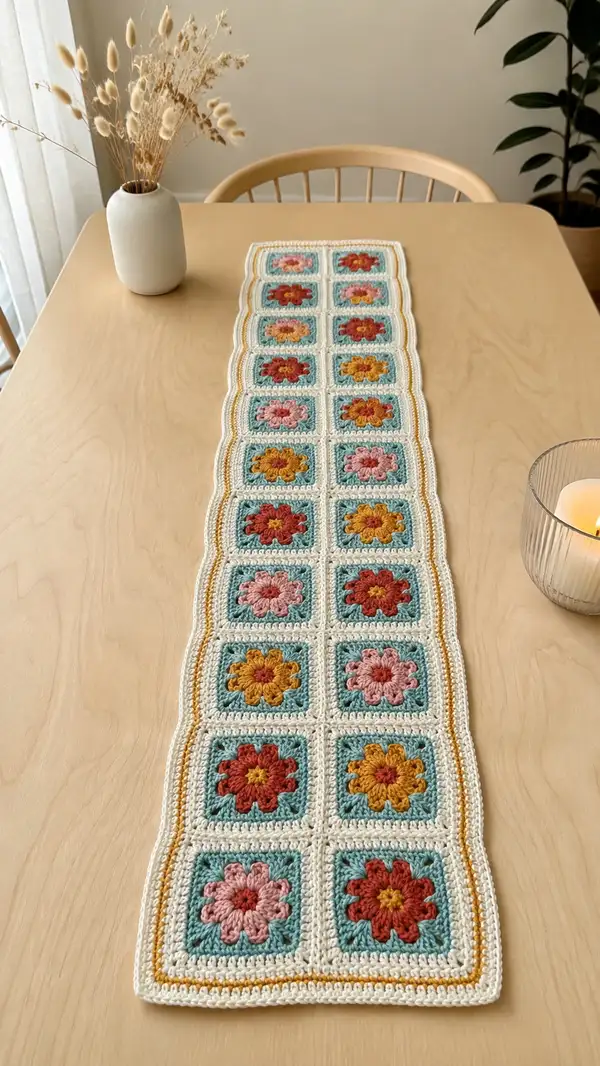
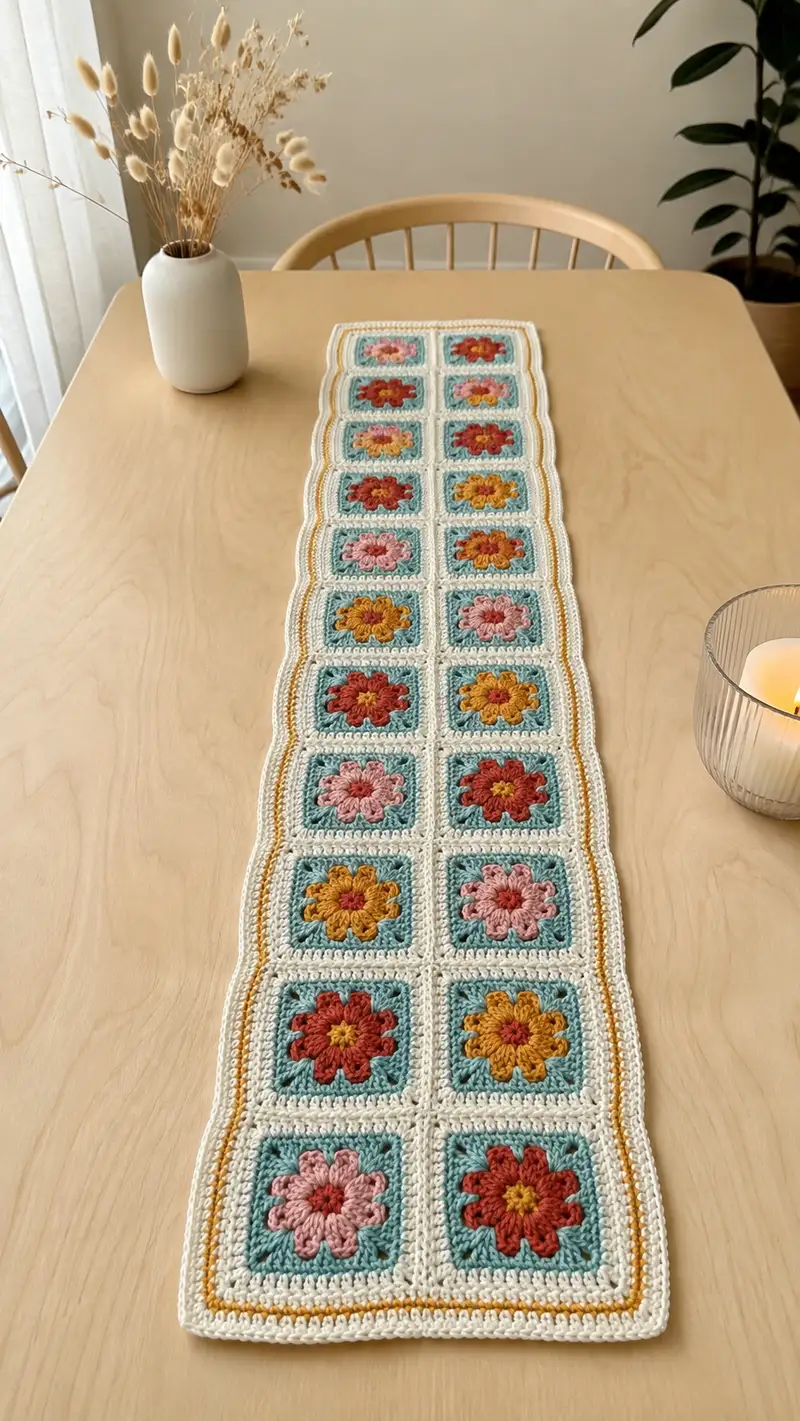
This long, elegant table runner is made from charming floral granny squares joined into a narrow two-column strip and finished with a soft scalloped border. The runner features warm mustard, coral/red and dusty pink flower centers set on a teal/seafoam square background with an ivory outer border. It’s perfect for dressing a dining table, sideboard or console and brings a handmade, cottage-chic vibe to your home.
Progress Tracker
0% Complete
— Overview :
Info :
This pattern builds a two-column table runner made of 24 floral granny squares (2 x 12). You will make identical floral motif squares, add a small square border to each, block squares, join-as-you-go to create rows, join rows together, and then work an outer multi-row border. Use the same hook for motifs and join for consistent gauge; switch to a slightly smaller hook for the final edging if you prefer a crisper edge.
— Notes on gauge and finished size :
Info :
Gauge: One finished motif (after blocking) = approximately 10 cm / 4 in square when worked with worsted weight (#4) yarn and a 3.5mm hook. Finished runner size (2 x 12 motifs): approximately 20 cm (width) x 120 cm (length) / 8 in x 47 in. Adjust the number of rows for length variations.
— Motif (Flower Granny Square) :
Round 1 :
MR, ch1, 6 sc into magic ring, pull tight (6)
Round 2 :
Ch2 (counts as hdc), 1 hdc in same st, inc in each st around (12)
Round 3 :
Change to Flower Color A (center petal color). Ch2, (1 hdc, ch2) x 6 into each stitch around to form 6 little loops for petals base (18 hdc, 6 ch-2 spaces)
Info :
Petal color: choose mustard, coral or dusty pink for alternating motifs. Keep a list to alternate colors down the runner as in the photo for the vintage look.
Round 4 :
Working into each ch-2 space: *(yarn-over, insert, pull up, repeat 4 times total) to create a 4-loop puff, yarn over and pull through all loops, ch1 to close puff; sl st into next hdc* — repeat for all 6 spaces to make 6 puff petals. Sl st to join (6 petals, base round remains 18 hdc)
Round 5 :
Change to Flower Center Color. Ch1, sc around the base of each petal (work 3 sc evenly around each puff petal), join with sl st — total 18 sc around petals (18)
Info :
Make petals tidy by working even small sc around each puff; this helps the petal fan sit flat when squared with the background rounds.
Round 6 :
Change to Teal (square background main color). Ch2, (2 dc in next st, ch1, 2 dc) all worked into the space between petal clusters to start corner clusters: *(2 dc, ch1, 2 dc) in corner points and (2 dc, ch1) along sides as needed* — form a 6-sided motif base. For clarity, work 3 corner cluster points alternating with side clusters so the round creates 6 outer chain spaces for the next round (work sits irregularly but will square in following rounds)
Round 7 :
Ch3 (counts as dc), dc in same st, *ch1, skip 2 sts, (2 dc, ch2, 2 dc) in next st (corner), ch1, skip 2 sts, dc in next;* repeat a total of 6 corner points so you have 6 distinct corners (this round intentionally begins to square the motif)
Info :
At this stage work loosely into side chains and space out dc clusters to encourage a square shape. Don’t be alarmed if motifs look hexagonal; the next rounds will square them fully.
Round 8 :
Ch1, sc evenly around turning corners into corners as (sc, ch2, sc) into each corner ch-space; on sides work 10 sc evenly between corners. After sc round you should have a tidy edge that reads as a square; count should be approximately 44 sc depending on spacing (approx. 44)
Round 9 :
Ch3, dc in next 3 sts, *(2 dc, ch2, 2 dc) into corner ch-2 space, dc in next 10 sts;* repeat around, ending with sl st to join (gives a neat classic granny-like square frame)
Info :
If your dc count is high or low, work extra or fewer dc between corners to keep corners square and even. Aim to make each side visually equal rather than strictly matching a number in this intermediate shaping round.
Round 10 :
Ch1, sc in same st and in every dc and ch-space around, work (sc, ch2, sc) in each corner – total will be one sc per stitch plus corner ch-2 (approx. 64 sc)
Round 11 :
Change to Ivory (joining color). Ch2, hdc in each st around worked into BLO to create a framed ridge; at corners work (hdc, ch2, hdc) — this creates a softer edge to seam squares together (approx. 64 hdc)
Info :
Working this round in BLO creates a subtle ridge that reads as the join line. If you prefer a flat seam, work in both loops instead.
Round 12 :
Ch1, sc in each st around, working (sc, ch2, sc) in each corner; finish with sl st and fasten off, leaving a 20-25 cm tail for join-as-you-go if you will join that side to an adjacent square (approx. 64 sc)
Info :
Fasten off and weave the short tail into the back of the square, but keep the longer tail if you plan to join this side to another now. Block each motif to a square of 10 cm / 4 in for consistent joining.
— Making the rest of your motifs :
Info :
Make a total of 24 motifs (2 across x 12 down). Alternate flower colors as in the photo or create your own color layout. Keep consistent teal background and ivory inner frame for a unified finish.
— Small square tidy-up rounds (per motif) :
Round 13 :
Optional tidy round in Teal: join with sl st to any corner, ch1, sc in same, sc in each st around including corners (sc, ch2, sc). This evens the edges and prepares the motif for join-as-you-go (approx. 64 sc)
Info :
Block each square flat: dampen lightly and pin to a 10 cm square, smoothing corners and sides so all motifs match. Allow to dry completely before joining.
— Join-As-You-Go (JAYG) Method — Joining motifs into rows :
Info :
You will join squares into horizontal rows of 2 squares each, then join rows vertically to form the full runner. The photos show 2 columns, 12 rows (24 squares). Use the long tail from the Round 12 of the right-hand square when joining to the square to its left, or vice versa depending on your layout. We join on the Ivory frame round so joins read as a narrow grid line.
Round 14 :
Position two blocked squares right sides up, with the square you are joining in your hands. Join with Ivory at a corner: ch1, sc in corner ch-space, *sc evenly along side of your working square; when you reach a corner ch-2 space that aligns with a corresponding corner on the already-made square, insert hook into that corresponding st on the adjacent square and sl st to join, then continue sc along next side;* repeat along the side until fully joined. Fasten off and weave tail. (Number of stitches equals number of sc on side; expect ~32 sts per side join)
Info :
Work the JAYG seam using the sc to sc method or invisible slip-stitch join — whichever gives a flatter seam. Check alignment before each join: stitches and corners should match after blocking.
Round 15 :
Join second square in the row using the same method so you have a completed 2-square row (sc seam across one long side per square). Press/steam lightly and pin seam flat if needed.
Info :
Make all 12 rows as 2-square rows (24 motifs total). Keep seams all worked with the same tension so the runner lies flat and seams are consistent.
— Joining rows together (vertical joins) :
Round 16 :
With two completed 2-square rows ready, align them right sides up. Join with Ivory using sc in each seam space along the long edges where rows meet: *sc through edge stitch of top row, then through corresponding stitch on bottom row, sl st to join if you prefer a flatter join;* continue across both columns so the seam runs in the grid space between squares. Fasten off and weave ends.
Info :
Work carefully at intersections where four corners meet — ensure your needle or hook picks both layers evenly to form a neat square grid. Use pins to hold rows in place before seaming if needed.
Round 17 :
Repeat vertical join process to join all 12 rows into the full runner. After joining all rows, press flat and check for any gaps; add a small whip stitch or extra sc to fill any open holes.
Info :
If you prefer seams with more definition like in the photo, work a round of surface slip stitches or sc along the seam grid to create a raised dividing line between squares.
— Stabilizing inner grid (optional) :
Round 18 :
Using Ivory, slip to any seam space and work a round of sc in each seam intersection around all internal seams (this is worked on top of seams to create a slightly raised grid). Work (sc, ch1) at intersections to keep corners open if desired.
Info :
This step is optional but recommended if your seams feel loose. The additional sc round gives the runner a quilted look similar to the image and helps it lie flat.
— Outer Border Preparation :
Round 19 :
After all squares are joined, single crochet around the entire outer perimeter in Ivory: ch1, sc evenly around working (sc, ch2, sc) in each corner. Keep tension consistent; total stitch count depends on final runner size — expect between 320-380 sc around a 2x12 runner (estimate based on motif gauge)
Info :
If your sides are wavy, add or subtract sc between corners to even out; the corners ch-2 keeps the runner square and prevents cupping.
Round 20 :
Change to Mustard contrast row: join mustard at any side with sl st, ch1, sc in same st, 1 sc in each st around, working (sc, ch2, sc) at corners. This thin color stripe is visible in the photo between the ivory and outer ivory scallop; fasten off after completing the round (approx. 320-380 sc)
Info :
This mustard stripe reads like a subtle piping that warms the edge. If you prefer a more muted look, use a pale gold or sandy beige instead.
Round 21 :
Return to Ivory: join with sl st, ch1, sc in each st around, (sc, ch2, sc) in corners — this creates a wider ivory frame (approx. 320-380 sc)
Info :
These three rounds (Ivory stripe, mustard stripe, Ivory wide frame) form the layered border visible in the finished runner and help stabilize the outer edge before working the scallop.
— Primary Scalloped Edge (large scallops) :
Round 22 :
Work around in pattern to create scallops: *skip 2 sts, in next st work (5 dc) all in same st for a big scallop, skip 2 sts, sl st in next st;* repeat to end. At corners, modify to work (3 dc, ch2, 3 dc) into corner ch-2 space so corners stay rounded. Fasten off. Number of scallops depends on perimeter; expect 40-48 scallops around typical runner.
Info :
Scallops give the runner its pretty undulating edge. Keep scallops evenly spaced — if a scallop looks too close to the corner, adjust by inserting an extra sl st before the corner cluster.
Round 23 :
Optional narrow row in Mustard to highlight scallops: Join mustard with a sl st to the top of each scallop, ch1, sc across the top of each 5-dc scallop (work 5 sc across the top stitches) then sl st into the sl st space between scallops. Fasten off after one round.
Info :
This narrow mustard accent mirrors the inner stripe and ties the palette together—work lightly to avoid distorting scallops.
Round 24 :
Return to Ivory for finishing: join at any scallop top, ch1, sc in each st around including into top of each scallop and into sl st spaces; in corners work (sc, ch2, sc). This round evens the tops of scallops and gives a clean finish (approx. same count as Round 21)
Info :
Check the edge for low spots — add an extra sc in low areas to even the runner. Fasten off and weave in ends carefully on the reverse side to keep the front neat.
— Final Decorative Edge (small picot edge) :
Round 25 :
For a delicate finish: join with sl st, *ch3, sl st in 3rd ch from hook (picot) into next st, sc in next 3 sts;* repeat around scallop tops to create a small picot detail. At corners, do (sc, ch3, picot, sc). Fasten off and weave ends.
Info :
The picot adds subtle texture and a handcrafted vibe similar to the photographed runner. Work loosely for airy picots, or tightly for a more defined edge.
— Alternative finishing options :
Info :
If you prefer a straighter edge, skip the scallop rounds and instead work three rounds of sc (Ivory, mustard, Ivory) then finish with a reverse single crochet (crab stitch) for a neat twisted edge.
— Blocking and final pressing :
Info :
After finishing the border, wet-block the entire runner: lightly spray or mist with water, then pin to a flat surface and shape the scallops and corners. Allow to dry completely (overnight) for best shape retention. Remove pins and hide ends on the wrong side with the yarn needle.
— Care instructions :
Info :
Hand wash or cool machine wash on delicate in a mesh bag. Reshape while damp and lay flat to dry. Avoid tumble drying to preserve the border and prevent distortion.
— Troubleshooting and tips (many small Info sections to aid success) :
Info :
If one side becomes slightly longer, add one extra sc between corners on the shorter side during the first sc border round to compensate. Use blocking to even out minor differences.
Info :
When joining rows, work slowly at intersections of four corners. Use a blunt yarn needle to sew tight intersections if your hook distorts the square alignment.
Info :
Keep a layout board or towel and arrange motif colors before joining so you don’t end up with clumped colors; a visual layout helps mimic the photo’s alternating palette.
Info :
To make a wider runner or table centerpiece, add more columns of motifs and adjust the border by adding more chains between corner clusters to expand the perimeter proportionally.
Info :
Record counts and color sequences on a notepad as you make each square so you can reproduce the same motif order or reverse it for a mirror-symmetric runner.
Congratulations — your floral granny square table runner is complete and ready to add charm to the table! Each square brightens the runner with cheerful petals and the ivory grid brings a classic, quilt-like finish. I hope you enjoyed watching your runner grow square by square — it makes a lovely gift or a seasonal centerpiece. Share a photo of your finished piece and celebrate your handmade success! 🧶🌼