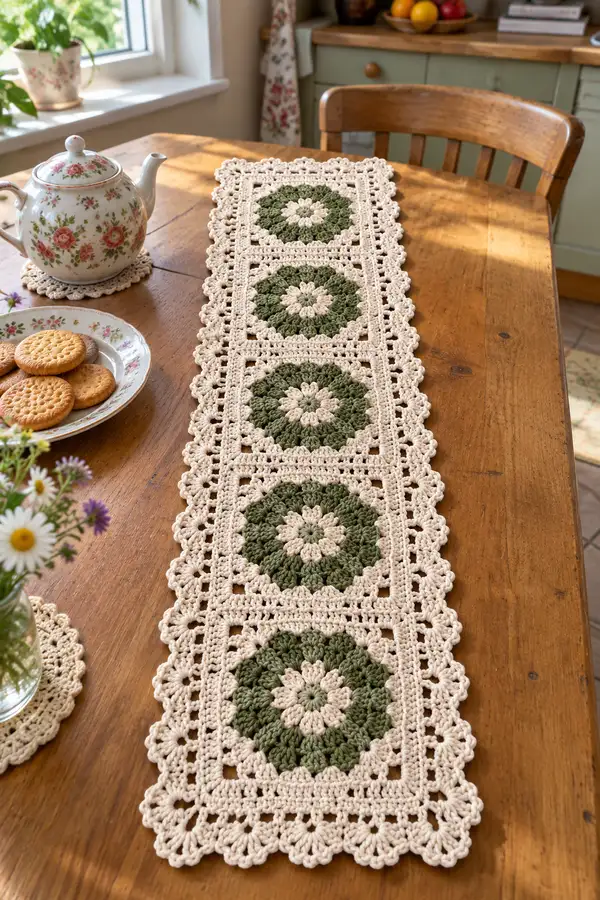
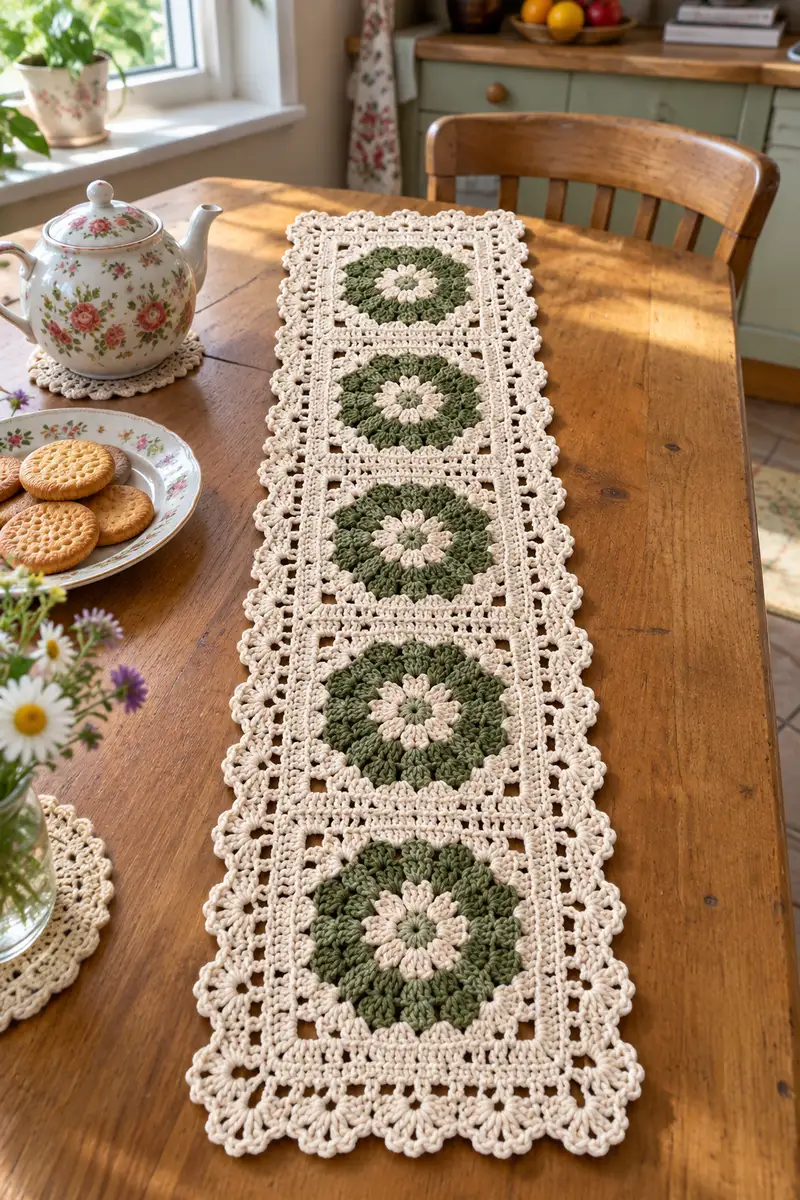
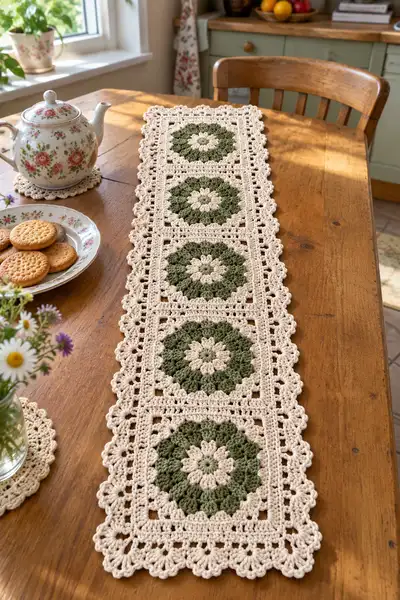
This elegant table runner features a row of four framed floral motifs with plush puff-petal centers and a delicate lacy scallop edge. Worked in two warm neutral tones, the runner combines textured puff clusters and classic granny-style square rounds for a vintage cottage look. The finished piece lays flat and drapes beautifully along the length of a wooden table or sideboard. Detailed instructions guide you through each motif, joining method, and decorative border.
Progress Tracker
0% Complete
— Notes & Gauge :
Info :
Gauge is not critical for a table runner but will affect final measurements. With worsted cotton and 4.5mm hook, each finished floral square should measure approximately 14 x 14 cm (5.5 x 5.5 in) before blocking. The finished runner pictured measures roughly 55-60 cm wide by 110-120 cm long (including scalloped edges) using four motifs joined lengthwise with a framed border. Block motifs to final size before joining for best results.
Info :
Puff stitch: yo, insert hook, pull up loop, yo, insert hook, pull up loop, yo, insert hook, pull up loop (you will have 7 loops on hook), yo and pull through all 7 loops, ch1 to close puff and secure. Count each puff as one stitch in the round unless otherwise noted.
— Floral Square Motif (Make 4) :
Round 1 :
MR, ch3 (counts as first dc), 11 dc into ring, sl st to top of ch3 to join (12)
Info :
Pull ring tight and join with sl st. You now have 12 double crochet stitches around your center ring. This round forms the base for the inner floral petals.
Round 2 :
Ch1, sc in same st, *ch3, skip 1 dc, sc in next dc* rep around, sl st to first sc to join (12 sc, 12 ch3 spaces)
Round 3 :
Change to cream (if working inner petal in cream) - Info: change color with final yarn over of last sl st to avoid a visible knot. Ch2 (counts as first hdc), *(hdc, puff) in next ch3-sp, ch1, sl st in base of puff to secure and form petal* rep around into each ch3-sp 12 times; sl st to top of ch2 to join (12 petals)
Info :
Each petal consists of an hdc followed by a puff close to the base. This creates the small raised flower in the center. Keep puffs consistent - do not pull too tightly.
Round 4 :
Ch3 (counts as dc), 1 dc in same st, *ch2, 2 dc in next petal base (between puffs)* rep around into each petal base (24 dc, 12 ch2-sps), sl st to top of ch3
Round 5 :
Ch1, sc in same st, *ch3, sc in next ch2-sp* rep around forming 24 sc and 12 ch3-sps, sl st to first sc
Round 6 :
Change to green. Ch3, (2 dc, puff, 2 dc) all worked into the next ch3-sp to form a raised petal group; *skip next sc, (2 dc, puff, 2 dc) into next ch3-sp* rep around, sl st to top of ch3 to join (12 large petal groups)
Info :
These large petal groups form the visible green petals in the motif. Each group is worked into the ch3 spaces created in Round 5. Each group occupies the space of one previous petal and counts as 1 repeat unit for increases in the next rounds.
Round 7 :
Ch3 (counts as dc), 1 dc in same st, *ch2, 2 dc in next petal group, ch2, 2 dc in next petal group* rep around increasing so there are 36 dc and 12 ch2-sps (work evenly across groups so each group receives 2 dc clusters separated by ch2)
Round 8 :
Ch2, hdc in each dc around, working 1 hdc in each of the 36 dc (36)
Info :
Round 8 creates an even circular band of hdc to prepare for squaring up. Keep tension even so that the circle remains flat; block if needed before squaring rounds.
Round 9 :
Ch3, dc in next 8 sts, *(2 dc, ch2, 2 dc) into next st to form corner, dc in next 9 sts* rep for 4 sides to begin forming a square (work spacing so you have 4 corner ch2-sps evenly spaced); sl st to join (approx 40-44 dc and 4 ch2 corners)
Info :
We are now converting the round into a square. The counts above are descriptive; aim to place 4 corner ch2 spaces evenly around the circle so that the square sides are approximately equal. If your stitch counts differ by a couple of stitches due to tension, adjust the number of dc between corners to create equal sides.
Round 10 :
Ch1, sc evenly around working 1 sc in each dc and 1 sc in each ch2-sp, place 3 sc in each ch2 corner to bulk the corner (approx stitch count will be even across sides). Sl st to join
Round 11 :
Ch3, dc in each st across until you reach corner, in corner work (2 dc, ch3, 2 dc) into corner ch2-sp from previous round, continue dc across next side; repeat for all 4 corners; sl st to join (this forms a larger ch3 corner to square up)
Round 12 :
Ch1, sc around working evenly in each dc and into ch3 corners work 5 sc in corner ch3 to create a square frame; sl st to finish (final square approx 14 x 14 cm before blocking)
Info :
Fasten off, weave in ends. Make 4 identical floral squares. At this stage you can gently block each square to exact dimensions to ensure even joins and a flat runner.
— Alternate Inner Color Option :
Info :
If you want a two-tone center (lighter green), after Round 6 change to lighter green for Round 7 and then return to main green for Round 8. Carry leftover yarn along the back or fasten off and rejoin for cleaner color changes.
— Joining Panels and Framed Rows (Join 4 Motifs Lengthwise) :
Info :
There are two joining methods included: Join-as-you-go (JAYG) for an invisible seam, or make all squares and whipstitch or mattress stitch them together. The following rounds describe a framed joining method that creates a neat border between squares and provides the ribs on both long edges.
Join Method - Prep :
Lay the 4 blocked squares face down in order. Ensure the seams/corners align. We will join squares along long sides so that the framed border creates a continuous band.
Joining Round 1 :
Using cream, join to one side of the first square at the midpoint with a sl st, ch2, 1 hdc in same st, hdc evenly around the edge for 3 sts, when you reach the side where squares meet, ch4 to create a join channel; on the adjacent square align and sl st into corresponding stitch on that square and continue hdc around both edges so that ch4 forms a small open channel between the squares. Continue around runner linking adjacent squares in same manner until all four are linked by ch4 join channels along the length. Sl st to join at starting point.
Info :
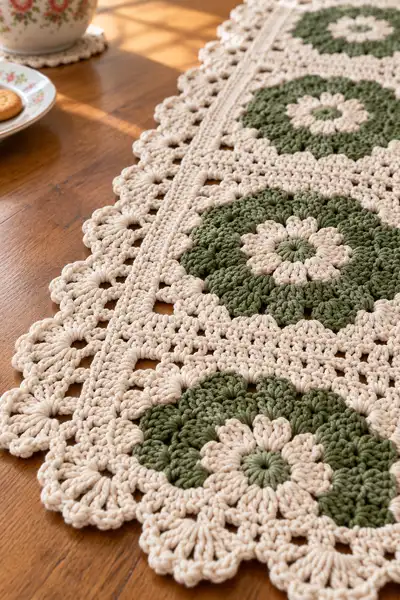
These ch4 channels create the little square openings visible between motifs in the photo. Keep the channels consistent—count the same number of hdc between channel points on each side so the look is symmetrical.
Joining Round 2 :
Ch3 (counts as dc), dc in each hdc around working 2 dc in each ch4 channel (1 dc either side of the channel plus 2 dc across the top) to create a sturdy rectangular frame along the seams. Work evenly at corners with (2 dc, ch2, 2 dc) to preserve the square shape. Sl st to join.
Joining Round 3 :
Ch1, sc in each st around, putting 3 sc in each ch2 corner space. This evens the frame and readies for decorative lattice rows. Sl st to join.
Info :
At this point you should have a continuous framed strip of four squares with small open windows between motifs. Check that the runner lies flat; if it waves, block and recheck stitch tension or add/removes one sc here or there to even perimeter.
— Lattice Row & Mid-Frame Detailing :
Round 1 :
With cream, ch3, *dc in next 2 sc, ch1, skip 1 sc* rep along the long sides to create a subtle openwork running line; around the short sides work dc evenly so the lattice aligns; sl st to join (work counts vary depending on your stitch count; maintain even spacing)
Info :
This row forms the straight rib that runs the length of the runner between the framed windows. Adjust the number of dc groups so that ribs run straight and parallel to each other; the runner pictured has two parallel rib rows—one on each side of the framed squares.
Round 2 :
Ch1, sc in each dc and sc across, placing 3 sc in corner spaces to stabilize (full perimeter now filled with sc). Sl st to join.
Info :
Work two parallel bands if you prefer the exact look in the photo: repeat these two rounds to create a second rib, spacing it 4-6 rows away from the inner frame depending on your motif size.
— Outer Square Frame (Work 6 Rounds to Build Border) :
Round 1 :
Ch3, dc in each st around until corner, in corner work (2 dc, ch3, 2 dc) into corner ch2 or ch3-sp; continue around; sl st to join (this makes a broader outer frame)
Round 2 :
Ch1, sc in each st around; place 5 sc in each corner ch3 space to bulk corners and prepare for scallops; sl st to join
Round 3 :
Ch3, dc in next 3 sts, *ch2, skip 2 sts, dc in next 4 sts* rep around so you create small open windows at regular intervals along the outer frame; sl st to join
Info :
These small windows will echo the square windows in the framed center and prepare space for the decorative scallop edge. Keep windows evenly spaced by counting sts between each ch2.
Round 4 :
Ch1, sc in each dc and sc across, working 3 sc in each ch2 corner. Sl st to join. Ensure the runner lies flat—adjust by adding or subtracting 1 sc in long sides if necessary.
Round 5 :
Ch3, dc in each st around, keeping corners as (2 dc, ch3, 2 dc). This will produce a smooth edge for scallops. Sl st to join.
Round 6 :
Ch1, sc around; sl st and fasten off. We will now work the scalloped edging in cream.
Info :
After Round 6 fasten off and weave in tails or leave a long tail for attaching the scallop if you prefer to join the scallop in a contrasting step. If the runner is slightly distorted, lightly steam-block or wet-block to shape.
— Scalloped Edge & Picot Shells (Final Decorative Edge) :
Round 1 :
Rejoin cream at any point on long side, ch1, *skip 1 st, 5 dc in next st (shell), skip 1 st, sc in next st, ch3, sc in next st* rep across long side to create shell-picot repeats; at corners work special corner shell: (sc, ch2, 7 dc, ch2, sc) to turn the shell into a corner; continue repeats down short side and repeat along the other long side; sl st to join
Info :
Shells are worked as 5 dc groups that form the petals of the scalloped border. The ch3 picot between shells echoes the little window feel in the framed center. For rounded petals in the photo the shell is worked into single stitches spaced regularly between sc rounds.
Round 2 :
Ch1, sc into the top of each 5-dc shell across, and into each ch3-picot place (sc, ch3, sc) to strengthen picot. At corners place (sc, ch2, 7 dc, ch2, sc) then sc across next side. Sl st to join and fasten off. Weave in ends neatly on the WS.
Info :
For the photo-accurate scallop look, the outermost shell has puff-like depth. If you want deeper petals, substitute each 5-dc shell with (3 dc, puff, 3 dc) worked into the same base stitch and decrease or increase ch spaces between shells to maintain consistent spacing.
— Decorative Corner Finish (Optional Extra Ruffle) :
Round 1 :
At each outer corner, after scallop round, join cream and work 5 shells into corner area radiating outwards (work shells into chain spaces and corner chs), finish with a reverse picot row (sc, ch3, sl st in first ch) to create a tiny ruffled edge. Fasten off and weave ends.
Info :
This ruffled corner is optional but gives a delicate finishing touch seen on vintage runners. Experiment on a corner sample first to check scale.
— Alternate Join-as-You-Go (JAYG) Method :
JAYG Round 1 :
With the final round of the second square (Round 12 on square), do not fasten off. Instead align the square with the already-made square, and when you reach the side to be joined, sc through the next st of the worked square, ch4, and sl st to the base square’s corresponding st to join; continue the final round while joining sections as you go. This creates an invisible seam with small ch4 windows between motifs.
Info :
Use JAYG if you prefer fewer ends to weave in and a neat continuous border. Pin squares exactly before you join so that the ch-spaces align perfectly and the motifs remain centered.
— Final Blocking & Finishing :
Info :
Once all squares are joined and scalloped edge is complete, gently damp-block the entire runner pinned to the desired rectangular dimensions. Pull corners square, pin scallops evenly, and allow to dry fully. Weave in all remaining ends on the WS, and trim close. Press gently with a warm iron if using cotton (use pressing cloth to avoid shine).
Info :
If you notice any open areas or uneven scallops after blocking, add a few discreet slip stitches at the base of scallops on the WS to hold shape. Store flat or rolled to preserve scallop shape.
Completing this runner is like framing four little floral paintings with yarn—each square blooms and the scalloped edge ties everything together. The two-color palette feels timeless and the textured petals add visual depth that looks beautiful on a wooden table. I hope you enjoy the meditative rhythm of puff stitches and the satisfaction of a perfectly blocked, hand-crafted table runner. 🧶🌿✨