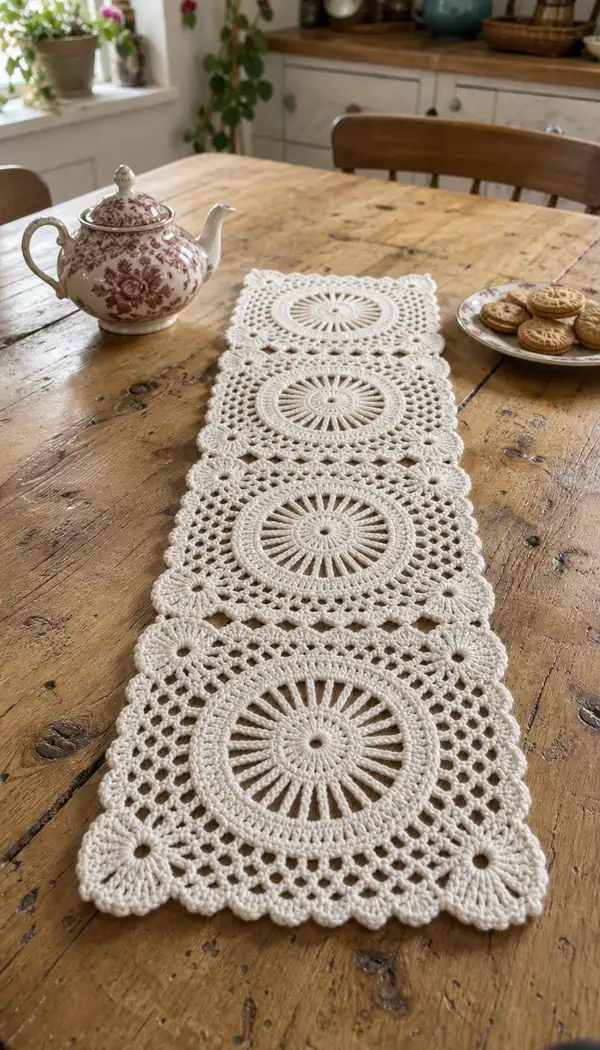
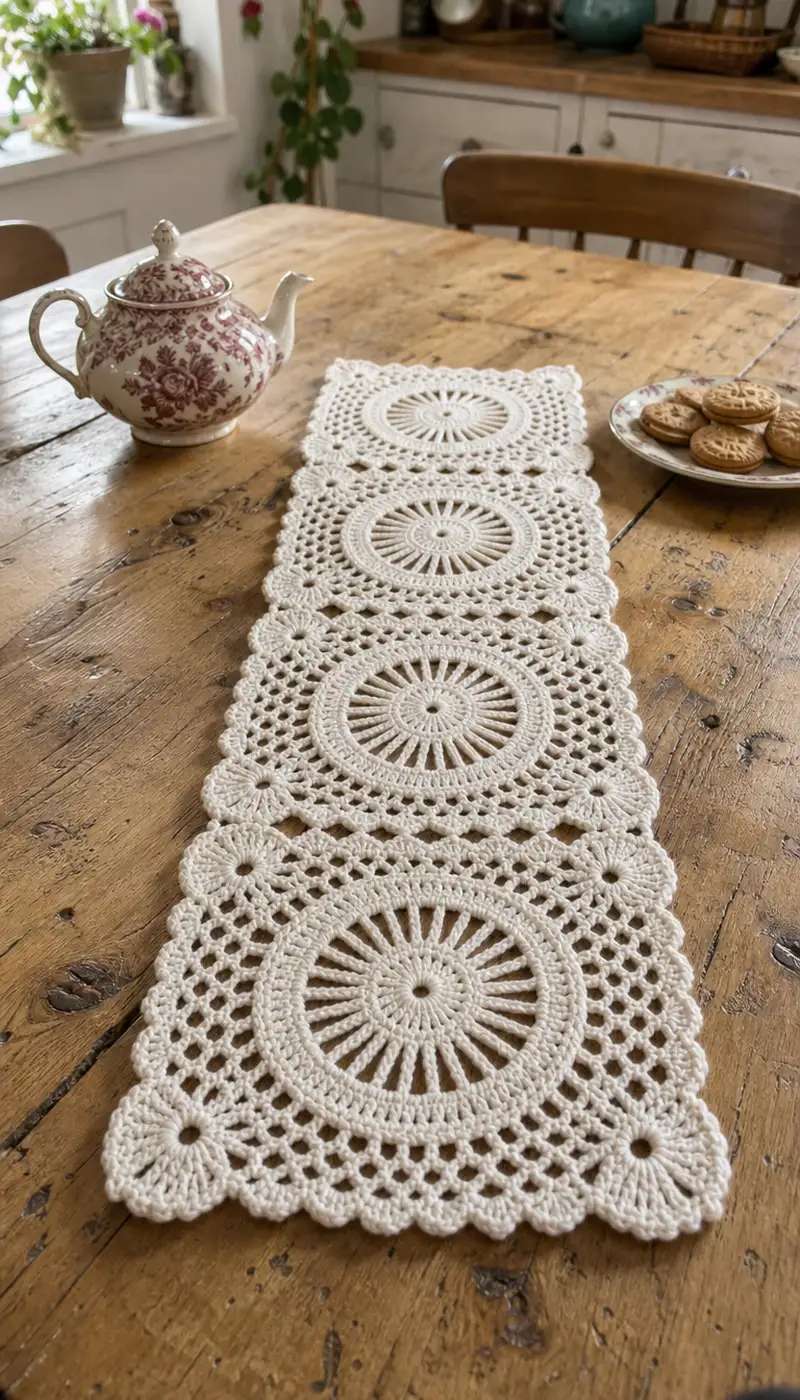
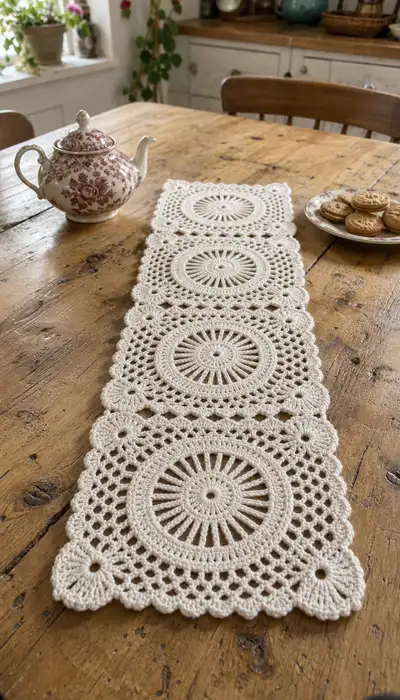
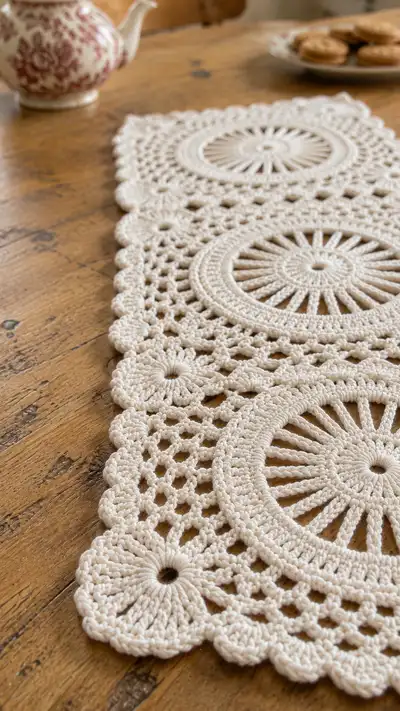
A delicate vintage-inspired table runner made from interconnected square medallion motifs in a soft ivory cotton. Each square features a radiating central medallion, lacy mesh surround, and pretty scalloped corners for a timeless, handmade look. The runner in the photos is three motifs long and sits beautifully on a wooden table as a centerpiece. This pattern teaches you to crochet each motif, join them seamlessly and finish with an elegant scalloped border.
Progress Tracker
0% Complete
— Notes & Gauge :
Info :
Gauge: Each completed square motif measures approximately 19cm (7.5 in) across when worked in worsted cotton using 3.5mm hook and blocked. Adjust hook if your gauge differs. The sample runner is three motifs long (approx 57cm / 22.5 in plus seam allowances). Work loosely enough to let lace open, but tight enough that motifs keep shape.
Info :
Abbreviations used are standard US terms. Work in continuous rounds unless otherwise instructed; join rounds with a sl st when instructed. Use stitch markers for first stitch of each round where helpful.
— Central Medallion (make 1 per square) :
Round 1 :
6 sc in magic ring (6)
Round 3 :
(1 sc, 1 inc) x 6 (18)
Round 4 :
(2 sc, 1 inc) x 6 (24)
Round 5 :
(3 sc, 1 inc) x 6 (30)
Info :
Keep tension even. This small center builds a stable base for the later spoke rows; do not over-tighten the magic ring — leave a small hole so round 6-8 can expand smoothly.
Round 6 :
(4 sc, 1 inc) x 6 (36)
Round 7 :
(5 sc, 1 inc) x 6 (42)
Round 8 :
(6 sc, 1 inc) x 6 (48)
Info :
We will form 16 radial spokes built from chain loops; 48 is divisible by 16 (3 base sts per spoke), which helps even placement. If you changed earlier rounds to adjust size, recalculate to a multiple of 16 for the spoke round.
Round 9 :
*1 sc in each of next 2 sts, ch 4, sk 1 st* x 16 (48 anchors, 16 ch-4 loops)
Info :
Place a stitch marker in the first sc of the round to mark the starting anchor; each ch-4 loop will become a radial spoke. Count loops as you go to ensure you have 16 evenly spaced loops.
Round 10 :
Into each ch-4 loop: (dc3, tr1, dc3) in the loop, sl st into next sc anchor; rep around creating 16 'petal' clusters (this forms the radial spokes)
Info :
These elongated clusters create raised spokes. Keep clusters consistent; work into the chain loop rather than stretching chains. After finishing the round, gently shape the spokes outward with your fingers before moving to next round.
Round 11 :
Ch 1, *1 sc in next 3 dc (from cluster), 1 sc in tr, 1 sc in next 3 dc*, sl st into next sc anchor; rep x16 (approx 80 sc)
Info :
Round 11 closes the radial clusters into a steady round of single crochets. Count regularly: each cluster yields 7 sc in this method, so with 16 clusters you should have ~112 entries counted if you include anchors; if you prefer a tidy count, treat each cluster group as a repeat rather than an absolute stitch count.
Round 12 :
(1 sc, 1 hdc) in each of next 2 sts, *2 hdc in next st* around to build a broader ring; rep evenly to maintain round (approx 112 hdc/sc combined)
Round 13 :
Ch 3 (counts as dc), *sk 1, 5 dc in next st (shell), sk 1, dc in next 3 sts*, rep around to create textured ring of shells and dc (work slowly to keep shell placement even)
Info :
If shell placement doesn't look centered, adjust by adding or removing one dc between shells so they sit symmetrically relative to spokes. Counting shells is easier than counting every stitch here.
Round 14 :
Ch 1, sc in each dc and in the centers of shells to make an even round of sc, join with sl st (maintain same number of points as previous round)
Round 15 :
*Ch 4, sk 2 sc, sc in next 2 sc* around to create small open lacy arches (rep until full round)
Info :
This beginning of the lacy band is important — the arches create the mesh that will later be expanded into the diamond lattice. Keep chains consistent in height (ch-4) for a crisp look.
Round 16 :
Into each ch-4 arch: (sc, ch 4, sc) forming a 2-sc anchored arch; sl st to next anchor; rep around (arch count equals prior ch-4 count)
Round 17 :
Ch 3, *dc 2 into ch-4 spaces, ch 3, dc 2 into same space, sk next 2 sc anchors, dc into next sc anchor*, rep around to start forming mesh diamonds (use marker to ensure repeats equal the number of arches)
Info :
Make sure you have an even number of diamond points so the next rounds can pair them. This mesh round is the skeleton for the openwork that defines the square's sides.
Round 18 :
Ch 1, sc in each dc and in chain spaces to tidy the mesh; when you reach corner zones (we'll define corners soon) prepare to switch into corner flower joins in later rounds
Round 19 :
*ch 5, sk 3 sts, sc in next st* around to produce larger lattice openings; adjust repeat count so openings remain even (expected count similar to beginning arches)
Info :
At this stage the motif looks circular but is expanding into a larger disc; we will use corner units to square off the motif into a square later. Do not fasten off — continue into the outerwork rounds.
Round 20 :
Into each ch-5 loop: sc, hdc, 3 dc, hdc, sc (a fan cluster) to create a textured ring; sl st into next anchor; rep around
Round 21 :
Ch 1, sc evenly across the fans and in lattice spaces to create a tidy ring, counting to maintain symmetry (expected total 128–144 stitches depending on earlier rounding)
Info :
Before you continue, lay the round flat and identify four positions roughly at 0, 90, 180 and 270 degrees that will become corners. You can mark them with pins — these are where corner flowers will be attached to square the motif.
Round 22 :
*Sk 4 sts, 7 tr cluster worked together in next st (forming a tall petal), sk 4 sts, sc in next*, rep around placing tall petal clusters at four evenly spaced positions (these will become corner starters)
Info :
These tall tr petals must be placed at four equal intervals. If your round count prevents perfect spacing, nudge earlier rounds by adding or removing one sc in the previous sc tidy round to get correct spacing for 4 corner petals.
— Mesh Band & Squaring (continue motif) :
Round 23 :
Ch 1, sc around until you reach a tall petal; around tall petal work: ch 6, sl st into top of petal, ch 6, continue sc to next tall petal; rep for all 4 petals (creating four long chain loops projecting outward)
Round 24 :
Into each ch-6 loop: (sc, hdc, 5 dc, hdc, sc) to make corner fan shells; after finishing all four corners you will have a loosely squared outline
Info :
These corner fans begin the square shape. Make sure fans are similarly tensioned and blocked flat before proceeding — this helps when you later join motifs into a runner.
Round 25 :
Ch 1, sc evenly across fans and mesh sections to create a continuous round; measure corner-to-corner to ensure symmetry (adjust a stitch or two if necessary)
Round 26 :
Work a row of filet diamonds along the sides: *ch 3, sk next 2 sts, sc in next st* across each side between corner fans to create a lattice band (repeat until full round)
Round 27 :
Into each diamond ch-3 space: (sc, ch 3, sc) to open the mesh; this builds the airy field seen across the square
Info :
This mesh field should look regular and even. If your mesh is too loose, try a smaller hook for the next motifs or pull slightly tighter on the chains. Keep the sides the same height so squares align when joining.
Round 28 :
Ch 1, sc around through sc and chain spaces to tidy motif and stabilize openwork (this round is meant to firm the mesh before we add decorative stitches)
Round 29 :
*Ch 2, sk 1, sc in next 2*, across side sections to create a scalloped base for corner flowers; work evenly so stitch counts match on all sides
Round 30 :
At each corner chain-2 valley: join to form a small ring with 6 sc (make 4 small rings) — these rings will act as centers for the corner flower petals
Info :
Make sure the little rings are placed exactly at corner points; they serve as anchor points for the petal clusters that form the scalloped corners.
— Corner Flower Units (make 4 per square) :
Round 31 :
Into each little ring: ch 1, 12 hdc evenly around ring, join with sl st (12)
Round 32 :
*In next hdc: sc, ch 3, sc in same st* (picot style) around creating 12 little loops around ring; sl st to join
Round 33 :
In each ch-3 loop: (sc, hdc, 5 dc, hdc, sc) to create rounded petals; rep for all 12 loops per corner to make a rosette, sl st to join
Info :
Each corner flower has 12 petal points which crowd into a scalloped shape. Press petals flat while wet-blocking and shape with a pin until dry for a crisp corner.
Round 34 :
Ch 1, sc around the base of corner petals into adjacent side mesh so the flower becomes integrated with the square edge (no fasten off)
Round 35 :
Repeat rounds 31–34 for all four corner units. After finishing the 4th corner, work sc across side mesh between flowers to tidy transitions
Round 36 :
Ch 2, *sk 1, 3 dc in next st, sk 1, ch 2, sc into next* across to create a decorative lattice row connecting corner flowers; rep around
Info :
At completion of round 36 your motif should read as a square with a central circular medallion, airy mesh sides, and four scalloped corner rosettes. Fasten off leaving a 30cm tail for joining, or continue to edge rounds if joining later by crochet-over method.
— Motif Tidying & Optional Stabilizing Round :
Round 37 :
Join new yarn if you fastened off. Ch 1, sc evenly around entire square working 2 sc into stitch where needed to maintain straight edges; this round stabilizes shape and evens stitch counts (expected 160–200 sc depending on tension)
Info :
This tidy round helps motifs sit flat and makes subsequent joining cleaner. If you plan to join motifs by whip stitch, leave this round off to avoid bulk at joins.
Round 38 :
If desired, work one more round of sc in BLO to create a subtle ridge around the square: 1 sc in each st BLO around; sl st to join; fasten off
Info :
Work this BLO round only if you want a defined framed look. It also gives a slightly raised line that looks attractive in photos and helps stitch definition on edges.
— Joining Squares (join as you go or sew later) :
Round 39 :
Option A (Join-as-you-go crochet Join): With motif A on hook and motif B positioned behind: sc through corresponding edge stitches of both motifs across side edge, working ch 1 spacer at corner junctions. Repeat across and continue joining other sides as required.
Info :
Join-as-you-go works well when motifs are fresh on the hook. Align motifs carefully so central medallions line up along the runner length. Use pins to ensure straight joins.
Round 40 :
Option B (Sewing Join - preferred for flat joins): Align two motifs with right sides up and mattress-stitch through backside loops along the sc tidy round. Use the long tail left when fastening off. Mattress stitch provides a nearly invisible join.
Info :
For a runner, I recommend sewing joins with a yarn needle and mattress stitch; this produces a neat, flat seam that keeps the runner laying flat on the table. Pin motifs in place before sewing.
Round 41 :
If joining three motifs in a straight runner: join the first seam between motifs 1 & 2, then join motifs 2 & 3. Match corner flowers so scallops alternate neatly. Reinforce join by passing needle twice through each joining point.
Info :
When sewing, keep tension light—too tight stitching will pucker the motifs. If seam looks loose after sewing, add a small invisible catch stitch along the edge interior for reinforcement.
— Outer Scalloped Border (work around full runner or each motif) :
Round 42 :
With runner laid flat, join yarn at any corner. Ch 1, sc evenly around the entire outside edge (if working around joined runner, work sc across joins as well), place 3 sc in each corner valley to build turning points
Round 43 :
*Ch 2, sk 1, 5 dc shell in next st, sk 1, ch 2, sc in next st* repeat around to form shell arches between sc posts creating a scalloped edge
Round 44 :
Into each shell: sl st into shell center, *ch 3, 4 dc into shell center, ch 3, sl st* for a small picot-scallop detail; rep across all shells
Info :
This decorative small scallop refines the edge and gives the beautiful finished look seen in the photos. Keep shells evenly spaced and block each scallop to a uniform size.
Round 45 :
Ch 1, sc in each picot and in spaces between shells to tidy and secure the scallop; when you reach a corner, work (sc, ch 2, sc) into the corner peak to keep edge turning smoothly
Round 46 :
Optional extra decorative round: *In next sc: 1 sc, ch 5, 1 sc* making slightly taller chain loops between scallops for a lacy finish; adjust to taste
Info :
If you add the optional lacy round, be sure to pin and block before trim — longer chain loops will strongly benefit from blocking to match the scallop rhythm.
— Alternate Edge Using Petal Clusters (optional) :
Round 47 :
Work around edge: *sc in next 2 sts, in next st work (ch 2, 7 dc in same st), sc in next 2 sts* making gathered petal clusters for a more textured border
Round 48 :
Ch 1, sc around petal clusters to tidy and flatten the petal round; fasten off and weave tails
Info :
Choose either scalloped or petal-based edge depending on desired look. The sample runner uses a scalloped shell edge with small picots for a refined vintage feel.
— Blocking & Finishing :
Round 49 :
Wet block each motif: pin square flat on blocking mat, stretching gently to perfect corners and scallops. Allow to dry fully. Use mild steam if needed to set cotton fibers.
Info :
Blocking is essential for lace clarity. Pin each scallop and corner flower to an even size to make joins neat. If motifs are joined before blocking, block the whole runner as one piece pinned flat.
Round 50 :
Weave in all loose ends with tapestry needle; for joins sewn with mattress stitch, hide tail by weaving through several interior stitches and trimming close to work.
Round 51 :
Optional: Light starch spray for table use if you prefer a crisper finish; test on a scrap first. Allow to dry completely before laying heavy objects on the runner.
Info :
For frequent use, cotton will soften slightly after washing. Re-block if you want to maintain crisp scallops.
— Making a Longer Runner & Sizing Notes :
Round 52 :
To make a runner longer than three motifs: make and block additional square motifs and join them sequentially using the mattress stitch described earlier. Each motif adds approx 19cm (7.5 in) in length before joins.
Round 53 :
If you prefer a narrower runner, work motifs with a lighter weight cotton (sport/DK) and a smaller hook; expect the motif to reduce proportionally but adjust repeat counts only if necessary to keep 16 spokes pattern intact.
Info :
Always make a sample motif and block it before committing to a full runner to ensure size and look meet your expectations.
— Troubleshooting Common Stitching Issues :
Info :
If corners won't lie flat, unpin the corner flower and flatten it with a damp press, re-pin and allow to dry longer. Slight pulls in the mesh can be relaxed with steam or a small amount of moisture.
Info :
When joining, if seams look visible, try turning motifs so the join sits on the underside, or use a finer yarn for sewing to reduce bulk. A consistent mattress stitch tension will make seams nearly invisible.
Info :
To repair a pulled blotch in a motif, remove the offending round back to the trouble spot and rework that section with even tension. It's easier to rework a single round than to adjust multiple joined motifs.
— Complete Round Summary (for reference) :
Round 57 :
Rounds 1–8: Build central disc to 48 sts; Rounds 9–11: make 16 spokes and enclose with sc; Rounds 12–16: create first textured ring and small arches; Rounds 17–21: mesh, diamond and fan shells; Rounds 22–36: corner petals and integrate flowers; Rounds 37–38: tidy rounds; Rounds 39–41: joins; Rounds 42–48: border and scallops; Rounds 49–51: blocking and finish.
Info :
Use this summary as a quick checklist when making multiple motifs. The detailed rounds above are intended to be followed exactly for consistent results.
Round 58 :
Final checks: Ensure all scallops are uniform and corner flowers are evenly shaped. Lay the runner on a flat surface to check for twists or uneven joins.
Round 59 :
Optional finishing touch: hand-stitch small clear beads into the center of corner rosettes for a subtle shimmer (not shown in images but optional)
Info :
Beads add weight — stitch them securely and avoid using on items for small children. The runner in the photo is bead-free for a pure crochet texture.
Round 60 :
Pattern complete. Enjoy your handmade runner and consider making coordinating placemats or coasters using the same medallion design scaled down.
This vintage-inspired medallion table runner turns simple crochet stitches into a beautifully textured centerpiece that elevates any table. With circular sunbursts, airy mesh and scalloped corners, each motif is a joy to crochet and a pleasure to display. Whether you make one motif or a full-length runner, the careful blocking and tidy joining bring out the classic, handmade charm. 🧶✨ Enjoy creating and gifting this timeless accent — it’s sure to become a family favorite. 🌿