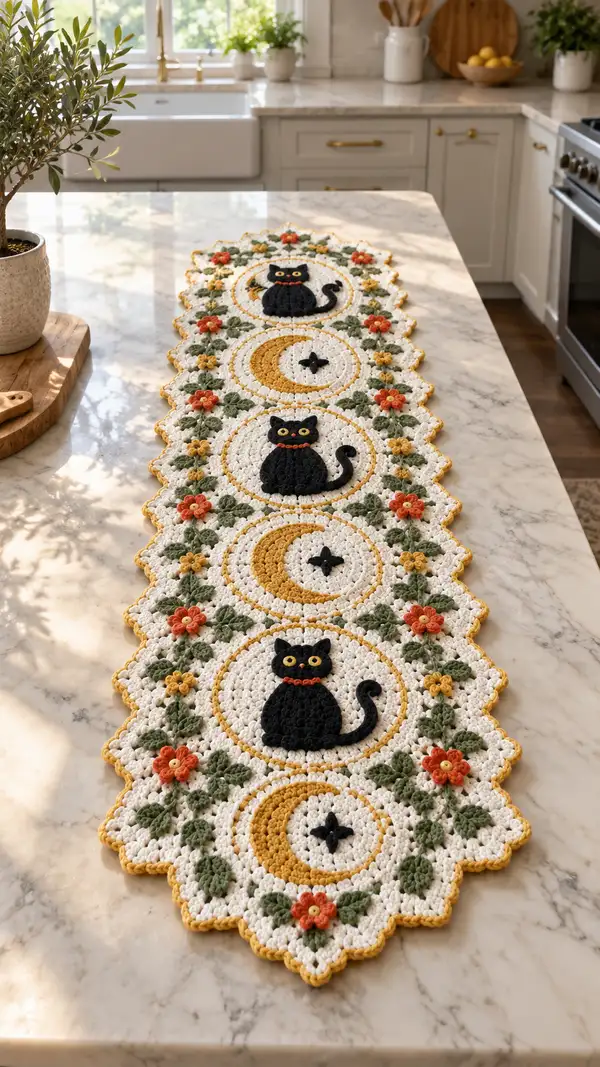
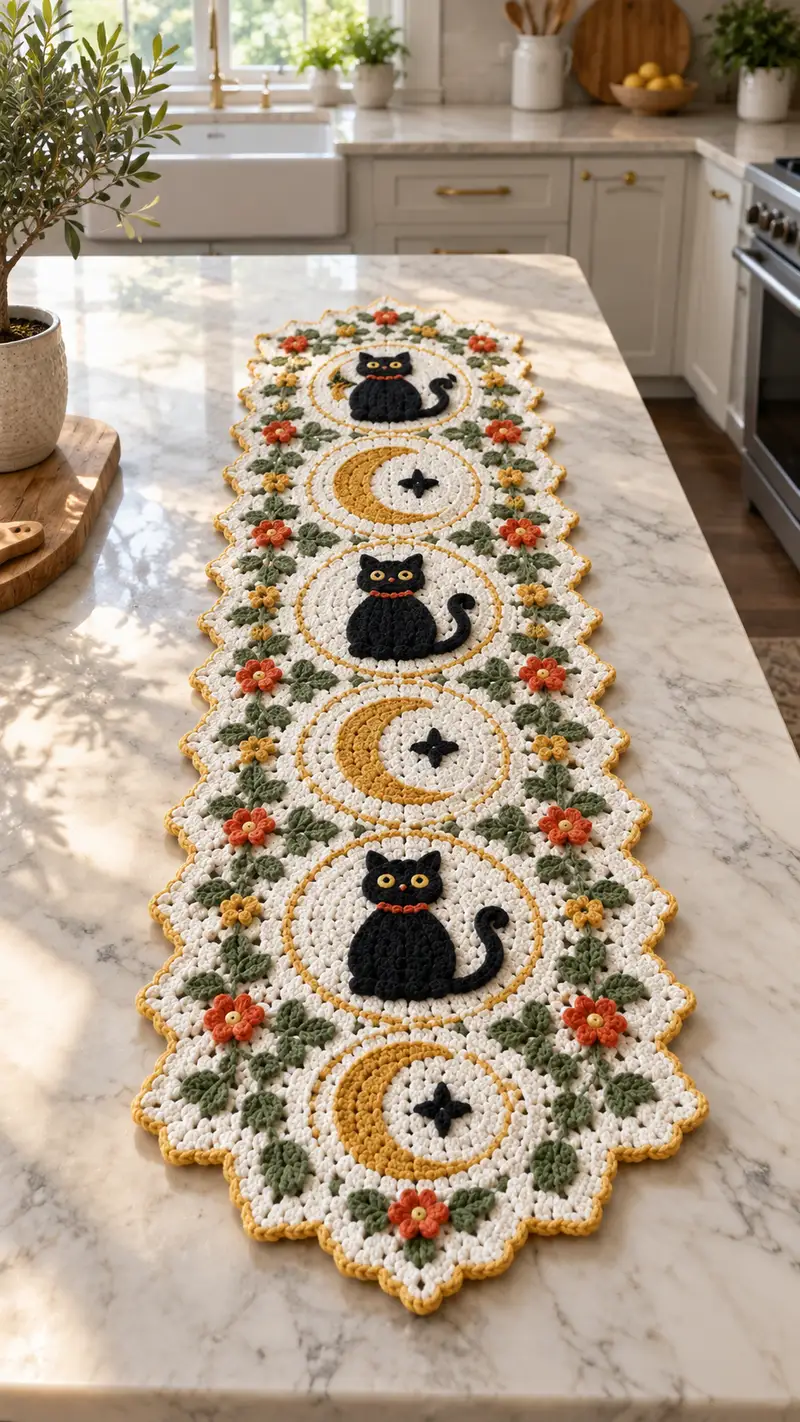
Create a charming scalloped table runner featuring alternating circular medallions with textured black cat appliques, crescent moons, and a floral vine border. Worked in warm cream, mustard, sage green and coral, this runner mixes cluster stitches, puff textures and 3D flowers for a cozy handmade accent. Detailed instructions guide you through each medallion, applique and final scalloped edging to ensure accurate placement and a polished finish.
Progress Tracker
0% Complete
— Overview & Gauge :
Info :
This runner is constructed from modular circular medallions joined into a long strip and finished with a scalloped edge. Make five medallions (alternating moon and cat motifs) to create the runner shown; adjust number for a shorter or longer runner. Gauge is not critical for pattern accuracy but affects final size. With worsted weight yarn and 4.0mm hook, one completed medallion measures approximately 8.5-9 inches across. Work tightly so applique stuffing does not show through.
— Materials Recap (before you begin) :
Info :
Prepare yarn bobbins for the four main colors: Cream (background), Mustard (gold accents), Black (cats and small stars), Sage (leaves), Coral (flowers), and Light Mustard (flower centers). Keep spare yarn for weaving and small repairs.
— Central Circular Medallion (Make 5) :
Round 1 :
6 sc in magic ring (6)
Round 3 :
(1 sc, 1 inc) x 6 (18)
Round 4 :
(2 sc, 1 inc) x 6 (24)
Round 5 :
(3 sc, 1 inc) x 6 (30)
Round 6 :
(4 sc, 1 inc) x 6 (36)
Round 7 :
(5 sc, 1 inc) x 6 (42)
Round 8 :
(6 sc, 1 inc) x 6 (48)
Info :
Change to Cream (background) yarn at the end of Round 8 if you began the medallion center in Mustard for an inner ring. Ensure your magic ring is closed neatly and your stitch counts are exact before proceeding to texture rounds.
Round 9 :
1 sc in each st (48)
Round 10 :
1 sc in each st (48)
Round 11 :
For gentle texture, *1 sc, puff in next st* rep around (48 stitches counting each puff as 1)
Info :
Puff stitch: Yarn over, insert hook, pull up loop (repeat 3 times to have 7 loops on hook), yarn over and pull through all loops, ch1 to close puff. Each puff counts as 1 stitch for counts.
Round 12 :
1 sc in each st (48)
Round 13 :
Change to Mustard. *3 sc in next st, sc next 7 sts* rep 6 times (48)
Info :
This creates a subtle raised ring for the golden highlight inside the medallion. If you prefer a thinner ring, use 3 sc clusters less frequently (sc next 9 sts) but keep counts consistent.
Round 14 :
Change to Cream. 1 sc in each st (48)
Round 15 :
1 hdc in each st (48)
Round 16 :
Work 48 dc clusters for raised texture: *(fpdc around next st, sc next st)* rep around (48)
Info :
Front post double crochets create a subtle ridge that later helps appliques sit proud. Maintain consistent tension and place marker at first fpdc to keep counts accurate.
Round 17 :
1 sc in each st (48)
Round 18 :
Begin scallop shaping: *(2 sc, ch2, 2 sc) in next st, skip next 3 sts, 1 sc in next 3 sts* rep around, adjusting last repeat to land evenly (48 base stitches, scallops will form outside)
Info :
Fasten off and weave ends. Make five medallions in total, alternating placement for motifs: Medallion 1 (Moon), 2 (Cat), 3 (Moon), 4 (Cat), 5 (Moon) as pictured. Block each medallion lightly to flatten and standardize size before applique placement and joining.
— Moon Applique (Make 3, One per Moon Medallion) :
Round 1 :
Using Mustard yarn: mr, ch1, 6 sc in mr (6)
Round 3 :
(1 sc, 1 inc) x 6 (18)
Round 4 :
(2 sc, 1 inc) x 6 (24)
Info :
We will shape a crescent by doing partial decreases and a curved outer edge; the moon is an applique worked flat and sewn onto the medallion center. Keep the next rounds slightly smaller than a full circle to allow the moon curve to fit inside the medallion ring.
Round 5 :
Working in rows joined to work a crescent: ch1, sc 8, turn, ch1, sc 6, turn, ch1, sc 4, turn (leaving remaining sts unworked) Fasten off. Reattach at opposite tip to round edges and sc 10 along the outer curve to create thickness. (This step creates an approximate crescent; counts will vary by shaping but create a crescent about 2.5-3 inches tall.)
Round 6 :
With Mustard, sc evenly around the crescent outer curve to create a neat, even applique edge. Aim for 20-24 sc around outer curve (24)
Round 7 :
Switch to Cream and sc a final row around the crescent's outer edge if desired to soften the look or to create a halo; alternatively leave mustard and use 1 sl st every 3 sts for a delicate border (24)
Info :
Sew the crescent centered inside the medallion golden ring using yarn needle and matching mustard yarn. Use small invisible whipstitches and pin before sewing to ensure even placement. Add a small black embroidered star (see star instructions below) to the center of the medallion inside the moon opening if desired.
— Small Star Embellishment (Make 3 for Moon Centers) :
Round 1 :
With Black yarn: mr, ch1, 5 sc into mr, pull tight (5)
Round 2 :
*Sl st in next st, ch3, sl st in same st* repeat 5 times around to create 5 tiny star points forming a cross-like star. Fasten off leaving tail for sewing. (x5 points)
Info :
Sew the star to the center of each moon medallion using a few tidy stitches. Keep the star flat and centered; do not overstuff.
— Cat Applique (Make 2) :
Info :
The cat is worked in several small pieces: body (textured using puff clusters), head (flat with eye placement), tail (curved tube), two ears (triangles), and collar. Work pieces individually and sew onto medallion center.
Cat Body - Round 1 :
With Black yarn: ch8, join with sl st to form a ring or work into ch: Round 1: sc 8 into ring/chain (8)
Round 3 :
(1 sc, inc) x8 (24)
Round 4 :
1 sc in each st (24)
Round 5 :
To build a textured body, *puff in next st, sc in next 2 sts* rep around (8 puffs + 16 sc) — total 24 counts (count puffs as one)
Info :
Puff stitch for cat body: Yarn over, insert hook, pull up loop (repeat 3 times), yarn over and pull through all loops, ch1 to close. This creates a dense bobble texture that resembles a soft cat body silhouette.
Round 6 :
1 sc in each st (24)
Round 7 :
Shape bottom: *(3 sc, dec) x 4* (20)
Round 8 :
(2 sc, dec) x 5 (15)
Round 9 :
(1 sc, dec) x 5 (10)
Round 10 :
Stuff lightly through openings; finish shaping with 5 dec (5)
Info :
Fasten off leaving a long tail for sewing. Cat body should be slightly domed and textured; do not overstuff or the body will be too rigid to sew flat onto medallion.
Cat Head - Round 1 :
mr, 6 sc in mr (6)
Round 3 :
(1 sc, inc) x6 (18)
Round 4 :
1 sc in each st (18)
Round 5 :
Make two ears: ch4, sl st to create triangle ear shape; or make small isosceles triangle: ch3, sc2 in 2nd ch from hook, ch1, turn, dec to point; make two and sew to head top. Head continues: 1 sc in each st 18 (head base)
Info :
Use small safety eyes or embroider eyes with golden/yellow centers. For safety eyes, attach during Round 3-4 before stuffing. Embroidered eyes are safer for children and give a flat look against medallion background.
Cat Tail :
Using Black yarn: ch18, sc in 2nd ch from hook across (17), continue working in rounds to form a tube: join ends with sl st to make a loop, then sc around tube for 6 rounds to create thickness; fasten off leaving tail for sewing and shape into a curl before securing. (Tube length about 2.5-3 inches)
Cat Collar :
With Coral yarn: ch12, sc across, sl st to join into a short ch necklace. Use small contrasting bead or stitch to form collar center. Sew collar around neck seam between head and body, but keep a small gap so collar sits proud.
Info :
Position cat body slightly below center so head sits inside inner golden ring. Pin all pieces to the medallion before sewing. Use ladder stitch to attach body and head to medallion through a few back loops to create an invisible seam. Sew tail onto medallion behind the body at an angle to create the characteristic curl.
— Floral Appliques (Flowers & Leaves) :
Large Flower - Make 10 :
With Coral yarn: mr, ch1, 12 sc in mr (12); Round 2: *ch3, sl st into same stitch (petal made), sl st into next st* rep around to make 6 petals. Fasten off leaving tail for sewing. Add small light mustard yarn center by sewing a 5-sc circle or attaching a small button bead.
Info :
Each medallion has 4 large coral flowers (two on each side), spaced evenly along the medallion circumference. Pin flower placement using the scallop points on the medallion edge as guides.
Small Flower - Make 10 :
With Light Mustard yarn: mr, 6 sc in mr, sl st to join, *ch3, sl st in same st* rep 3 times (3 petals). Fasten off and sew centers with small coral seed bead or embroidered french knot.
Leaf - Make 30 :
With Sage yarn: ch6, sc in 2nd ch from hook, hdc in next, dc in next 2, hdc in next, sl st to tip to shape leaf curve. Fasten off leaving tails. Alternatively: ch7, 1 sc in 2nd ch, 1 hdc, 2 dc, 1 hdc, 1 sc to create a defined small leaf. Block slightly for definition.
Info :
Each medallion side forms a short vine of leaves interspersed with coral and small mustard flowers. Arrange leaves in mirrored pairs to create an organic vine look; use the scallop points as alignment marks for even spacing.
— Joining Medallions into Runner :
Info :
Lay out five medallions in desired order: Moon (1), Cat (2), Moon (3), Cat (4), Moon (5). Align the scallop points so medallions nestle into each other slightly; pin through paired scallop points where they touch. Use a whip stitch or mattress stitch for a flat join. Join from center outward to prevent bunching.
Joining Method A (Invisible Mattress Stitch) :
With Cream yarn and yarn needle, match stitch to stitch along adjoining scallop points. Insert needle under the front loop of the first medallion and the back loop of the second to create an invisible seam; continue along entire join. Secure ends and weave tails inside medallions.
Joining Method B (Crochet Join) :
Hold two medallions together right sides facing. With Cream yarn, join with sl st through both scallop points, sl st across the area you wish to join (approx 6-8 sl sts), then fasten off. Repeat for each pair. Crochet join creates small ridges that blend nicely with surrounding texture.
Info :
Check alignment by laying runner flat and smoothing each join. If any medallion sits high, gently tug the seam and tighten or add a few extra securing stitches. Blocking slightly after joining helps flatten seams before border is added.
— Scalloped Border & Edge Finish :
Round 1 (Edge Preparation) :
With Cream yarn, work 1 sc evenly around entire outer edge of the joined runner to tidy joins and create a uniform base for the scallop. Place 2 sc in each scallop point to emphasize points where medallions meet. (Count will vary by final assembled length)
Round 2 :
With Mustard yarn, *skip 1 st, (2 dc, ch2, 2 dc) in next st, skip 1 st, sc in next 3 sts* rep around to form bold scallops. Adjust counts at corners/joins to keep scallops even. Each scallop occupies approximately 6 base sts; modify repeats frequency to ensure even distribution across runner edge.
Info :
Use stitch markers at medallion join seams to maintain pattern alignment. The mustard scallop creates the gold-finished edge seen in the photo and should be neat and consistent in height.
Round 3 (Refining) :
With Mustard, sl st around each scallop edge to tidy the curves; alternatively, use a contrasting cream picot row: *(sc, ch3, sl st in 3rd ch) in the center dc of each scallop* to create delicate points between scallops.
Round 4 :
Finish with a tight reverse single crochet (crab stitch) in Mustard along the very edge to give a defined finished look. Work evenly and keep tension slightly firmer than body rows to help the scallops sit out.
Info :
Block or steam-block the entire runner flat. Pin scalloped points out with T-pins to emphasize shape while drying. This final blocking step sharpens scallops and helps appliques settle into medallion centers.
— Additional Decorative Embellishments :
Info :
Attach small embroidered french knots or tiny beads to flower centers for sparkle. Add extra leaves or tiny buds along the vine as desired. For a holiday variation, substitute coral flowers for deep red and add a metallic thread in the scallop rounds.
— Finishing Touches & Weaving Ends :
Info :
Weave all tails under several stitches on the wrong side and trim close. Use a small dab of fabric glue at the ends if the runner will be laundered or used frequently to prevent tails from reemerging. Hand-wash gently or spot clean as needed, and lay flat to dry.
Final Size Info :
With worsted yarn and 5 medallions, the finished runner should measure approximately 36-44 inches in length and around 8.5-9 inches across at its widest scallop points. Adjust medallion count for a longer or shorter runner; each additional medallion adds roughly 8.5-9 inches to length.
Info :
If you wish to make a table runner to fit a specific table length, lay out medallions and adjust their quantity before joining. You may also create half-medallions for tapered ends if you want rounded terminations instead of a scalloped point.
This scalloped cat and moon table runner brings cozy, whimsical charm to any table with textured medallions and delicate floral vines. The modular design makes it easy to personalize length and color palette. I hope every stitch you place brings a smile and a little bit of handmade magic to your home. 🧶✨🐾