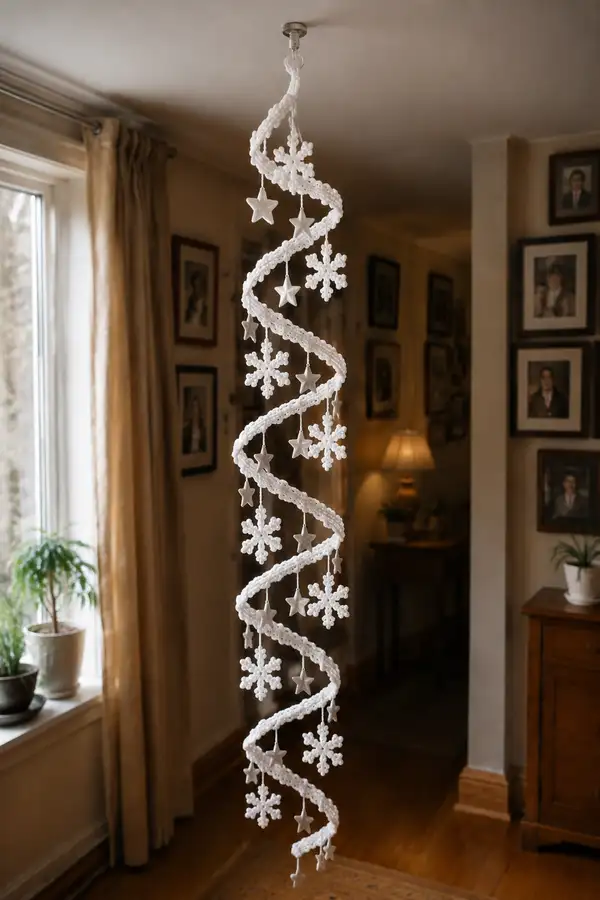
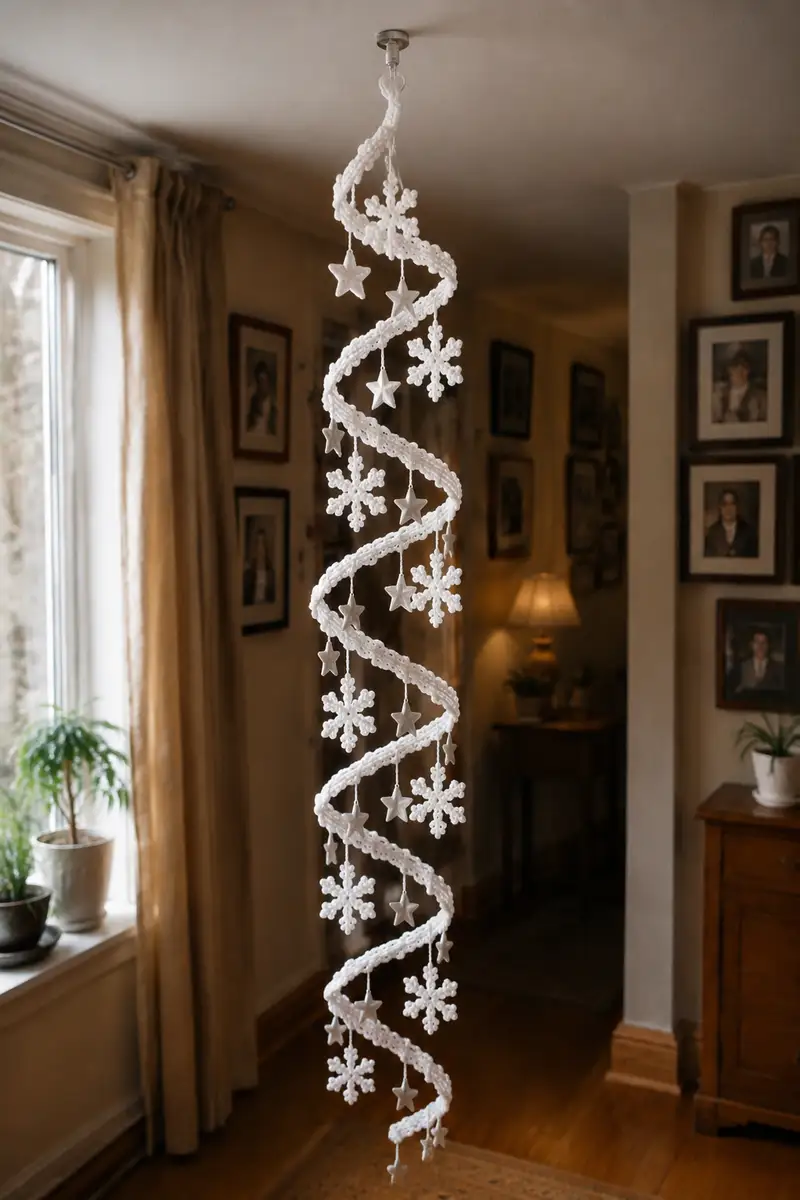
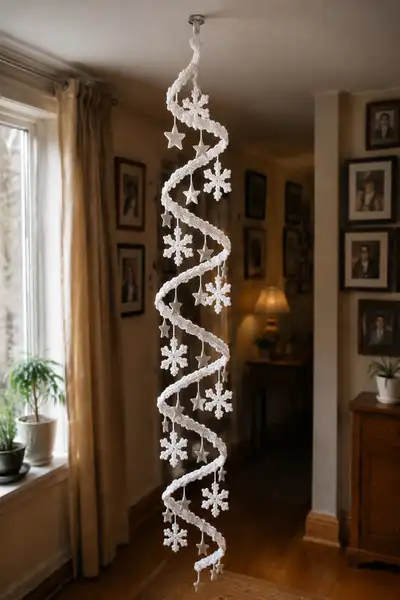
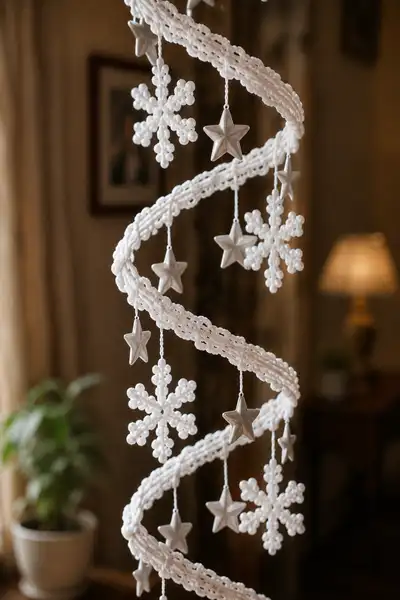
Create an elegant cascading spiral garland decorated with lacy white crochet snowflakes and dangling silver stars. This pattern walks you through making a long lacy spiral ribbon (a tubular spiral rope), delicate beaded-effect snowflakes, small 3D stars, and secure hanging chains. The finished piece hangs as a vertical spiral mobile—perfect for holiday decor or a winter wedding accent. Detailed shaping, stiffening, and assembly notes included for a professional finish.
Progress Tracker
0% Complete
— Materials & Gauge :
Info :
Use DK or light worsted (sport/DK) white yarn and a 3.5mm hook. Gauge is not critical for this hanging garland, but gauge affects final spiral diameter and motif size. For reference, 10 rounds of the spiral tube (30 sts) measure approximately 2.5 cm in height when worked tightly.
— Spiral Tube (Main Ribbon) :
Round 3 :
(1 sc, inc) x 6 (18)
Round 4 :
(2 sc, inc) x 6 (24)
Round 5 :
(3 sc, inc) x 6 (30)
Info :
At this point you have established a tubular base of 30 stitches. The spiral in the photos is narrow and tubular rather than flat, so maintain continuous rounds to create a firm rope. If you prefer a slightly wider spiral, increase one more round: (4 sc, inc) x 6 to make 36 sts.
Round 6 :
1 sc in each st around (30)
Round 7 :
1 sc in each st around (30)
Round 8 :
1 sc in each st around (30)
Round 9 :
1 sc in each st around (30)
Info :
Work the tube in continuous rounds without joining. Use a stitch marker to mark the first stitch of the round and move it up each round. Keeping the tube narrow will let it coil smoothly; if you want a looser spiral you can work in a slightly larger hook.
Round 10-20 :
1 sc in each st around (30)
Info :
Measure as you go: aim for a finished straight length of crocheted tube before shaping of approximately 180-220 cm for a tall cascade like the sample. You can stop earlier for a shorter garland. The number of rounds determines length: every 10 rounds adds roughly 2-3 cm of tube length when crocheted tightly in DK yarn. Count rounds to reach desired length.
Round 21-40 :
1 sc in each st around (30) — continue until you reach the desired raw tube length. For our sample we worked a total of 200 rounds which resulted in a 210 cm tube length.
Info :
If you want the spiral to be slightly flattened with decorative openwork on the edges, switch to working every other round in BLO for 6 rounds to create a subtle ridge. See optional texture Info below.
Optional Texture Rounds 41-46 :
1 sc in each st BLO (30)
Info :
Switch back to regular rounds after the ridge. This creates the lacy chain-like edges visible on the sample. You can place these texture ridges every 20-30 cm along the tube to add interest.
Round 47-120 :
1 sc in each st around (30) — continue to complete the full length of your tube. For the sample, continue until you have 200 rounds total. Keep a round counter and break your work into lengths (for example, 4 sections of 50 rounds) to make stitching easier.
Info :
Fasten off leaving a long tail to weave into the end. Weave tail into the interior of the tube so the end looks neat. If you prefer extra stiffness, insert a thin plastic tube or flexible wire inside the crocheted tube before closing the end.
— Snowflake Motif (Make 10–12 or as desired) :
Info :
These snowflakes use a central ring and six arms built from picots and small bobbles/popcorn clusters to achieve the beaded appearance. Use a smaller 3.0–3.5mm hook for crisper stitches and tighter bobbles.
Round 1 :
Make a mr. Ch 1, 6 sc in mr. Pull tight and sl st to first sc (6)
Round 2 :
(Ch 6, sl st into next sc) x 6 to create 6 loops around center (6 loop spaces)
Info :
Each arm will be created on the ch-6 loop. Keep tension even on the chains to make arms symmetrical.
Round 3 :
Working into first ch-6 loop: (sc, ch 3, sc, ch 3, sc) into loop, sl st into center ring. Repeat into each loop (6 arms). After finishing, sl st to join (36 stitches counted as 6 little clusters plus joins)
Round 4 :
For each arm: sl st to the first ch-3 space, (pic: ch3, sl st in first ch), *[1 sc, bobble, 1 sc]* into the next chain space, (ch 2, sl st) to close. Repeat for each arm. This is a textural round, no single-number stitch total necessary because it's cluster-based.
Info :
Bobble technique: (Yarn over, insert hook, pull through, yarn over, pull through 2 loops) repeat 4 times until five loops on hook, yarn over and pull through all loops, ch 1 to secure. Alternatively use a 5-dc popcorn: 5 dc in same st, remove hook, insert hook into first dc, draw loop through and ch1 to close.
Round 5 :
On each arm: after the bobble, ch 3, sl st at the tip to form the round bead look. Return to center with sl st. Repeat for all 6 arms.
Info :
At this stage the snowflake measures about 6–7 cm across in DK yarn. If you want a smaller or larger snowflake, use thinner yarn with a smaller hook or thicker yarn with a larger hook.
Round 6 :
Optional decorative edging: work sc around the entire snowflake spacing evenly - count approximately 36 sc around total if you place 3 sc between each arm base (approximate)
Round 7 :
Make 6 small picot clusters at the outer arm tips: (sc, ch 3, sl st in 1st ch) to create small points. Finish with sl st to center and fasten off leaving a long tail for sewing.
Info :
Weave the long tail through the center of the snowflake and use it to attach the hanging cord. For a bead-like appearance as in the sample photo, block the snowflake flat and spray with a light starch while pinning it to a foam mat.
— Crocheted Star Ornament (Optional, Make 12–16) :
Round 1 :
mr, ch 2, 10 hdc in mr, sl st to join (10)
Round 2 :
(ch 3, skip next st, sl st into next) x 5 to form 5 points (5 loop spaces)
Round 3 :
Into each loop: (sc, ch 2, 3 dc, ch 2, sc) to shape each point. Finish and sl st to join. Fasten off leaving a tail. Optional: push a small piece of polyfill into center to make a slightly 3D star before closing with tail.
Info :
If you prefer the metallic stars in the photo, substitute purchased silver star ornaments and attach by thin cord instead of crocheting stars. Crocheted stars create a softer, handmade look; store-bought ones add shimmer.
— Hanging Chain & Bead Spacer (Make many as needed) :
Round 1 :
Ch 40 (or desired length for drop), sl st into 2nd ch from hook and all across to make a firm crochet chain. Fasten off leaving long tail for attachment.
Info :
Shorter chains (20–30 ch) look better closer to the top; longer chains (40–60 ch) give a longer dramatic drop. Use consistent lengths for a balanced look or vary for a whimsical cascade like the sample.
Round 2 :
To create a tiny beaded spacer similar to the little bobble chains in the photo: ch 6, *sl st into the first ch to form a mini loop*, repeat to create small bead loops. These mini loops act as connectors between star/snowflake and main chain.
Info :
Alternatively use small pearl beads threaded onto your cord for instant bead effects. Secure beads by knotting cord immediately above and below beads so they stay put.
— Assembly Preparation :
Info :
Lay your long spiral tube on a flat surface. Determine positions for hanging motifs by draping the tube into a spiral on a cylindrical object (such as a narrow vase or rolled towel) to approximate the final helix. Space snowflakes approximately 12–18 cm vertically apart measured along the spiral, and silver stars alternated between snowflakes so they dangle between arms.
Info :
Decide top and bottom orientation. The top will have a hanging loop attached to the tube end; the bottom can have a small decorative tassel, star, or weighted bead to keep the spiral hanging straight.
— Attaching Hanging Chains to the Spiral Tube :
Round 1 :
Using the long tail left at the top end of your tube, create a hanging loop of ch 8–12 and sl st back into the top of the tube; weave tail through the inside of the tube and secure with knots. This forms the main ceiling loop.
Round 2 :
At each marked position along the tube where a motif will hang: with yarn tail and needle, insert tapestry needle through the tube at the spot, pull through a 40-ch hanging chain tail (from previous section) and secure by stitching the tail into the interior of the tube for 3–4 cm. Tie an internal knot to secure and weave in the tail to hide extra length.
Info :
Stitching the hanging cord into the interior of the tube rather than tying around the outside keeps the exterior clean and maintains the smooth spiral look as in the sample photo. Use several stitches to lock each cord in place so ornaments remain secure.
Round 3 :
Attach a snowflake or star to the end of each hanging chain. For snowflakes: thread the long tail from the motif center through the last stitch of the chain and secure with hidden stitches. For purchased stars: tie the star's small loop securely to the chain and add a discreet drop of fabric glue if desired.
Info :
Alternate snowflake and star placement so visual weight balances along the spiral. Use a small level or visually check from several angles to ensure symmetry.
— Stiffening & Shaping the Spiral :
Info :
To hold the helix shape, the crocheted tube can be stiffened using fabric starch or diluted PVA/water mixture. Spray evenly and gently shape over a cylindrical former (a 6–8 cm diameter rod, rolled cardboard tube, or narrow vase). For a permanent curve, insert a flexible wire or plastic support inside the tube before stiffening and then bend the support into a spiral.
Round 1 :
Place the tube over your chosen former and wrap it into a loose spiral. Pin into place on a blocking mat using rust-proof pins so the spiral spacing is even (approx 4–5 cm between turns for the pictured sample). Allow to dry completely (12–24 hours) with stiffener.
Info :
If you inserted a wire, be sure to hide the ends inside the tube and wrap them with tape to avoid sharp points. The internal wire also helps the spiral maintain its shape when hung and prevents sagging over time.
— Final Attachment & Weighting :
Round 1 :
Once the tube is fully dry and stiff, remove pins and slide the spiral off the former. Reposition hanging chains if the stiffening shifted them. Add small weights at the bottom of a few chains (tiny metal washers wrapped in felt and sewn) to help motifs hang straight.
Info :
If your spiral tends to spin when hanging, attach a small ribbon tether between two opposite points on adjacent turns to reduce rotation while keeping the overall look balanced.
— Optional Decorative Edging & Final Touches :
Round 1 :
For a scalloped edge along the spiral, slip back onto the tube and work small shell stitches across the exposed outer ridge: (sc, ch2, 3 dc, ch2, sc) every 6 stitches to create a scallop. Do this carefully so you do not alter the tube stiffness significantly.
Info :
Add delicate embroidery of silver thread along a single edge if you desire more shine. Keep embellishments lightweight so they do not distort the helix balance.
— Care & Storage :
Info :
Store flat or on a wide tube to prevent crushing the spiral. Light dusting and occasional reshaping with hand-held steamer set to very low will freshen the structure. Avoid heavy humidity if starch stiffener was used; store in a dry place.
Final Notes :
This pattern gives you a strong structural approach: a tubular crocheted spiral with many repeat rounds to create length, paired with a concise snowflake and star motif recipe. Customize spacing, length, and motif quantity to suit your display space. For a dense garland use motifs every 8–10 cm; for airy display use every 12–18 cm.
This spiral garland brings winter indoors with delicate crocheted snowflakes and twinkling stars. The process of crocheting a long tubular spiral and seeing it shaped into a perfect hanging helix feels wonderfully satisfying. Each motif you attach adds personality and shimmer, creating a handmade heirloom you can reuse year after year. 🎄✨ It’s a joyful project that turns simple yarn into a dramatic seasonal centerpiece. Happy hooking and enjoy the sparkle! ❄️