🧢 Beautiful ✨ Detailed πŸ’ Adorable

Adorable Easter Bunny Amigurumi Pattern

Adorable Easter Bunny Amigurumi Pattern
4.0β˜… Rating
8-10 Hours Time Needed
2.0K Made This
βœ‚οΈ

Intermediate Level

Ideal for those with basic knitting experience, featuring slightly more advanced stitches and techniques to expand your skills.

⏱️

All-Day Adventure

Requires 8-10 hours, ideal for a full day of immersive knitting.

🧸

Cute Companion

An adorable friend to cherish, handcrafted with love to bring comfort and joy for years to come.

About This Adorable Easter Bunny Amigurumi Pattern

This delightful Easter bunny pattern combines classic amigurumi techniques with charming details that bring personality to life. The 35cm tall bunny features a lovely combination of yellow and white chenille yarn, creating a soft and huggable texture that's perfect for cuddling. With its sweet facial features, pink inner ears, and purple bow accent, this bunny captures the essence of springtime joy. The pattern includes comprehensive instructions for creating each component, from the rounded head to the fluffy tail.

Adorable Easter Bunny Amigurumi Pattern crochet pattern - detailed view of completed project

What makes this pattern special is the attention to detail in the facial features and accessories. The felt eyes and carefully crafted mouth give the bunny a gentle, friendly expression that appeals to both children and adults.

Why You'll Love This Adorable Easter Bunny Amigurumi Pattern

I absolutely love how this pattern creates such a perfect balance between simplicity and charm. The way the yellow and white colors complement each other gives the bunny a classic, timeless appeal that never goes out of style. I'm particularly fond of how the chenille yarn creates that irresistibly soft texture that makes you want to squeeze and cuddle the finished piece. The size is just right too - big enough to be impressive but not so large that it becomes overwhelming to work on.

Adorable Easter Bunny Amigurumi Pattern step 1 - construction progress Adorable Easter Bunny Amigurumi Pattern step 2 - assembly progress Adorable Easter Bunny Amigurumi Pattern step 3 - details and accessories Adorable Easter Bunny Amigurumi Pattern step 4 - final assembly and finishing

Switch Things Up

I love experimenting with different color combinations for this adorable bunny pattern! While the classic yellow and white version is absolutely charming, I've had wonderful results creating seasonal variations. Try using soft pastels like lavender and cream for a dreamy spring look, or go bold with bright pink and white for a more contemporary feel. I've also made versions using variegated yarn that creates beautiful color transitions throughout the body.

For special occasions, I like to customize the bow color to match the theme - red for Valentine's Day, green for Christmas, or even rainbow colors for a playful twist. The belly piece is another great place to add personal touches - I've embroidered initials or small hearts on some of my bunnies to make them extra special gifts.

Don't be afraid to adjust the ear positioning slightly to give your bunny different personalities - more upright ears create an alert, curious expression, while slightly droopy ears give a more relaxed, sleepy appearance. These small modifications make each bunny unique and full of character!

Common Mistakes & How to Fix Them

βœ— Forgetting to stuff firmly enough during construction can result in a floppy, shapeless bunny that won't hold its form properly over time. βœ— Not maintaining consistent tension when changing colors between yellow and white sections can create uneven stitches that affect the overall appearance. βœ— Placing the facial features incorrectly or asymmetrically can completely change the bunny's expression and make it look unbalanced or wonky. βœ— Overstuffing the head or body can distort the shape and make it difficult to attach other pieces securely to the main body.

Adorable Easter Bunny Amigurumi Pattern

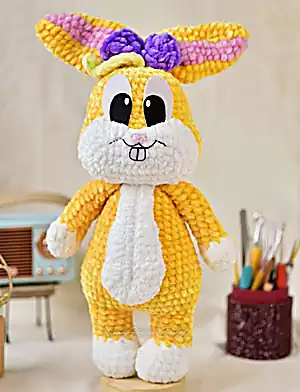
Create your own cuddly Easter companion with this charming bunny amigurumi pattern! Standing at 35cm tall, this sweet bunny features beautiful yellow chenille yarn with a white belly, adorable pink inner ears, and a cute purple bow. Perfect for Easter gifts, nursery decor, or as a beloved toy for children and adults alike. The pattern includes detailed step-by-step instructions for creating the head, body, arms, legs, ears, tail, and all the adorable accessories that make this bunny special.

Intermediate 8-10 Hours

Materials Needed for Adorable Easter Bunny Amigurumi Pattern

β€” Main Fabric

  • 01
    Chenille yarn in yellow color for main body and head
  • 02
    Chenille yarn in white color for belly, inner ears, and facial area
  • 03
    Cotton yarn in pink for nose details
  • 04
    Purple yarn for decorative bow accent

β€” Tools Required

  • 01
    Crochet hook size 6mm
  • 02
    Crochet hook size 2.5mm (for nose details)
  • 03
    Sewing needle
  • 04
    Scissors
  • 05
    Fabric glue or hot glue gun
  • 06
    Fiberfill stuffing
  • 07
    Black felt for eyes
  • 08
    White felt for eyes
  • 09
    Stitch markers

Progress Tracker

0% Complete

β€” Arms (make 2) :

Round 1 :

Start with white yarn, 6 sc

Round 2 :

6 inc (12)

Round 3 :

12 sc

Round 4 :

5 sc, 1 bobble, 6 sc

Info :

Change to yellow color yarn

Round 5 :

(sc, dec) * 4 times (8)

Round 6-7 :

8 sc

Round 8 :

3 sc, inc, 4 sc (9)

Round 9-11 :

9 sc

Round 12 :

4 sc, inc, 4 sc (10)

Round 13-15 :

10 sc

Info :

Stuff firmly, cut yarn and leave long tail for sewing

β€” Legs (make 2) and Body :

Round 1 :

Start with white yarn. Chain 5: start to crochet on 2nd chain from hook: 3 sc, 4 sc in same stitch, continue on other side: 2 sc, inc (11)

Round 2 :

inc, 2 sc, 4 inc, 2 sc, 2 inc (18)

Round 3-5 :

18 sc

Round 6 :

4 sc, 5 dec, 4 sc (13)

Info :

Change to yellow color

Round 7 :

6 sc, dec, 5 sc (12)

Round 8-11 :

12 sc

Info :

Stuff firmly, cut yarn. Do 2nd leg same way, do not cut yarn, chain 2 and join legs together

β€” Body :

Round 12 :

12 sc on 1st leg, 2 sc on chain, 12 sc on 2nd leg, 2 sc on chain (28)

Round 13 :

(3 sc, inc) * 7 times (35)

Round 14 :

(4 sc, inc) * 7 times (42)

Round 16 :

(inc, 2 sc) * 3 times, 24 sc, (inc, 2 sc) * 3 times (48)

Round 16-18 :

48 sc

Round 19 :

(6 sc, dec) * 6 times (42)

Round 20 :

(5 sc, dec) * 6 times (36)

Round 21 :

(4 sc, dec) * 6 times (30)

Round 22 :

(3 sc, dec) * 6 times (24)

Round 23 :

(2 sc, dec) * 6 times (18)

Round 24-26 :

18 sc

Round 27 :

4 sc on body, 5 sc through body and arm 1, 4 sc on body, 5 sc through body and arm 2

Round 28-30 :

18 sc

Round 31 :

(sc, dec) * 6 times (12)

Round 32 :

12 sc

Round 33 :

12 sc

Info :

Stuff firmly, do not cut yarn, continue to crochet head

β€” Head :

Round 34 :

12 inc (24)

Round 35 :

(sc, inc) * 12 times (36)

Round 36 :

(2 sc, inc) * 12 times (48)

Round 37 :

(3 sc, inc) * 12 times (60)

Round 38-40 :

60 sc, continue to middle of head back (9 sc), place marker for new starting point

Round 41 :

5 sc, 10 dec, 10 sc, 10 dec, 5 sc (40)

Round 42 :

(3 sc, dec) * 8 times (32)

Round 43-49 :

32 sc, stuff as you go

Round 50 :

(2 sc, dec) * 8 times (24)

Round 51 :

(sc, dec) * 8 times (16)

Round 52 :

8 dec (8)

Info :

Stuff firmly, cut yarn and weave end
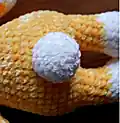
β€” Tail :

Round 1 :

Use white yarn, 6 sc in MR (6)

Round 2 :

6 inc (12)

Round 3 :

(sc, inc) * 6 times (18)

Round 4-5 :

18 sc

Round 6 :

(sc, dec) * 6 times (12)

Info :

Fasten off and leave long tail for sewing

β€” Ears :

Round 1 :

Yellow: 5 sc in MR (5)

Round 2 :

2 inc, inc, 2 inc (10)

Round 3 :

4 sc, 2 sc, 4 sc (10)

Round 4 :

(sc, inc) * 2 times, sc, inc, (sc, inc) * 2 times (15)

Round 5-9 :

6 sc, 3 sc, 6 sc (15)

Round 10 :

(2 sc, inc) * 2 times, 2 sc, inc, (2 sc, inc) * 2 times (20)

Round 11-17 :

8 sc, 4 sc, 8 sc (20)

Round 18 :

20 sc

Info :

Fold in half, cut yarn and leave long tail for sewing

β€” Belly :

Round 1 :

Use white yarn. Chain 14, start on 2nd chain from hook: 12 sc, 5 sc in same stitch, 12 sc on other side. Chain 1 and turn (27)

Round 2 :

6 sc, 5 hdc, dc, 5 dc inc, dc, 5 hdc, 6 sc (34)

Info :

Cut yarn and leave long tail for sewing

β€” Mouth :

Round 1 :

Use white yarn. Chain 11, start on 2nd chain from hook: inc, 8 sc, 4 sc in same stitch, 8 sc on other side, inc, slst (24)

Round 2 :

Chain 1, 2 inc, 8 sc, 4 inc, 8 sc, 2 inc, slst (32)

Round 3 :

Chain 1, (sc, inc) * 2 times, 8 sc, (sc inc) * 4 times, 8 sc, (sc, inc) * 2 times, slst (40)

Round 4 :

Chain 2, 5 dc, 2 hdc, 2 sc, 2 slst, 2 sc, 2 hdc, 7 dc, 2 hdc, 12 slst, 2 hdc, 2 dc (40)

Info :

Cut yarn and leave long tail for sewing

β€” Nose :

Round 1 :

Use cotton yarn in pink and 2.5mm hook. 4 sc in MR, close hole and cut yarn. Leave long tail for sewing

Info :

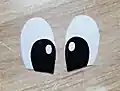
Use black and white felt to cut the eyes

β€” Hair :

Instructions :

Use yellow yarn. Chain 10: start on 2nd chain from hook: 2 slst, 2 sc, 2 hdc, 3 dc, slst and fasten off. Leave long tail for sewing

β€” Bow :

Instructions :

Use purple yarn. Chain 5: 4 treble crochet on 1st chain, chain 4 and slst into 1st chain, chain 4 + 4 treble crochet on 1st chain, chain 4 and slst. Cut yarn and leave long tail to wrap around middle of bow

Assembly Instructions

  • Sew the belly on the body over rounds 16-33, ensuring proper alignment and secure attachment
  • Attach the ears to the head on rounds 47-51, positioning them symmetrically for balanced appearance
  • Sew the bow next to the ears and attach the hair piece close to the bow for decorative accent
  • Sew the mouth to the head over rounds 35-42, centering it properly for correct facial expression
  • Attach the tail to the back of body over rounds 15-18, securing firmly for durability
  • Use hot glue to attach the felt eyes on the face, ensuring they are level and properly spaced

Important Notes

  • πŸ’‘This pattern uses US crochet terminology and works in spiral rounds without slip stitches unless stated
  • πŸ’‘Use yarn under technique for single stitches to create neat, even stitches when stuffing
  • πŸ’‘Do not stuff too tightly as this can distort the shape and make assembly difficult
  • πŸ’‘You can use any type of yarn with appropriate hook size to create different sizes
  • πŸ’‘Use stitch markers to track your rounds, especially during color changes between yellow and white
  • πŸ’‘Chenille yarn creates a soft, plush texture but requires gentle handling during construction

This enchanting Easter bunny pattern brings springtime joy into your home with its perfect blend of classic charm and modern appeal. The combination of soft chenille yarn in cheerful yellow and crisp white creates a delightful texture that's irresistible to touch. With its sweet facial features, perky ears, and adorable purple bow, this 35cm tall bunny becomes an instant beloved companion for Easter celebrations or year-round cuddles. The detailed instructions guide you through every step, making it a rewarding project that results in a treasured keepsake. 🐰 Happy crocheting! 🧢✨

You ask,

we answer.

FAQs

What size will the finished bunny be?

The completed bunny stands approximately 35cm (about 14 inches) tall, making it the perfect size for cuddling and display.

Can I use different yarn weights for this pattern?

Yes! You can use any yarn weight with the appropriate hook size. Using lighter weight yarn will create a smaller bunny, while heavier yarn will make it larger.

Is chenille yarn required or can I substitute?

While chenille creates the soft, plush texture shown, you can substitute with any yarn of similar weight. Cotton or acrylic yarn work well as alternatives.

How do I attach the felt eyes securely?

The pattern recommends using hot glue for secure attachment. Make sure the felt pieces are clean and dry, and position them carefully before applying glue.

What's the best way to stuff the bunny for proper shape?

Stuff firmly but not too tightly. Use small amounts of fiberfill at a time and distribute evenly to maintain the bunny's shape without distorting the stitches.