🧢 Beautiful ✨ Detailed πŸ’ Adorable

Adorable Pig Amigurumi Pattern

Adorable Pig Amigurumi Pattern
4.2β˜… Rating
6-8 Hours Time Needed
3.9K Made This
βœ‚οΈ

Intermediate Level

Ideal for those with basic knitting experience, featuring slightly more advanced stitches and techniques to expand your skills.

⏱️

Weekend Treat

Takes 5-7 hours, making it an enjoyable project to finish over a couple of days.

🧸

Cute Companion

An adorable friend to cherish, handcrafted with love to bring comfort and joy for years to come.

About This Adorable Pig Amigurumi Pattern

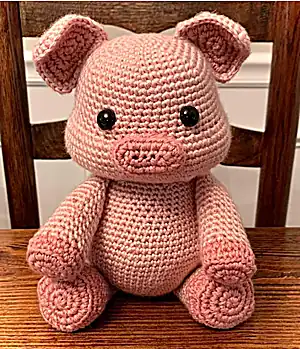
This delightful pig amigurumi pattern creates a charming farmyard friend that's perfect for cuddling and display. The pattern features detailed construction with separate pieces for the head, body, arms, legs, ears, nose, and curly tail. With its sweet expression created by safety eyes and a perfectly shaped snout, this little pig captures all the endearing qualities that make pigs such beloved animals. The two-toned pink coloring adds depth and dimension to the finished piece.

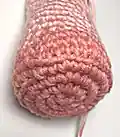
Adorable Pig Amigurumi Pattern crochet pattern - detailed view of completed project

Working in continuous rounds with clear stitch counts, this pattern builds your amigurumi skills while creating a treasured keepsake. The detailed ear construction with layered pink tones gives this pig its distinctive and realistic appearance.

Why You'll Love This Adorable Pig Amigurumi Pattern

I absolutely love how this pig pattern combines simplicity with sophistication - the basic stitches create such an expressive and endearing character! The way the ears are constructed with two different shades of pink gives incredible depth and realism that makes this little pig come alive. I'm particularly fond of the detailed shaping techniques that create those perfect chubby proportions and the adorable curly tail that adds such personality. The clear instructions make it enjoyable to work through each section, and watching this sweet pig take shape round by round is incredibly satisfying.

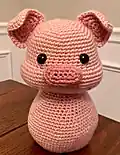
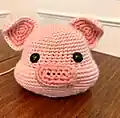
Adorable Pig Amigurumi Pattern step 1 - construction progress Adorable Pig Amigurumi Pattern step 2 - assembly progress Adorable Pig Amigurumi Pattern step 3 - details and accessories Adorable Pig Amigurumi Pattern step 4 - final assembly and finishing

Switch Things Up

I love experimenting with different color combinations when making this pig pattern! Instead of the traditional pink, try creating a spotted pig using white as the main color with brown or black spots added after completion. You could also make a more realistic pig by using tan or beige tones, or go completely whimsical with pastel rainbow colors for a unicorn-inspired pig.

For a seasonal twist, consider making a winter pig with a tiny crocheted scarf or hat, or add small embroidered flowers for a spring version. The ear technique in this pattern works beautifully with contrasting colors - imagine a pig with bright blue outer ears and soft cream inner ears for a truly unique look!

Another fun variation is adjusting the size by using different hook sizes and yarn weights. A tiny version using fingering weight yarn and a steel hook creates an adorable miniature pig perfect for keychains, while bulky yarn creates a huge cuddly companion. You could even add wire to the limbs to make your pig poseable for photos and play.

Common Mistakes & How to Fix Them

βœ— Forgetting to use stitch markers can cause you to lose track of rounds, especially during the complex head shaping sections with multiple stitch counts βœ— Overstuffing the limbs makes them too rigid and prevents proper positioning - stuff lightly and leave the top sections unstuffed as instructed βœ— Placing safety eyes incorrectly between rows 14-15 can throw off the entire facial expression - measure 7 stitches apart carefully before securing βœ— Rushing through the ear assembly without properly aligning the light and dark pink pieces results in uneven or misshapen ears that affect the overall appearance

Adorable Pig Amigurumi Pattern

Create your very own cuddly pink pig companion with this delightful amigurumi pattern! This charming little piggy features adorable floppy ears, a sweet snout, and the perfect chubby proportions that make it irresistibly huggable. Perfect for gifting to loved ones or adding a touch of farmyard charm to your home, this pattern guides you through creating a timeless toy that will bring smiles for years to come. With clear step-by-step instructions and helpful photos, you'll enjoy every stitch of bringing this sweet pig to life.

Intermediate 6-8 Hours

Materials Needed for Adorable Pig Amigurumi Pattern

β€” Main Fabric

  • 01
    Light pink yarn (weight 3 cotton yarn recommended)
  • 02
    Dark pink yarn (weight 3 cotton yarn recommended)
  • 03
    Lightweight cotton yarn in pink tones for best results

β€” Tools Required

  • 01
    Size B crochet hook (2.25mm)
  • 02
    Large needle for sewing
  • 03
    Two 12mm black safety eyes
  • 04
    Poly-Fil polyester fiberfill stuffing
  • 05
    Stitch markers or safety pins
  • 06
    Scissors
  • 07
    Yarn needle for finishing

Progress Tracker

0% Complete

β€” Head :

Row 1 :

6 sc in MR

Row 2 :

6 inc (12)

Row 3 :

[ 1 sc, inc ] x 6 (18)

Row 4 :

[ 2 sc, inc ] x 6 (24)

Row 5 :

[ 3 sc, inc ] x 6 (30)

Row 6 :

[ 4 sc, inc ] x 6 (36)

Row 7 :

[ 5 sc, inc ] x 6 (42)

Row 8 :

[ 6 sc, inc ] x 6 (48)

Row 9 :

[ 7 sc, inc ] x 6 (54)

Row 10-17 :

54 sc

Row 18 :

14 inc in front loop, 4 sc, 14 inc in front loop, 22 sc (82)

Row 19-20 :

82 sc

Row 21 :

60 sc, dec, 18 sc, dec (80)

Row 22 :

60 sc, dec, 16 sc, dec (78)

Row 23 :

60 sc, dec, 14 sc, dec (76)

Row 24 :

60 sc, dec, 12 sc, dec (74)

Row 25 :

60 sc, dec, 10 sc, dec (72)

Row 26 :

[ 10 sc, dec ] x 6 (66)

Row 27 :

[ 2 sc, dec ] x 5, sc 12, [ dec, 2 sc ] x 8, dec (52)

Row 28 :

[ sc, dec ] x 6, sc 6, [ dec, sc ] x 8, dec x 2 (36)

Row 29 :

[ 4 sc, dec ] x 6 (30)

Row 30 :

[ 3 sc, dec ] x 6 (24)

Info :

Fasten the thread. Leave a long tail for sewing. Stuff the head tightly.

Info :

Do not sew the head to the body until the eyes have been fastened on securely.

Info :

Place the black safety eyes between rows 14 and 15. The eyes should be about 7 stitches apart. Fasten the back of the safety eyes through the head securely.

β€” Nose :

Chain 7 :

Work with dark pink yarn

Row 1 :

Starting in the second chain from hook, sc 12 all around the foundation chain (6 sc on one side, then continue to other side and sc 6 more). There will be two stitches in each chain when finished.

Row 2 :

12 inc (24)

Row 3 :

24 sc in back loop only

Row 4 :

dec, 2 sc, dec, 3 sc, dec, 2 sc, dec, 3 sc, dec, 4 sc (19)

Info :

Fasten the thread. Leave a long tail for sewing. Place a small amount of stuffing in the inside of the nose. Sew between and just under the eyes on rows 18-22 of the head.

β€” Ears Part 1 (x2) :

Row 1 :

Work with dark pink yarn. 3 sc in MR

Row 2 :

[4 sc in the next stitch] x 3 times. (12)

Row 3 :

2 sc, [4 sc in next stitch, 3 sc] x 2, 4 sc in next stitch, sc (21)

Row 4 :

4 sc, [4 sc in next stitch, 6 sc] x 2, 4 sc in next stitch, 2 sc (30)

Info :

Fasten the thread.

β€” Ears Part 2 (x2) :

Row 1 :

Work with light pink yarn. 3 sc in MR

Row 2 :

[4 sc in next stitch] x 3 times. (12)

Row 3 :

2 sc, [4 sc in next stitch, 3 sc] x 2, 4 sc in next stitch, sc (21)

Row 4 :

4 sc, [4 sc in next stitch, 6 sc] x 2, 4 sc in next stitch, 2 sc (30)

Row 5 :

6 sc, [4 sc in next stitch, 9 sc] x 2, 4 sc in next stitch, 3 sc (39)

Info :

After you make one light pink ear, leave the thread uncut and continue to crochet the light pink and a dark pink ear together using the instructions below.

Info :

Take the dark pink triangle and place it over the light pink triangle. Sc through both triangles all the way around. Because the light pink has more stitches (39) than the dark pink (30) you will need to skip three stitches on each side of the light pink triangle.

Info :

Sew the ears on the head between rows 7 and 13. Let there be about 12 stitches between the ears on row 7. Leave about 4 stitches of the bottom of the ear unattached to give it an "earlobe" look. Bend the top of the ear to give it a folded look.

β€” Body :

Row 1 :

Work with light pink yarn. 6 sc in MR

Row 2 :

6 inc (12)

Row 3 :

[ 1 sc, inc ] x 6 (18)

Row 4 :

[ 2 sc, inc ] x 6 (24)

Row 5 :

[ 3 sc, inc ] x 6 (30)

Row 6 :

[ 4 sc, inc ] x 6 (36)

Row 7 :

[ 5 sc, inc ] x 6 (42)

Row 8 :

[ 6 sc, inc ] x 6 (48)

Row 9 :

[ 7 sc, inc ] x 6 (54)

Row 10 :

[ 8 sc, inc ] x 6 (60)

Row 11 :

[ 9 sc, inc ] x 6 (66)

Row 12 :

[ 10 sc, inc ] x 6 (72)

Row 13-14 :

72 sc

Row 15 :

6 sc, inc, [ 11 sc, inc ] x 5, 5 sc (78)

Row 16-21 :

78 sc

Row 22 :

[ 11 sc, dec ] x 6 (72)

Row 23 :

[ 10 sc, dec ] x 6 (66)

Row 24 :

66 sc

Row 25 :

5 sc, dec, [ 9 sc, dec ] x 5, 4 sc (60)

Row 26 :

[ 8 sc, dec ] x 6 (54)

Row 27 :

4 sc, dec, [ 7 sc, dec ] x 5, 3 sc (48)

Row 28 :

48 sc

Row 29 :

[ 6 sc, dec ] x 6 (42)

Row 30-32 :

42 sc

Row 33 :

[ 5 sc, dec ] x 6 (36)

Row 34 :

[ 4 sc, dec ] x 6 (30)

Row 35 :

[ 3 sc, dec ] x 6 (24)

Info :

Fasten the thread securely and hide the tail in the body. Stuff the body tightly. Sew the head onto the body.

β€” Arms (x2) :

Row 1 :

Start with dark pink yarn. 6 sc in MR

Row 2 :

6 inc (12)

Row 3 :

12 inc (24)

Row 4 :

24 sc in back loop only

Row 5 :

[ 4 sc, dec ] x 4 (20)

Info :

Switch to light pink yarn. For a seamless transition, put the hook into the next loop. Wrap the light pink thread around the hook and pull through. Wrap the light pink thread around the hook again and pull through the light pink and dark pink loops to finish the first stitch. Continue in light pink.

Row 6 :

[ 3 sc, dec ] x 4 (16)

Row 7-11 :

16 sc

Row 12 :

[ 6 sc, dec ] x 2 (14)

Row 13-17 :

14 sc

Row 18 :

[ 5 sc, dec ] x 2 (12)

Row 19-21 :

12 sc

Info :

Fasten the thread. Leave a long tail for sewing. Stuff lightly and do not stuff all the way. Leave the top 4 rows of the arm empty of stuffing. Sew where the head and body of the pig meet at a 45 degree angle. Leave about 10 stitches in between the arms at the top, front side of the pig.

β€” Legs (x2) :

Row 1 :

Start with dark pink yarn. 6 sc in MR

Row 2 :

6 inc (12)

Row 3 :

12 inc (24)

Row 4 :

[ sc, inc ] x 12 (36)

Row 5 :

36 sc back loop only

Row 6 :

[ 4 sc, dec ] x 6 (30)

Row 7 :

[ 3 sc, dec ] x 6 (24)

Info :

Switch to light pink yarn. For a seamless transition, put the hook into the next loop. Wrap the light pink thread around the hook and pull through. Wrap the light pink thread around the hook again and pull through the light pink and dark pink loops to finish the first stitch. Continue in light pink.

Row 8 :

[ 10 sc, dec ] x 2 (22)

Row 9-10 :

22 sc

Row 11 :

[ 9 sc, dec ] x 2 (20)

Row 12-13 :

20 sc

Row 14 :

[ 8 sc, dec ] x 2 (18)

Row 15-19 :

18 sc

Info :

Leave a long tail for sewing. Stuff lightly and do not stuff all the way. Leave the top 4 rows of the leg empty of stuffing. Sew on on the bottom of the pig.

β€” Tail :

Chain 16 :

Start with dark pink yarn

Row 1 :

Starting in the second chain from hook, 4 sc in each chain for the next 13 chains. Then make 2 sc in the second to last chain, and then sl st in the last chain and tie off.

Info :

You can leave a long tail to sew it onto the pig there. I personally like that end of the tail to be the end that pokes out. I fastened off the thread and then sewed the other end of the tail to the pig. It is up to you!

Info :

Sew on rows 11-13 on the back of the pig.

Assembly Instructions

  • Attach safety eyes between rows 14-15 of the head, spacing them 7 stitches apart, and secure the backs tightly before attaching head to body
  • Stuff the nose lightly and sew it between and just under the eyes on rows 18-22 of the head
  • Create ears by joining the light pink and dark pink triangles together, then sew to head between rows 7-13 with 12 stitches between ears
  • Sew the completed head onto the body after both pieces are fully stuffed
  • Attach arms at a 45-degree angle where the head and body meet, leaving 10 stitches between arms on the front
  • Sew legs to the bottom of the pig, ensuring they're positioned for stability when sitting
  • Attach the curly tail to rows 11-13 on the back of the pig, choosing which end you prefer to have showing

Important Notes

  • πŸ’‘Work in continuous spiral rounds and use stitch markers to track the beginning of each round
  • πŸ’‘Stuff all pieces firmly but not overly tight to maintain proper shape and proportions
  • πŸ’‘Leave the top 4 rows of arms and legs unstuffed to allow for better positioning when sewing
  • πŸ’‘For children under 3, embroider eyes instead of using safety eyes to prevent choking hazards
  • πŸ’‘Use lightweight cotton yarn (weight 3) for best results and proper proportions
  • πŸ’‘Take time with the ear assembly as the two-toned effect is crucial for the pig's character
  • πŸ’‘Pin all pieces in place before final sewing to ensure proper positioning and symmetry

This adorable pig amigurumi pattern brings farmyard charm straight to your crochet hook! With its sweet expression, floppy ears, and perfectly round body, this little piggy is designed to become a treasured companion for children and adults alike. The pattern combines simple techniques with thoughtful details like two-toned ears and a curly tail that give this pig incredible personality. Whether you're creating a gift for someone special or adding to your own collection, this charming pig will surely bring smiles and warm hearts wherever it goes. 🐷 Happy crocheting! 🧢✨

You ask,

we answer.

FAQs

What yarn weight should I use for this pig pattern?

The pattern recommends using lightweight cotton yarn (weight 3) for best results. Using heavier weight yarn can result in skewed proportions and holes in your work.

Can I make this pig safe for small children?

Yes! For children under 3, embroider the eyes with yarn or thread instead of using safety eyes, which can be a choking hazard.

How do I get the ears to look right?

The key is carefully joining the light and dark pink triangles. Skip 3 stitches on each side of the light pink triangle to accommodate the different stitch counts, and leave the bottom 4 stitches unattached for that realistic 'earlobe' look.

Why should I leave parts of the limbs unstuffed?

Leaving the top 4 rows of arms and legs unstuffed allows for better positioning and a more natural look when sewing them to the body.

What's the best way to change colors between pink shades?

For seamless color transitions, put your hook into the next loop, wrap the new color around the hook, pull through, then wrap again and pull through both the new color and old color loops to complete the stitch.