๐Ÿงถ Beautiful โœจ Detailed ๐Ÿ’ Adorable

Baby Deer Amigurumi Pattern

Baby Deer Amigurumi Pattern
4.8โ˜… Rating
5-7 Hours Time Needed
2.4K Made This
โœ‚๏ธ

Intermediate Level

Ideal for those with basic crochet experience, featuring slightly more advanced stitches and techniques to expand your skills.

โฑ๏ธ

Weekend Treat

Takes 5-7 hours, making it an enjoyable project to finish over a couple of days.

๐Ÿงธ

Cute Companion

An adorable friend to cherish, handcrafted with love to bring comfort and joy for years to come.

About This Baby Deer Amigurumi Pattern

This pattern creates a small, adorable baby deer amigurumi with a removable-looking sweater detail and embroidered accents. It uses simple single crochet shaping and basic increases and decreases to sculpt the head, body, limbs, ears and horns. Clear round-by-round instructions and placement notes help you assemble the toy accurately.

Baby Deer Amigurumi Pattern crochet pattern - detailed view of completed project

Includes a materials list, abbreviations, and step-by-step assembly guidance to make finishing easy. The finished doll measures approximately 15 cm when using the recommended yarn and hook size.

Why You'll Love This Baby Deer Amigurumi Pattern

I absolutely love this pattern because it balances simplicity with charming details that bring the deer to life. I enjoy how the little sweater and embroidered accents add personality without complicated techniques. The shaping is satisfying โ€” you can see the form grow as you work each round. I also love that it is compact and quick to make, perfect for gifts or a delightful decoration.

Baby Deer Amigurumi Pattern step 1 - construction progress Baby Deer Amigurumi Pattern step 2 - assembly progress Baby Deer Amigurumi Pattern step 3 - details and accessories Baby Deer Amigurumi Pattern step 4 - final assembly and finishing

Switch Things Up

I love to switch the sweater color to pastel shades for a softer, baby-inspired look; try pale pink or mint for a different mood.

I sometimes change the yarn weight and hook size to create a tiny keychain version or a larger cuddle-sized deer; experiment with DK versus sport weight yarn.

I add different eye types depending on the recipient โ€” safety eyes for durability, or embroidered eyes for a fully baby-safe toy.

Try embroidering little flowers or stars on the sweater instead of the green V-stitches to customize the motif.

For a festive twist, add a small crocheted scarf or a felt bow tied under the chin for seasonal variations.

I often use a tiny bell on the collar as shown, or swap it for a wooden bead for a rustic look.

Want a sleepy deer? Use slanted embroidered eyelids or shorter eye placement for a gentle, dozy expression.

Consider adding wire to the horns or limbs for posability if you want the deer to hold a small prop or stand in a dynamic pose.

Change the nose color or size to create characters โ€” a brown or pink nose offers a different personality to the face.

You can make a whole family by varying sizes and colors; siblings or holiday sets make lovely handmade gifts.

Common Mistakes & How to Fix Them

โœ— Skipping the instruction to stuff pieces as you go can cause difficult shaping later; stuff gradually during the rounds to achieve smooth, even shaping. โœ— Not changing colors neatly at the specified round leads to messy joins; change color at the end of the stated round and carry or secure yarn tails before continuing. โœ— Forgetting to place the eyes at the recommended rows results in mismatched facial placement; attach the safety eyes between rows 43 and 44, nine stitches apart, as indicated for a balanced face. โœ— Neglecting stitch counts after increases or decreases causes uneven shaping; count stitches after each shaping round and use markers to track the start of rounds. โœ— Pulling the stuffing too tight will distort the overall shape; stuff firmly but gently, distributing fiberfill evenly for a rounded finish.

Baby Deer Amigurumi Pattern

Make a sweet baby deer amigurumi with this complete crochet pattern. You will be guided through every round, color change, and assembly step so you can create a cuddly handmade companion. The pattern includes materials, abbreviations, and clear placement notes to help you finish a lovely 15 cm deer. Perfect for gifting or decorating your home with a charming handmade toy.

Intermediate 5-7 Hours

Materials Needed for Baby Deer Amigurumi Pattern

โ€” Main Fabric

  • 01
    YarnArt Jeans brand yarn (used in project) - DK/light-worsted weight recommended
  • 02
    Beige yarn for body and head - small amount (main color)
  • 03
    White yarn for muzzle and nose base - small amount
  • 04
    Brown yarn for horns and eyebrow details - small amount
  • 05
    Red yarn for sweater and small nose circle - small amount
  • 06
    Green yarn for embroidered accents on sweater - small amount

โ€” Tools Required

  • 01
    Crochet hook size 1.80-2.00 mm
  • 02
    Yarn needle for sewing and embroidery
  • 03
    8 mm safety eyes (2 pieces)
  • 04
    Scissors
  • 05
    Polyester fiberfill (fiberfill)
  • 06
    Stitch markers (optional)
  • 07
    Little bell for collar
  • 08
    Tapestry needle

Progress Tracker

0% Complete

โ€” Body :

Info :

Start with beige color.

Round 1 :

Round 1. 15 ch, starking from 2nd ch inc, 12 sc, 3 sc in 1 stitch (work on the other side of tihe chain) 13 sc. (30)

Round 2 :

Round 2. 2 inc, 12 sc, 3 inc, 12 sc, inc. (36)

Round 3 :

Round 3. (sc, inc) 2 times, 13 sc, (inc, inc) 3 times, 12 sc, inc. (42)

Round 4 :

Round 4. (2 sc, inc) 2 times, 14 sc, (inc, 2 sc) 3 times,12 sc, inc. (48)

Round 5 :

Round 5. BLO sc around. (48)

Round 6 :

Round 6. sc around. (48)

Round 7 :

Round 7. (7 sc, inc) 6 times. (54)

Round 8-13 :

Round 8-13. sc around. (54)

Info :

change color (red)

Round 14 :

Rround 14. sc around. (54)

Round 15 :

Round 15. (7 sc, dec) 6 times. (48)

Round 16-17 :

Round 16-17. sc around. (48)

Round 18 :

Round 18. (6 sc,dec) 6 times. (42)

Round 19-20 :

Round 19- 20. sc around. (42)

Round 21 :

Round 21. (5 sc, dec) 6 times. (36)

Round 22-23 :

Round 22-23. sc around. (36)

Round 24 :

Round 24. (4 sc, dec) 6 times. (30)

Round 25-26 :

Round 25-26. sc around. (30)

Round 27 :

Round 27. (3 sc, dec) 6 times. (24)

Round 28-29 :

Round 28-29. sc around. (24)

Info :

change color (beige)

Round 30 :

Round 30. (3sc, inc) 6 times. (30)

Round 31 :

Round 31. (4 sc, inc) 6 times.(36)

Round 32 :

Round 32. (5 sc, inc) 6 times.(42)

Round 33 :

Round 33. (6 sc,inc) 6 times. (48)

Round 34 :

Round 34. (7 sc,inc) 6 times. (54)

Round 35 :

Round 35. (8 sc,inc) 6 times. (60)

Round 36-48 :

Round 36-48. sc around. (60)

Round 49 :

Round 49. (8 sc,dec) 6 times. (54)

Round 50 :

Round 50. (7 sc,dec) 6 times. (48)

Round 51 :

Round 51. (6 sc,dec) 6 times.(42)

Round 52 :

Round 52. (5 sc,dec) 6 times.(36)

Round 53 :

Round 53. (4 sc,dec) 6 times. (30)

Round 54 :

Round 54. (3 sc,dec) 6 times. (24)

Round 55 :

Round 55. (2 sc,dec) 6 times. (18)

Round 56 :

Round 56. (sc,dec) 6 times. (12)

Round 57 :

Round 57. (dec) 6 times.

Info :

Attach the eyes to the 43rd and 44th rows, 9 stitches apart.

โ€” Arms :

Info :

Start with beige color.

Round 1 :

Round 1. 6 sc into a magic ring. (6)

Round 2 :

Round 2. (inc) 6 times. (12)

Round 3 :

Round 3. (sc,inc) 6 times. (18)

Round 4 :

Round 4. BLO sc around. (18)

Round 5-7 :

Round 5-7. sc around. (18)

Round 8 :

Round 8. (4 sc,dec) 3 times. (15)

Round 9-10 :

Round 9-10. sc around. (15)

Info :

change color (red)

Round 11 :

11. sc around. (15)

Round 12 :

Round 12. (3 sc,dec) (12)

Info :

Crochet the two edges together at the same time.

โ€” Ears :

Info :

Start with beige color.

Round 1 :

Round 1. 6 sc into a magic ring. (6)

Round 2 :

Round 2. (sc,inc) 3 times. (9)

Round 3 :

Round 3. sc around. (9)

Round 4 :

Round 4. (2 sc,inc) 3 times. (12)

Round 5 :

Round 5. sc around. (12)

Round 6 :

Round 6 . (3 sc,inc) 3 times. (15)

Round 7-12 :

Round 7-12. sc around. (15)

Info :

Crochet the two edges together at the same time.

โ€” Nose :

Info :

Start whit white color.

Round 1 :

Round 1. 1. 6 ch, starking from 2nd ch inc, 3 sc, 3 sc in 1 stitch (work on the other side of tihe chain) 4 sc . (12)

Round 2 :

Round 2. 2 inc, 3 sc,3 inc, 3 sc, inc. (18)

Round 3 :

Round 3.( sc, inc) 2 times, 4 sc, (inc) 3 times, 3 sc, inc. (24)

Round 4 :

Round 4. BLO sc. (24)

Round 5-7 :

Round 5-7. sc around. (24)

Item Name (P1) :

Round 1.6 sc into q magic ring. (6) Round 2. (inc) 6 times.

โ€” Horns :

Info :

Start with brown color.

Round 1 :

Round 1. 6 sc into a magic ring.(6)

Round 2 :

Round 2. (sc, inc) 3 times. (9)

Round 3-5 :

Round 3-5. sc around. (9)

Round 6 :

Round 6. 10. 3 sc, inc, 4 sc, dec. (9)

Assembly Instructions

  • Attach the eyes to the head between rows 43 and 44, placing them 9 stitches apart to ensure correct facial spacing.
  • Sew the nose (white muzzle) between rows 32 and 39, centering it on the face and securing firmly with invisible stitches.
  • Sew the sleeves (arm openings) to the body between rows 25 and 26, positioning them symmetrically and sewing through the top stitches for a neat join.
  • Sew the ears to the head between rows 50 and 51, spacing them evenly and angling slightly outward for a natural look.
  • Plant the antlers (horns) between rows 53 and 55 and secure them firmly to the head for stability.

Important Notes

  • ๐Ÿ’กRemember to fill in the pieces as you go; stuffing as you work makes shaping easier and neater.
  • ๐Ÿ’กThe size of the doll will vary depending on the yarn used; if you use the same yarn the finished approximate size will be 15 cm.
  • ๐Ÿ’กUse a small hook (1.80-2.00 mm) to achieve tight stitches and prevent stuffing from showing through.

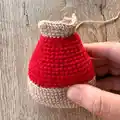
This adorable Baby Deer amigurumi is a delightful project that results in a charming, handmade companion. ๐ŸฆŒ The pattern includes full round-by-round instructions, materials, and placement notes to make assembly simple. ๐Ÿงถ Whether made as a gift or a cozy decoration, this little deer brings warmth and smiles.

You ask,

we answer.

FAQs

What size will the finished piece be?

The finished amigurumi measures approximately 15 cm tall when using the recommended YarnArt Jeans yarn and a 1.80-2.00 mm hook.

Can I use different yarn weights for this pattern?

Yes, you can use different yarn weights, but this will affect the final size. Use an appropriate hook for your chosen yarn and adjust eye size if needed.

Do I need prior crochet experience for this pattern?

This pattern is rated intermediate, so basic knowledge of single crochet, increases, decreases, and working in rounds is recommended for best results.

How long does this project typically take to complete?

Most crocheters complete this project in 5-7 hours, though time may vary based on experience level, attention to detail, and assembly time.