🧢 Beautiful ✨ Detailed πŸ’ Adorable

Bear Clothes Amigurumi Pattern

Bear Clothes Amigurumi Pattern
4.2β˜… Rating
5-7 Hours Time Needed
1.1K Made This
βœ‚οΈ

Intermediate Level

Ideal for those with basic crochet experience, featuring slightly more advanced stitches and techniques to expand your skills.

⏱️

Weekend Treat

Takes 5-7 hours, making it an enjoyable project to finish over a couple of days.

🧸

Cute Companion

An adorable friend to cherish, handcrafted with love to bring comfort and joy for years to come.

About This Bear Clothes Amigurumi Pattern

This pattern provides complete instructions to crochet a set of clothes for an 18 cm amigurumi bear including a shaped witch hat, decorative band, pompom, cardigan and underpants. Youll work in rounds and short rows, change colors for trims, and add small sewn details such as a belt buckle and buttons. The pattern focuses on small, precise shaping and finishing so your clothes fit neatly and look polished.

Bear Clothes Amigurumi Pattern crochet pattern - detailed view of completed project

Includes round-by-round stitch counts, decoration pieces, and clear finishing instructions for sewing and gluing parts. Photos and descriptions guide you through assembly and final touches for a charming result.

Why You'll Love This Bear Clothes Amigurumi Pattern

I absolutely love this pattern because it turns simple yarn into a delightful outfit that brings personality to any amigurumi. I enjoy the playful shaping in the hat and how the little belt and pompom really finish the look. The cardigan construction is clever and quick, and I appreciate how the pattern balances detail with achievable steps. I find it rewarding to make a full outfit that fits perfectly and adds character to handmade toys.

Bear Clothes Amigurumi Pattern step 1 - construction progress Bear Clothes Amigurumi Pattern step 2 - assembly progress Bear Clothes Amigurumi Pattern step 3 - details and accessories Bear Clothes Amigurumi Pattern step 4 - final assembly and finishing

Switch Things Up

I love customizing this pattern by changing the color palette; try pastels for a softer look or bright primary colors for playful contrast.

I sometimes make the hat larger by working extra increase rounds and a wider brim for a more dramatic appearance.

I like to replace the pompom with a stitched tassel or a tiny crochet star for a unique finish.

If you want a posable outfit, consider adding a thin wire inside the hat brim to help it hold a shape.

For a delicate look, use a lighter weight yarn and smaller hook to create a mini version suitable as a keychain accessory.

I often embroider tiny motifs on the cardigan front before sewing it together to personalize it for gifts.

Swap buttons for tiny snaps or decorative beads if you prefer a seamless closure with less sewing.

Try making a matching scarf or tiny boots by adapting the underpants pattern shaping and stitch counts.

I recommend experimenting with texture stitches (like hdc or puff stitches) for the brim to add visual interest and depth.

When in doubt about sizing, test a small sample swatch and adjust hook size or rounds until the fit matches your amigurumi toy.

Common Mistakes & How to Fix Them

βœ— Skipping stitch counts during increases can cause the hat brim to warp; count your stitches at the end of each round and mark increases to maintain the correct shape. βœ— Changing color without fastening properly can cause loose ends; always fasten off and weave in ends or carry yarn neatly to avoid unraveling. βœ— Overstuffing the pompom or stuffing unevenly creates a lumpy finish; stuff gradually and shape gently with small amounts of fiberfill for a smooth result. βœ— Sewing pieces without pinning first leads to misaligned decorations; pin or baste the decoration and belt in place before permanently sewing or gluing. βœ— Working with inconsistent tension distorts sizes between the hat and cardigan; maintain even tension and check gauge against the recommended finished size. βœ— Forgetting to trim and fix loops leaves visible knots; always trim threads and secure loops as instructed before final assembly.

Bear Clothes Amigurumi Pattern

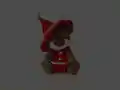
Make adorable, removable clothes for your amigurumi bear with this detailed crochet pattern. Youll create a shaped witch-style hat, pompom, decorative band, cardigan, and underpants with full step-by-step rounds. The instructions include clear stitch counts and finishing notes so you can sew and style each piece with confidence. Perfect for gifting or dressing up your favorite handmade toy.

Intermediate 5-7 Hours

Materials Needed for Bear Clothes Amigurumi Pattern

β€” Main Fabric

  • 01
    YarnArt Jeans No: 01 (use for base color - red)
  • 02
    YarnArt Jeans No: 53 (use for details - black)
  • 03
    YarnArt Jeans No: 35 (use for details - white)
  • 04
    Small amounts of yellow yarn for belt buckle
  • 05
    Polyester filler for the pompom
  • 06
    Buttons - 4 pieces (white small buttons)

β€” Tools Required

  • 01
    Crochet hook size 2.0 mm
  • 02
    Yarn needle for sewing and weaving ends
  • 03
    Scissors
  • 04
    Stitch markers (optional)
  • 05
    Small amount of second glue (fabric glue) for decorations
  • 06
    Buttons 4 pieces
  • 07
    Polyester stuffing for pompom

Progress Tracker

0% Complete

β€” Cap :

1th :

4 sc into the adjusteble ring

2 th :

3 sc, inc = 5 sc

3 th :

1 sc, inc, 3 sc = 6 sc

4 th :

4 sc, inc, 1 sc= 7 sc

5 th :

1 sc, inc, 3 sc, inc, 1 sc = 9 sc

6 th :

(2 sc, inc) x 3 times = 12 sc

7 th :

12 sc

8 th :

(2 sc, inc) x 4 times = 16 sc

9 th :

16 sc

10 th :

(3 sc, inc) x 4 times = 20 sc

11 th :

20 sc

12 th :

(4 sc, inc) x 4 times = 24 sc

13 th :

24 sc

14 th :

(5 sc, inc) x 4 times = 28 sc

15 th :

28 sc

16 th :

(6 sc, inc) x 4 times = 32 sc

17 th :

32 sc

18 th :

(7 sc, inc) x 4 times = 36 sc

19 th :

36 sc

20 th :

(8 sc, inc) x 4 times = 40 sc

21 th :

40 sc

22 th :

(9 sc, inc) x 4 times = 44 sc

23 th :

(10 sc, inc) x 4 times = 48 sc

24 th :

(11 sc, inc) x 4 times = 52 sc

25 th :

(12 sc, inc) x 4 times = 56 sc

26 th :

(13 sc, inc) x 4 times = 60 sc

27 th :

(14 sc, inc) x 4 times = 64 sc

28 th :

(15 sc, inc) x 4 times = 68 sc

29 th :

(16 sc, inc) x 4 times = 72 sc

30 th :

(11 sc, inc) x 6 times = 78 sc

31 th :

(12 sc, inc) x 6 times = 84 sc

32 th :

(13 sc, inc) x 6 times = 90 sc

33 th :

(14 sc, inc) x 6 times = 96 sc

34 th :

2 ch, (2 dc, inc) x 32 times = 128 sc

35-36 th :

128 dc

Info :

Trim the thread, fix the loop.

Info :

Next, insert a hook with a black thread, from the wrong side of the hat in the 7th row from the end of the hat and crochet: 40 ch, cut the thread, fix the loop. We tie a small knot at the tip of the chain of ch. Next, against this crochet chain, we also crochet 40 ch and tie a small knot at the end of the chain of ch:

β€” Detail on the hat :

1 th :

67 ch, 66 sc

2-3 th :

1 ch, turning detail, 66 sc

Info :

Trim the thread, fix the loop.

β€” Hat Decoration :

Item Name (P1) :

35 ch, 4 sc, (in one loop: 1 sc, ch, 1 sc), 10 sc, (in one loop: 1 sc, ch, 1 sc), 5 sc, (in one loop: 1 sc, ch, 1 sc), 10 sc, (in one loop: 1 sc, ch, 1 sc), 1 sc. We cut the thread, fix the loop. We connect the beginning and the end and sew.

β€” Pompon :

1 th :

6 sc into the adjusteble ring

2 th :

(inc) x 6 times = 12 sc

3 th :

(1 sc, inc) x 6 times = 18 sc

4 th :

(2 sc, inc) x 6 times = 24 sc

5-7 th :

24 sc

8 th :

(2 sc, dec) x 6 times = 18 sc

9 th :

(1 sc, dec) x 6 times = 12 sc

Info :

Stuff

10 th :

(dec) x 6 times = 6 sc

Info :

Trim the thread, fix the loop, leave the thread for sewing to the cap.

Info :

We sew or glue the part on the hat (in the 4th - 5th row from the end of the hat), glue the decoration on the part. We sew a pompom:

β€” Cardigan :

Item Name (P1) :

45 ch: 10 dc, arch (hdc, ch, hdc), 5 dc (sleeve), arch, 10 dc, arch, 5 dc (sleeve), arch, 10 dc

Round :

2 ch, turning detail, 11 dc, arch, 7 dc (sleeve), arch, 12 dc, arch, 7 dc (sleeve), arch, 11 dc

Row :

2 ch, turning detail, 12 dc, 3 ch, 10 loops skip and starting from 11 loops crochet 16 dc, 3 ch, 10 loops skip and starting from 11 loops crochet 12 dc = 46 loops

Row :

1 ch, turning detail, 9 sc, (inc, 2 sc) x 9 times, 10 sc = 55 sc

Row :

1 ch, turning detail, 10 sc, (inc, 3 sc) x 9 times, 9 sc = 64 sc

Row :

(1 ch, turning detail, 64 sc) x 5 rounds

Info :

We change the color of the thread to white

Row :

(1 ch, turning detail, 64 sc) x 2 rounds

Info :

Next, go to the side of the part and crochet button loops: 4 ch, 3 loops skip and starting with 4 crochet loops: 10 sc, 4 ch, 3 loops skip and in the last loop crochet sl st.

Info :

We cut the thread, fix the loop. We sew buttons on the front and back.

β€” Underpants, we use red thread :

Item Name (P1) :

33 ch, 32 sc

Row :

(1 ch, turning detail, 32 sc) x 2 rounds

Row :

1 ch, turning detail, 1 sc, dec, 26 sc, dec, 1 sc = 30 sc

Row :

1 ch, turning detail, 1 sc, dec, 24 sc, dec, 1 sc = 28 sc

Row :

1 ch, turning detail, 1 sc, dec, 22 sc, dec, 1 sc = 26 sc

Row :

1 ch, turning detail, 1 sc, dec, 20 sc, dec, 1 sc = 24 sc

Row :

1 ch, turning detail, 1 sc, dec, 18 sc, dec, 1 sc = 22 sc

Row :

1 ch, turning detail, 1 sc, dec, 16 sc, dec, 1 sc = 20 sc

Row :

1 ch, turning detail, 1 sc, dec, 14 sc, dec, 1 sc = 18 sc

Row :

1 ch, turning detail, 1 sc, dec, 12 sc, dec, 1 sc = 16 sc

Row :

1 ch, turning detail, 1 sc, dec, 10 sc, dec, 1 sc = 14 sc

Rows :

(1 ch, turning detail, 14 sc) x 10 rounds

Row :

1 ch, turning detail, 1 sc, inc, 10 sc, inc, 1 sc = 16 sc

Row :

1 ch, turning detail, 1 sc, inc, 12 sc, inc, 1 sc = 18 sc

Row :

1 ch, turning detail, 1 sc, inc, 14 sc, inc, 1 sc = 20 sc

Row :

1 ch, turning detail, 1 sc, inc, 16 sc, inc, 1 sc = 22 sc

Row :

1 ch, turning detail, 1 sc, inc, 18 sc, inc, 1 sc = 24 sc

Row :

1 ch, turning detail, 1 sc, inc, 20 sc, inc, 1 sc = 26 sc

Row :

1 ch, turning detail, 1 sc, inc, 22 sc, inc, 1 sc = 28 sc

Row :

1 ch, turning detail, 1 sc, inc, 24 sc, inc, 1 sc = 30 sc

Row :

1 ch, turning detail, 1 sc, inc, 26 sc, inc, 1 sc = 32 sc

Rows :

(1 ch, turning detail, 32 sc) x 3 rounds

Info :

We cut the thread, fix the loop.

Info :

We sew 3 rows on the sides:

β€” Rubber band :

Item Name (P1) :

5 ch, 4 sc

Row :

(1 ch, turning detail, 4 sc for the back of the loop) x 62 rounds

Assembly Instructions

  • Sew or glue the black band decoration to the hat in the 4th - 5th row from the end, then sew the yellow buckle decoration centered on the band.
  • Attach the pompom to the top point of the hat using the remaining thread, securing tightly and weaving the end into the hat.
  • Sew buttons onto the cardigan front and back where button loops were crocheted, aligning loops and buttons for a neat closure.
  • Sew the underpants side seams by matching edges and stitching three rows on each side as indicated for a secure fit.

Important Notes

  • πŸ’‘Change color exactly where noted (for the cardigan border switch to white) to keep a clean trim line.
  • πŸ’‘Trim the thread and fix loops after each separate piece to prevent unraveling during assembly.
  • πŸ’‘Pin decorations and button placements before sewing or gluing to ensure correct alignment and symmetry.
  • πŸ’‘Stuff the pompom lightly and evenly before closing to achieve a neat, round shape.
  • πŸ’‘Use a small amount of fabric glue for tiny decorations if sewing is difficult, but reinforce with stitching where possible.

Create a charming outfit for your amigurumi bear with this complete clothes set: hat, pompom, belt, cardigan and underpants. Each piece is sized for an 18 cm toy and includes clear step-by-step rounds so you can follow along easily. Add small personal touches like embroidery or color swaps to make the outfit uniquely yours. 🧢✨

You ask,

we answer.

FAQs

What size will the finished piece be?

The finished clothes are designed to fit an amigurumi toy approximately 18 cm tall when using the recommended YarnArt Jeans and a 2.0 mm hook.

Can I use different yarn weights for this pattern?

Yes, but changing yarn weight will affect final size; choose an appropriate hook for your yarn and expect a different fit for the clothes.

Do I need prior crochet experience for this pattern?

This pattern is rated intermediate so basic familiarity with rounds, increases, decreases, and changing colors is recommended.

How long does this project typically take to complete?

Most crocheters complete the full clothes set in 5-7 hours, though time will vary depending on experience and any customizations.