About This Bernat Pipsqueak Star Blanket Pattern
This Bernat Pipsqueak Star Blanket pattern creates an approximately 40" (101.5 cm) star-shaped blanket with fluffy texture and alternating color rounds. It uses Bernat Pipsqueak bulky chenille-style yarn and works outward from the center to form distinctive star points. The pattern includes clear round-by-round instructions for shaping, color changes, and special stitch techniques.
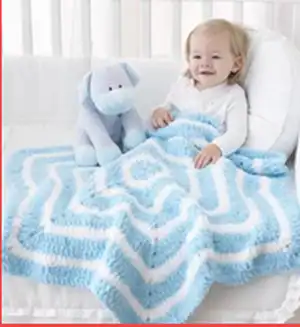
Worked in rounds with easy repeating sections and simple decreases, this blanket is an enjoyable weekend project. The finished blanket is soft, plush, and ideal for babies or as a comforting lap throw.
Why You'll Love This Bernat Pipsqueak Star Blanket Pattern
I love how this pattern turns a few simple stitch repeats into a striking star-shaped blanket that feels luxurious and cuddly. It’s satisfying to watch the star emerge as you work, and the Pipsqueak yarn gives it an irresistibly soft finish that I enjoy wrapping up in.
Switch Things Up
I like using this pattern with two contrasting colors to emphasize each star point and create a bold graphic look.
I often substitute a similar bulky chenille yarn if Pipsqueak is unavailable, but I always swatch to check gauge.
I sometimes add a simple single-crochet border in the main color to give the edges a defined finish that lasts through washing.
I recommend working the sc2tog decreases gently so the star points remain smooth and even.
I enjoy blocking the final blanket lightly to open stitches and keep each point symmetrical.
I always use stitch markers on the first stitch of each round to avoid losing my place during color changes.
I prefer to weave in ends as I go when changing colors to keep the back of the blanket tidy and reduce finishing time.
I find that working with good lighting helps a lot when handling the fluffy texture of Pipsqueak yarn for accurate stitch placement.
I like gifting this blanket as it’s quick to make and has a high perceived value thanks to its shape and plush texture.
I encourage trying subtle color gradients if you want a softer look instead of high-contrast stripes.
Common Mistakes & How to Fix Them
✗ Skipping the initial join when making the center ring can leave a gap; join with a slip stitch to close the ring securely.
✗ Not keeping track of where rounds start will misplace color changes; use a stitch marker at the top of each round to stay aligned.
✗ Forgetting that ch-3 counts as a dc may cause incorrect stitch counts; always count the ch-3 as the first dc of the round.
✗ Pulling loops too tight while making sc2tog can distort the stitch; draw up loops gently and maintain even tension when completing the sc2tog.