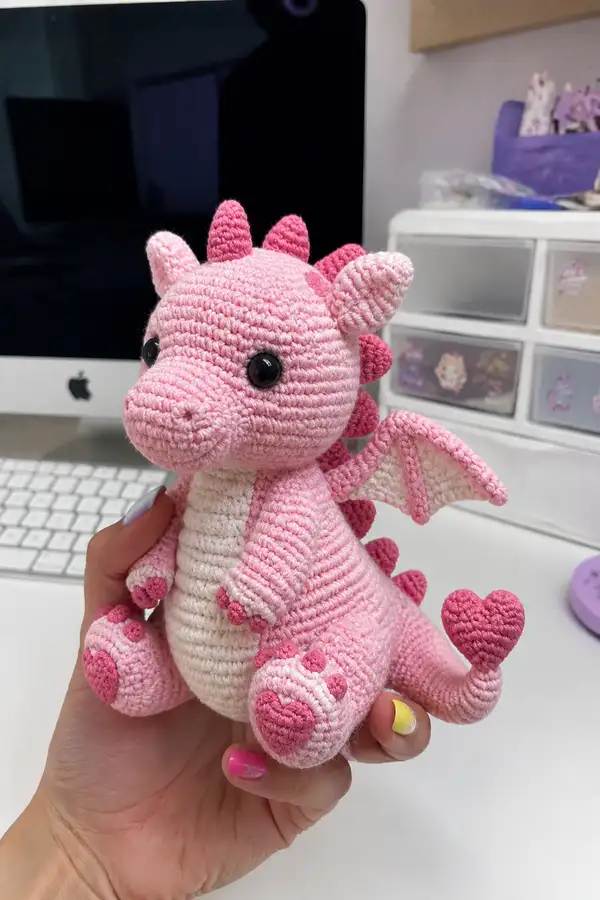
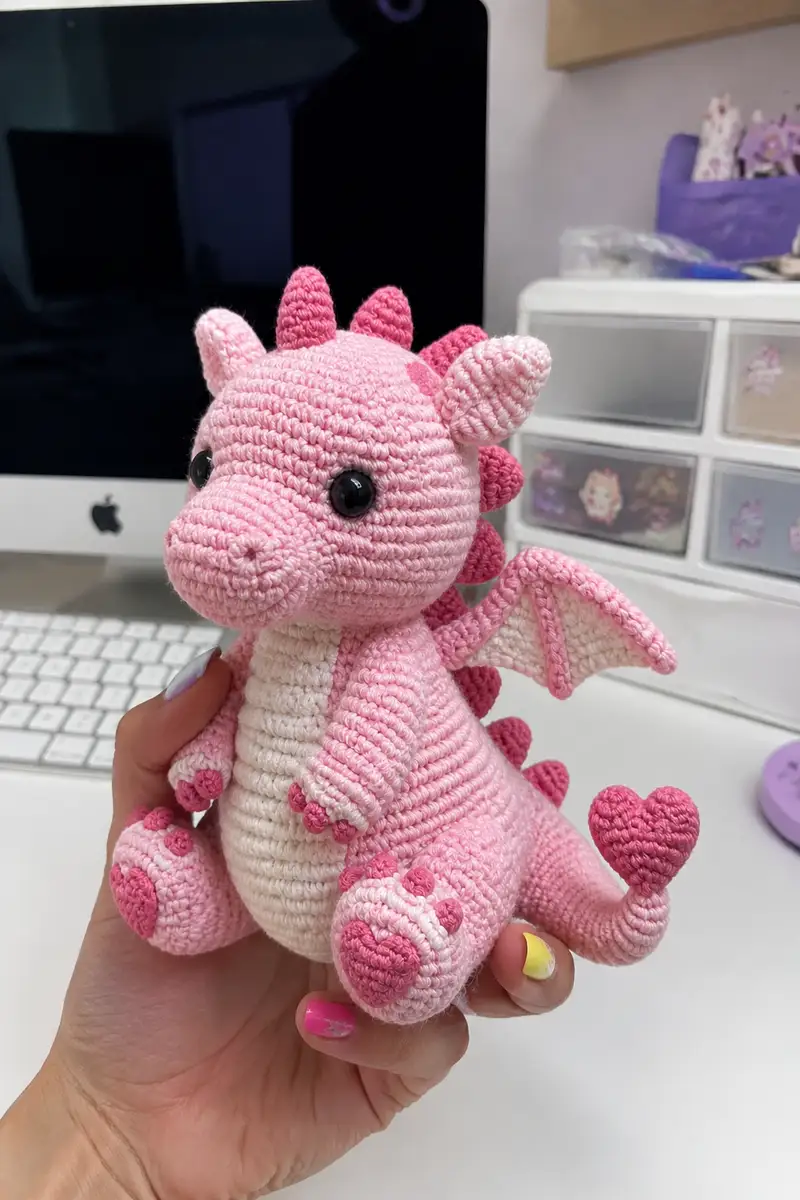
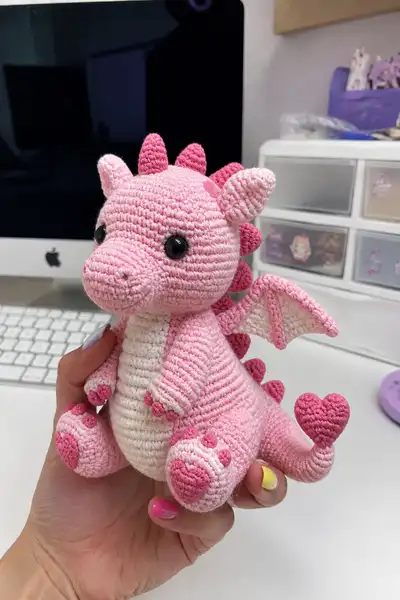
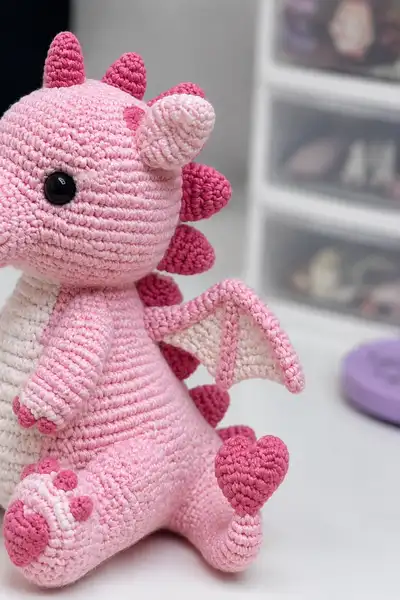
Make an irresistibly cuddly blush pink dragon with a heart-tipped tail, contrasting darker-pink spikes and a cream belly. This ami features large shiny safety eyes, sweet rounded snout, small rounded ears, winged arms with a pale membrane and darker pink edging, and tiny heart-shaped paw pads. The pattern includes full round-by-round instructions for every piece and detailed assembly tips to recreate this charming little companion.
Progress Tracker
0% Complete
— Head :
Round 1 :
6 sc in magic ring (6)
Round 3 :
(1 sc, inc) x 6 (18)
Round 4 :
(2 sc, inc) x 6 (24)
Round 5 :
(3 sc, inc) x 6 (30)
Round 6 :
(4 sc, inc) x 6 (36)
Round 7 :
(5 sc, inc) x 6 (42)
Round 8 :
(6 sc, inc) x 6 (48)
Rounds 9-16 :
1 sc in each st around (48)
Info :
Place safety eyes between rounds 12 and 14, approximately 9-11 stitches apart depending on expression desired. Use stitch markers and measure on both sides to ensure symmetry; do not fasten off yet.
Round 17 :
1 sc in each st (48)
Round 18 :
(6 sc, dec) x 6 (42)
Info :
Begin light stuffing at round 18, pressing evenly into the crown. Stuff firmly around the eye area but avoid overstuffing the face which will distort placement.
Round 19 :
(5 sc, dec) x 6 (36)
Round 20 :
(4 sc, dec) x 6 (30)
Round 21 :
(3 sc, dec) x 6 (24)
Round 22 :
(2 sc, dec) x 6 (18)
Info :
At round 22 the head begins narrowing into the neck. Continue stuffing, focusing on rounding the cheeks and filling the snout base from the inside with small bits to maintain shape.
Round 23 :
(1 sc, dec) x 6 (12)
Info :
Fasten off leaving a long tail for sewing to the body. Finish stuffing to desired firmness before closing the hole completely; this tail will be used to stitch the head to the neck opening on the body.
— Snout (Make 1, sew to head) :
Round 1 :
6 sc in magic ring (6)
Round 3 :
(1 sc, inc) x 6 (18)
Round 4 :
(2 sc, inc) x 6 (24)
Round 5 :
1 sc in each st around (24)
Round 6 :
(2 sc, dec) x 6 (18)
Round 7 :
1 sc in each st around (18)
Round 8 :
(1 sc, dec) x 6 (12)
Info :
Stuff the snout firmly but compactly so it keeps a rounded, slightly elongated shape. Place it centered over the lower front of the head and sew with whip stitch using the long tail. Add two small embroidery nostrils with darker-pink yarn at the front of the snout.
— Ears (Make 2) :
Round 1 :
6 sc in magic ring (6)
Round 3 :
(1 sc, inc) x 6 (18)
Round 4 :
(2 sc, inc) x 6 (24)
Round 5-6 :
1 sc in each st around (24)
Round 7 :
(2 sc, dec) x 6 (18)
Round 8 :
(1 sc, dec) x 6 (12)
Info :
Fold slightly and sew bottom opening closed. Attach ears to the top sides of the head between rounds 4-8, angling them slightly forward. Sew firmly with long tail and hide ends inside head.
— Body :
Round 1 :
6 sc in magic ring (6)
Round 3 :
(1 sc, inc) x 6 (18)
Round 4 :
(2 sc, inc) x 6 (24)
Round 5 :
(3 sc, inc) x 6 (30)
Round 6 :
(4 sc, inc) x 6 (36)
Round 7 :
(5 sc, inc) x 6 (42)
Round 8 :
(6 sc, inc) x 6 (48)
Round 9 :
(7 sc, inc) x 6 (54)
Round 10-16 :
1 sc in each st around (54)
Info :
If making the cream belly panel separately, change to cream yarn now and work belly panel rows (instructions follow). Otherwise continue body in main color. Keep rounds even and use stitch marker to mark start of round; this body will form a wide stable base so keep tension steady.
Round 17 :
(7 sc, dec) x 6 (48)
Round 18 :
(6 sc, dec) x 6 (42)
Info :
Begin stuffing body firmly from the bottom through the opening, adding more stuffing as you reach the waist and neck area. Use small pieces of stuffing to avoid lumps and to shape the belly curve.
Round 19 :
(5 sc, dec) x 6 (36)
Round 20 :
(4 sc, dec) x 6 (30)
Round 21 :
(3 sc, dec) x 6 (24)
Round 22 :
1 sc in each st around (24)
Round 23 :
(2 sc, inc) x 6 (30)
Round 24-26 :
1 sc in each st around (30)
Round 27 :
(2 sc, dec) x 6 (24)
Round 28 :
(1 sc, dec) x 6 (18)
Info :
Leave a large tail to sew the head in place. The neck opening is formed here; you will insert the head and sew evenly around the opening. Fasten off after securing head.
— Belly Panel (Flat, in cream) :
Info :
Work a slightly oval flat panel in cream to stitch onto the front body. This is worked in continuous rounds to create a shallow oval. Place it centered over the front between rounds 10-18 of body when measured on the prototype.
Round 1 :
6 sc in magic ring (6)
Round 3 :
(1 sc, inc) x 6 (18)
Round 4 :
(2 sc, inc) x 6 (24)
Round 5 :
(3 sc, inc) x 6 (30)
Round 6 :
1 sc in each st around (30)
Round 7 :
Work FLO 1 sc in first 6 sts, ch 2, turn and work along opposite side to create oval length: ch1 to pick up; continue 1 sc in each remaining st to finish oval edge (30)
Info :
Sew belly panel to body using mattress stitch around the edge. Start sewing at top near neck and work downward, keeping edge flush with body shaping. Slight stretching of the panel across the center makes a nice rounded belly look.
— Arms (Make 2) :
Round 1 :
6 sc in magic ring (6)
Round 3 :
(1 sc, inc) x 6 (18)
Round 4 :
1 sc in each st around (18)
Round 5 :
1 sc in each st (18)
Info :
These first few rounds form the hand. Add three tiny darker-pink dots for finger pads (instructions in a later section) before continuing to shape the wrist and arm tube.
Round 6-10 :
1 sc in each st around (18) - work 5 rounds to lengthen arm (18)
Round 11 :
(2 sc, inc) x 6 (24)
Round 12-16 :
1 sc in each st around (24)
Round 17 :
(2 sc, dec) x 6 (18)
Round 18 :
1 sc in each st around (18)
Info :
Stuff the hand firmly and the arm tube more lightly so it remains flexible. Leave a long tail for sewing. Position arms at body rounds 16-20 (measuring on assembled body), seam using ladder stitch through both arm opening and body wall for a neat join. Repeat for second arm and mirror placement.
— Hand Finger Dots (tiny pads) :
Round 1 :
3 sc in magic ring (3)
Round 2 :
3 sc in each st around (3) - work two rounds total for a tiny bump
Info :
Make 3 small dots for each hand in darker-pink and sew them onto the front tips of the hands with a few secure stitches. These add character and match the foot pads.
— Legs (Make 2) :
Foot Round 1 :
6 sc in magic ring (6)
Round 3 :
(1 sc, inc) x 6 (18)
Round 4 :
(2 sc, inc) x 6 (24)
Round 5 :
1 sc in each st around (24)
Round 6 :
1 sc in each st around (24)
Round 7 :
(3 sc, dec) x 6 (18)
Round 8-12 :
1 sc in each st around (18) - form ankle and lower leg
Round 13 :
(1 sc, inc) x 6 (24)
Round 14-20 :
1 sc in each st around (24)
Round 21 :
(2 sc, dec) x 6 (18)
Round 22 :
1 sc in each st around (18)
Round 23 :
(1 sc, dec) x 6 (12)
Info :
Stuff feet firmly to create a stable base. Sew circular paw pads onto the feet using darker-pink yarn. Position legs on the lower body opening, spacing evenly so the dragon sits upright; secure with many stitches for stability.
— Foot Paw Pads (Make 2) :
Round 1 :
6 sc in magic ring (6)
Round 3 :
1 sc in each st around (12)
Info :
Sew the larger pad on the front of the foot and add three small dots above it using the tiny bump method from the hands. Use darker pink for contrast for a cute paw look.
— Dorsal Spikes / Plates (Make 7-9 small cones) :
Spike (Make 1) Round 1 :
6 sc in magic ring (6)
Round 3 :
(1 sc, inc) x 6 (18)
Round 4 :
(2 sc, inc) x 6 (24)
Round 5 :
1 sc in each st around (24)
Round 6 :
(2 sc, dec) x 6 (18)
Info :
Stuff spikes lightly with a tiny amount of filling or leave hollow for a flatter, sewn-down look. Make 7 spikes for the center back and smaller ones for the top of the head between ears. Use darker rose pink for spikes to contrast with the body.
Repeat :
Make 7-9 spikes total, varying size by stopping increases earlier for smaller spikes (e.g., stop at round 3 for small spikes).
— Wing - Outer Edge (Make 2) :
Info :
Wings are worked flat in two layers: a cream membrane and a pink border forming ribs. Attach the membrane first, then work pink border and ribs in raised rows. Work wings mirror image so one faces left and one right.
Round 1 :
Ch 9, 1 sc in 2nd ch from hook, 1 sc across (8), turn to work along opposite side of chain: 1 sc in each ch back to starting point, join to form a thin oval (16)
Round 2 :
1 sc in each st around (16)
Round 3 :
(1 sc, inc) x 8 (24)
Round 4 :
Work 1 sc in each st around (24)
Round 5 :
Turn and work 1 hdc along the top ridge to create a raised rib (24)
Info :
Switch to pink for edging. Make a border by working 1 sc evenly around the entire wing, placing 2 sc in corners to create curve. Add 2-3 short ribs by working a few sc posts from edge to membrane to mimic wing bones. Sew wings to back sides of the body between rounds 13-16 approximately aligned with the arm seam.
— Tail :
Round 1 :
6 sc in magic ring (6)
Round 3 :
1 sc in each st around (12)
Round 4 :
(2 sc, inc) x 4 (16)
Round 5-9 :
1 sc in each st around (16) - lengthen tail by working 5 rounds to create curve and taper area
Round 10 :
(2 sc, dec) x 4 (12)
Round 11 :
1 sc in each st around (12)
Round 12 :
(1 sc, dec) x 4 (8)
Info :
Keep the tail lightly stuffed if you want it to be floppy; add pipe cleaner or wire inside before stuffing if you prefer poseable tail. Leave a tail at the base to sew securely into the back body opening around round 8-10 on the body.
— Heart Tail Tip :
Round 1 :
6 sc in magic ring using darker pink (6)
Round 3 :
(1 sc, inc) x 6 (18)
Round 4 :
1 sc in each st around (18)
Round 5 :
(2 sc, dec) x 4 (12)
Round 6 :
1 sc in each st around (12)
Round 7 :
Fasten off leaving long tail and shape into a small heart by folding and sewing two lobes together and closing the base. Sew heart tip to tail end using strong stitches; hide tail end inside tail.
— Small Decorative Spikes on Tail and Head (Make 4-6 small knobs) :
Round 1 :
4 sc in magic ring (4)
Round 3 :
1 sc in each st around (8) - make 4-6 of these small knobs and sew along tail and back of head
Info :
Vary placement and size for visual interest. Sew them centered over the tail curve and along the top of the head aligned with dorsal spikes for a cohesive look.
— Final Details and Embroidery :
Info :
Use a small amount of darker pink to embroider nostrils and simple mouth line if desired. Add blush to cheeks with fabric-safe pastel powder or a tiny bit of diluted fabric paint for a soft look. Ensure all small parts are secured tightly before gifting to children.
Finishing :
Weave in all ends inside body and trim. Double-check sewn joints and reinforce where needed. Position head and limbs symmetrically and adjust stuffing to even shape.
Info :
If you prefer smaller or larger finished size, change yarn weight and hook size; remember to adjust safety eye size accordingly. For a firmer fabric, use a hook 0.5mm smaller than recommended for your yarn.
This blush love-dragon brings so much joy from the first stitch to the final heart tip. Each rounded loop and tiny spike becomes a detail to cherish. The pattern's modular approach makes assembly feel like a rewarding puzzle, and the finished friend is perfect for gifting or display. 🧶💗 Take your time, savor each section, and enjoy the sweet outcome — a handmade companion with personality and warmth! ✨