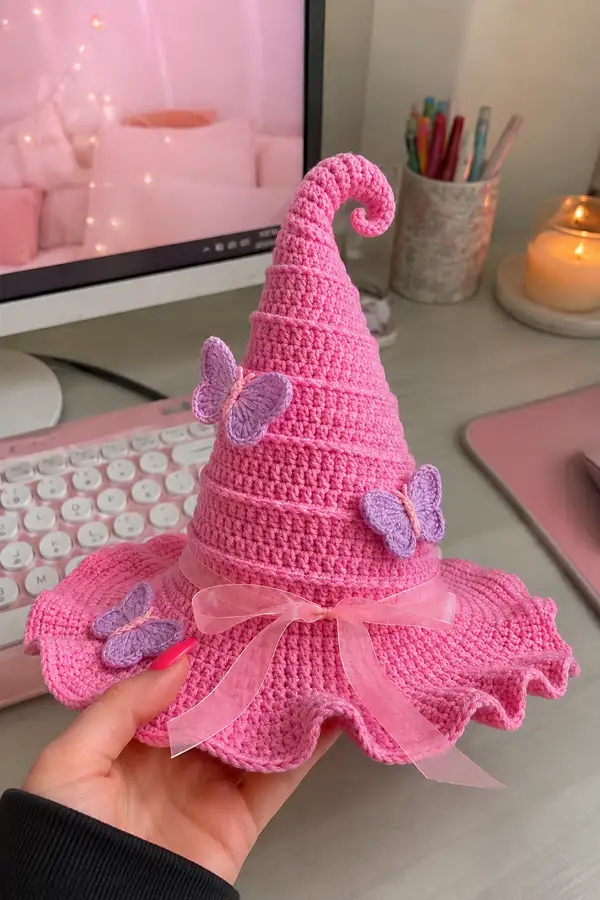
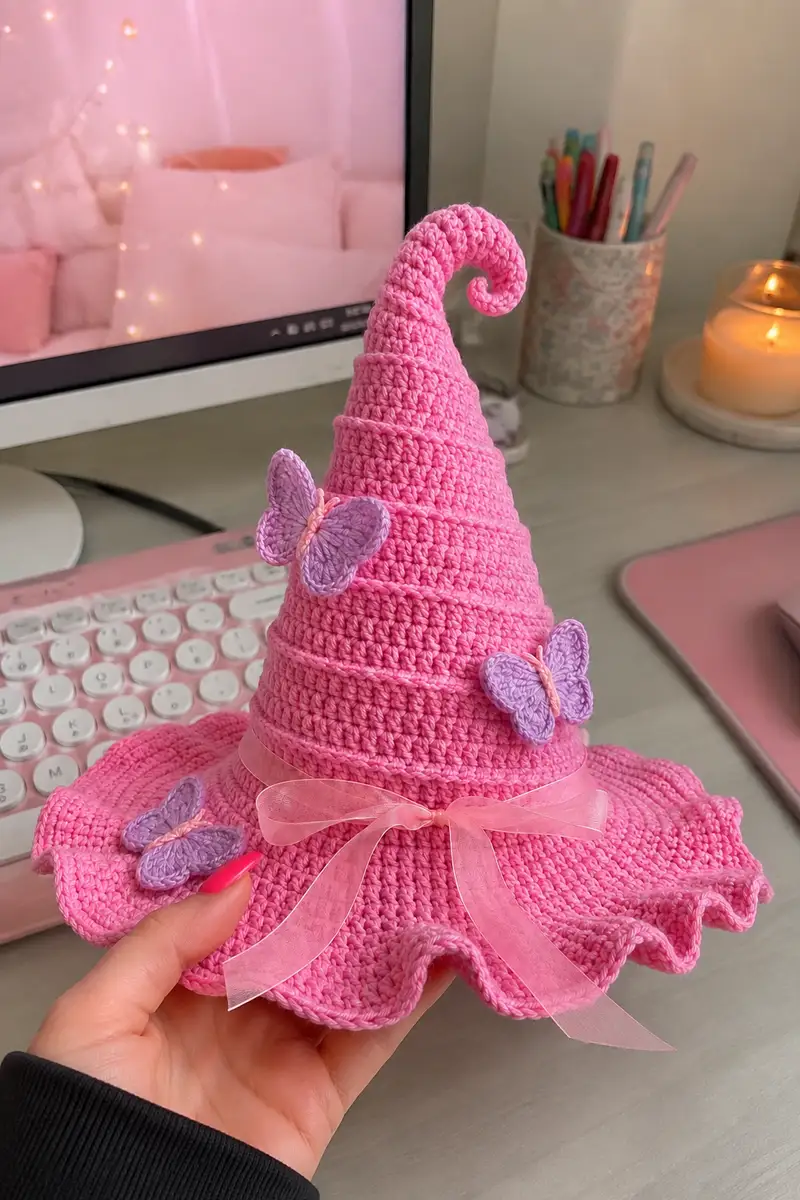
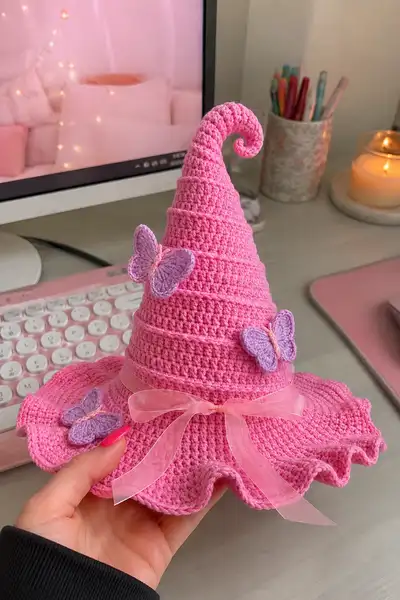
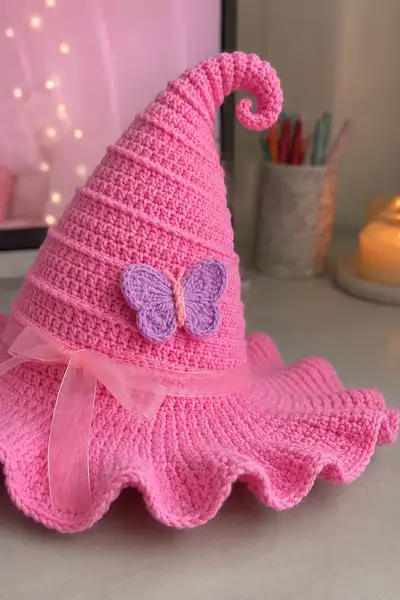
A whimsical spiral witch hat crocheted in bright bubblegum pink, trimmed with a ruffled brim, sheer pink ribbon, and three lavender butterflies. The hat has a tapered, cone-shaped crown that finishes in a playful curled tip and a wide wavy brim for a dreamy, fairy-like silhouette. Perfect as a decorative accessory, desk prop, or a seasonal accent for costumes and displays.
Progress Tracker
0% Complete
— Cone (Main Crown) :
Round 1 :
6 sc in magic ring (6)
Round 3 :
(1 sc, 1 inc) x 6 (18)
Round 4 :
(2 sc, 1 inc) x 6 (24)
Round 5 :
(3 sc, 1 inc) x 6 (30)
Round 6 :
(4 sc, 1 inc) x 6 (36)
Round 7 :
(5 sc, 1 inc) x 6 (42)
Round 8 :
(6 sc, 1 inc) x 6 (48)
Round 9 :
(7 sc, 1 inc) x 6 (54)
Round 10 :
(8 sc, 1 inc) x 6 (60)
Info :
These first ten rounds build the base circumference of the crown. Maintain even tension to keep the base flat. If you need a slightly larger build, work one extra increase round (9 sc, 1 inc) x 6 to reach 66 sts.
Round 11-16 :
1 sc in each st around (60)
Info :
Work in continuous rounds for a smooth spiral look. If you prefer visible round joins, sl st to join and ch1, then continue. Using continuous rounds creates the horizontal ridges seen in the photos.
Round 17 :
(8 sc, 1 dec) x 6 (54)
Round 18 :
(7 sc, 1 dec) x 6 (48)
Round 19 :
(6 sc, 1 dec) x 6 (42)
Info :
Start tapering the crown here. Check your fit by placing the crown over the head/form you intend to use; you are shaping a gentle cone rather than a sphere. No stuffing is used for the crown — the structure is maintained by the fabric and optional interfacing or wire.
Round 20 :
(5 sc, 1 dec) x 6 (36)
Round 21 :
(4 sc, 1 dec) x 6 (30)
Round 22 :
(3 sc, 1 dec) x 6 (24)
Round 23 :
(2 sc, 1 dec) x 6 (18)
Info :
At this stage the crown is narrowing toward the top where we will attach the spiral tip. Smooth the fabric with your hands and measure the crown height — adjust next rounds for a taller or shorter cone by adding or skipping an even round if desired.
Round 24 :
(1 sc, 1 dec) x 6 (12)
Info :
Fasten off leaving a long tail (about 20-25 cm). You'll use this tail to sew the spiral tip into the crown's small opening. Do not stuff the crown — instead, consider lightly blocking or adding a strip of interfacing inside the lower rounds if you want extra stiffness along the brim area.
— Spiral Curl Tip :
Round 1 :
6 sc in magic ring (6)
Round 3 :
(1 sc, 1 inc) x 6 (18)
Round 4-8 :
1 sc in each st around (18)
Info :
This small tube forms the flexible spiral tip. Work these rounds snugly so the tube holds shape when wrapped. If you plan to insert wire for a poseable curl, leave access at the open end you will later sew into the crown.
Round 9 :
(2 sc, 1 dec) x 4 + (2 sc) (14)
Round 10 :
(1 sc, 1 dec) x 4 + (2 sc) (10)
Info :
Fasten off leaving a long tail. Shape the spiral by gently wrapping the tube around your finger or a small dowel to create the tight curl shown in the photos. If using wire, insert a thin wire inside the tube before closing to make the curl poseable. Sew the open end into the top opening of the crown created earlier.
Round 12 :
Sew spiral tip into crown opening using mattress stitch and the long tail; make sure it sits centered and curves forward slightly
— Brim Base (Flat Circle) :
Round 1 :
6 sc in magic ring (6)
Round 3 :
(1 sc, 1 inc) x 6 (18)
Round 4 :
(2 sc, 1 inc) x 6 (24)
Round 5 :
(3 sc, 1 inc) x 6 (30)
Round 6 :
(4 sc, 1 inc) x 6 (36)
Round 7 :
(5 sc, 1 inc) x 6 (42)
Round 8 :
(6 sc, 1 inc) x 6 (48)
Round 9 :
(7 sc, 1 inc) x 6 (54)
Round 10 :
(8 sc, 1 inc) x 6 (60)
Info :
We are increasing by 6 stitches per round to keep the circle flat. If your brim begins to ruffle up early, reduce the number of increase rounds. If it cups downward, add one more increase round.
Round 11 :
(9 sc, 1 inc) x 6 (66)
Round 12 :
(10 sc, 1 inc) x 6 (72)
Round 13 :
(11 sc, 1 inc) x 6 (78)
Round 14 :
(12 sc, 1 inc) x 6 (84)
Round 15 :
(13 sc, 1 inc) x 6 (90)
Round 16 :
(14 sc, 1 inc) x 6 (96)
Round 17 :
(15 sc, 1 inc) x 6 (102)
Round 18 :
(16 sc, 1 inc) x 6 (108)
Round 19 :
(17 sc, 1 inc) x 6 (114)
Round 20 :
(18 sc, 1 inc) x 6 (120)
Info :
This gives a wide brim similar to the sample. Adjust the number of increase rounds if you want a wider or narrower brim. After round 20 you should have a generous flat disc that will form the hat's brim.
Round 21-24 :
1 sc in each st around (120)
Info :
These rounds build the brim thickness and create a sturdy edge to attach the crown. Work tightly and check that the disc lies flat; if it begins to ruffle too early, block before continuing.
— Brim Ruffle (Scalloped Edge) :
Round 1 :
*sk 1 st, 5 dc in next st, sk 1 st, sc in next st* rep around (creates scallops; final sc count will match number of shells)
Info :
Because this round uses shells, the stitch count will not stay the same numerically as the previous sc round — you are working groups. Keep the spacing even; place a stitch marker at the start of the first shell to count repeats and ensure you end with a full shell.
Round 2 :
Working in FLO of previous sc round, *sc in shell center, ch1, sc between shells* rep around to define scallop (this evens and slightly tightens the ruffle)
Round 3 :
Optional: Repeat Round 1 to exaggerate ruffle for a deeper wave
Info :
Decide how dramatic you want the ruffle. The sample shows a pronounced scallop that is just one shell round deep with a neat finishing round. If you add extra shell rounds, the brim will ripple more. Finish by fastening off and weaving in ends on the underside of the brim so the top remains smooth.
— Decorative Band (Optional Crochet Band) :
Round 1 :
Ch 120 (or enough chains to wrap around crown base snugly), sl st to form ring (do not twist)
Round 2 :
Ch1, 1 sc in each chain around (120)
Round 3-6 :
1 sc in each st around (120)
Info :
If using a ribbon instead of a crocheted band, measure and cut ribbon to wrap around and tie a bow. Pin ribbon in position before attaching butterflies so you can adjust placement exactly as desired. Crochet band adds permanence and can be slipped on/off.
— Butterfly Applique (Make 3) :
Round 1 :
With lavender yarn, ch 6. Row 1: skip first ch from hook, sc in next 5 ch, turn (5)
Round 2 :
Ch1, sc in first st, hdc in next, dc in next 2 sts, sc in last st, turn (5) — this shapes the upper wing
Round 3 :
Ch1, sc in each st across (5) — fold to mirror for lower wing
Info :
This small strip forms one half of a wing. Repeat to make the opposite wing or make both wings separately and sew them together at the center. The sample butterflies appear to be two mirror wings sewn along the center using a contrasting body color.
Round 4 :
Make a second wing the same as Rounds 1-3 (5 sts)
Round 5 :
With both wings aligned, join at the center with slip stitches across 2-3 sts to create a butterfly shape, leaving top and bottom curves to puff slightly (use 1-2 sl st to secure middle)
Round 6 :
Using pale pink yarn, ch 12 and wrap around center of butterfly; sew ends down on the underside to create a raised body. Fasten off and weave in ends.
Info :
For a fuller butterfly, add a tiny row of picots along the wing edges or use a smaller hook to tighten the wing edges. Make three butterflies of similar size and gently shape them with fingers for a slight curve before sewing onto the crown and brim.
— Alternative Detailed Butterfly (Flat Motif) :
Round 1 :
mr, 6 sc in ring (6)
Round 2 :
inc in each st around (12)
Round 3 :
(1 sc, inc) x 6 (18)
Round 4 :
Work two petals: For each petal, ch4, 2 dc in 2nd ch from hook, dc in next ch, sl st to base; repeat for upper pair, then lower pair to make four tiny petals around center
Info :
This version creates a slightly more detailed butterfly, with four curved lobes that resemble wings. Use contrasting yarn for the center body and stitch a vertical column down the middle for the body highlight, as in the photos.
— Finishing and Embellishment :
Info :
Block the brim slightly to ensure the ruffle is even. Lay the brim flat and pin the scallops into place. Mist with water and allow to dry over a rounded surface for best results. If you prefer a stiffer brim, apply a light hat stiffener or use low-temp iron with interfacing between rounds 21-24 before the ruffle round.
Round 1 :
Position the crown onto the brim: center the crown opening over the center of the brim. With long tail from crown or with new yarn, whip stitch the crown base to the brim's inner circle, spacing stitches evenly, sewing through one loop of brim rounds and one of crown rounds.
Info :
Sew slowly and stop to check the crown sits plumb; adjust by adding an extra tuck stitch if one side feels longer. Use pins to hold crown in place while you sew to avoid shifting.
Round 2 :
Attach the decorative band or ribbon around the base of the crown; tie a neat bow at the back or side and tack the knot with a couple of small stitches so it doesn't slip.
Round 3 :
Pin butterflies: place two butterflies on the crown spaced vertically and one on the brim near the bow (as in sample). Sew each butterfly down with small stitches through the center only so wings keep a lifted dimension.
Info :
Bring extra thread to the underside and weave it through a few stitches before trimming to hide ends. For an elevated look, only tack center bodies and leave wing tips free to preserve the 3-D effect.
Round 4 :
If you used wire in the spiral tip, make sure wire ends are folded back and wrapped in yarn to prevent sharp points. Trim any visible wire and sew the wrap closed securely.
Round 5 :
Final trim: tidy all ends, plump any shaped areas gently with fingers and give a final blocking if needed.
Info :
Your finished hat should hold a soft cone with a pronounced curl and an even ruffled brim with three butterfly accents. Change ribbon style to match seasons and swap butterfly colors for customized themes.
This bubblegum pink spiral witch hat brings together playful shapes and charming details to create a truly magical accessory! The tall cone, curled tip, ruffled brim and sweet butterfly appliques collaborate to make a whimsical statement piece you'll love to display. Each round of shaping and scalloping adds personality, and the finished hat is a delight to share as a gift or seasonal decoration. I hope this pattern sparks creativity and brightens your crafting time — happy stitching! 🧶🎀