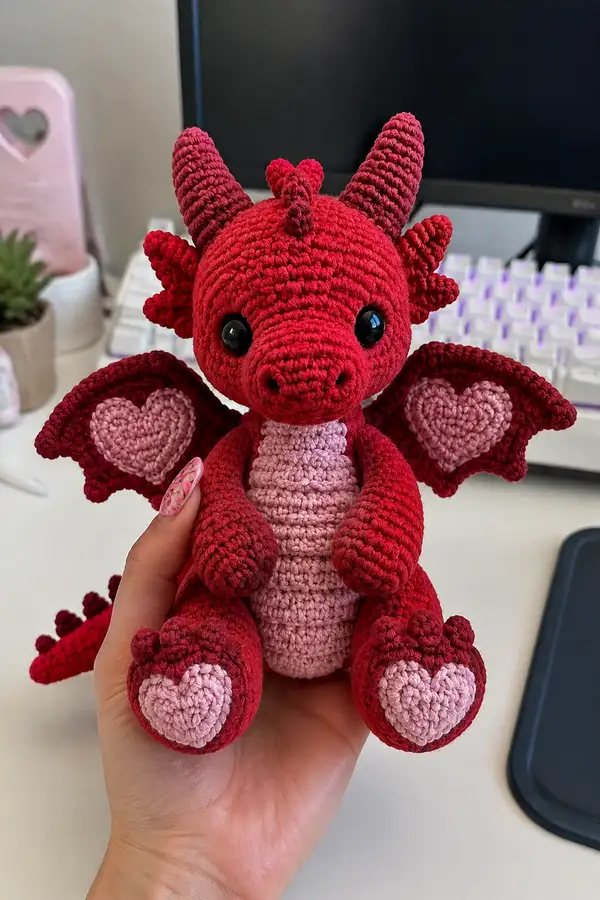
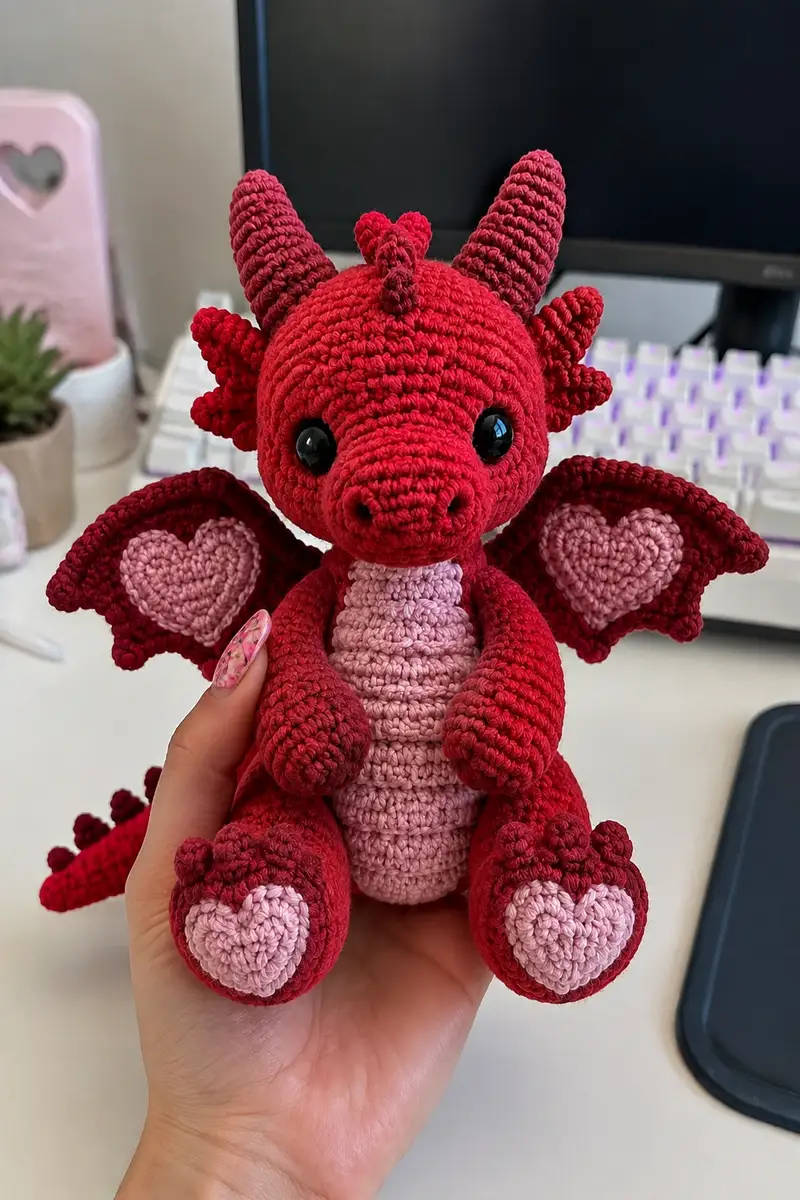
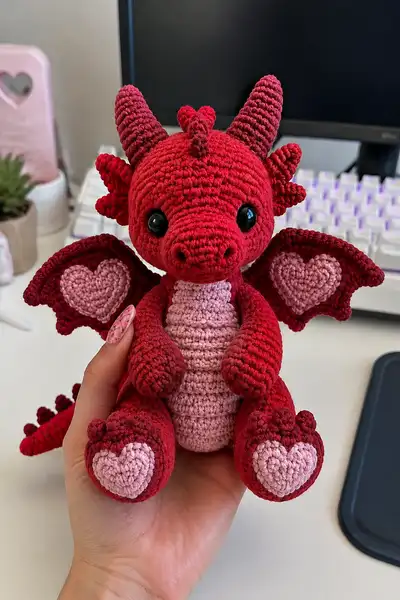
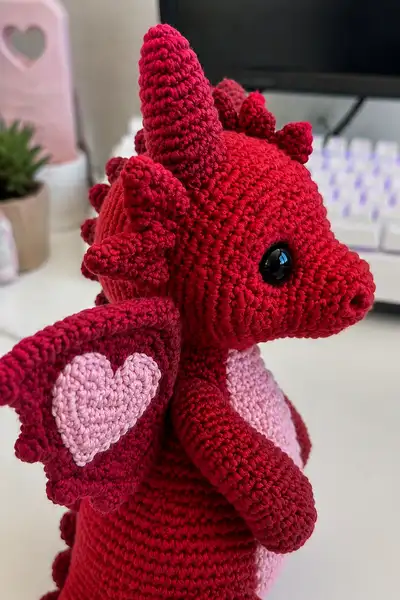
Create an adorable cherry-red Valentine dragon with heart-shaped wing panels and heart feet. This amigurumi features a rounded head with a pronounced snout, large safety eyes, curved horns, a ribbed pale-pink belly, scalloped wing edges and a row of back spikes. The pattern uses simple amigurumi shaping and step-by-step assembly to help you craft a lovable, poseable plush dragon that makes a perfect gift.
Progress Tracker
0% Complete
— Notes & Techniques :
Info :
This pattern is written in US terms. Work in continuous rounds unless otherwise instructed; use a stitch marker to mark the first stitch of each round. Keep tension tight enough that stuffing does not show through. I recommend using a 3.25mm hook with worsted weight yarn for the size shown. Adjust hook size if your fabric is too loose.
— Head (make 1) :
Round 1 :
6 sc in magic ring (6)
Round 3 :
(1 sc, 1 inc) x 6 (18)
Round 4 :
(2 sc, 1 inc) x 6 (24)
Round 5 :
(3 sc, 1 inc) x 6 (30)
Round 6 :
(4 sc, 1 inc) x 6 (36)
Round 7 :
(5 sc, 1 inc) x 6 (42)
Round 8 :
(6 sc, 1 inc) x 6 (48)
Round 9-12 :
1 sc in each st (48)
Info :
Place safety eyes between rounds 13 and 14 approximately 9-11 stitches apart center-to-center depending on desired cuteness. Use needle to mark eye sockets before attaching eyes permanently. If embroidering eyes later, mark positions now as guides.
Round 13-16 :
1 sc in each st (48)
Round 17 :
(6 sc, 1 dec) x 6 (42)
Round 18 :
(5 sc, 1 dec) x 6 (36)
Info :
Begin light stuffing from the top of the head now. Stuff gradually so the head keeps its round shape; do not overstuff — the head should be firm but slightly yielding.
Round 19 :
(4 sc, 1 dec) x 6 (30)
Round 20 :
(3 sc, 1 dec) x 6 (24)
Round 21 :
(2 sc, 1 dec) x 6 (18)
Round 22 :
(1 sc, 1 dec) x 6 (12)
Info :
Fasten off leaving a long tail for sewing the head to the body. Finish stuffing completely and close the hole using yarn needle and ladder/stitch method. If you are attaching the snout separately, leave the head opening slightly looser to allow sewing the snout to the front.
— Snout / Muzzle (make 1) :
Round 1 :
6 sc in magic ring (6)
Round 3 :
(1 sc, 1 inc) x 6 (18)
Round 4 :
(2 sc, 1 inc) x 6 (24)
Round 5 :
(3 sc, 1 inc) x 6 (30)
Round 6 :
1 sc in each st (30)
Round 7 :
(4 sc, 1 dec) x 5 (25)
Round 8 :
(3 sc, 1 dec) x 5 (20)
Round 9 :
(2 sc, 1 dec) x 5 (15)
Round 10 :
1 sc in each st (15)
Info :
The snout is intended to be a slightly elongated cone, so after round 10 you will work short increases and decreases to shape the nose ridge and nostrils. Keep stitches centered so it sits neatly on the head.
Round 11 :
(2 sc, 1 inc) x 5 (20)
Round 12 :
1 sc in each st (20)
Round 13 :
(3 sc, 1 dec) x 4, 2 sc (16)
Round 14 :
(2 sc, 1 dec) x 4 (12)
Round 15 :
(1 sc, 1 dec) x 4 (8)
Info :
Do not overstuff the snout. Add a small amount of fiberfill to keep shape but keep it flexible enough to sew smoothly to the head. Sew snout to head aligning the narrow end to the front center of head rounds 11-14 area. Embroider or stitch nostrils using 2 short straight stitches on the tip's last round.
— Body (make 1) :
Round 1 :
6 sc in magic ring (6)
Round 3 :
(1 sc, 1 inc) x 6 (18)
Round 4 :
(2 sc, 1 inc) x 6 (24)
Round 5 :
(3 sc, 1 inc) x 6 (30)
Round 6 :
(4 sc, 1 inc) x 6 (36)
Round 7-10 :
1 sc in each st (36)
Info :
Switch to pale-pink yarn at the next round if you want a ribbed belly. If keeping a single color body, continue with main color. For the pictured look, change to pale-pink and work belly rows in pale-pink, then switch back to red for side/body rounds. Carry color neatly or fasten off and reattach.
Round 11 :
Change to pale-pink. 1 sc in each st BLO (36) to create a shallow ridge for the belly edge (36)
Round 12-18 :
1 sc in each st (36) in pale-pink (36)
Info :
Begin stuffing the body lightly by adding stuffing in small amounts. The body should be firmer at the bottom to allow the dragon to sit upright. Do not fully stuff until the legs are attached for best shaping control.
Round 19 :
Change back to main cherry-red color. 1 sc in each st (36)
Round 20 :
(4 sc, 1 dec) x 6 (30)
Round 21 :
(3 sc, 1 dec) x 6 (24)
Round 22 :
(2 sc, 1 dec) x 6 (18)
Round 23 :
(1 sc, 1 dec) x 6 (12)
Info :
Fasten off leaving long tail for sewing to head and for closing the base if you choose to close. If attaching legs separately, leave the opening slightly larger and close after legs are secure. For a stable sit, weave tail through the last round and pull snug around legs after sewing.
— Arms (Make 2) :
Round 1 :
6 sc in magic ring (6)
Round 3 :
(1 sc, 1 inc) x 6 (18)
Round 4-6 :
1 sc in each st (18)
Info :
Stuff the hand portion more firmly to give weight to the paw. The arms are shaped like rounded tubes with a slightly larger hand end and tapered shoulder. Keep stuffing light in the upper arm so attachment is neat.
Round 7 :
(4 sc, 1 dec) x 3 (15)
Round 8-12 :
1 sc in each st (15)
Round 13 :
(2 sc, 1 dec) x 3 (12)
Round 14-16 :
1 sc in each st (12)
Round 17 :
(1 sc, 1 dec) x 4 (8)
Round 18 :
1 sc in each st (8)
Info :
Fasten off leaving a long tail for sewing. Stuff hand portion firmly and arm tube lightly. Position arms at the sides of the body around body rounds 10-14 for a natural hugging pose, sew through the body fabric using a strong yarn tail, and secure with multiple stitches.
— Legs / Feet (Make 2) :
Round 1 :
6 sc in magic ring (6)
Round 3 :
(1 sc, 1 inc) x 6 (18)
Round 4 :
(2 sc, 1 inc) x 6 (24)
Round 5 :
(3 sc, 1 inc) x 6 (30)
Round 6 :
1 sc in each st (30)
Info :
For the heart on the foot, make heart applique separately (see Heart Applique section). Stuff the foot firmly and flatten the sole slightly before adding the heart applique to the sole using whip stitch.
Round 7 :
(4 sc, 1 dec) x 5 (25)
Round 8 :
(3 sc, 1 dec) x 5 (20)
Round 9-12 :
1 sc in each st (20)
Round 13 :
(2 sc, 1 dec) x 5 (15)
Round 14 :
(1 sc, 1 dec) x 5 (10)
Round 15 :
1 sc in each st (10)
Round 16 :
(1 sc, 1 inc) x 5 (15)
Round 17 :
1 sc in each st (15)
Round 18 :
(2 sc, 1 dec) x 3, 1 sc (12)
Round 19 :
1 sc in each st (12)
Round 20 :
Fasten off leaving long tail. Stuff foot and shape. Sew heart applique onto sole centered and secure edges smoothly (see Heart Applique section for motif)
Info :
Attach legs to bottom of body evenly spaced, usually around the last 6 rounds of the body to allow the dragon to sit. Sew through both leg and body fabric in several passes for stability.
— Horns (Make 2) :
Round 1 :
6 sc in magic ring (6)
Round 3 :
(1 sc, 1 inc) x 6 (18)
Round 4 :
1 sc in each st (18)
Round 5 :
(2 sc, 1 dec) x 6 (12)
Round 6-8 :
1 sc in each st (12)
Round 9 :
(1 sc, 1 dec) x 4 (8)
Round 10-12 :
1 sc in each st (8)
Round 13 :
6 dec then shape to close if desired (3)
Info :
Horns are best worked in slightly tighter tension and may be lightly stuffed or left flat depending on desired stiffness. Make two identical horns and position them on top of head symmetrically. Sew horns to head around head round 6-8 area for a balanced look.
— Spikes (Make 7-9) :
Spike Pattern :
Round 1: 4 sc in mr (4). Round 2: (1 sc, inc) x 2 (6). Round 3: 6 sc (6). Round 4: (1 sc, 1 dec) x 2 (4). Round 5: 4 sc, fasten off leaving tail for sewing.
Info :
Make 7-9 small spikes of varying sizes to sew along the center back from head to tail. For variety, make some slightly taller (add a round of 6 sc at top) and some smaller. Sew spikes in a line balancing spacing with the tail cone.
— Tail :
Round 1 :
6 sc in magic ring (6)
Round 3 :
(1 sc, 1 inc) x 6 (18)
Round 4-8 :
1 sc in each st (18)
Round 9 :
(2 sc, 1 dec) x 4, 2 sc (14)
Round 10-12 :
1 sc in each st (14)
Round 13 :
(1 sc, 1 dec) x 4 (10)
Round 14-16 :
1 sc in each st (10)
Round 17 :
(1 sc, 1 dec) x 3 (6)
Round 18 :
6 sc (6) - Fasten off leaving long tail for sewing. Add small spike tip from the spike pattern to tail end and alternate a few sewn spikes along the top of the tail.
Info :
Stuff the tail lightly, firmer near the base for stability and tapered toward the tip. Insert optional wire for poseability ensuring ends are folded and padded before final stuffing.
— Wing Outer Panel (Make 2) :
Round 3 :
(1 sc, 1 inc) x 6 (18)
Round 4 :
(2 sc, 1 inc) x 6 (24)
Round 5 :
1 sc in each st (24)
Round 6 :
BLO 1 sc in each st (24) - this makes a soft ridge along the wing base
Round 7 :
5 sc, ch 2, skip 2, 1 sc in next, rep across to shape scallop edge then adjust to make a wing shape roughly 24-28 sts wide depending on placement
Round 8 :
Work along the outer edge increasing and decreasing in short sequences to form a curved scalloped silhouette. Example: (1 sc next 3, 1 inc) x 4 then (3 sc, dec) across - shape until wing reaches a gentle curve - final count ~30
Info :
Work the outer panel fairly flat; do not overstuff. Make two identical outer panels. The scalloped outer edge should have small loops to attach inner heart panel and to create the frilly look shown.
— Wing Inner Heart Panel (Make 2) :
Round 1 :
Magic ring: ch1, 6 sc into ring (6)
Round 2 :
(1 sc, inc) x 3 (9)
Round 3 :
(2 sc, inc) x 3 (12)
Round 4 :
(3 sc, inc) x 3 (15)
Round 5 :
1 sc in next 15 (15)
Round 6 :
Start shaping heart top lobes: in next 3 sts work (1 sc, hdc, 1 dc) forming lobe, skip 1, sl st to center, mirror lobe on opposite side and sc across bottom to shape heart. Fasten off leaving tail
Info :
Sew the heart panel centered onto the inner side of the outer wing panel. Use small, invisible whip stitches around the heart edge. For the textured look, stitch the heart down with small passes in the middle so it sits slightly raised as pictured.
— Wing Assembly (Make 2) :
Info :
Place inner heart panel on the flat inner face of outer wing and stitch into place. Then, work a single-row edging in main cherry red around the wing joining both layers (if you prefer a fuller wing, make a second backing layer). Leave top edge unclosed for sewing to body.
Round 1 :
Edge: join red to wing edge and sc evenly around to finish scallops (approx 30-36 sc depending on how many scallops you created)
Info :
Sew wings to the upper back of the body between body rounds 8-12 depending on the size and positioning. Pin wings first to check symmetry. Use firm sewing for stability.
— Heart Applique for Feet (Make 2) :
Round 1 :
6 sc in magic ring (6) - use pale-pink yarn (6)
Round 2 :
(1 sc, inc) x 3 (9)
Round 3 :
(2 sc, inc) x 3 (12)
Round 4 :
Work top lobes: in next 3 sts work (sc, hdc, dc) to form each lobe, complete bottom curve with sc across remaining sts to form heart outline. Fasten off leaving tail for sewing (heart should be flat and slightly raised)
Info :
Sew hearts onto soles of the feet centered carefully. Use small stitches around the edge to maintain clean outline. Add a tiny stitch in center to create the raised look if desired.
— Small Decorative Spikes on Feet & Head (Make 6-8) :
Spike Pattern :
Round 1: 4 sc in mr (4). Round 2: inc in each st (8). Round 3: 8 sc (8). Fasten off leaving tail. Sew 3 small spikes on each foot toe area and 3-4 along the head ridge.
Info :
Vary spike sizes slightly and alternate placement so they look organic. Secure tightly as they are small and might get tugged by little hands.
— Finishing & Assembly :
Info :
Assemble in this order for neat results: sew snout to head, attach horns, sew head to body, attach arms and legs, sew tail to back, attach wings and then sew spikes and foot hearts. Use pins to position pieces before sewing to ensure symmetry.
Step 1 :
Sew snout to head aligning the base of the snout with head-rounds 11-14. Use ladder stitch or whip stitch and work several passes to make the join firm. Weave tail into inside and knot to secure.
Step 2 :
Sew horns on top of head at head rounds 5-8 slightly set back from the forehead. Make sure both horns mirror each other in angle and height.
Step 3 :
Sew head to body by matching the base of the head (the cast-off round) to the body opening. Pin all around, then sew using mattress or whip stitch. Stuff the neck area firmly before the final passes for a smooth neck join.
Step 4 :
Attach arms to body sides at body rounds 10-14 and sew through both arm and body fabrics for a secure joint. Use small stitches and reinforce the top of the arm once sewn.
Step 5 :
Sew legs to bottom of body spaced evenly so the dragon sits upright. Use extra reinforcing stitches through the base of each leg to the body for sitting stability. Attach hearts to the bottoms after legs are fully secured.
Step 6 :
Sew tail at the center back lower body aligning the tail base with the last few body rounds. Attach back spikes from the head down to tail with spikes centered along the spine.
Step 7 :
Sew wings to upper back area; place them slightly angled outward. For extra strength, stitch through wing top and body seam several times. Sew inner heart panels in place if not pre-attached.
Info :
Weave in all ends on the inside of the toy, use a little fabric glue under safety eye washers if desired, and hide knots inside the stuffing. Add small embroidered details like eyebrows or mouth if you want more character.
— Embroidery & Final Detail :
Info :
Embroider the nostrils with short satin stitches or use a tiny yarn bit for a neater look. A small smile can be created by placing a short curved backstitch between snout bottom rounds. Blush cheeks lightly with fabric-safe pastel powder if desired.
Final :
Give the dragon one last shaping with your hands: press seams, neaten spikes, and adjust stuffing if areas look uneven. Enjoy your cuddly cherry-red Valentine dragon!
This charming cherry-red Valentine dragon brings together playful details and classical amigurumi shaping for a lovable handmade friend. Each heart applique and scalloped wing is a tiny celebration of craft and care. Whether made as a gift or kept on your shelf, this dragon is sure to brighten someone's day with its sweet expression and huggable form. 🧶💖✨