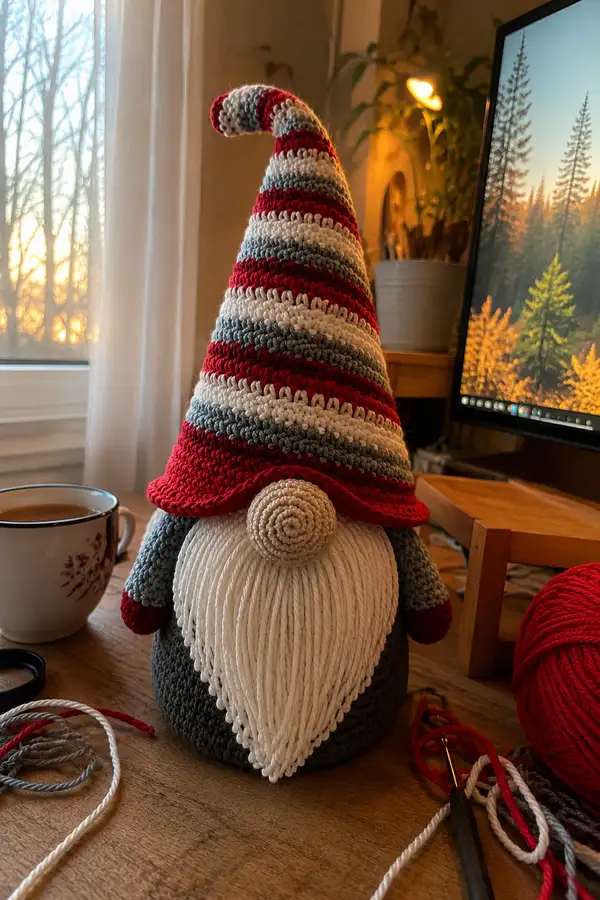
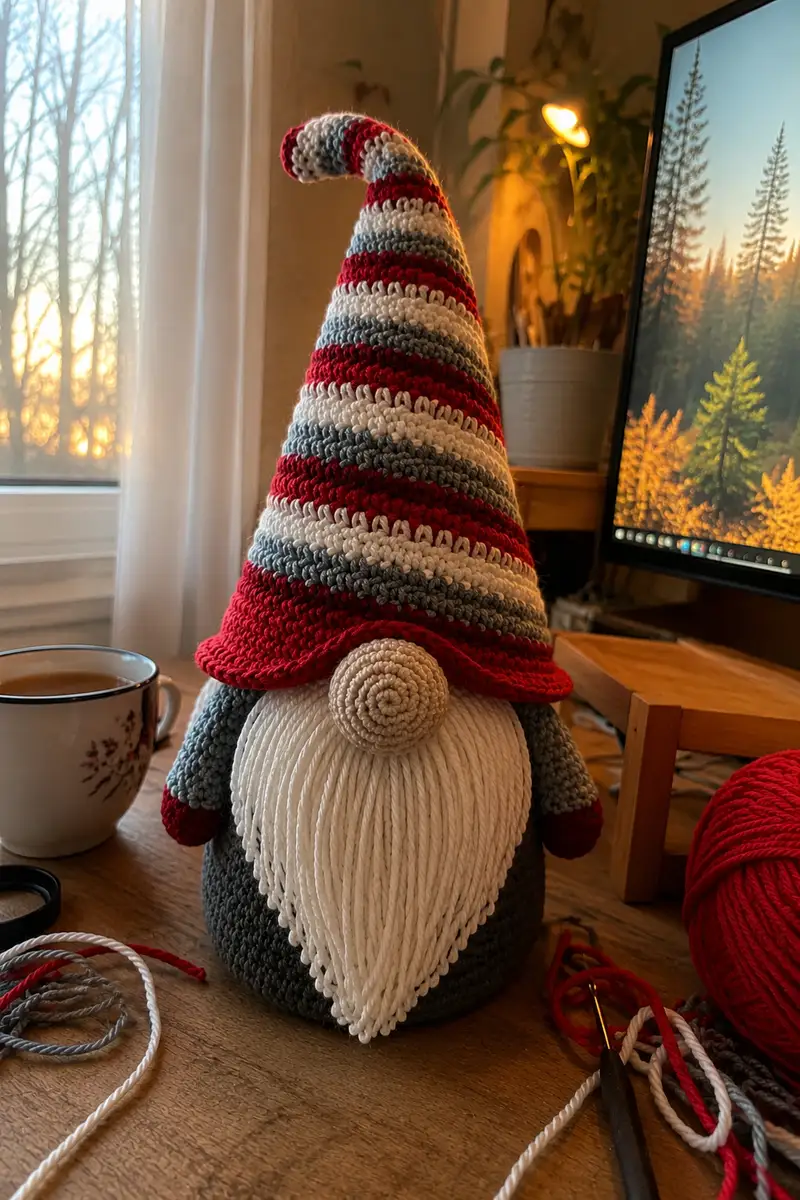
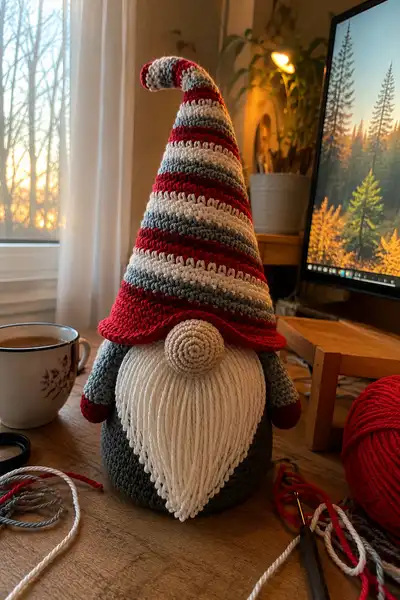
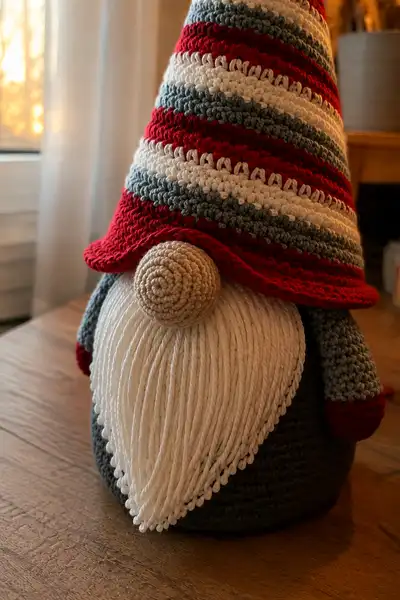
Create a charming oversized Christmas gnome with a long striped hat, looped yarn beard and a round button nose. This pattern recreates the cozy grey body, red/white/grey hat stripes, curled hat tip and little mittened arms shown. Perfect as a festive centerpiece or handmade gift — detailed, step-by-step instructions and assembly tips included.
Progress Tracker
0% Complete
— Head :
Round 1 :
6 sc in magic ring (6)
Round 3 :
(1 sc, 1 inc) x 6 (18)
Round 4 :
(2 sc, 1 inc) x 6 (24)
Round 5 :
(3 sc, 1 inc) x 6 (30)
Round 6 :
(4 sc, 1 inc) x 6 (36)
Round 7 :
(5 sc, 1 inc) x 6 (42)
Round 8 :
(6 sc, 1 inc) x 6 (48)
Round 9 :
1 sc in each st (48)
Round 10 :
1 sc in each st (48)
Info :
This gnome's face is mostly covered by the hat and beard, so head size is moderate. Use even rounds here to build height. Place stitch marker at beginning of every round to keep count.
Round 11 :
1 sc in each st (48)
Round 12 :
1 sc in each st (48)
Round 13 :
1 sc in each st (48)
Info :
Decide where the beard will attach before stuffing head - beard strands will be anchored across the central front panels. Mark the middle front stitch to orient the beard.
Round 14 :
1 sc in each st (48)
Round 15 :
1 sc in each st (48)
Round 16 :
1 sc in each st (48)
Round 17 :
(6 sc, 1 dec) x 6 (42)
Round 18 :
(5 sc, 1 dec) x 6 (36)
Info :
Begin gentle stuffing now. For a round, stable head start with moderate stuffing to support the nose and beard attachments. Stuff evenly around.
Round 19 :
(4 sc, 1 dec) x 6 (30)
Round 20 :
(3 sc, 1 dec) x 6 (24)
Round 21 :
(2 sc, 1 dec) x 6 (18)
Round 22 :
(1 sc, 1 dec) x 6 (12)
Info :
Fasten off leaving a 20-30 cm tail for sewing head to body. Finish closing with tapestry needle or invisible decrease and weave tail inside head. Do not overstuff; head should be lightly stuffed to allow hat to sit comfortably.
— Nose (Button Nose) :
Round 1 :
6 sc in magic ring (6)
Round 3 :
(1 sc, 1 inc) x 6 (18)
Round 4 :
1 sc in each st (18)
Round 5 :
(2 sc, 1 dec) x 6 (12)
Info :
Stuff nose firmly but not to distortion. Fasten off leaving long tail for sewing. Sew nose to head at the front center under brim about 3-4 rounds down from hat edge. Position by pinning first, then stitch around base to attach securely.
— Body :
Round 1 :
6 sc in magic ring (6)
Round 3 :
(1 sc, 1 inc) x 6 (18)
Round 4 :
(2 sc, 1 inc) x 6 (24)
Round 5 :
(3 sc, 1 inc) x 6 (30)
Round 6 :
(4 sc, 1 inc) x 6 (36)
Round 7 :
(5 sc, 1 inc) x 6 (42)
Round 8 :
(6 sc, 1 inc) x 6 (48)
Info :
This body is squat and wide to support the tall hat. Work the body in a dark grey. Use continuous rounds for a neater surface and no visible seams. Mark the beginning of round for consistent shaping.
Round 9 :
1 sc in each st (48)
Round 10 :
1 sc in each st (48)
Round 11 :
1 sc in each st (48)
Round 12 :
1 sc in each st (48)
Round 13 :
1 sc in each st (48)
Info :
Check your base diameter now. If the body feels too small for the hat, add one more round of increases (4 sc, 1 inc) x 8 to grow to 56 sts; otherwise continue. The sample uses 48 sts and looks balanced with the hat scale shown in the photo.
Round 14 :
1 sc in each st (48)
Round 15 :
1 sc in each st (48)
Round 16 :
1 sc in each st (48)
Round 17 :
1 sc in each st (48)
Round 18 :
1 sc in each st (48)
Info :
Begin stuffing the body here. Add fiberfill gradually, packing bottom firmly to provide stability. The body should be firm but still squeezable enough for the neck seam to seat well.
Round 19 :
(6 sc, 1 dec) x 6 (42)
Round 20 :
(5 sc, 1 dec) x 6 (36)
Round 21 :
(4 sc, 1 dec) x 6 (30)
Round 22 :
(3 sc, 1 dec) x 6 (24)
Round 23 :
(2 sc, 1 dec) x 6 (18)
Round 24 :
(1 sc, 1 dec) x 6 (12)
Info :
Leave a long tail for sewing the head to the body after closing. Alternatively, stop decreasing at round 21-22 and leave an opening to insert the stuffed head then sew together for a seamless neck. The latter creates a more secure attachment for a tall hat.
— Arms (Make 2) :
Round 1 :
6 sc in magic ring (6)
Round 3 :
(1 sc, 1 inc) x 6 (18)
Round 4 :
1 sc in each st (18)
Info :
Start the arms in grey for sleeves, switching to red for mitten tips near the end. Stuff the palm/chubby hand area firmly to keep shape and allow the arm to rest against the body.
Round 5 :
1 sc in each st (18)
Round 6 :
1 sc in each st (18)
Round 7 :
1 sc in each st (18)
Round 8 :
Change to red yarn. 1 sc in each st (18)
Info :
For a neat color transition, finish the last stitch of the previous round with the new yarn color, then continue. You can carry the unused yarn inside the arm or fasten off and weave ends later.
Round 9 :
1 sc in each st (18)
Round 10 :
1 sc in each st (18)
Round 11 :
(2 sc, 1 dec) x 6 (12)
Round 12 :
1 sc in each st (12)
Round 13 :
1 sc in each st (12)
Round 14 :
(1 sc, 1 dec) x 4 (8)
Info :
Stop stuffing when you reach the wrist area; leave the upper arm unstuffed or lightly stuffed so it flattens slightly against the body once attached. Stuff the mitten end firmly to preserve the rounded glove look.
Round 15 :
1 sc in each st (8)
Round 16 :
1 sc in each st (8)
Round 17 :
1 sc in each st (8)
Round 18 :
1 sc in each st (8)
Round 19 :
Fasten off leaving tail for sewing. Flatten open end and whip stitch closed or sew into body later (8)
Round 20 :
Info :Repeat for second arm. When attaching, pin arms to body between rounds 12-16 of body for natural placement in sample photo.
— Hat (Striped Tall Hat with Brim) :
Round 1 :
6 sc in magic ring (6)
Round 3 :
(1 sc, 1 inc) x 6 (18)
Round 4 :
(2 sc, 1 inc) x 6 (24)
Round 5 :
(3 sc, 1 inc) x 6 (30)
Round 6 :
(4 sc, 1 inc) x 6 (36)
Round 7 :
(5 sc, 1 inc) x 6 (42)
Round 8 :
(6 sc, 1 inc) x 6 (48)
Info :
The hat begins with a small crown and increases to a wide brim. We will work straight after round 8 to build the long cone. Keep rounds neat because the hat brim will roll outward slightly for that ruffled look.
Round 9-12 :
1 sc in each st (48)
Round 13 :
Change to red yarn. 1 sc in each st (48)
Round 14 :
Change to white yarn. 1 sc in each st (48)
Round 15 :
Change to light grey yarn. 1 sc in each st (48)
Round 16 :
Change to red yarn. 1 sc in each st (48)
Round 17 :
Change to white yarn. 1 sc in each st (48)
Info :
Stripe pattern: in the sample the stripes alternate red, white, grey with small stripe heights of 1-3 rounds. You can adapt stripe heights; each color change round should be finished cleanly. Carry yarn inside if you prefer to avoid many ends.
Round 18 :
Change to grey yarn. 1 sc in each st (48)
Round 19 :
Change to red yarn. 1 sc in each st (48)
Round 20 :
Change to white yarn. 1 sc in each st (48)
Round 21 :
Change to grey yarn. 1 sc in each st (48)
Round 22 :
Change to red yarn. 1 sc in each st (48)
Round 23 :
Change to white yarn. 1 sc in each st (48)
Info :
Continue this color rotation to create the tall striped cone. In the sample the hat reaches a height of about 30-36 rounds after the brim. Add more rounds for a taller hat until desired height is reached.
Round 24-38 :
Repeat stripe sequence every 1-3 rounds as desired; keep stitch count at 48 per round (48)
Round 39 :
To begin tip shaping, (6 sc, 1 dec) x 6 (42)
Round 40 :
(5 sc, 1 dec) x 6 (36)
Round 41 :
(4 sc, 1 dec) x 6 (30)
Round 42 :
(3 sc, 1 dec) x 6 (24)
Round 43 :
(2 sc, 1 dec) x 6 (18)
Round 44 :
(1 sc, 1 dec) x 6 (12)
Info :
Before closing the very tip, decide whether you want a wired, poseable tip. If yes, insert a short piece of floral wire or pipe cleaner before stuffing; fold and secure wire ends to avoid sharp points. Fasten off and close, leaving tail for attaching to head if desired.
Round 46 :
Fasten off and weave in ends. Use the long tail to sew the hat to the head or make it removable by stitching only a small portion in the center.
— Hat Brim (Ruffled Brim Effect) :
Round 1 :
Attach yarn at base of hat (round 8 area). Ch 1, work 1 sc in each st around (48)
Round 2 :
1 sc in each st BLO (48)
Round 3 :
(1 sc, 1 hdc, 1 dc) in each st around to create a pronounced ruffle - or for milder ruffle do (1 sc, 1 hdc) x 48 (144 sts if using the dc option)
Info :
The sample shows a gentle rolled brim. Using BLO on the first brim round creates a subtle ridge, then adding a lightweight ruffle row makes the brim flip naturally. Adjust fullness to taste by increasing or reducing stitches in the ruffle round.
— Beard (Looped Strand Technique) :
Info :
The beard is created by anchoring long strands across a triangular front area, using a loop or latch-hook-style attachment. Use bulky/size 5 strands or two strands of worsted held together for the thick look in the photo. Each strand is folded in half and attached with a lark's head knot through the stitches in the beard zone.
Step 1 :
Cut multiple lengths of cream yarn about 35-45 cm long depending on desired beard length. For this sample, approx. 40 strands give full coverage across the front.
Step 2 :
Identify the triangular chain of stitches across front of head where beard should attach, approximately spanning 14-18 stitches wide and about 10-12 rows down if head were visible. Mark top center stitch and measure outward symmetrically.
Step 3 :
Starting at the leftmost marked stitch, fold a strand in half, insert the folded loop through the stitch from front to back, pull the two loose ends through the loop and tighten to form a lark's head knot. Repeat across the marked area in close rows to achieve a filled triangular shape.
Info :
For a tapered beard shape, attach more strands in center columns and progressively fewer toward the sides and bottom. Trim strands into a pointed or rounded shape after attaching. The sample shows a tapered V with a neat pointed bottom - use scissors to trim evenly.
Step 4 :
Work rows of attachments so that each subsequent row overlaps previous strands slightly, creating fullness. Aim for about 8-10 rows of strands depending on length to create the dense look. Once attached, comb strands gently with fingers and trim tapered edge.
Step 5 :
Optional: If you prefer a looped top edge as in the photo’s scalloped border, anchor the topmost row of loops through the stitches but do not pull ends through, leaving a half-loop that creates a row of loops framing the top of the beard.
Info :
For extra security, dab a small amount of fabric glue at the knot bases on the inside of the head, or weave the tails into a foundation row and stitch across with matching yarn. Be mindful of bulk when adding glue.
— Finishing Nose & Beard Placement :
Info :
Position nose over the top center of the beard. The nose should overlap the topmost beard strands slightly so it looks anchored within the beard. Pin nose into place on the folded brim area, then sew with the long tail through the head and back to secure. Use extra stitches to ensure the nose is firmly anchored.
— Assembly and Optional Stabilizing Base :
Step 1 :
Sew head to body: If body is closed, create a small opening at the top of the body by leaving the last 6-8 stitches and slip-stitching only partway, allowing you to insert the head. Use the head tail and body tail to whip stitch the head securely to the body rim. Use even stitching and check orientation as per photo - the beard should face the front.
Info :
Some crocheters prefer to sew head to body before closing completely to create a smoother neck seam—this is optional. In the sample the head sits slightly nestled under the hat brim for a cozy look.
Step 2 :
Attach arms: Pin arms to the sides of the body approximately between body rounds 12 and 18 (counting from bottom up) so they rest naturally. Using the arm tail and matching yarn, sew through body and arm with ladder stitch or whip stitch. Make sure mittens sit forward as shown.
Info :
If you want the arms slightly movable, attach with only a few stitches at the shoulder or use safety joints, but note that the sample arms are fully sewn for a fixed pose.
Step 3 :
Attach hat: Decide if hat will be removable or fixed. For removable, sew only a few stitches at the center to create a stop. For a fixed hat, sew around the hat base to the head using the long tail and matching color. Ensure the brim covers the top portion of the beard and the nose just peeks out as in the sample.
Info :
To get the rolled brim look that curves forward over the nose, sew the front 1/3 of the brim more securely and leave back loosely stitched or unstitched so the brim can roll naturally.
Step 4 :
Final shaping and trimming: Trim beard to desired shape, shape brim, and add small embellishments as desired such as a pom-pom at the hat tip or a stitched loop hanger on the back.
Info :
Check all seams and reinforce with a few extra stitches if needed. Weave in all ends inside the body to avoid visible tails. Add a touch of blush to cheeks with fabric-safe paint if desired.
— Optional Hat Curl Reinforcement (Poseable Tip) :
Step 1 :
Before closing the hat tip, thread a length of floral wire or pipe cleaner into the tip and fold it back on itself so there is no sharp end. Continue closing the tip while leaving a little slack so you can shape the curl.
Info :
Secure wire ends inside the hat by twisting them together and covering with a short piece of yarn or tape, then embed into stuffing so the wire does not poke out.
— Optional Base Stabilizer :
Info :
For a very stable gnome that stands without tipping, sew a felt or cardboard circle into the bottom before completing the final rounds of the body, or add a small bag of beans inside the base enclosed in fabric to weight it. Ensure weight is well centered.
— Pattern Notes and Tips :
Info :
Use a hook slightly smaller than recommended for your yarn to ensure tight stitches that do not show stuffing. Keep stitch markers and row counters to track rounds. When changing colors often in the hat, carry yarn up the inside and secure floats every 6-8 stitches to avoid long catches.
This jolly gnome pattern brings together cozy textures and festive stripes to add instant holiday charm to any room. The looped beard and tall striped hat give it whimsical personality while remaining easy to personalize. Make one as a special handmade gift or a seasonal centerpiece you’ll enjoy every year. 🧶🎁✨