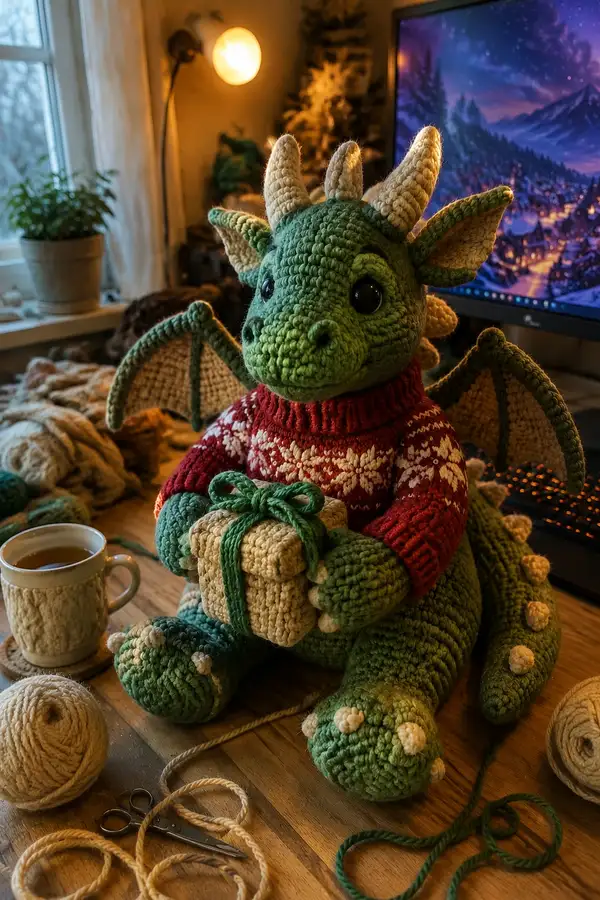
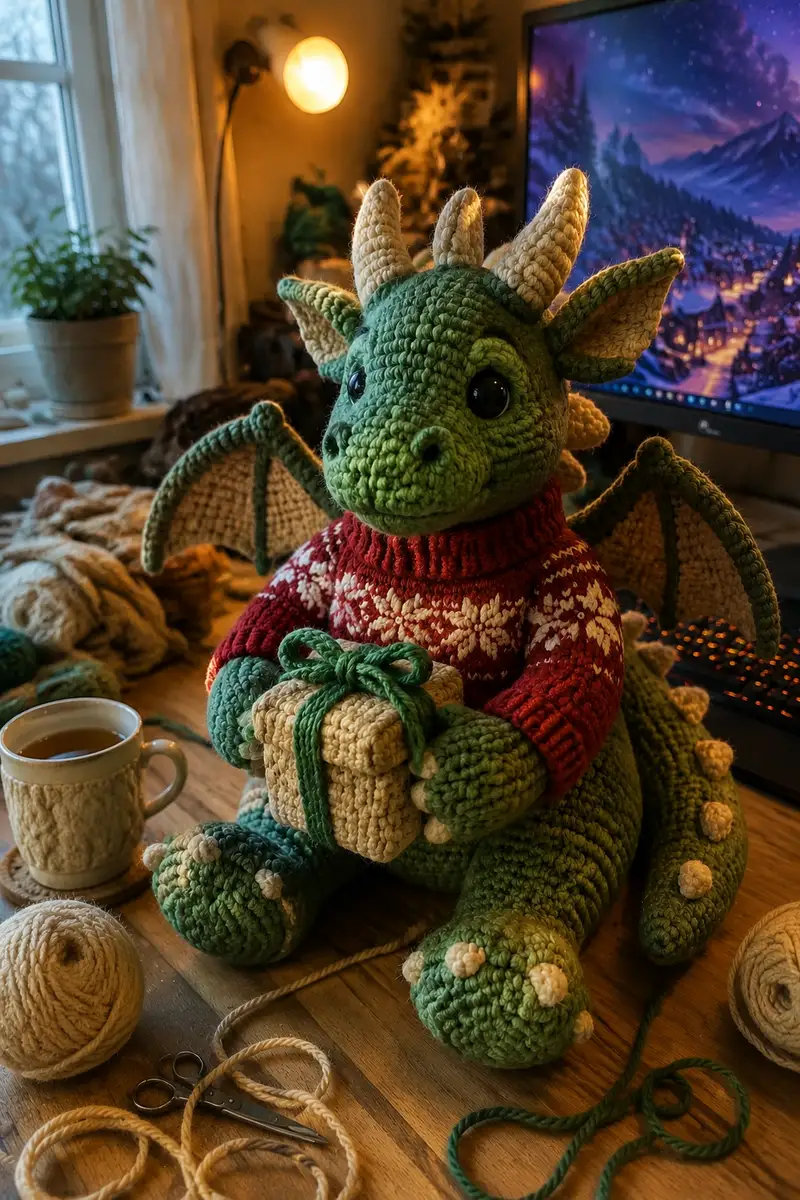
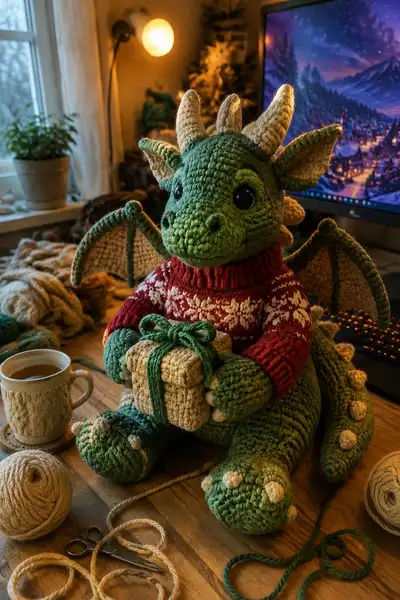
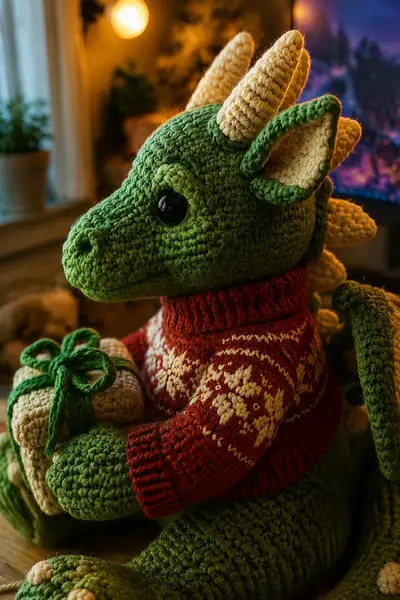
A large, huggable green dragon amigurumi dressed in a festive red Fair Isle style sweater, clutching a cream gift with a green bow. Features cream horns, spikes and wing liners, big glossy safety eyes, and detailed claws. Warm, textured stitches give the dragon a plush, chunky look — perfect as a holiday centerpiece or a cuddly handmade gift.
Progress Tracker
0% Complete
— Head Main :
Round 1 :
6 sc in magic ring (6)
Round 3 :
(1 sc, 1 inc) x 6 (18)
Round 4 :
(2 sc, 1 inc) x 6 (24)
Round 5 :
(3 sc, 1 inc) x 6 (30)
Round 6 :
(4 sc, 1 inc) x 6 (36)
Round 7 :
(5 sc, 1 inc) x 6 (42)
Round 8 :
(6 sc, 1 inc) x 6 (48)
Round 9-14 :
1 sc in each st (48)
Info :
Place safety eyes between rounds 12-13, approximately 6-8 stitches apart depending on desired expression. Use stitch markers to mark eye placement and later the center front for snout placement.
Round 15-18 :
1 sc in each st (48) - work these rounds to build the head height and to create space for snout positioning (48)
Info :
Start flattening the crown slightly by working even until round 18. If you want a slightly longer head, add 1-3 more even rounds here before decreases.
Round 19 :
(6 sc, 1 dec) x 6 (42)
Round 20 :
(5 sc, 1 dec) x 6 (36)
Round 21 :
(4 sc, 1 dec) x 6 (30)
Info :
Begin stuffing the back and upper part of the head firmly to keep a round shape. Stuff a little more at the crown so the head retains a slightly domed top.
Round 22 :
(3 sc, 1 dec) x 6 (24)
Round 23 :
(2 sc, 1 dec) x 6 (18)
Round 24 :
(1 sc, 1 dec) x 6 (12)
Info :
Fasten off leaving a 20-30 cm tail for sewing to the body later. Finish stuffing the head before closing the final rounds. The head will be sewn to the body after snout attachment.
— Snout / Muzzle :
Round 1 :
6 sc in magic ring (6)
Round 3 :
(1 sc, 1 inc) x 6 (18)
Round 4 :
(2 sc, 1 inc) x 6 (24)
Round 5 :
(3 sc, 1 inc) x 6 (30)
Round 6-8 :
1 sc in each st (30)
Info :
The snout is worked as a separate elongated oval that is sewn to the front lower rounds of the head. Place a stitch marker in the center front of the snout to match to the head's center front marker.
Round 9 :
(3 sc, 1 inc) x 6 (36)
Round 10-12 :
1 sc in each st (36)
Round 13 :
(4 sc, 1 dec) x 6 (30)
Round 14 :
(3 sc, 1 dec) x 6 (24)
Round 15 :
(2 sc, 1 dec) x 6 (18)
Round 16 :
(1 sc, 1 dec) x 6 (12)
Info :
Before closing fully, stuff the snout firmly, concentrating stuffing in the nose area to give a forward projection. Leave a long tail to sew the snout onto the head and shape the nostrils with short stitches after attachment.
— Eyes, Nostrils & Face Details :
Info :
Use large safety eyes (18-20mm). Insert eyes between rounds 12-14 of the head main, spacing 6-8 stitches apart depending on expression. Secure backs on the inside. If embroidering eyelids, use a darker green and backstitch small crescents above eyes on rounds 12-13.
Info :
Sew the snout centered on the lower front of the head. Use surface stitches to create two small nostril depressions just above the nose tip. Optionally embroider a small smile under the snout center using darker green yarn.
— Ears (Make 2) :
Round 1 :
6 sc in magic ring (6)
Round 3 :
(1 sc, 1 inc) x 6 (18)
Round 4 :
1 sc in each st (18)
Round 5 :
(2 sc, 1 dec) x 4, 2 sc (14)
Round 6 :
1 sc in each st (14)
Round 7 :
BLO: 1 sc in each st BLO (14) - this creates a foldable ridge for ear rim
Round 8 :
FLO: 1 sc in each st FLO (14) - add inner ear liner by sewing cream triangle inside
Round 9 :
Decrease slightly for ear tip: (3 sc, 1 dec) x 3 + 2 sc (12)
Round 10 :
Fasten off leaving tail for sewing. Shape ear and tack 2-3 stitches to fix fold at base.
Info :
Sew ears to the head between rounds 8-11, set slightly angled back. Add cream inner ear by crocheting a small oval (6-10 rounds) and sewing into ear hollow, then stitching ear rim green over the edge for a finished look.
— Horns (Make 3 - two large, one small) :
Round 1 :
6 sc in magic ring (6)
Round 3 :
1 sc in each st (12)
Round 4 :
(2 sc, 1 inc) x 4 (16)
Round 5-8 :
1 sc in each st (16) - work even to build length (16)
Round 9 :
(2 sc, 1 dec) x 4 (12)
Round 10 :
1 sc in each st (12)
Round 11 :
(1 sc, 1 dec) x 4 (8)
Round 12 :
Fasten off leaving long tail for sewing. Stuff lightly and shape taper by pulling tail through center a few times.
Info :
Insert a short length of pipe cleaner or floral wire inside the horn if you want a slightly poseable horn or to make it stand up firmly; fold wire end and bury in stuffing to avoid poke-through.
— Neck Collar & Joining Head to Body :
Info :
After head and snout are joined, leave the neck opening wide enough to join securely to the body. Use the 12-st opening created in head rounds as the neck join. Place the head on the body top and sew through matching rounds with whip or mattress stitch for a neat finish.
— Body :
Round 1 :
6 sc in magic ring (6)
Round 3 :
(1 sc, 1 inc) x 6 (18)
Round 4 :
(2 sc, 1 inc) x 6 (24)
Round 5 :
(3 sc, 1 inc) x 6 (30)
Round 6 :
(4 sc, 1 inc) x 6 (36)
Round 7 :
(5 sc, 1 inc) x 6 (42)
Round 8 :
(6 sc, 1 inc) x 6 (48)
Round 9-12 :
1 sc in each st (48)
Info :
If you are adding the sweater, either make the sweater directly over the body or crochet the sweater separate and dress the dragon later. For body-only, continue in green yarn; for dressed version, start sweater pattern on round 9 or later as described in sweater section.
Round 13-16 :
1 sc in each st (48)
Round 17 :
(6 sc, 1 dec) x 6 (42)
Round 18 :
(5 sc, 1 dec) x 6 (36)
Round 19 :
(4 sc, 1 dec) x 6 (30)
Round 20 :
(3 sc, 1 dec) x 6 (24)
Info :
Begin stuffing the body at this point. Stuff moderately firm around the bottom so the dragon can sit stable. Leave the top less stuffed to accept the neck join and offer a snug join for the head.
Round 21 :
(2 sc, 1 dec) x 6 (18)
Round 22 :
(1 sc, 1 dec) x 6 (12)
Round 23 :
6 dec (6) - or stop here if making a flat bottom and later add a base disc
Info :
If you prefer a flat base for sitting stability, stop at round 22, fasten off leaving long tail and stitch onto a 12-18 sc disc base worked separately in spiral rounds to form a stable platform.
— Legs (Make 2) :
Round 1 :
6 sc in magic ring (6)
Round 3 :
(1 sc, 1 inc) x 6 (18)
Round 4 :
(2 sc, 1 inc) x 6 (24)
Round 5 :
(3 sc, 1 inc) x 6 (30)
Round 6-9 :
1 sc in each st (30)
Info :
Work single crochet rounds to create a squat foot. For toe bumps, work small cream 4-round spheres (see Claws section) and sew onto toe positions before stuffing fully.
Round 10 :
(3 sc, 1 inc) x 6 (36)
Round 11-16 :
1 sc in each st (36) - leg shaft
Round 17 :
(5 sc, 1 dec) x 6 (30)
Round 18 :
(4 sc, 1 dec) x 6 (24)
Round 19 :
1 sc in each st (24)
Round 20 :
(3 sc, 1 dec) x 6 (18)
Round 21 :
1 sc in each st (18) - leave opening for sewing
Round 22-25 :
Fasten off leaving long tail for sewing and finish stuffing foot and leg. Sew legs to bottom of body around rounds 1-4 of body base for stable seating.
Info :
Position legs evenly on the base; when sewn in a seated pose, the legs sit forward. Pin the legs and test sit posture before final sewing; add felt or small weight inside the foot for stability if required.
— Arms (Make 2) :
Round 1 :
6 sc in magic ring (6)
Round 3 :
(1 sc, 1 inc) x 6 (18)
Round 4 :
(2 sc, 1 inc) x 6 (24)
Round 5-8 :
1 sc in each st (24) - hand/paw
Info :
Add a flat palm shaping by working 1 sc in FLO for one round and then continuing over both loops; this creates a slight ridge resembling a thumb separation area.
Round 9 :
(2 sc, 1 inc) x 6 (30)
Round 10-14 :
1 sc in each st (30) - lower arm
Round 15 :
(4 sc, 1 dec) x 5 (25)
Round 16 :
(3 sc, 1 dec) x 5 (20)
Round 17 :
1 sc in each st (20)
Round 18-20 :
Fasten off leaving long tail for sewing. Stuff hands firmly and arms lightly to the elbow. Insert optional wire for poseable arms before stuffing fully.
Info :
Sew the arms to the sides of the body at rounds 18-22 for a natural sitting posture. Stitch through both arm and body securely with ladder stitch for a clean join.
— Claws / Toe Bumps (Make 12 small bumps) :
Round 1 :
6 sc in magic ring (6)
Round 3 :
1 sc in each st (12)
Round 4 :
(2 sc, 1 dec) x 3 (9)
Round 5 :
Fasten off leaving tail for sewing. Make 10-12 of these small cream bumps and sew onto toes and top of tail as visible in image.
Info :
Arrange three bumps on each foot in a triangular pattern and several along the tail top spaced evenly. Sew tightly and weave tails inside the body to secure.
— Tail :
Round 1 :
6 sc in magic ring (6)
Round 3 :
(1 sc, 1 inc) x 6 (18)
Round 4 :
(2 sc, 1 inc) x 6 (24)
Round 5-12 :
1 sc in each st (24) - work even to create length (24)
Round 13 :
(3 sc, 1 dec) x 6 (18)
Round 14-18 :
1 sc in each st (18)
Round 19 :
(2 sc, 1 dec) x 6 (12)
Round 20 :
1 sc in each st (12)
Round 21-25 :
Fasten off leaving long tail for sewing. Before final sewing, attach cream spike bumps along tail top at even intervals (see spike section). Stuff tail firmly for a plump finish.
Info :
Sew tail to back of body at the lower center back. Hinge it slightly so it curves around the side when seated; secure firmly with many passes of yarn for stability.
— Spikes (Make 10-12 small spikes) :
Round 1 :
4 sc in magic ring (4)
Round 3 :
1 sc in each st (8)
Round 4 :
(2 sc, 1 dec) x 2 (6)
Round 5 :
Fasten off leaving long tail. Make 10-12 spikes in cream; sew along the center back from neck to tail tip and add a few extra along hips as pictured.
Info :
Space spikes evenly; use pins to visualize placement before sewing. Smaller spikes near the head look proportional; larger slightly in mid-back can be made by using 10-round version of spike if desired.
— Wings (Make 2) :
Info :
Wings are worked flat as two-layer panels. Work inner membrane in cream, then border with green and slip stitch or single crochet together for a framed look.
Round 1 :
Ch 16, sc in 2nd ch from hook and across (15)
Round 2 :
Ch 1, turn, sc across (15)
Round 3 :
Ch 1, 2 sc in first st, sc to last st, 2 sc in last st (17)
Round 4 :
Ch 1, sc across (17)
Round 5 :
Ch 1, 2 sc at first, (sc in next 3 sts), 2 sc at next, sc to last, 2 sc in last (19)
Round 6-8 :
1 sc in each st (19)
Round 9 :
Ch 1, work shape along outer edge: sc 6, hdc 2, dc 2, hdc 2, sc to end (19) - creates a scalloped upper wing edge
Info :
Switch to green yarn at this point for the wing rim. Work a round of sc around the cream membrane in green to create an outer frame. Work in BLO for one round to make the edge stand up.
Round 10 :
Attach green and sc around edge, working 2 sc in corners and approx 40 sc total depending on shape. Fasten off and sew to body between rounds 10-14 at the upper back.
Round 11 :
Optional: add a thin pipe cleaner in the outer rim before final joining if you want stiff, poseable wings. Wrap with a row of sc to hide the wire.
— Sweater (worked separate, then dressed OR crocheted over body) :
Info :
This sweater mimics Fair Isle knit using stranded crochet colorwork. Work sweater in the round from the hem up in red as main color and cream for motifs. The neck and cuffs are worked in ribbing using BLO and FLO technique to mimic knitted ribs.
Round 1 (Hem) :
Ch 48 and join in round, sc in each ch to form ring (48) - try ring on body for fit
Round 2-4 :
1 sc in each st (48)
Round 5 :
Change to BLO ribbing: 1 sc in each st BLO (48)
Round 6-10 :
1 sc in each st BLO to build ribbing height (48)
Info :
For the Fair Isle motif, carry the contrast cream yarn across the wrong side and only catch floats no longer than 4-5 sts. Use stranded crochet technique keeping tension even.
Round 11-20 :
Work colorwork motif rows: alternating red main with cream motif stitches. Example motif row: *3 red, 2 cream, 4 red, 2 cream, repeat* - maintain total 48 sts per round. Repeat pattern to cover torso. (48)
Info :
Sleeves are worked separately: ch 18 join into round and work 1 sc rounds until sleeve length matches body armhole measurement (approx 12-14 rounds). Add ribbed cuff by working BLO for 6 rounds in red. Sew sleeves into sweater body using mattress stitch.
Round 21 :
Change to red only and work neck shaping: (6 sc, 1 dec) x 6 (42)
Round 22 :
1 sc in each st (42)
Round 23 :
Switch to BLO and work 8 rounds for a folded turtleneck (42)
Round 24 :
Fold neck and slip stitch through both layers around to close for a neat roll-over turtleneck appearance. Fasten off and weave ends.
Info :
Try sweater on the body before final closing to ensure good fit. Adjust number of motif rounds for shorter or longer torsos. The sweater can be sewn shut under the arms or left removable depending on preference.
— Gift Box (Prop) :
Box Bottom Round 1 :
6 sc in magic ring (6)
Round 3 :
(1 sc, 1 inc) x 6 (18)
Round 4 :
(2 sc, 1 inc) x 6 (24)
Round 5-6 :
1 sc in each st (24)
Box Top :
Make a second identical square for the lid and join both around the sides by working sc rounds to create depth (work 6 sc rounds up sides to form a cube about 5-6 cm tall).
Info :
Make the lid slightly larger in circumference by adding 1-2 sc evenly on the top rim to allow it to fit over the bottom snugly. Stuff the bottom lightly for a soft toy box or leave unstuffed for a hollow prop.
Ribbon :
Ch 50, sl st back to create a cord. Tie around the box and make a simple bow. Use dark green yarn for contrast to cream box. Sew bow to top center of lid.
— Assembly Instructions :
Info :
Block and position all parts before sewing. Use pins to hold each piece in place and view from several angles to ensure symmetry and correct posture.
Step 1 :
Attach head to body by aligning the 12-st neck opening of the head with the top opening of the body. Pin evenly and sew using a whip stitch or ladder stitch through each round to produce a smooth join.
Step 2 :
Sew snout to front of head, centering to nose marker. Use ladder stitch around the snout base and add a few surface embroidery stitches to define nostrils and mouth.
Step 3 :
Attach arms to sides of the body between rounds 18-22. Pin in place so the hands rest naturally holding the gift. Sew firmly with multiple passes and weave tails inside.
Step 4 :
Sew legs to the base of the body; place them so the dragon can sit steadily, slightly angled outward to cradle the gift. Reinforce attachment with extra stitches through the body base.
Step 5 :
Sew wings to the upper back at rounds 10-14. Position so they are symmetric and slightly outward. Secure with strong stitches and hide ends inside the body.
Step 6 :
Sew spikes along the center back from neck to tail. Attach horns and ears, placing horns on the head crown slightly angled forward and ears set back at the sides.
Step 7 :
Place the gift between the hands and sew the hands lightly to the gift to secure its position. Optionally glue the bow knot for extra hold.
Step 8 :
Weave all loose ends well inside body, trim tails, and check for any gaps where stuffing might show. Add final shaping with mattress stitch if needed.
— Finishing Touches & Detailing :
Info :
Use surface slip stitch or embroidery to add small eyebrow ridges, smile lines, and light shading around eyes. Apply a tiny dab of fabric paint or blush to cheeks if desired for extra charm.
Info :
Secure safety eyes with washers behind head and weave ends of sweater and gift seams inside the body. If giving to a child under 3, embroider eyes instead of safety eyes for safety compliance.
This adorable amigurumi dragon blends whimsical charm with cozy holiday details to become an instant favorite! The Fair Isle-style sweater, cream horns and spikes, and the tiny wrapped gift make it a delightful seasonal keepsake. Each stitch builds personality — perfect for gifting or keeping as a cuddly centerpiece. 🎄🧶