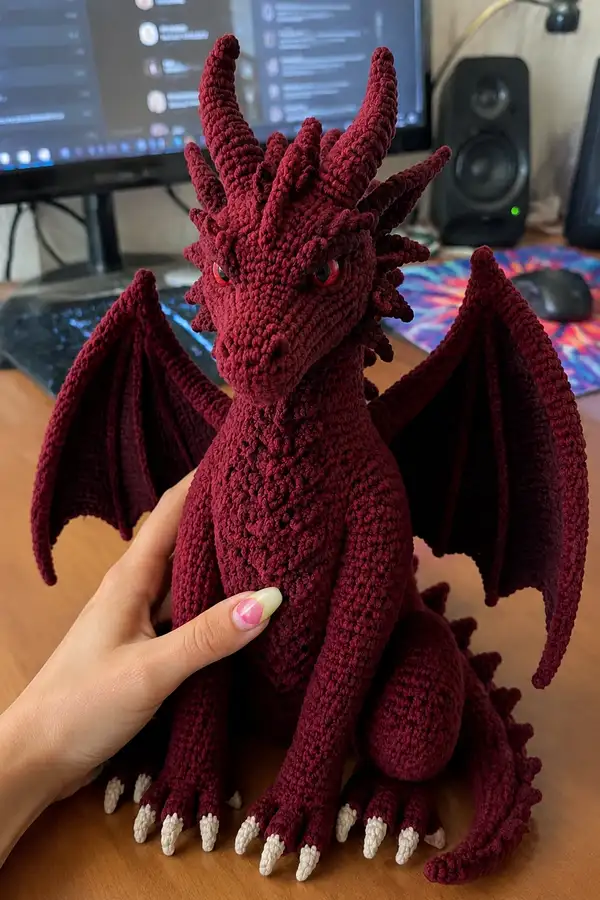
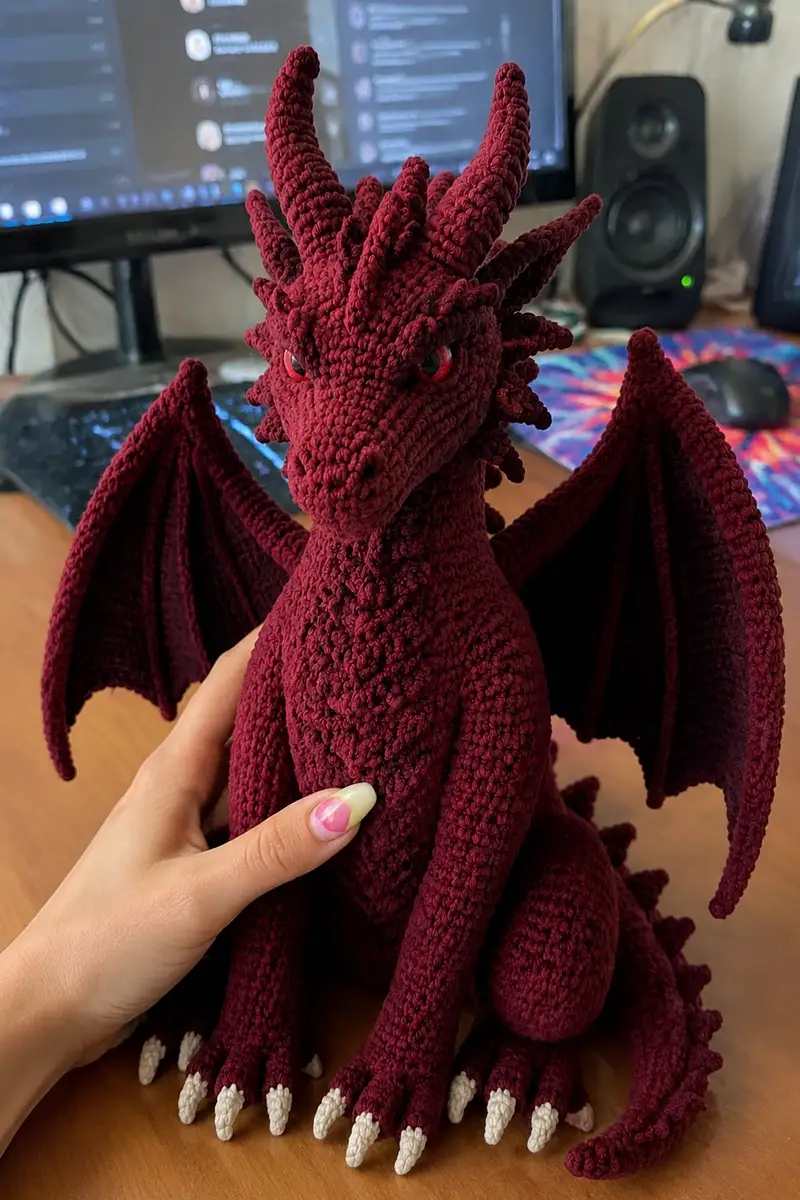
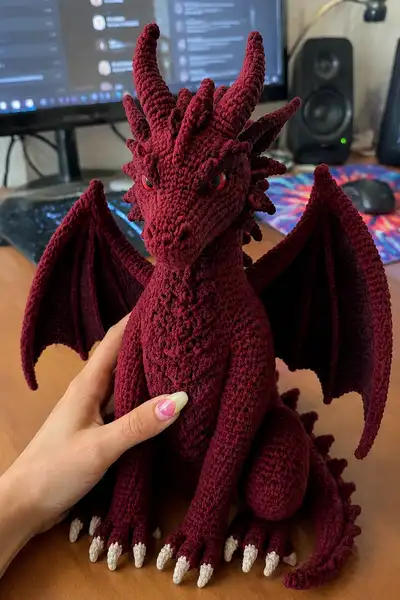
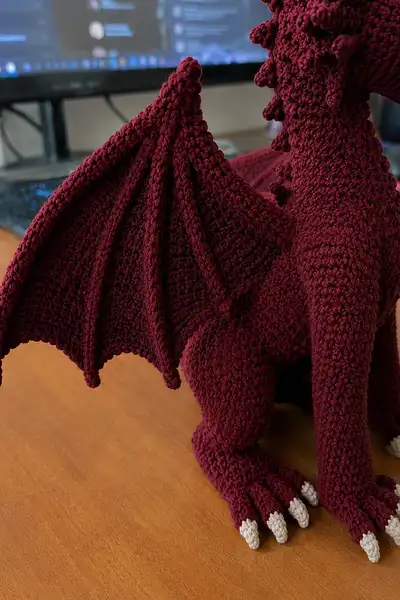
Create a dramatic deep-maroon dragon with swept horns, layered spikes, articulated wings and ivory claws. This detailed amigurumi pattern walks you through each sculpted round — head, long neck, textured body, limbs, tail and framed wings — to reproduce the fierce yet cuddly dragon shown. Suitable for crocheters seeking a richly detailed, poseable creature with textured scales and carved facial expression.
Progress Tracker
0% Complete
— Head :
Round 1 :
6 sc in magic ring (6)
Round 3 :
(1 sc, 1 inc) x 6 (18)
Round 4 :
(2 sc, 1 inc) x 6 (24)
Round 5 :
(3 sc, 1 inc) x 6 (30)
Round 6 :
(4 sc, 1 inc) x 6 (36)
Round 7 :
(5 sc, 1 inc) x 6 (42)
Round 8 :
(6 sc, 1 inc) x 6 (48)
Round 9-12 :
1 sc in each st (48)
Info :
Place safety eyes between rounds 11-12, approximately 10-12 stitches apart for the expression shown. Mark the center line of the face to keep eyes even. If embroidering, mark eye positions before stitching.
Round 13 :
(6 sc, 1 dec) x 6 (42)
Round 14 :
1 sc in each st (42)
Round 15 :
(5 sc, 1 dec) x 6 (36)
Round 16 :
1 sc in each st (36)
Round 17 :
(4 sc, 1 dec) x 6 (30)
Round 18 :
(3 sc, 1 dec) x 6 (24)
Info :
Begin stuffing head firmly but not overly hard. Use small bits of fiberfill to shape the snout and the forehead. Add more stuffing near the brow to give a pronounced ridge for the horn bases.
Round 19 :
(2 sc, 1 dec) x 6 (18)
Round 20 :
(1 sc, 1 dec) x 6 (12)
Info :
Fasten off leaving a 20-30cm tail for sewing neck to head. Do not fully close; leave opening to attach to neck piece. Final facial shaping and embroidery are easier now before full closure.
Round 22 :
Re-attach yarn at upper snout area and work 6 sc along the top to extend snout for shaping (6)
Round 23 :
Inc round across these 6 sts: (1 sc, inc) x 3 (9)
Round 24 :
(2 sc, inc) x 3 (12)
Round 25 :
Work 6 rounds even to extend snout tip: 1 sc in each st (12) x6 rounds
Info :
The snout extension is worked flat along top of head to create a longer tapered nose as in the reference. Stuff lightly inside this section only to keep nose slightly firm but flexible.
Round 31 :
Attach back to head main opening and work 1 round of 1 sc in each st around join area to create a seamless transition (count depends on body neck join)
Info :
Create textured brow ridges by working short bobble-like bumps: insert needle from front to back and pull small loop, secure with 1 sc. Repeat across brow to match picture's strong expression.
— Horns (Make 2) :
Round 1 :
6 sc in magic ring (6)
Round 3 :
(1 sc, inc) x 6 (18)
Round 4 :
(2 sc, inc) x 6 (24)
Round 5-7 :
1 sc in each st (24)
Info :
Horns are tapered cones with a slight curve. Work most of the cone in continuous rounds and then slacken tension and pull one side slightly during sewing to create a forward curve.
Round 8 :
(3 sc, dec) x 6 (18)
Round 9 :
(2 sc, dec) x 6 (12)
Round 10 :
(1 sc, dec) x 6 (6)
Info :
Do not stuff horns fully; add a tiny amount for shape or insert a short piece of floral wire if you want poseable tips. Sew horns to the top of the skull centered over brow ridges using the long tail.
— Crown Spikes (Make 10-14 small cones) :
Round 1 :
5 sc in magic ring (5)
Round 3 :
1 sc in each st (10)
Round 4 :
(2 sc, dec) x 3 + 1 sc (7)
Round 5 :
5 dec to close small cone (2-3)
Info :
Make many small cones of varying sizes (some 3 rounds, some 4 rounds) and sew them around the crown and along the neck ridge to reproduce the layered spike effect. Stagger sizes for a natural look.
— Neck :
Round 1 :
6 sc in magic ring (6)
Round 3 :
(1 sc, inc) x 6 (18)
Round 4 :
(2 sc, inc) x 6 (24)
Round 5-7 :
1 sc in each st (24)
Info :
The neck is long and sculpted. Work in continuous rounds and add texture rows by crocheting alternating sets of 1-2 rounds in BLO to create faint vertical ridges shown in the photo.
Round 8 :
(3 sc, inc) x 6 (30)
Round 9-12 :
1 sc in each st (30)
Round 13 :
(4 sc, inc) x 6 (36)
Round 14-18 :
1 sc in each st (36)
Info :
Sew small crown spikes along the top of the neck as you work or after completion. Space spike cones 4-6 stitches apart for a continuous ridge. Use the same yarn to attach securely.
Round 19-24 :
1 sc in each st (36) x6 rounds to build height and taper toward body connection
Round 25 :
(4 sc, dec) x 6 (30)
Round 26 :
(3 sc, dec) x 6 (24)
Round 27 :
(2 sc, dec) x 6 (18)
Round 28 :
(1 sc, dec) x 6 (12)
Info :
Leave a 25-30cm tail for sewing to the body. Stuff neck moderately firm; too much stuffing will make neck hard to curve. If adding wire for poseable neck, insert it before final stuffing and wrap lightly with fiberfill.
— Body :
Round 1 :
6 sc in magic ring (6)
Round 3 :
(1 sc, inc) x 6 (18)
Round 4 :
(2 sc, inc) x 6 (24)
Round 5 :
(3 sc, inc) x 6 (30)
Round 6 :
(4 sc, inc) x 6 (36)
Round 7 :
(5 sc, inc) x 6 (42)
Round 8-12 :
1 sc in each st (42) x5 rounds
Info :
If you want a slightly broader chest like the sample, add 1 round of (6 sc, inc) to reach 48 sts before working even rounds. Keep body symmetrical and use stitch markers for front center placement.
Round 13 :
(6 sc, inc) x 6 (48)
Round 14-20 :
1 sc in each st (48) x7 rounds to form torso length
Round 21 :
(6 sc, dec) x 6 (42)
Round 22 :
(5 sc, dec) x 6 (36)
Info :
Begin stuffing body firmly from the bottom up, leaving a firmer base so the dragon sits steady. Add more stuffing at hips to support leg joins.
Round 23 :
(4 sc, dec) x 6 (30)
Round 24 :
(3 sc, dec) x 6 (24)
Round 25 :
(2 sc, dec) x 6 (18)
Round 26 :
(1 sc, dec) x 6 (12)
Info :
Fasten off leaving long tail for sewing the belly panel and neck. Before closing fully, position the legs and secure with pins to be certain of placement.
— Belly Panel (Textured) :
Round 1 :
Ch 24, join with sl st to form a ring (24)
Round 2-6 :
1 sc in each ch around (24)
Round 7 :
Work 1 sc BLO in each st to create a raised edge (24)
Round 8-14 :
1 sc in each st (24) x7 rounds adding subtle increase rounds at base if you need more length
Info :
Sew belly panel to the front of the torso from chest to lower belly aligning center with front seam. Use mattress stitch to keep edges neat. This creates the textured scale pattern seen on the chest.
— Front Legs / Arms (Make 2) :
Round 1 :
6 sc in magic ring (6)
Round 3 :
(1 sc, inc) x 6 (18)
Round 4-6 :
1 sc in each st (18) x3 rounds forming paw base
Info :
Work the paw base slightly flattened by placing stitch markers at front/back center. You will later create toes by working short cones for claws and shaping the top of the paw.
Round 7 :
(2 sc, inc) x 6 (24)
Round 8-12 :
1 sc in each st (24) x5 rounds to form lower arm
Round 13 :
(2 sc, dec) x 6 (18)
Round 14-18 :
1 sc in each st (18) x5 rounds to form upper arm
Round 19 :
(1 sc, dec) x 6 (12)
Info :
Stuff pads and lower arm firmly. Leave long tail for sewing. If you want poseable arms, insert a length of wire into the center before closing, ensuring ends are wrapped and covered with fiberfill.
— Hind Legs (Make 2) :
Round 1 :
6 sc in magic ring (6)
Round 3 :
(1 sc, inc) x 6 (18)
Round 4 :
(2 sc, inc) x 6 (24)
Round 5-8 :
1 sc in each st (24) x4 rounds building the foot
Info :
Hind feet in photo are large with distinct toes. After form base, use short toe cones (see claws below) to create separate toes by sewing cones into front edge and sculpting with a few surface slip stitches for toe separation.
Round 9 :
(3 sc, inc) x 6 (30)
Round 10-14 :
1 sc in each st (30) x5 rounds forming lower leg
Round 15 :
(3 sc, dec) x 6 (24)
Round 16-22 :
1 sc in each st (24) x7 rounds shaping thigh
Round 23 :
(2 sc, dec) x 6 (18)
Round 24 :
(1 sc, dec) x 6 (12)
Info :
Stuff feet and legs firmly. Pin legs to body and make small adjustments before sewing: legs should be wide-set so the dragon can sit. Use extra reinforcing passes when sewing to make legs stable for display.
— Claws / Toes (Make 10-12 small claws) :
Round 1 :
4 sc in magic ring using cream yarn (4)
Round 3 :
(1 sc, inc) x 4 (12)
Round 4-5 :
1 sc in each st (12) x2 rounds to build height
Round 6 :
(1 sc, dec) x 4 (8)
Round 7 :
4 dec, fasten off leaving tail for sewing (4)
Info :
Sew claws to the front edge of each paw and foot. For the larger hind feet, use 4-5 claws per foot; for front paws use 3 claws. Use a contrasting cream color for strong visual impact as in the photo.
— Tail :
Round 1 :
6 sc in magic ring (6)
Round 3 :
(1 sc, inc) x 6 (18)
Round 4-6 :
1 sc in each st (18) x3 rounds
Round 7 :
(2 sc, inc) x 6 (24)
Round 8-16 :
1 sc in each st (24) x9 rounds building substantial tail body
Round 17 :
(2 sc, dec) x 6 (18)
Round 18-22 :
1 sc in each st (18) x5 rounds tapering tail
Round 23 :
(1 sc, dec) x 6 (12)
Info :
Stuff tail moderately. Attach a series of small cone spikes along the top of the tail by sewing cones every 4-6 stitches, decreasing cone size gradually toward the tip.
— Tail Spike Cones (Make 12-16) :
Round 1 :
4 sc in magic ring (4)
Round 3 :
1 sc in each st (8)
Round 4 :
(1 sc, dec) x 2 (6)
Round 5 :
3 dec to close (1-3)
Info :
Vary spike sizes by skipping or adding a round to make the tail organic. Sew spikes along the midline of the tail, spacing them slightly closer near the tip.
— Wing Membrane (Make 2) :
Round 1 :
Ch 36, join with sl st to form ring (36)
Round 2 :
1 sc in each ch around (36)
Round 3 :
1 sc in each st (36)
Round 4 :
(5 sc, inc) x 6 (42)
Round 5-8 :
1 sc in each st (42) x4 rounds flattening and increasing slightly to create generous wing span
Info :
Wing membranes are worked flat as a round tube then opened and blocked. Work in joined rounds so the fabric is dense and does not curl. You can increase width by adding more ch at the foundation to match photo scale.
Round 9 :
(6 sc, inc) x 6 (48)
Round 10-18 :
1 sc in each st (48) x9 rounds building wing depth. Add a few rounds of BLO to create natural fold lines if desired.
Round 19 :
Fasten off and fold wing membrane in half lengthwise; edge stitch the long edge with a round of sc to create a clean seam (48)
Info :
Block wings flat on foam and pin to shape if you want crisp folds. Attach internal wing bones/ridges for structure before final sewing to body.
— Wing Bones / Ridges (Make 2 sets with 4 ridges each) :
Round 1 :
Ch 2, work 20 sc along chain (20)
Round 2-10 :
1 sc in each st (20) x9 rounds to create a long narrow ridge
Info :
For a raised ridge, work these bones with a 3.0mm hook to make them slightly tighter than the wing membrane. Add 2-3 rounds of sl st on one side to create a stronger ridge. Insert wire inside if you want poseable wing bones.
Round 11 :
Decrease both ends if desired with 2 sc dec at each end over last rounds to give tapered look (approx 16 sts)
Info :
Sew 3-4 ridges onto inner side of each wing membrane spaced evenly; the ridges correspond to the major 'finger' supports shown in the photo. Reinforce with extra stitches at base where it meets body.
— Wing Tip Spikes (Make 6-8 small cones) :
Round 1 :
4 sc in magic ring (4)
Round 3 :
1 sc in each st (8)
Round 4 :
3 dec, fasten off leaving tail (3)
Info :
Sew these spikes along the outer edge of wing tips matching the scalloped silhouette in the picture. Make sure each spike is evenly spaced and sewn so that wings keep curvature.
— Surface Texture and Scale Rows :
Round 1 :
On torso and legs, work 1 round of 1 sc BLO to create slight ridges (counts same as surrounding rounds)
Row 2 :
Work a 'scale' row by making small bobble clusters: (insert hook in st, pull up loop, yo, pull through one loop, repeat 3 times then draw through all loops and secure with sl st) every 3-4 stitches across the chest centerline
Info :
These surface techniques are what give the dragon its carved, scaly chest appearance. Work them in staggered rows and secure each cluster tightly so they read as raised scales.
— Finishing Details :
Info :
Sew head to neck and neck to body using long tails and mattress stitch, stuffing each junction firmly before final closure. Attach wings at upper back between rounds where the shoulder meets torso (approx rounds 12-16 on body). Arrange spikes along the spine from crown to tail tip. Add claws to toes and embroider nostrils or add tiny black stitches for extra expression. Weave in all ends and add glue to eye backs if you want extra security.
Info :
The pattern above describes modular pieces so you can adjust sizes. If any counts do not perfectly align during assembly, alter number of rounds in the belly panel or wing membranes slightly to match seam circumference when sewing pieces together.
This dramatic maroon dragon brings a sense of fantasy and handmade warmth to any collection. Each section — from horns to wing bones to tiny claws — is an opportunity to practice shaping and texturing. The long, detailed build is deeply satisfying and yields a bold, display-ready creature. Enjoy the slow stitching and sculpting process, and share your finished dragon with pride. 🐉🧶