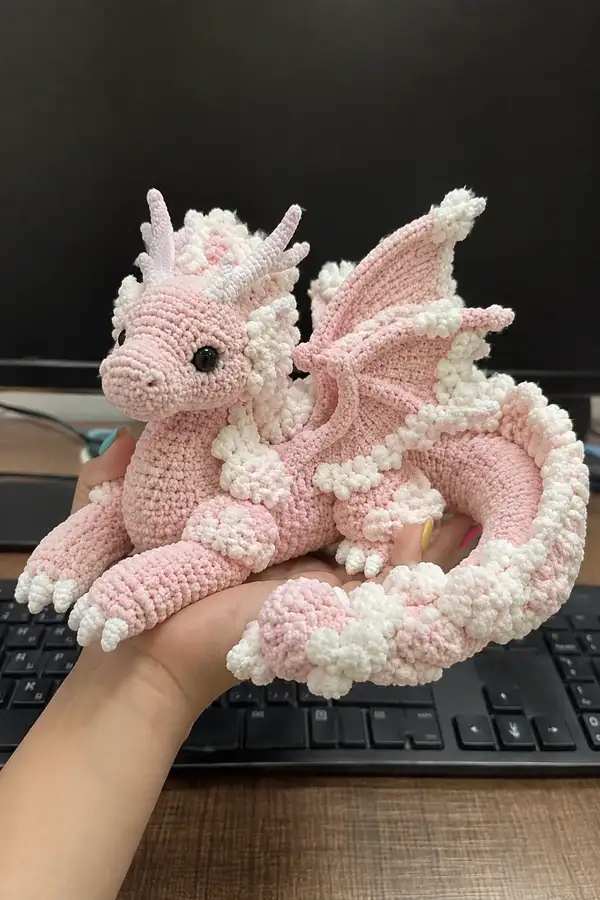
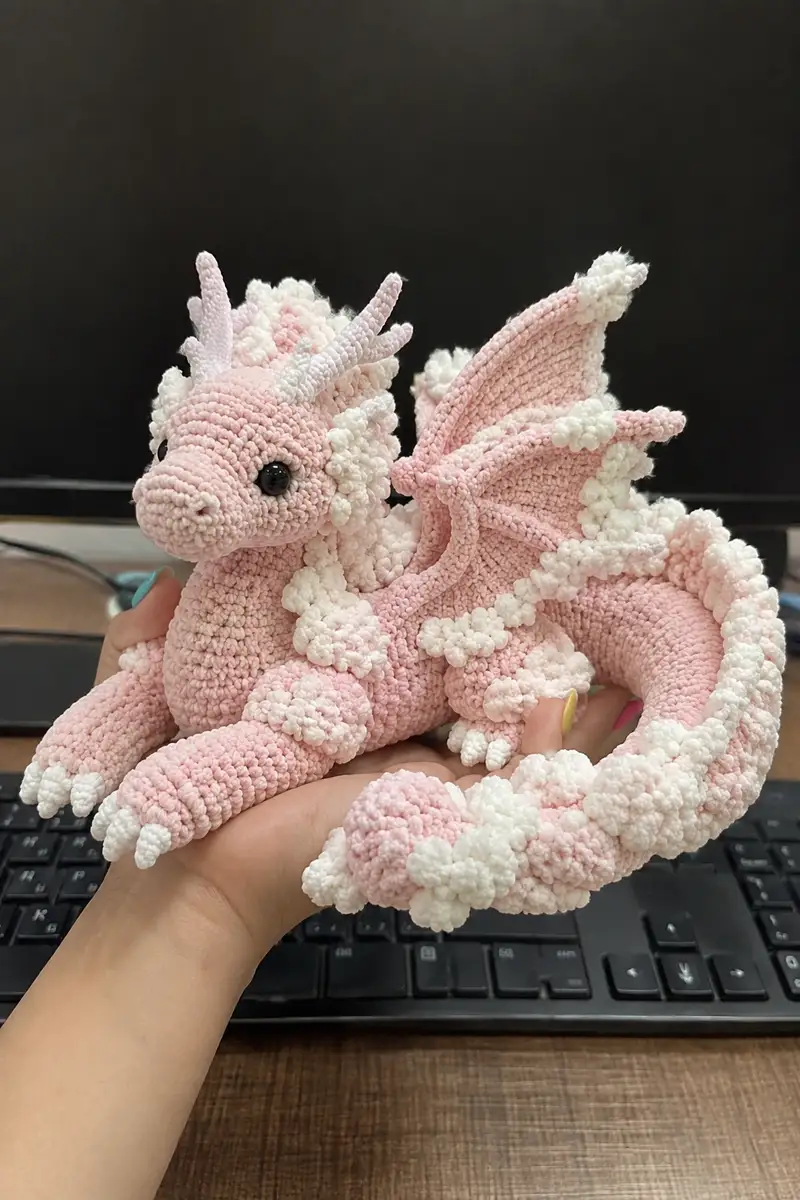
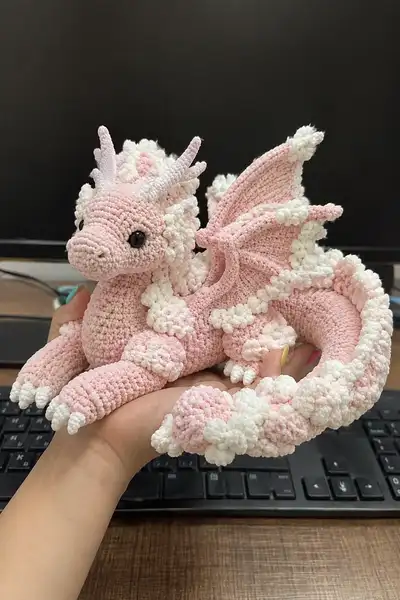
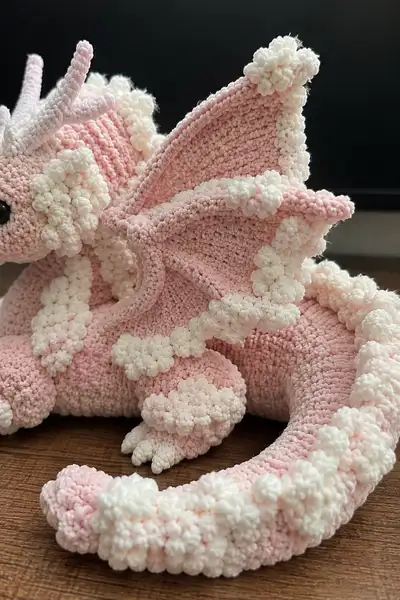
Create a soft, pastel pink cloud dragon with fluffy white cloud-like bobbles, delicate wings and a curled tail. This plush amigurumi features chenille-style yarn texture, sculpted muzzle, tiny horns and lots of fluffy puff clusters along the spine, tail and wings. Detailed step-by-step instructions and tips make assembly and placement simple. Perfect as a special handmade gift or a cozy decorative companion.
Progress Tracker
0% Complete
— Head & Neck :
Round 1 :
6 sc in magic ring (6)
Round 3 :
(1 sc, inc) x 6 (18)
Round 4 :
(2 sc, inc) x 6 (24)
Round 5 :
(3 sc, inc) x 6 (30)
Round 6 :
(4 sc, inc) x 6 (36)
Round 7 :
(5 sc, inc) x 6 (42)
Round 8 :
(6 sc, inc) x 6 (48)
Round 9-15 :
1 sc in each st (48)
Info :
Place safety eyes between rounds 13 and 14, leaving 7-9 stitches between eyes depending on desired cute expression; mark the first stitch of each round with a stitch marker
Round 16 :
(6 sc, dec) x 6 (42)
Round 17 :
(5 sc, dec) x 6 (36)
Info :
Begin stuffing head lightly to keep shape; add fiberfill in small amounts so face stays smooth and evenly rounded
Round 18 :
(4 sc, dec) x 6 (30)
Round 19 :
(3 sc, dec) x 6 (24)
Round 20 :
(2 sc, dec) x 6 (18)
Round 21-25 :
1 sc in each st (18) (these rounds form the neck column)
Info :
Keep the neck narrower than the head; stuff neck lightly but firmly enough that it supports the head when sewn to the body
Round 26 :
(1 sc, inc) x 6 (24) (flared neck base)
Round 27 :
(2 sc, inc) x 6 (30)
Round 28-32 :
1 sc in each st (30) (neck base and seam allowance for attaching to body)
Info :
Fasten off leaving a long tail for sewing to the body; finish stuffing head so it retains a soft but defined shape. Ensure eye washers are secure before closing.
— Body :
Round 1 :
6 sc in magic ring (6)
Round 3 :
(1 sc, inc) x 6 (18)
Round 4 :
(2 sc, inc) x 6 (24)
Round 5 :
(3 sc, inc) x 6 (30)
Round 6 :
(4 sc, inc) x 6 (36)
Round 7 :
(5 sc, inc) x 6 (42)
Round 8 :
(6 sc, inc) x 6 (48)
Round 9-12 :
1 sc in each st (48)
Info :
Mark the center back and front. The chest and leg placement lines will be around rounds 9-12. Use two pins to mark left and right leg positions before embroidering or sewing legs on.
Round 13 :
(6 sc, dec) x 6 (42)
Round 14 :
(5 sc, dec) x 6 (36)
Round 15-18 :
1 sc in each st (36)
Info :
Begin stuffing body moderately from the bottom upward. Add stuffing in layers so the body remains soft and squeezable but holds shape.
Round 19 :
(4 sc, dec) x 6 (30)
Round 20 :
(3 sc, dec) x 6 (24)
Round 21 :
(2 sc, dec) x 6 (18)
Round 22-26 :
1 sc in each st (18)
Info :
If you will attach the head directly, leave the top opening large enough to insert the neck base (rounds 28-32 of the head). Do not close the body; instead stop with a long tail for sewing.
Round 27 :
(1 sc, inc) x 6 (24)
Round 28 :
(2 sc, inc) x 6 (30)
Round 29-30 :
1 sc in each st (30) - leave opening for head neck attachment by not fastening off
— Front Legs (Make 2) :
Round 1 :
6 sc in magic ring (6)
Round 3 :
(1 sc, inc) x 6 (18)
Round 4 :
(2 sc, inc) x 6 (24)
Round 5-8 :
1 sc in each st (24) (forms the foot length)
Info :
Sew three small white claws to the front of the foot (see Claws section). Stuff the foot firmly so it supports the body when sitting.
Round 9 :
(3 sc, dec) x 6 (18)
Round 10-15 :
1 sc in each st (18) (lower leg)
Round 16 :
(2 sc, dec) x 6 (12)
Round 17 :
1 sc in each st (12)
Round 18 :
1 sc in each st, fasten off leaving long tail for sewing (12)
Info :
Stuff the leg firmly at the foot then more lightly toward the top. Use pins to position legs at body rounds 10-13 (from the body start) before sewing.
— Hind Legs (Make 2 - larger) :
Round 1 :
6 sc in magic ring (6)
Round 3 :
(1 sc, inc) x 6 (18)
Round 4 :
(2 sc, inc) x 6 (24)
Round 5 :
(3 sc, inc) x 6 (30)
Round 6-9 :
1 sc in each st (30) (forms foot/ankle)
Info :
Add three white claws to each foot and shape the ankle with extra stuffing placed toward the heel so the dragon can sit steadily.
Round 10 :
(4 sc, dec) x 6 (24)
Round 11-18 :
1 sc in each st (24) (main thigh)
Round 19 :
(2 sc, dec) x 6 (18)
Round 20 :
1 sc in each st (18)
Round 21 :
(1 sc, dec) x 6 (12)
Round 22 :
1 sc in each st, fasten off leaving long tail for sewing (12)
Info :
Stuff hind legs firmly at the feet and ankles, more moderate stuffing at thighs so legs remain poseable when sewn at the body base (rounds 20-24 of the body).
— Tail :
Round 1 :
6 sc in magic ring (6)
Round 3 :
(1 sc, inc) x 6 (18)
Round 4 :
(2 sc, inc) x 6 (24)
Round 5-10 :
1 sc in each st (24) (begin long tail column)
Info :
For a sculpted, curled tail, crochet longer rounds then insert a flexible wire or pipe cleaner down the center before stuffing. Wrap the wire ends in a small bit of yarn and seal inside stuffing so wire ends do not poke out.
Round 11 :
(3 sc, dec) x 6 (18)
Round 12-15 :
1 sc in each st (18)
Round 16 :
(2 sc, dec) x 6 (12)
Round 17-20 :
1 sc in each st (12) - tapering tip
Info :
Stuff the tail firmly enough to hold shape but still flexible. Attach cloud bobble motifs along the upper spine of the tail: space motifs approximately every 6-8 stitches and sew securely.
Round 21 :
Optional: continue rounds to desired tail length in 12 sc rounds; fasten off leaving long tail for sewing to body base
— Wing (Make 2) - Inner Ridge & Membrane :
Inner Ridge Round 1 :
6 sc in magic ring (6)
Inner Ridge Round 2 :
6 sc around (6) - work in continuous rounds to create a curved tube
Inner Ridge Round 3-12 :
1 sc in each st (6) - lengthen until ridge measures about 8-10 cm depending on scale
Info :
Fasten off leaving long tail for sewing; create a second identical ridge. These ridges will be sewn to the wing membrane later to make 'bones' that hold the wing open.
Membrane Row 1 :
Ch 20 (or adjust to desired wing span), sc in 2nd ch from hook and across (19)
Membrane Row 2 :
Ch 1, turn, sc in each st across (19)
Membrane Row 3 :
Ch 1, turn, (2 sc in first st) 1 sc across until last st, (2 sc in last st) - increase at both ends to create wing flare (21)
Membrane Row 4-8 :
Ch 1, turn, 1 sc in each st (21) - work flat rows to form membrane height
Info :
After row 8, slip stitch short edges together to create a curved, cupped membrane. Fold slightly and sew inner ridge tubes on top of the fold to form wing bones. Use BLO on the top rows to make a clean scalloped edge where puff clusters will be sewn.
Membrane Shaping Row 9 :
Ch 1, fold membrane along center, join with sl st to create base seam, then finish by sc around outer edge (work in both loops) to create a neat rim (approx 42 sc around depending on shaping)
Membrane Row 10-14 :
Work 1 sc in each st around to bulk up the rim and create stitch ridges for attaching puffs (approx 42 per round)
Info :
Attach inner ridge pieces along the inner fold by sewing through membrane and ridge tube every 4-6 stitches. Position the ridge pieces to suggest wing fingers: one long ridge near the leading edge and a shorter ridge toward the center.
Membrane Final :
Fasten off leaving long tail for sewing to the body; add white puff motifs around the perimeter as shown in photos.
— Horns & Ear Spines (Make 2 horns + small spines) :
Horn Round 1 :
6 sc in magic ring (6)
Horn Round 2 :
6 sc in each st (6) - continue as a tube
Horn Round 3-10 :
1 sc in each st (6) - make length to desired horn size (approx 8-10 rounds)
Horn Taper Round 11 :
(1 sc, dec) x 2 then sc in remaining 2 stitches (4)
Horn Round 12 :
Dec twice to close to 2 or 1 stitch tip; fasten off leaving long tail for sewing
Info :
Stuff horns lightly or not at all to keep them supple; position two on the top of head with slight outward and backward tilt before sewing firmly so they stay upright.
— Cloud Bobble Motifs (Make 40-50 - variable) :
Round 1 :
Magic ring, ch 1, *yarn over, insert hook, pull up loop, yo, pull through two loops* (puff stitch made by 4 partial loops) repeated 6 times into ring, ch 1 and sl st to close (6 puff clusters) - fasten off leaving tail (approx size 1.2 cm)
Round 2 :
Make a second round puff in same ring if you want a fuller puff: join yarn to puff base and make 6 more small sc between puffs to stabilize, then finish.
Round 3 :
Alternatively make 3-row puffs by repeating round 1 twice for extra fluffy 'clouds' (works well along spine and tail)
Info :
Make 40-50 small cloud motifs in soft white. Size can be varied slightly by changing the number of loops per puff. Secure ends and leave a 25-30 cm tail for sewing each puff onto the dragon later.
— Claws (Make 12 small claws) :
Round 1 :
6 sc in magic ring (6)
Round 3-4 :
1 sc in each st (12)
Round 5 :
(1 sc, dec) x 4 (8)
Round 6 :
Dec 4 (4), fasten off leaving tail to sew onto foot tip
Info :
Sew three claws to each front and hind foot using the long tail; arrange claws slightly splayed and tack with a few extra stitches for durability.
— Decorative Ridge Row (Optional continuous spine ridge) :
Round 1 :
With main color, sl st along center back of body from base of neck to tail beginning, making small loops every 4-6 stitches as anchor points for cloud motifs
Info :
These anchor sl sts make it easier to space cloud puffs evenly and keep them aligned on the spine and tail; use them when sewing puffs in place.
— Assembly Notes & Finishing Touches :
Info :
Block pieces lightly if needed to flatten membranes. Use pins to position head to body: the head neck base (rounds 28-32 of head) should align with body top opening (rounds 29-30 of body). Sew using ladder stitch around the entire neck seam to make an invisible join.
Info :
Arrange the two front legs symmetrically in front, and the hind legs slightly rearward. Sew wings to the upper sides of the body so the membranes sit slightly above the leg seam and the inner ridge bones align with the body curve.
Info :
Sew cloud puff motifs to the head crest, spine, tail, legs and wing edges. Start by pinning each puff in place, then use the long tail to whipstitch through the base of the puff and into the body for a secure attachment. Add clusters in layers for depth.
Info :
Use a yarn needle and matching pink yarn to embroider nostrils and tiny smile lines if desired. Blend a tiny amount of soft pink fabric paint on cheeks if you like a blushing effect (test on a scrap first).
This pastel cloud dragon is handmade magic—soft chenille body, sculpted muzzle and cloud puffs that make it feel like curling up with a fluffy dream. Each section comes together to create a lovable, tactile companion you can cherish. I hope you enjoy making and gifting this whimsical dragon! 🧶☁️✨