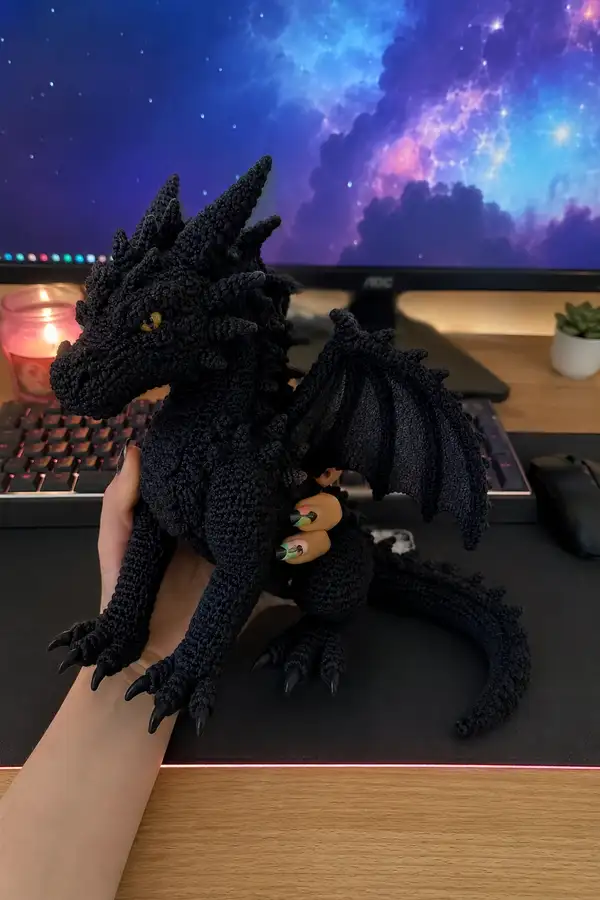
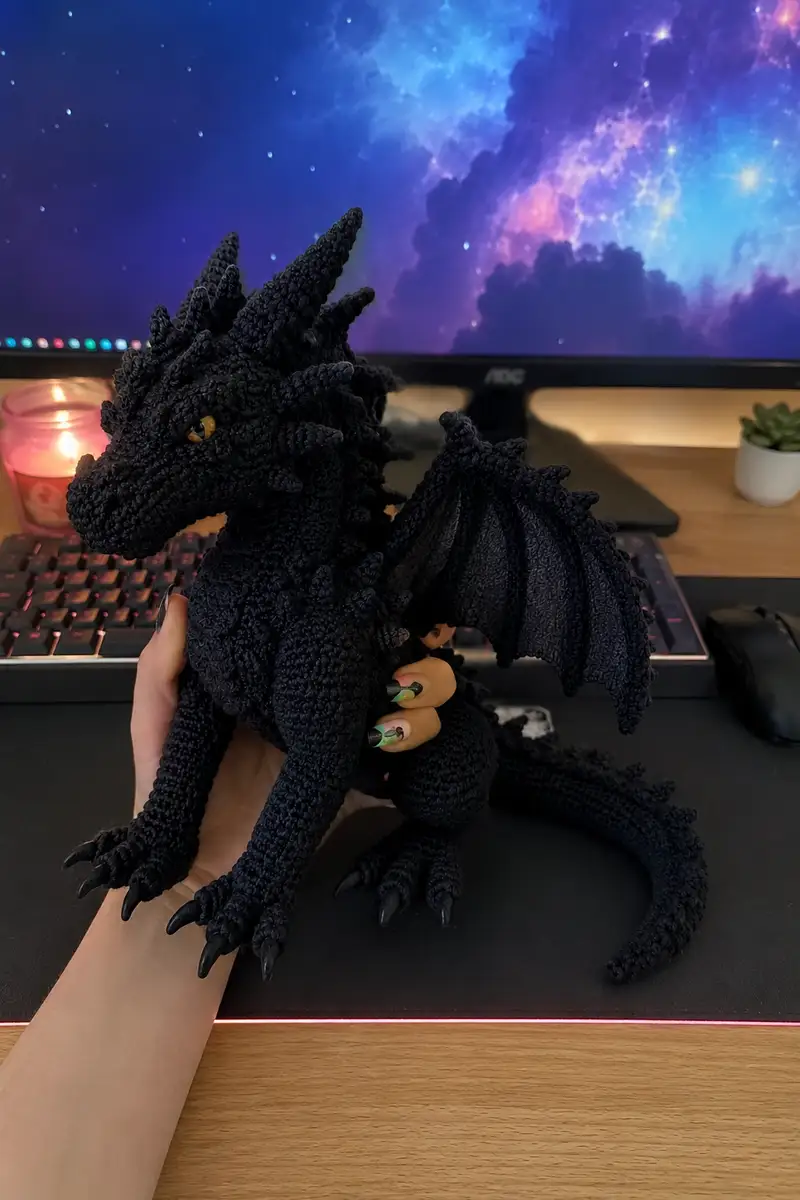
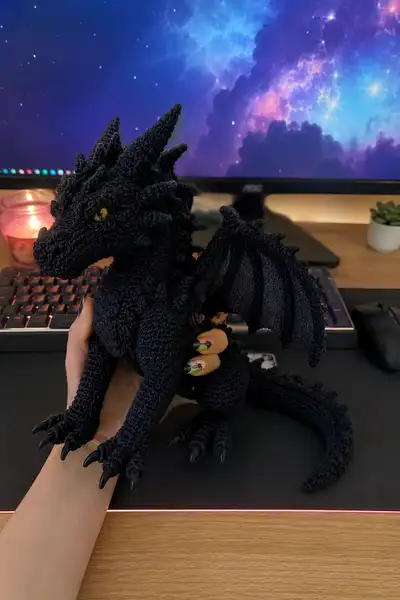
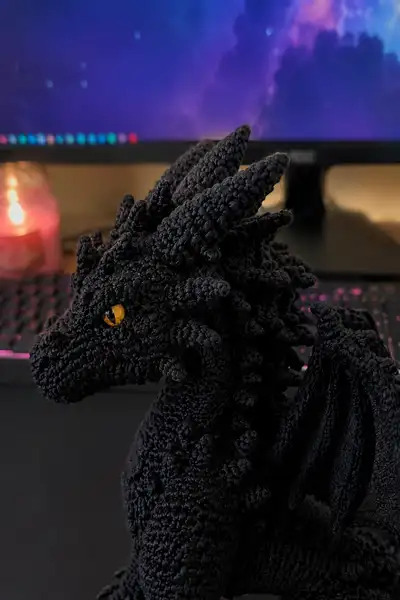
Create a dramatic, highly detailed shadow-black dragon amigurumi with spiked back, articulated wings, and amber cat-like eyes. This pattern guides you step-by-step through sculpted head shaping, layered horns and spikes, sturdy legs, clawed feet, and a long articulated tail. Deep-black textured yarn and contrast amber safety eyes give this dragon its moody, mysterious look — perfect as a collectible or dramatic gift.
Progress Tracker
0% Complete
— Head :
Round 1 :
6 sc in magic ring (6)
Round 3 :
(1 sc, 1 inc) x 6 (18)
Round 4 :
(2 sc, 1 inc) x 6 (24)
Round 5 :
(3 sc, 1 inc) x 6 (30)
Round 6 :
(4 sc, 1 inc) x 6 (36)
Round 7 :
(5 sc, 1 inc) x 6 (42)
Round 8 :
(6 sc, 1 inc) x 6 (48)
Round 9 :
1 sc in each st (48)
Round 10 :
1 sc in each st (48)
Info :
These early rounds create the skull bulk. Work tightly; the head uses dense stuffing later to hold sculpted snout and jaw. Use a stitch marker to mark round start.
Round 11 :
1 sc in each st (48)
Round 12 :
1 sc in each st (48)
Round 13 :
(3 sc, 1 inc) x 12 (60)
Info :
Place safety eyes between rounds 13-14 about 10-12 stitches apart (measured across the curve) for a narrow, catlike expression. Insert eyes now and secure washers before stuffing.
Round 14 :
1 sc in each st (60)
Round 15-16 :
1 sc in each st (60)
Round 17 :
(4 sc, 1 dec) x 10 (50)
Round 18 :
(3 sc, 1 dec) x 10 (40)
Info :
Begin shaping the snout and jaw by working slightly tighter tension in front-facing stitches. Start stuffing the skull lightly—you will add more stuffing after the snout forms.
Round 19 :
(2 sc, 1 dec) x 10 (30)
Round 20 :
(1 sc, 1 dec) x 10 (20)
Round 21 :
(1 sc, 1 dec) x 6 (12)
Info :
At this stage you will form the elongated snout: using removable marker, identify the front 8-10 stitches which will be extended later to sculpt the nose. Leave the remainder as the back skull.
Round 22 :
For snout extension, rejoin at the front point and work 12 rounds of 1 sc in each st (12)
Round 23 :
(1 sc, inc) x 6 (18)
Round 24 :
(2 sc, inc) x 6 (24)
Round 25 :
1 sc in each st for 4 rounds (24)
Info :
Stuff the snout firmly now to keep the elongated muzzle rigid but not over-stuffed. Use small amounts of fiberfill to avoid lumps and achieve a smooth taper.
Round 26 :
(3 sc, 1 dec) x 6 (18)
Round 27 :
(2 sc, 1 dec) x 6 (12)
Info :
Fasten off the snout leaving a long tail to sew the open snout to the underside of the head and to create jaw definition with surface embroidery if desired. Reinforce the seam by sewing through both layers several times.
Round 29 :
Rejoin at back skull and work 2 sc in each of next 6 sts to slightly widen base for neck (12)
Round 30 :
1 sc in each st (12)
Round 31 :
(2 sc, 1 inc) x 4 (16)
Round 32 :
1 sc in each st (16)
Round 33 :
(3 sc, 1 inc) x 4 (20)
Round 34 :
1 sc in each st (20)
Round 35 :
Fasten off leaving long tail for sewing to neck. Finish stuffing head through the neck opening to balance weight; head should be firm but slightly softer than body core.
— Neck :
Round 1 :
Join yarn to body of head where neck will attach. 6 sc in magic ring (6)
Round 3 :
(1 sc, 1 inc) x 6 (18)
Round 4 :
(2 sc, 1 inc) x 6 (24)
Round 5-8 :
1 sc in each st (24)
Info :
Work neck in continuous rounds to create a tube that will be sewn into the body opening. Add light stuffing as you go; neck should be firm enough to support head weight without sagging.
Round 9 :
(3 sc, 1 dec) x 6 (18)
Round 10 :
(2 sc, 1 dec) x 6 (12)
Round 11 :
1 sc in each st (12)
Round 12 :
Fasten off leaving long tail for sewing. Neck will be attached later to the body opening and reinforced with ladder stitch.
— Body :
Round 1 :
6 sc in magic ring (6)
Round 3 :
(1 sc, 1 inc) x 6 (18)
Round 4 :
(2 sc, 1 inc) x 6 (24)
Round 5 :
(3 sc, 1 inc) x 6 (30)
Round 6 :
(4 sc, 1 inc) x 6 (36)
Round 7 :
(5 sc, 1 inc) x 6 (42)
Round 8 :
(6 sc, 1 inc) x 6 (48)
Round 9 :
(7 sc, 1 inc) x 6 (54)
Info :
This body is fairly broad and forms the chest and belly. Work increases evenly and keep the surface smooth. If you want a chunkier dragon, add one more increase round (inc every 7-8 sc).
Round 10-14 :
1 sc in each st (54)
Round 15 :
(7 sc, 1 dec) x 6 (48)
Round 16 :
(6 sc, 1 dec) x 6 (42)
Info :
Begin forming connection points for legs and wings: mark positions using pins. The front leg openings sit around rounds 11-13 on the body circumference; hind legs near rounds 2-4 at the bottom after closure.
Round 17 :
(5 sc, 1 dec) x 6 (36)
Round 18 :
1 sc in each st (36)
Round 19 :
(4 sc, 1 dec) x 6 (30)
Round 20 :
(3 sc, 1 dec) x 6 (24)
Info :
At round 20 the body begins to taper. Keep the stuffing moderate; body should be stuffed firmly but leave a slight give so limbs can be sewn flush.
Round 21 :
(2 sc, 1 dec) x 6 (18)
Round 22 :
(1 sc, 1 dec) x 6 (12)
Round 24 :
Fasten off leaving long tail for closing and for sewing the neck and tail later. Before final closing, leave a larger opening if you are inserting a wire armature into the belly for poseable legs.
— Front Legs (Make 2) :
Round 1 :
6 sc in magic ring (6)
Round 3 :
(1 sc, 1 inc) x 6 (18)
Round 4 :
(2 sc, 1 inc) x 6 (24)
Round 5-7 :
1 sc in each st (24)
Info :
These rounds make the paw/foot base. Work tightly and stuff the paw firmly to help it hold shape under body weight.
Round 8 :
(2 sc, 1 dec) x 6 (18)
Round 9 :
(1 sc, 1 dec) x 6 (12)
Round 10 :
1 sc in each st (12)
Round 11 :
Change to working in BLO. 1 sc in each st BLO for 6 rounds (12)
Info :
The BLO rounds create a ridge for the 'wrist' seam and make the leg look segmented. At round 14 mark the join point to the body — you will sew the leg to the body around this row.
Round 17 :
1 sc in each st (12)
Round 18 :
Fasten off leaving long tail for sewing. Insert light stuffing into the leg shaft; make the paw firm and taper the stuffing up the leg to create a natural look.
Info :
Add wire if you want poseable front legs: insert wire through the center and bend the ends to anchor in the body or wrap with yarn before stuffing tightly.
— Hind Legs (Make 2) :
Round 1 :
6 sc in magic ring (6)
Round 3 :
(1 sc, 1 inc) x 6 (18)
Round 4 :
(2 sc, 1 inc) x 6 (24)
Round 5 :
(3 sc, 1 inc) x 6 (30)
Round 6-9 :
1 sc in each st (30)
Info :
Hind legs are thicker to support the dragon's rear. Stuff the foot very firmly and add extra stuffing into the heel for stability.
Round 10 :
(3 sc, 1 dec) x 6 (24)
Round 11 :
(2 sc, 1 dec) x 6 (18)
Round 12 :
1 sc in each st (18)
Round 13 :
Work 6 rounds BLO to create ankle ridge (18)
Round 19 :
(1 sc, 1 dec) x 6 (12)
Round 20 :
1 sc in each st (12)
Round 21 :
Fasten off leaving long tail for sewing. Stuff firmly and position the hind leg so the foot rests flat; sew into body with ladder stitch for tidy seam.
— Claws (Make 10) :
Small Claw :
Round 1: 4 sc in magic ring (4)
Round 2 :
1 sc in each st (4)
Round 3 :
1 sc in next 2 sts, 1 dec (3)
Round 4 :
1 sc in each st (3). Fasten off leaving long tail. Stuff lightly and shape to a point when sewing onto toes.
Info :
Make 5 claws per front foot and 5 per hind foot depending on your foot shaping—photo shows 4-5 claws per foot. For a sharper look you can use polymer clay or pre-made plastic claws glued after sewing.
— Tail :
Round 1 :
6 sc in magic ring (6)
Round 3 :
(1 sc, 1 inc) x 6 (18)
Round 4-6 :
1 sc in each st (18)
Round 7 :
(1 sc, 1 dec) x 6 (12)
Round 8-12 :
1 sc in each st (12)
Round 13 :
(2 sc, 1 inc) x 4 (16) - begin slight flair for tail tip
Round 14-18 :
1 sc in each st (16)
Round 19 :
(3 sc, 1 inc) x 4 (20)
Round 20-24 :
1 sc in each st (20)
Round 25 :
Work tapered decrease rounds to shape tip: (3 sc, 1 dec) x 4 (16)
Round 26 :
(2 sc, 1 dec) x 4 (12)
Round 27 :
(1 sc, 1 dec) x 4 (8)
Round 28 :
Fasten off leaving long tail for sewing. Stuff firmly but leave tip slightly softer than base for natural curve.
Info :
Weave a length of floral wire inside for poseable tail if desired. Wrap wire with leftover yarn to cushion before stuffing and leave wire ends folded and pushed into the base to anchor.
— Spikes and Horns (Multiple, see sizes) :
Large Horn (Make 2) :
Round 1: 6 sc in magic ring (6)
Round 2 :
(1 sc, inc) x 3 (9)
Round 3 :
(2 sc, inc) x 3 (12)
Round 4 :
1 sc in each st (12)
Round 5 :
(2 sc, dec) x 3 (9)
Round 6 :
(1 sc, dec) x 3 (6)
Round 7 :
1 sc in each st (6)
Round 8 :
Fasten off leaving long tail for sewing. Make the horn slightly curved by sewing base to head at a slanted angle. Stuff very lightly.
Medium Spike (Make 8) :
Round 1: 6 sc in magic ring (6); Round 2: 6 sc (6); Round 3: (1 sc, dec) x 2 (4); Round 4: 4 sc - fasten off leaving tail. Stuff minimally and sew along neck and tail as a row of ridges.
Small Spike (Make 16) :
Round 1: 4 sc in magic ring (4); Round 2: 4 sc (4); Round 3: 1 dec, 2 sc (3) - fasten off. Use these along midline and around jaw for texture.
Info :
Create spikes in sets: large horns for top head, medium spikes along crown and shoulders, and small spikes down the neck and tail. Vary placement and angle to create a natural, layered look.
— Wing Structure (Make 2 - Bones) :
Wing Bone Base :
Round 1: 6 sc in magic ring (6)
Round 3 :
(1 sc, 1 inc) x 6 (18)
Round 4-6 :
1 sc in each st (18)
Round 7 :
Work 10 rounds decreasing slightly on the tip forming the long primary bone: (2 sc, 1 dec) x 4 then 1 sc across (14) then (1 sc, 1 dec) rounds to make a tapered bone. Fasten off leaving long tail for sewing.
Info :
The wing 'bones' are long tapered tubes sewn in a fan from the shoulder. Reinforce by inserting thin wire or slip a pipe-cleaner inside tubes if you want poseable wings.
— Wing Membrane :
Start :
Pick up yarn along the inner edge of the attached wing bones. Chain 30 (this forms the top edge between bones) and work 1 sc into most stitches across bones to create triangular membrane panels.
Round 1 :
Work 1 sc across chain and bone edges to create a tight fabric; aim for approximately 100 sc along the outer edge of the wing (counts vary by size)
Round 2-10 :
Work in rows: ch1 turn, 1 sc in each st across. On the long rows you will increase at the outer edge to create curvature: (10 sc, inc) repeat until the membrane cup forms—this typically produces a soft cupped wing that mirrors a bat wing. Fasten off and weave ends.
Info :
Use tighter tension for the membrane to avoid sagging. If you prefer a defined edged wing, work the final round in BLO so the ridge stands out. Sew membrane to bone tubes and then to body marked points at rounds 9-12 on body.
— Neck and Body Spikes (Surface Crochet & Sewn Rows) :
Surface Spike Row 1 :
Use the small spike motif. Position along the neck seam every 6-8 stitches. Sew medium spikes at crown intervals and smaller spikes between them in staggered rows.
Row Work :
For a textured bobble row you can also work surface popcorns: insert hook into a stitch, yarn over and pull up 5 loops, yarn over and pull through all loops, sl st into base to anchor. Repeat every 4-6 stitches to simulate scaled texture.
Info :
Alternate sewn spikes and surface popcorn to achieve the clustered look seen on the pictured dragon. Spike sizes and intervals create the layered silhouette.
— Assembly & Finishing Touches :
Info :
Before sewing pieces together, block wing membranes flat and pre-shape horns and spikes. Pin everything in place to check symmetry and balance.
Head to Neck :
Sew the neck opening to the body opening using the long tail and ladder stitch. Aim to attach the neck at body rounds 10-12 with even spacing.
Legs to Body :
Sew front legs to the body at body rounds 11-13. Sew hind legs to the underside at body rounds 2-4. Reinforce with extra stitches through the core for stability.
Wings to Shoulders :
Sew wing tubes to body sides at the marked shoulder points (rounds ~10-12). Secure wing bones then attach the membrane; add a few sturdy stitches through body yarn and bone core to hold weight.
Tail to Body :
Sew tail into the rear base of the body with lots of securing stitches; continue the central spike row smoothly onto the tail seam so spikes appear continuous.
Spike & Horn Placement :
Sew large horns to the top of the head angled slightly back. Add rows of medium and small spikes down center back, shoulders and tail. Use photos to guide spacing: larger clusters near the crown and shoulder, smaller ones towards tail tip.
Final Finish :
Secure all ends by weaving through multiple stitches and trimming. Optionally add a little fabric paint to eye edges or embroider nostrils and mouth creases with thin yarn for detail. Steam-block membrane if fiber allows to keep shape.
Info :
If using safety eyes, make sure washers are tightly secure before final stuffing and closing. If embroidering eyes, use a threader to pull embroidery floss through the fabric and layer for depth.
This shadow dragon is a labor of love — every horn and spike adds mood and personality to the final creature. The deep-black texture and amber eyes make it a standout piece for shelf display or a dramatic gift. Take your time on assembly; careful pinning and sewing transforms all the parts into a cohesive, fierce dragon. Enjoy the meditative process and the proud moment when you place the final spike! 🖤🐉