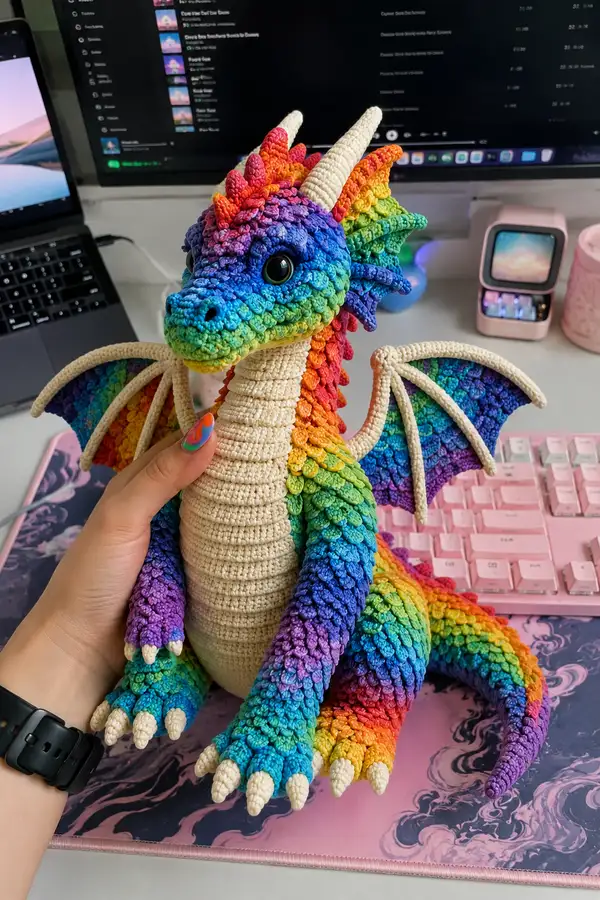
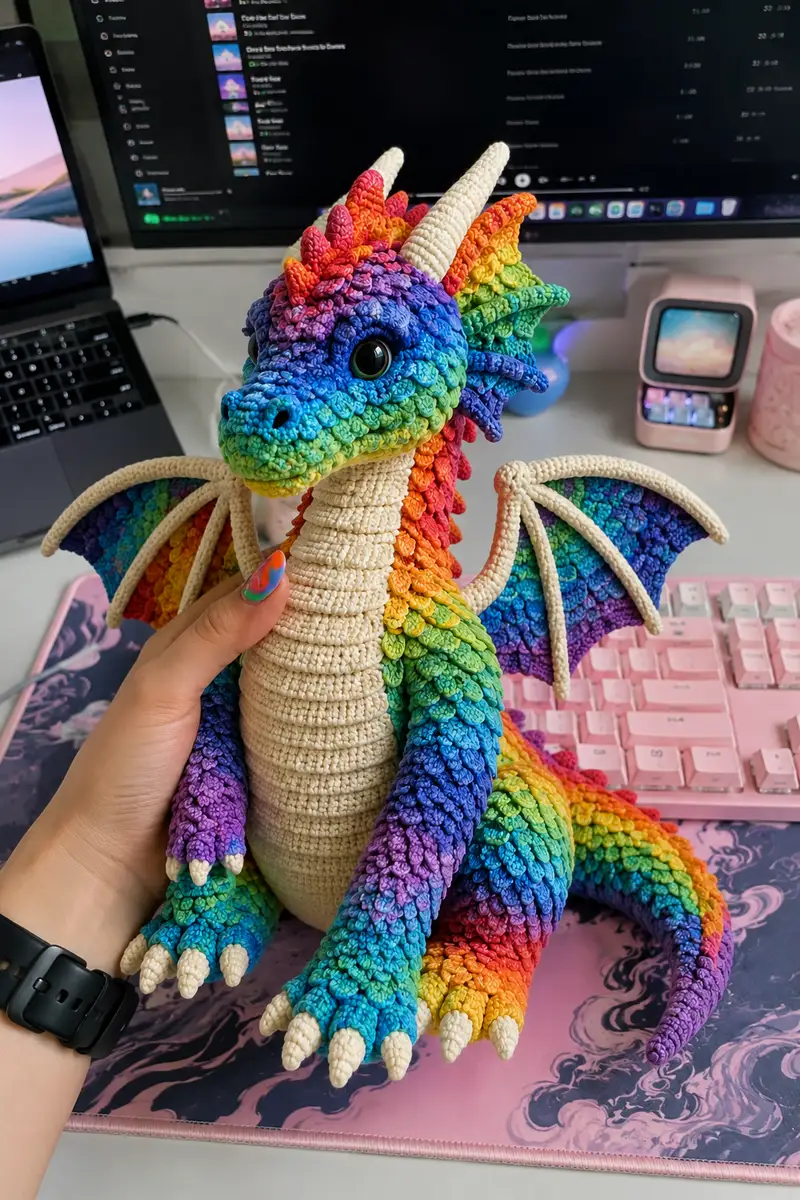
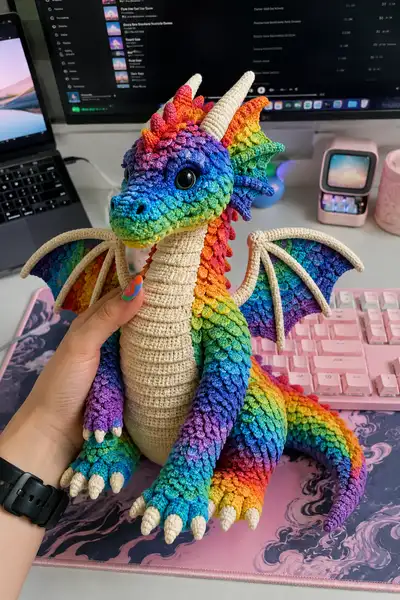
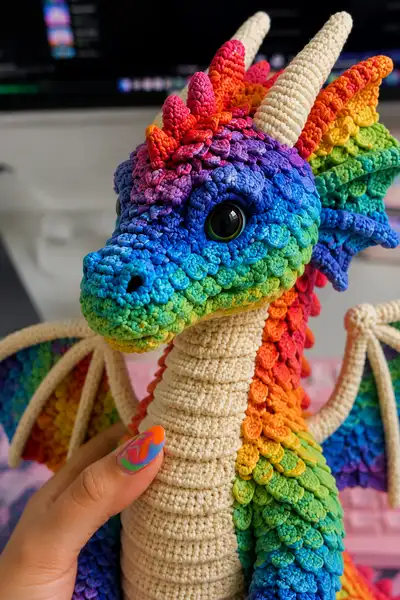
Create a vibrant, large-scale rainbow dragon with textured crocodile-style scales and a cream ribbed belly. This pattern recreates the plush shown with curled tail, expressive safety eyes, curved horns, detailed claws and full wings. Full-color transitions, layered spines and sculpted snout bring this whimsical dragon to life. Detailed, step-by-step instructions and many Info tips make this a rewarding advanced amigurumi project.
Progress Tracker
0% Complete
— Notes & Techniques :
Info :
This pattern is worked in continuous rounds (spiral) unless otherwise noted. Use a stitch marker to mark the first stitch of each round and move it up as you work. Colors: the rainbow gradation shown was made using a long-gradient variegated yarn; you can change color more often for striped look or join short scraps as desired. Crocodile scales are worked as overlay rows on base sc rounds; scales do not change the circular stitch count but create an added texture layered on top of base rounds.
Info :
Gauge: not critical for amigurumi but recommended to have tight stitches so stuffing does not show. If your stitches are loose, go down a hook size. This pattern includes many Info sections; read them carefully before proceeding with each area.
— HEAD :
Round 1 :
6 sc in magic ring (6)
Round 3 :
(1 sc, 1 inc) x 6 (18)
Round 4 :
(2 sc, 1 inc) x 6 (24)
Round 5 :
(3 sc, 1 inc) x 6 (30)
Round 6 :
(4 sc, 1 inc) x 6 (36)
Round 7 :
(5 sc, 1 inc) x 6 (42)
Round 8 :
(6 sc, 1 inc) x 6 (48)
Round 9-12 :
1 sc in each st (48)
Info :
Place safety eyes between rounds 13 and 14 later when asked — temporarily leave a small gap. Pin eyes in place using spare yarn tails and ensure they are centered horizontally. Eye spacing shown is approximately 8-10 stitches apart on a 48-st round depending on expression.
Round 13 :
1 sc in each st (48)
Round 14 :
1 sc in each st (48)
Info :
To build the snout forward, we will extend the head by adding extra rounds and selective increases at the front facing stitches. Identify the front center stitch (midline). We will use slight increases at front 8 stitches to create the muzzle projection.
Round 15 :
(6 sc, 1 inc) x 6 (54) — increase evenly; placement of increases slightly biased to belly/front for longer snout
Round 16 :
1 sc in each st (54)
Round 17 :
1 sc in each st (54)
Info :
At this point start to build nostril shaping: we will create two hollow nostril openings on round 18-20 by skipping a small number of stitches and crocheting over the skipped area to leave a small hole. Place markers 6-8 stitches apart on the snout to mark nostril positions.
Round 18 :
Sc 10, sc2tog, sc across until next nostril area, sc2tog, sc to end (54) — slight decreases to define front line (maintain 54)
Round 19 :
1 sc in each st (54)
Round 20 :
1 sc in each st (54)
Info :
Insert safety eyes now between rounds 13-15: place eyes centered between rounds 13 and 15 and approximately 20-22 stitches apart (on a 54-st round this is about 20-22 sts). Use washers to secure eyes behind fabric or embroider eyelids after placement. If embroidering eyes instead, use surface embroidery now before stuffing head fully.
Round 21 :
(6 sc, 1 dec) x 6 (48)
Round 22 :
(5 sc, 1 dec) x 6 (42)
Round 23 :
1 sc in each st (42)
Info :
Begin stuffing head firmly now, focusing on cheeks and snout so the nose keeps shape. Use small bits of fiberfill to press into nostril curves and around eye sockets. Continue stuffing as you decrease.
Round 24 :
(4 sc, 1 dec) x 6 (36)
Round 25 :
(3 sc, 1 dec) x 6 (30)
Round 26 :
(2 sc, 1 dec) x 6 (24)
Round 27 :
(1 sc, 1 dec) x 6 (18)
Info :
Fasten off leaving long tail for sewing the head to the neck/body later. Finish stuffing so head is firm but not overfilled — it should allow the neck to sit into the body opening with a slight give for sewing.
— NECK (Ribbed cream neck) :
Info :
The neck appears as a long ribbed cream cylinder worked in rounds using BLO to create horizontal ridges. Work the neck flat around a small circumference and then seam to the body. This neck will be worked then joined to body later; leave a long tail for sewing.
Round 1 :
6 sc in magic ring (6)
Round 3 :
(1 sc, 1 inc) x 6 (18)
Round 4 :
(2 sc, 1 inc) x 6 (24)
Info :
Once you have 24 stitches, continue working in continuous rounds, but beginning each round work in BLO to create ridges (1 sc in each st BLO) for 24 stitches each round. This will create the horizontal ribbed texture.
Round 5-26 :
1 sc in each st BLO (24) — repeat for 22 rounds to form a long ribbed neck (adjust length to preference)
Info :
Stuff neck lightly as you work. Neck should be semi-firm; we will sew top of neck to underside of head later. Leave top opening slightly open to shape seam to head.
Round 27 :
1 sc in each st (24)
Info :
Fasten off leaving a long tail for sewing. Do not close end — it will be joined to the body opening while stuffing is adjusted to fit the torso later.
— BODY (Base under scales) :
Round 1 :
6 sc in magic ring (6)
Round 3 :
(1 sc, 1 inc) x 6 (18)
Round 4 :
(2 sc, 1 inc) x 6 (24)
Round 5 :
(3 sc, 1 inc) x 6 (30)
Round 6 :
(4 sc, 1 inc) x 6 (36)
Round 7 :
(5 sc, 1 inc) x 6 (42)
Round 8 :
(6 sc, 1 inc) x 6 (48)
Round 9-14 :
1 sc in each st (48)
Info :
These initial rounds form the body tube under the scales. Work base rounds in the variegated rainbow yarn if you want seamless color transitions with scales. You can also work body base in matching rainbow and then apply separate scale rows in contrasting stitches for emphasis.
Round 15 :
(6 sc, 1 inc) x 6 (54) — expand belly area slightly for broad chest
Round 16-22 :
1 sc in each st (54)
Info :
Begin placing leg attachment points: mark front leg positions on round 18 and hind legs on round 22 by counting stitches and marking positions. For a 54-st round, place front legs approximately at stitches 10 and 44 (mirror), and hind legs lower at round 24 positions similarly. Keep marks to sew legs later.
Round 23 :
(7 sc, 1 dec) x 6 (48) — gentle shaping toward waist
Round 24 :
(6 sc, 1 dec) x 6 (42)
Round 25 :
(5 sc, 1 dec) x 6 (36)
Round 26 :
1 sc in each st (36)
Info :
Stuff body gradually as you reach the lower rounds. Body should be firm at chest and moderate at sides to allow a sitting position. Leave the bottom opening wide for attaching tail and/or legs; we will finish closing after parts are sewn in place.
Round 27 :
(4 sc, 1 dec) x 6 (30)
Round 28 :
(3 sc, 1 dec) x 6 (24)
Round 29 :
(2 sc, 1 dec) x 6 (18)
Round 30 :
(1 sc, 1 dec) x 6 (12)
Info :
Do not close the body yet — leave bottom open to insert legs, tail and attach neck. We will seam around openings to finish after assembly. If you prefer, stuff body now to final firmness and use a small funnel to push stuffing into narrow places.
— UNDERBELLY PLATE (Cream ribbed belly) :
Info :
The belly is worked as a flat oval panel using cream yarn in rows or rounds with BLO ridges to mimic the ribbed look. Work an oval approximately matching the body front and sew it to the body after stuffing. The ribbing can be worked in rounds as shown for a textured look; pattern here gives a round method for congruence with the neck.
Round 1 :
6 sc in magic ring (6)
Round 3 :
(1 sc, 1 inc) x 6 (18)
Round 4 :
(2 sc, 1 inc) x 6 (24)
Round 5 :
(3 sc, 1 inc) x 6 (30)
Round 6-18 :
1 sc in each st BLO (30) — repeat 13 rounds to create long ribbed strip (adjust number to length of belly)
Round 19 :
1 sc in each st (30)
Info :
Fasten off leaving long tail to sew the belly panel neatly to the body front. Pin the panel centered on the body and sew with ladder or whip stitch, stretching panel slightly to fit the curve of the torso for a neat seam.
— FRONT LEGS (Make 2) :
Info :
Front legs are chunky, tapered tubes with crocodile scales on the outer face and cream claws. Work each leg in variegated yarn for scales and switch to cream for claws. Stuff hands/feet firmly and limbs lightly to allow pose.
Round 1 :
6 sc in magic ring (6)
Round 3 :
(1 sc, 1 inc) x 6 (18)
Round 4 :
(2 sc, 1 inc) x 6 (24)
Round 5-8 :
1 sc in each st (24)
Info :
Start applying first rows of crocodile scales on the outer front-facing side: work 1 sc round, then a crocodile stitch round (see Crocodile Scale section below) across 12 scales per row. Always work scales toward the leg edge so layering faces backward toward the tail.
Round 9-14 :
1 sc in each st (24) — intersperse with crocodile scale overlay rounds every second round until you reach round 14 for foot depth
Round 15 :
Change to cream yarn. (3 sc, 1 dec) x 6 (18) — shape into wrist area
Round 16-18 :
1 sc in each st (18) — continue in cream
Round 19 :
(2 sc, 1 dec) x 6 (12)
Round 20 :
1 sc in each st (12)
Round 21 :
Fasten off leaving long tail for sewing. Stuff foot/hand firmly; keep limb slightly understuffed near seam to body so it stitches in smoothly
Info :
Make claws separately (see Claws section) and sew them to the foot tip. Alternatively, work cream claws directly as small cones and attach. Repeat for second front leg; mirror crocodile scales orientation so scales face outward.
— HIND LEGS (Make 2) :
Round 1 :
6 sc in magic ring (6)
Round 3 :
(1 sc, 1 inc) x 6 (18)
Round 4 :
(2 sc, 1 inc) x 6 (24)
Round 5-9 :
1 sc in each st (24)
Info :
Hind legs are larger — apply more frequent crocodile scale rows (every second round) and shape the ankle more prominently for a seated pose. Mark top join stitches for sewing to the body (place marker over 12 consecutive stitches for each leg).
Round 10 :
(1 sc, 1 inc) x 6 (30)
Round 11-14 :
1 sc in each st (30)
Round 15 :
(3 sc, 1 inc) x 6 (36)
Round 16-18 :
1 sc in each st (36)
Round 19 :
Change to cream for foot area. (3 sc, 1 dec) x 6 (30)
Round 20 :
(2 sc, 1 dec) x 6 (24)
Round 21 :
(1 sc, 1 dec) x 6 (18)
Round 22 :
Fasten off leaving long tail for sewing. Stuff foot area firmly and shape toe area. Sew claws to toes as with front legs.
— TAIL :
Info :
Tail is long and tapered with full crocodile scales covering most of it. Work tail base on a larger circumference then decrease gradually to a point. Leave end open for stuffing; curl tail into pose as you stuff and optionally insert wire for holding shape.
Round 1 :
6 sc in magic ring (6)
Round 3 :
(1 sc, 1 inc) x 6 (18)
Round 4 :
(2 sc, 1 inc) x 6 (24)
Round 5-8 :
1 sc in each st (24)
Info :
Start overlaying crocodile scale rows every second round across the entire circumference of the tail; ensure scales are staggered to create smooth overlapping. For a 24-st tail circumference, aim for 8 scales per round (clusters anchored across 3 stitches each). Repeat scale rows until tail is near desired length.
Round 9-22 :
1 sc in each st (24) — intersperse crocodile stitch overlay rows every other round for scale coverage; repeat until tail measures desired length (approx. 30–36 rounds total including decreases)
Round 23 :
(2 sc, 1 dec) x 6 (18)
Round 24 :
(1 sc, 1 dec) x 6 (12)
Info :
Fasten off leaving a long tail for sewing. Stuff tail firmly, allowing a slightly denser fill near the base to help balance the dragon. If using wire, insert now and sculpt the tail into the curled pose; wrap wire with small amounts of stuffing to avoid poking through crocheted fabric.
— WINGS (Bone rods and membrane) :
Info :
Wings are made with cream wing bones (tubes) that form ribs and a colorful scale membrane worked separately and sewn to the bones. Each wing has 5 bones radiating from the shoulder. Work bones as thin cream tubes and the membrane as a flat semicircle with crocodile scales on the outer surface.
Wing Bone Round 1 :
6 sc in magic ring (6)
Wing Bone Round 2-18 :
1 sc in each st (6) — continue until bone is approx. 12–15 cm or desired length
Info :
Make 10 bones (5 per wing). If you want poseable wings, insert floral wire into each bone tube before closing ends. Fasten off bones leaving long tails for sewing.
Wing Membrane Round 1 :
Work a chain of 36, join to make a semicircular shaping foundation and work shells or crocodile scales across to create the colorful inner membrane (see detailed membrane steps below)
Wing Membrane Rounds 2-16 :
Work rows of sc and crocodile scales working increases at the outer edge to create broad, slightly curved membrane. Aim for approx. 16 rounds to create size matching photos. Fasten off and block membrane flat before assembly.
Info :
Sew bones to membrane in radial arrangement and then attach whole wing to body at shoulder join (sew bone bases into body seam). Reinforce with extra stitches and a dab of glue if desired. Position wings slightly backward for natural resting pose.
— HORNS (Make 2) :
Round 1 :
6 sc in magic ring (6)
Round 3-12 :
1 sc in each st (12) — work for length, then begin tapering
Round 13 :
(3 sc, 1 dec) x 3 (9)
Round 14 :
(2 sc, 1 dec) x 3 (6)
Round 15 :
6 dec (3) — if too small, simply fasten off and sew base into head; alternatively stuff slightly and fasten off with tail for sewing
Info :
Horns are slightly curved — before stuffing bend the tube into a gentle curve and stuff to hold shape. Sew one horn on either side of the frill at the top of the head. The picture shows cream horns with subtle ridges — you may work one round in BLO occasionally to create ridges if you like.
— FRILL / SPINES (Make 12-14 small spikes) :
Info :
Frill is a series of overlapping small spike units worked in the variegated rainbow to create the mane/spines along the top of the head and neck. Work small cone motifs and sew them in rows overlapping like shingles.
Spike Round 1 :
4 sc in magic ring (4)
Spike Round 3 :
(1 sc, 1 inc) x 4 (12)
Spike Round 4 :
(2 sc, 1 inc) x 4 (16)
Spike Round 5-6 :
1 sc in each st (16) — shape spike height
Spike Round 7 :
(2 sc, 1 dec) x 4 (12)
Spike Round 8 :
Fasten off leaving long tail for sewing each spike in overlapping rows along the crest
Info :
Make approx. 12–14 spikes and arrange them along the neck and head in rainbow order. Sew each spike overlapping the previous to create a layered crest. Use small stitches and secure each spike well; add extra stitches where two rows overlap to keep them flat.
— CROCODILE SCALES (Overlay rows applied to body pieces) :
Info :
Crocodile stitch (scales) creates rows of overlapping scales. Method used here: after a sc round, work a row that creates the scale shells anchored into pairs of stitches from the previous sc round. A standard scale unit uses 5 dc in one stitch to create a scale, anchored in the preceding round to form overlap. When applying to a round with N stitches, you will work N/3 scale anchors (rounded) across the round; the base sc round count remains unchanged.
Scale Round A (base round) :
1 sc in each st around (keeps stitch count constant)
Scale Round B (scale round) :
(Into next sc: skip 1 sc, work 5 dc into next st, sl st into skipped st space to anchor) x across circumference. The number of scales will equal about one third of the base stitch count — e.g., on 48 base sts expect ~16 scales per round. Always anchor scales so that they point backward (toward tail) for correct overlap.
Info :
Alternate base sc rounds and scale rounds as follows: base sc round, scale round, base sc round, scale round, etc. Stagger scale rows so scales of the next row sit between the scales below (i.e., on the single sc behind two dc shells). When working on curved areas like head or limb ends, you may need to add or remove one scale at row ends — adjust visually to keep even coverage.
Scale Color Info :
Work scales in rainbow variegated yarn for the gradient. To achieve the same bold rainbow steps, plan rows of scales so that each row captures a segment of color. If using scraps, change color at base sc rounds; fasten off scales rows leaving tails to weave in.
— CLAWS (Make 10-12) :
Round 1 :
4 sc in magic ring (4)
Round 3 :
(1 sc, 1 inc) x 4 (12)
Round 4-6 :
1 sc in each st (12)
Round 7 :
(2 sc, 1 dec) x 4 (9)
Round 8 :
Fasten off leaving long tail for sewing. Make 3 claws for each foot (front and back) as needed and sew onto toes. Stuff claws minimally or leave hollow depending on look desired.
Info :
For larger claws, work one extra increase round and make claw slightly longer. Attach claws with ladder stitch or whip stitch and secure with extra stitches through foot base.
— EYE & FACIAL DETAIL :
Info :
Eyes used in the sample are large safety eyes with green rims and black centers. Insert eyes between rounds 13-15 of the head, about 20-22 stitches apart for the 54-st round. Secure with washers and optionally apply a small dab of fabric glue behind washer for extra security. Embroider small eyelid ridges or use a small sc loop above eyes to mimic semi-closed lids.
Round (Nose/nostril embroidery) :
Use black scrap and yarn needle to stitch tiny nostrils on snout tip: create two small straight stitches into the shell of the snout to form nostril holes. Reinforce from inside with an extra knot if desired.
Info :
If you prefer embroidered eyes for a child-safe toy, use satin stitch or long French knots to form glossy eyes and highlight with a small white embroidered dot for reflection.
— ASSEMBLY & FINISHING :
Info :
Block and shape all pieces before final sewing. Pin each limb, wing and horn in place and evaluate symmetry. Use small running stitches and secure knots to keep heavy parts attached. Sew through body and limb fabric several times for reinforcement where legs meet weight-bearing areas.
Final Head Attachment :
Position head opening over neck top, adjust stuffing for perfect fit, then sew neck to head using long tail from neck or head, mattress stitch around opening to create invisible seam.
Final Body Closure :
After sewing legs and tail into place, close bottom using invisible decrease method and whip stitch the remaining hole closed, weaving the tail inside several rounds.
Info :
Weave in all ends through several stitches and trim close. Add safety washer covers and check firmness of stuffing. For extra stability add a few securing stitches of strong thread where legs and wings join body.
This giant rainbow dragon is a labor of love — each scale row stacks into a dazzling gradient and the cream ribs give perfect contrast. Stitch by stitch you'll watch the whimsical creature take form, bringing color and personality to your shelf. Celebrate the finished piece — it’s a joyful display of texture, shape and rainbow magic! 🧶🌈