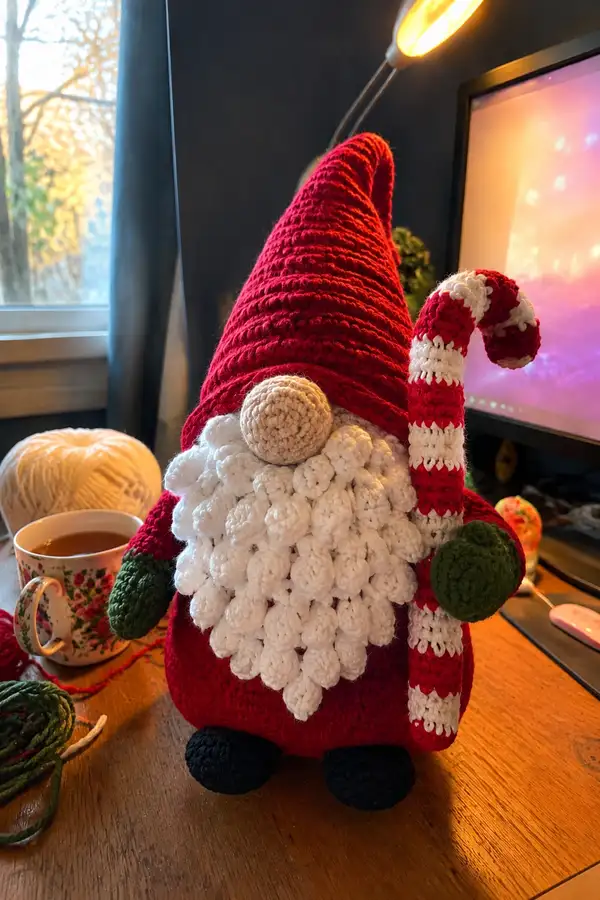
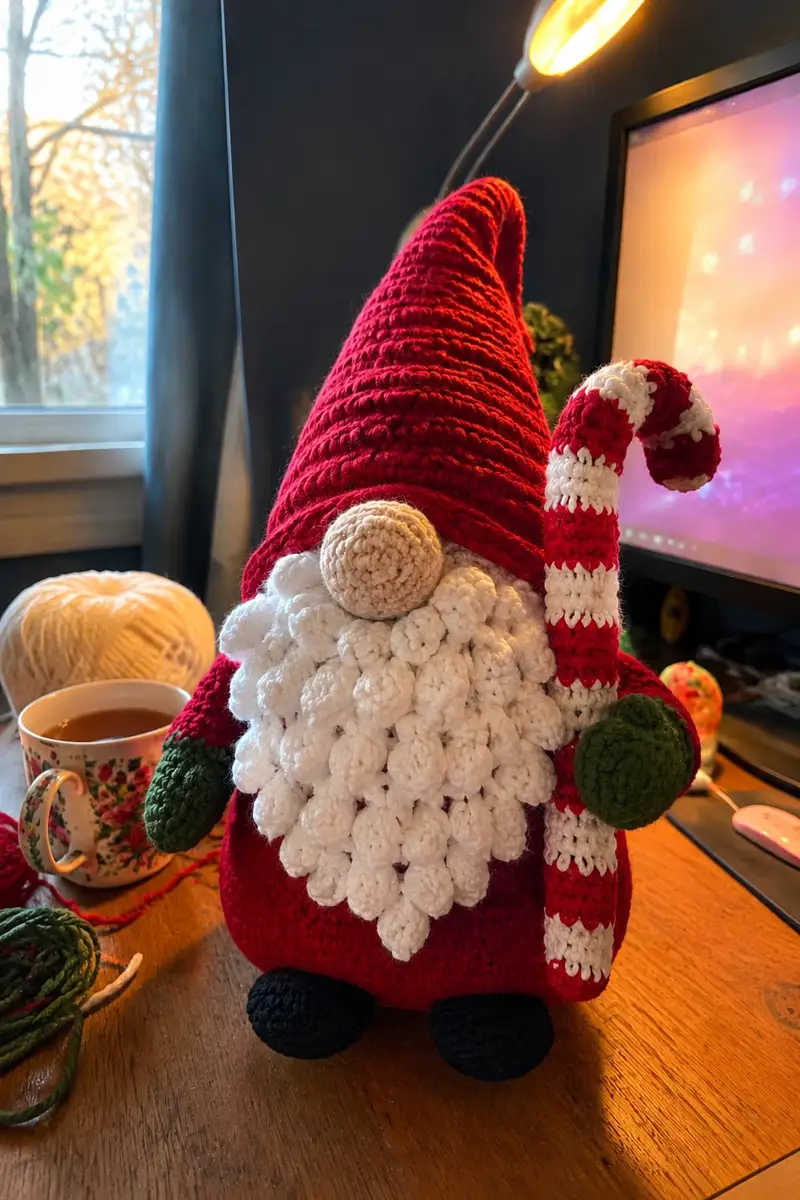
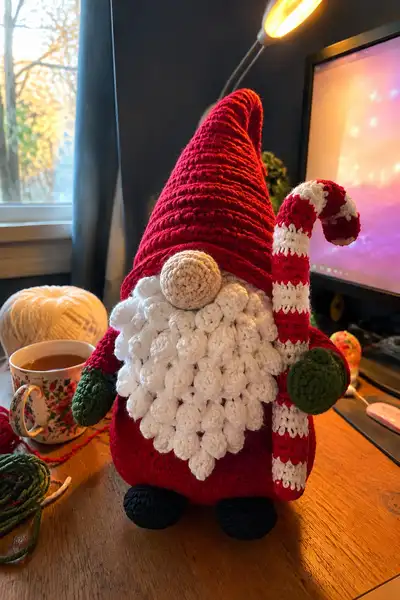
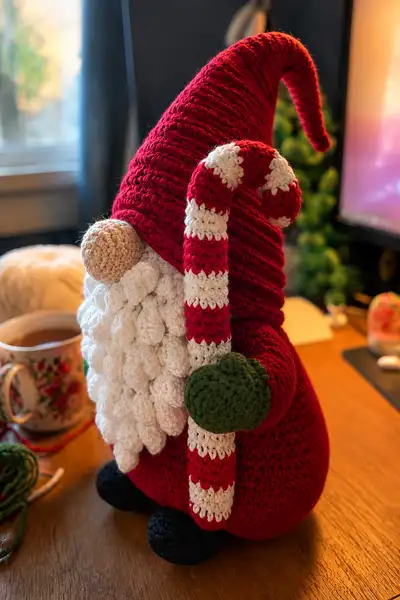
Make a jolly, oversized Christmas gnome with a tall slouchy hat, fluffy layered snowy beard, candy-cane staff and button-like nose. This pattern teaches construction for a soft, stuffed gnome with defined feet, mittens, and a striped candy cane accessory. Perfect as a festive decoration or a cozy handmade holiday gift with lots of texture and personality.
Progress Tracker
0% Complete
— Head :
Round 1 :
6 sc in magic ring (6)
Round 3 :
(1 sc, 1 inc) x 6 (18)
Round 4 :
(2 sc, 1 inc) x 6 (24)
Round 5 :
(3 sc, 1 inc) x 6 (30)
Round 6 :
(4 sc, 1 inc) x 6 (36)
Round 7 :
(5 sc, 1 inc) x 6 (42)
Round 8 :
(6 sc, 1 inc) x 6 (48)
Round 9 :
1 sc in each st (48)
Round 10 :
1 sc in each st (48)
Info :
Place safety eyes or mark nose position now. For this gnome the eyes are hidden behind beard; instead we place the nose centered. To place nose later, mark the center front at round 12 - this helps align nose placement under hat.
Round 11 :
1 sc in each st (48)
Round 12 :
1 sc in each st (48)
Round 13 :
1 sc in each st (48)
Info :
If embroidering cheeks or mouth, plan placement now. This gnome has a pronounced nose and a full beard that covers most facial features.
Round 14 :
1 sc in each st (48)
Round 15 :
1 sc in each st (48)
Round 16 :
(6 sc, 1 dec) x 6 (42)
Round 17 :
(5 sc, 1 dec) x 6 (36)
Info :
Begin stuffing head moderately firm. Leave enough softness so the head will sit neatly into the body opening. Keep stuffing evenly distributed as you decrease.
Round 18 :
(4 sc, 1 dec) x 6 (30)
Round 19 :
(3 sc, 1 dec) x 6 (24)
Round 20 :
(2 sc, 1 dec) x 6 (18)
Round 21 :
(1 sc, 1 dec) x 6 (12)
Info :
Fasten off leaving a long tail for sewing the head to the body. Finish closing hole with yarn needle and weave tail into head interior for a neat finish. If you prefer to attach the hat directly while the head is open, leave a slightly longer tail to anchor the hat later.
— Nose :
Round 1 :
6 sc in magic ring with cream/peach (6)
Round 3 :
(1 sc, 1 inc) x 6 (18)
Round 4 :
1 sc in each st (18)
Round 5 :
(4 sc, 1 dec) x 3 (15)
Round 6 :
(3 sc, 1 dec) x 3 (12)
Info :
Stuff nose firmly but leave center slightly softer so it sits naturally on the beard. Fasten off leaving long tail for sewing. Sew the nose to the head over the center front (marked at head round 12) so it pokes out under the hat brim and above the beard.
— Body :
Round 1 :
6 sc in magic ring (6)
Round 3 :
(1 sc, 1 inc) x 6 (18)
Round 4 :
(2 sc, 1 inc) x 6 (24)
Round 5 :
(3 sc, 1 inc) x 6 (30)
Round 6 :
(4 sc, 1 inc) x 6 (36)
Round 7-9 :
1 sc in each st (36)
Info :
Change to red yarn now if you started the base in another color. Work these next rounds in continuous spiral to avoid visible seams. Use a stitch marker for round start.
Round 10 :
(5 sc, 1 inc) x 6 (42)
Round 11-14 :
1 sc in each st (42)
Round 15 :
(6 sc, 1 inc) x 6 (48)
Round 16-18 :
1 sc in each st (48)
Info :
This wide section forms the main belly. The body sits flat on its bottom; stuffing strategy here is crucial. Add stuffing in layers so the base remains round but stable. You can add a small disk of cardboard or felt inside the base for extra stability if desired.
Round 19 :
(6 sc, 1 dec) x 6 (42)
Round 20 :
(5 sc, 1 dec) x 6 (36)
Round 21 :
(4 sc, 1 dec) x 6 (30)
Round 22 :
(3 sc, 1 dec) x 6 (24)
Round 23 :
(2 sc, 1 dec) x 6 (18)
Info :
Begin stuffing body firmly after round 18. Add more stuffing as you reduce. For a stable standing gnome, pack the base quite firmly and keep the top of the body slightly less packed so the head can be sewn in easily.
Round 24 :
(1 sc, 1 dec) x 6 (12)
Info :
Fasten off leaving a long tail for sewing the head. Alternatively, leave head opening slightly larger and sew head into it, then close around the neck for a smooth seam. Make sure body is firmly stuffed before attaching legs and feet.
— Hat (Tall Slouchy Cone) :
Info :
Hat is worked in red in continuous spiral. This hat is tall and tapered; it is worked with increases early, then many even rounds to get height, then slight decreases to shape tip. Use BLO on several rounds to create subtle ridges if desired.
Round 1 :
6 sc in magic ring (6)
Round 3 :
(1 sc, 1 inc) x 6 (18)
Round 4 :
(2 sc, 1 inc) x 6 (24)
Round 5 :
(3 sc, 1 inc) x 6 (30)
Round 6 :
(4 sc, 1 inc) x 6 (36)
Round 7 :
(5 sc, 1 inc) x 6 (42)
Round 8 :
1 sc in each st (42)
Round 9 :
1 sc in each st (42)
Info :
From round 10 onwards you will work mostly even rounds to build height. If you want the hat to fold forward, add a few BLO rounds near the brim to create a firmer edge. Pin the finished hat over the head to decide desired slouch before closing the tip.
Round 10-22 :
1 sc in each st (42)
Round 23 :
(6 sc, 1 dec) x 6 (36)
Round 24-30 :
1 sc in each st (36)
Round 31 :
(5 sc, 1 dec) x 6 (30)
Round 32-36 :
1 sc in each st (30)
Round 37 :
(4 sc, 1 dec) x 5 (25)
Round 38-42 :
1 sc in each st (25)
Round 43 :
(3 sc, 1 dec) x 5 (20)
Round 44-48 :
1 sc in each st (20)
Info :
At this stage determine desired tip curve: to make a strong bend at the end, insert a short length of wire or tightly pack stuffing at the tip before closing. For a soft droop, stuff lightly and leave more flexibility. If using wire, fold the ends and hide inside the hat lining with extra stitches.
Round 49 :
(2 sc, 1 dec) x 5 (15)
Round 50 :
(1 sc, 1 dec) x 5 (10)
Info :
Fasten off leaving long tail to sew hat to head. Block hat gently into shape if desired by steaming or pinning and allowing to dry. Hat is intentionally oversized and will cover most of the head; when attaching, leave a small opening for the nose and beard to poke through.
— Beard: Layered Puff/Cluster Scales :
Info :
The beard is made from many repeated small puff/popcorn motifs sewn in offset rows to create a triangular full beard. Each motif is worked separately and attached. We'll define the motif rounds and then provide assembly layout. Make approximately 35-50 motifs depending on desired fullness; the example uses 40 motifs arranged in 7 rows (7,7,6,6,5,4,5) to create a layered triangular beard that reaches the body front.
Beard Motif - Round 1 :
6 sc in magic ring with white (6)
Beard Motif - Round 2 :
ch1, (yarn over, insert, pull up loop) x 3 in same st to make a small puff then ch1, secure with sl st into same stitch - repeat in next 5 sts to create 6 mini puffs; alternatively work 6 clusters of (2 dc, ch1, 2 dc) in 6 sts as decorative little petals. End with sl st to join. (6 clustered petals)
Beard Motif - Round 3 :
Work 1 sc around base of each cluster to tidy and give a stiffer edge (6)
Info :
Make 40 motifs or adjust to preference. Use a smaller hook (3.0mm) for motifs to keep them tight and textured. Leave a 10-15 cm tail on each motif for sewing. Block motifs lightly if needed to flatten cluster bases.
Assembly Row Layout :
Arrange motifs in rows from top (closest to nose) downward: Row1: 7 motifs, Row2: 7 motifs overlapping Row1, Row3: 6 motifs, Row4: 6 motifs, Row5: 5 motifs, Row6: 4 motifs, Row7: 5 motifs forming the bottom tip. Pin each motif overlapping slightly so the clusters create a full scalloped effect. Sew each motif to the head/body using a whipstitch around the base, catching a few stitches of the head or super-firmly anchoring to the hat lower rim for stability.
Info :
Start sewing Row1 centered under the nose, approximately aligned with head rounds 12-13. Work outward symmetrically. Attach additional motifs to the body front at lower rows to create a continuous surface that extends to body round 10-14 depending on your placement. Keep motif tops tucked slightly under the hat brim for a natural look.
— Left Arm (Make 1) :
Round 1 :
6 sc in magic ring with green (6)
Round 3 :
(1 sc, 1 inc) x 6 (18)
Round 4-6 :
1 sc in each st (18)
Info :
These rounds form the mitten hand. Stuff the hand firmly now. If you prefer a thumb shape, create a small separate mini tube of 6-8 rounds and sew to the side of round 4-5 of the hand before stuffing.
Round 7 :
(2 sc, 1 dec) x 6 (12)
Round 8-12 :
1 sc in each st (12)
Round 13 :
(2 sc, 1 inc) x 4 (16)
Round 14-18 :
1 sc in each st (16)
Info :
Leave a long tail on round 18 for sewing the arm to the body. Stuff the arm lightly so it has a soft bend when attached. Position arms at body rounds 14-18 (count from the top of body) so mittens rest near the beard edge when sewn.
— Right Arm (Make 1) :
Round 1 :
6 sc in magic ring with green (6)
Round 3 :
(1 sc, 1 inc) x 6 (18)
Round 4-6 :
1 sc in each st (18)
Round 7 :
(2 sc, 1 dec) x 6 (12)
Round 8-12 :
1 sc in each st (12)
Round 13 :
(2 sc, 1 inc) x 4 (16)
Round 14-18 :
1 sc in each st (16)
Info :
Sew arms to body using the long tails, positioning the right arm so the hand can grip the candy cane. Use pins to find a comfortable resting position before final stitching.
— Candy Cane Staff :
Info :
Candy cane is worked as a long tube in red and white stripes around a wire or stuffed core. The hook size can be 3.0-3.5mm depending on yarn thickness. Optionally insert floral wire for a hooked top that holds its curve.
Round 1 :
6 sc in magic ring with red (6)
Round 3 :
(1 sc, 1 inc) x 6 (18)
Round 4-30 :
1 sc in each st (18) working in spiral and changing colors every 3 rounds: alternate 3 rounds red, 3 rounds white, repeating until staff measures desired length (~30-35 cm before hook). Use Info below for color change technique.
Info :
For clean stripes, finish the last stitch of a color by completing the final yarn-over with the new color and carry the yarn inside the tube or fasten off and rejoin each time. If using wire, leave a 3-4 cm wire tail at each end and fold or cap the end safely before stuffing and closing. To create the hooked top, work the last 8-12 rounds around the wire bent into a hook, then stuff lightly and close.
Round 31 :
(2 sc, 1 dec) x 6 (12)
Round 32 :
(1 sc, 1 dec) x 4 (8)
Info :
Fasten off leaving long tail to sew the candy cane into the right mitten. If you used wire, tuck wire ends inside mitten and secure with wrapping before sewing closed.
— Left / Right Foot (Make 2) :
Round 1 :
6 sc in magic ring with black (6)
Round 3 :
(1 sc, 1 inc) x 6 (18)
Round 4 :
(2 sc, 1 inc) x 6 (24)
Round 5-8 :
1 sc in each st (24)
Round 9 :
(2 sc, 1 dec) x 6 (18)
Round 10 :
(1 sc, 1 dec) x 6 (12)
Info :
Stuff feet firmly and flatten the base slightly so they sit flat under the body. Leave long tail for sewing; position feet spaced evenly at bottom of body (approximately 6-8 stitches apart depending on body circumference) so the gnome can stand. Sew feet to body through several rounds to ensure stability.
— Optional Hat Brim / Hat Trim :
Round 1 :
Attach red to hat lower edge and work 1 sc in each st BLO for one round to create a defined brim edge (42)
Round 2 :
Work 1 round of hdc in each st for a softer lift if desired (42)
Info :
You may also add a loop or pom-pom at the hat tip. For the look in photos the brim is minimal so motifs tuck under slightly; keep brim narrow so beard sits flush under hat.
— Finishing Touches and Embellishments :
Info :
Sew nose in place centered and just above the top row of beard motifs. Sew brim of hat over top edge of beard and nose, tacking in a few hidden stitches near the nose so hat maintains position. Sew the beard motifs in layered rows starting at the top under the nose and working downwards, overlapping bases to avoid visible gaps. When sewing arms, attach firmly at body rounds 12-16 depending on your placement preference so the mittens appear to hold the candy cane naturally.
Info :
Weave in all loose ends and trim close. If desired, add a few embroidered stitches for a mouth line peeking at the edge of the beard, or small rosy blush using fabric-safe powder on the cheek area around the nose.
Info :
For increased durability, add a few stitches through the beard motifs into the hat underside so the beard cannot shift. Test the gnome for standing balance and, if necessary, add a small flat insert in the base of the body to broaden the footprint.
Congratulations — you now have a festive, squishable Big Snowy Beard Gnome ready to sit on your mantle or join your holiday display! This character combines a tall whimsical hat, cushy body, textured snowy beard and a cheerful candy cane staff for tons of seasonal charm. Each step of assembly brings out personality; you can customize colors and small details to make it uniquely yours. 🎄🧶 Share your finished gnome with friends and family for instant holiday smiles!