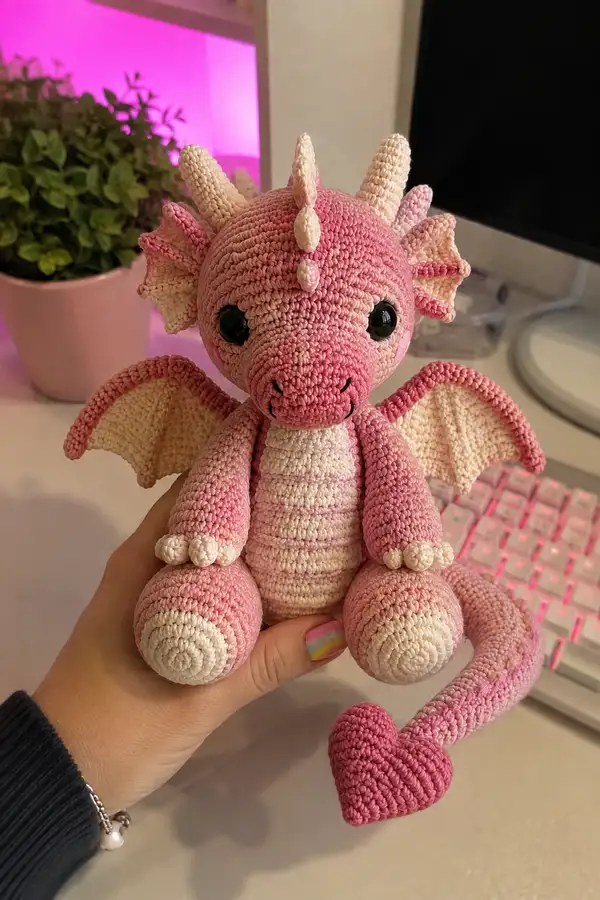
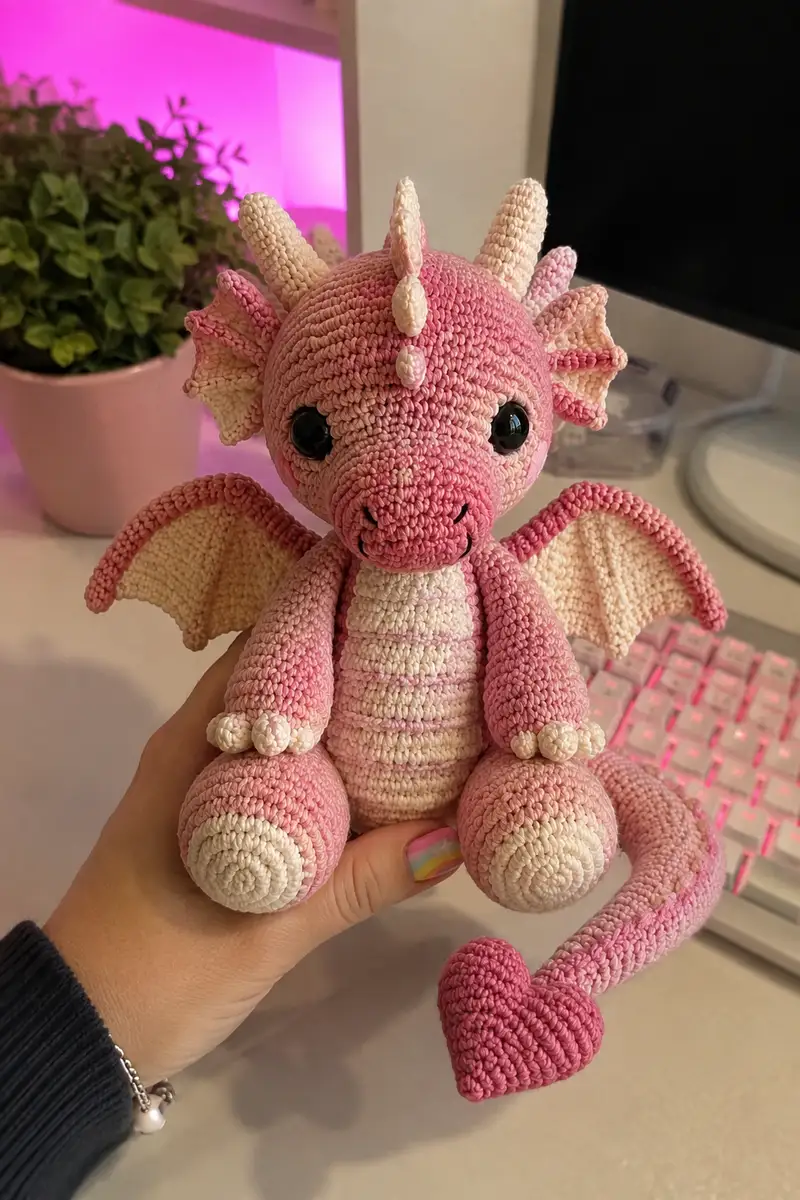
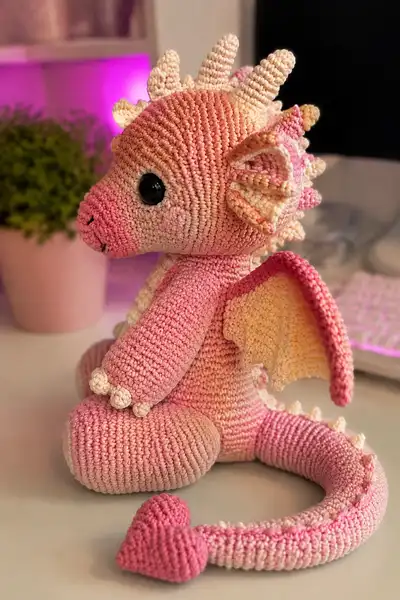
Create this charming pink dragon with a heart-shaped tail, curly horns and soft wing membrane. The pattern reproduces the plush, seated pose, scalloped belly, tiny claws and textured spikes. Worked in tight single crochet with color changes and small decorative pieces, this dragon makes a lovely gift or decorative companion. Detailed assembly and shaping instructions guide you through every round to achieve the same cuddly look.
Progress Tracker
0% Complete
— Head :
Round 1 :
6 sc in magic ring (6)
Round 3 :
(1 sc, inc) x 6 (18)
Round 4 :
(2 sc, inc) x 6 (24)
Round 5 :
(3 sc, inc) x 6 (30)
Round 6 :
(4 sc, inc) x 6 (36)
Round 7 :
(5 sc, inc) x 6 (42)
Round 8 :
(6 sc, inc) x 6 (48)
Round 9 :
(7 sc, inc) x 6 (54)
Round 10-16 :
1 sc in each st (54)
Info :
At this stage the head is forming. Place safety eyes between rounds 13-14, measuring approximately 9-11 stitches apart depending on desired expression. For a curious, wide-eyed look use 11 sts apart; for a cuter look use 9 sts apart. Secure eyes with washers before stuffing more.
Round 17 :
(7 sc, dec) x 6 (48)
Round 18 :
(6 sc, dec) x 6 (42)
Round 19 :
(5 sc, dec) x 6 (36)
Info :
Begin stuffing the head firmly but not overstuffed. Use small amounts of fiberfill to shape around the eyes and nose area. Keep stuffing accessible as you work next decreases to maintain shape continuity.
Round 20 :
(4 sc, dec) x 6 (30)
Round 21 :
(3 sc, dec) x 6 (24)
Round 22 :
(2 sc, dec) x 6 (18)
Round 23-28 :
1 sc in each st (18) - work 6 rounds to form neck tube (23-28) (18)
Info :
Continue stuffing the head through the neck tube until firm and well-shaped. The neck tube remains open for sewing to the body; leave a 15-20 cm tail for sewing. If you prefer a flexible neck, insert a short piece of wire before closing the head off.
Round 29 :
Start decreasing to shape neck base: (1 sc, dec) x 6 (12)
Round 30 :
6 dec (6) - close or fasten off leaving long tail for sewing
Info :
Fasten off and leave a long tail for sewing. Do not overstuff the neck area as it will be stitched to the body and needs to compress slightly to hold shape. Use mattress or ladder stitch to close if you prefer, but leave the tail long so you can whip stitch the head to body securely.
— Muzzle / Snout :
Round 1 :
6 sc in magic ring (6)
Round 3 :
(1 sc, inc) x 6 (18)
Round 4 :
1 sc in each st (18)
Round 5 :
(2 sc, dec) x 4, 1 sc (14) - shape a rounded snout
Info :
Lightly stuff the muzzle. Embroider nostrils and mouth with black yarn or thread after placing on head. Sew muzzle centered between eyes, align bottom of muzzle with round 15-16 of head to match proportions.
— Head Spikes and Horns (Make 9 small spikes and 3 horns) :
Small Spike Round 1 :
4 sc in magic ring (4)
Small Spike Round 2 :
4 inc (8)
Small Spike Round 3-4 :
1 sc in each st (8)
Small Spike Round 5 :
Dec x4 (4) - finish, fasten off leaving tail for sewing
Info :
Make nine of these for the dorsal row, decreasing size slightly for the smaller ones near the head top. Place them along the center of the head from forehead to nape at intervals of 3-5 stitches depending on spike size.
Horn (cone) Round 1 :
6 sc in magic ring (6)
Horn Round 2 :
(1 sc, inc) x 3 (9)
Horn Round 3 :
(2 sc, inc) x 3 (12)
Horn Rounds 4-8 :
1 sc in each st (12)
Horn Round 9 :
(2 sc, dec) x 3 (9)
Horn Round 10 :
Dec x3 (3) - finish, stuff slightly and close, leave tail for sewing
Info :
Make three horns of similar size: two slightly shorter for side placement and one taller for the center. Stuff lightly to keep them stiff. Sew horns to top of head in a triangular arrangement (center, left, right) with spikes filling the gap between them.
— Ears / Frilled Fins (Make 2) :
Round 1 :
6 sc in magic ring (6)
Round 3 :
(1 sc, inc) x 6 (18)
Round 4 :
(2 sc, inc) x 6 (24)
Round 5 :
1 sc in each st (24)
Round 6 (Frill) :
Work along edge: *ch1, sl st into next st, ch2, hdc into same st* rep around to create scalloped frill (24 scallops) - fasten off and leave tail for sewing
Info :
Sew ears to sides of the head around rounds 10-12, slightly angled forward. Add a second smaller frill inside the ear using contrasting cream yarn to match the sample's layered ear look.
— Body :
Round 1 :
6 sc in magic ring (6)
Round 3 :
(1 sc, inc) x 6 (18)
Round 4 :
(2 sc, inc) x 6 (24)
Round 5 :
(3 sc, inc) x 6 (30)
Round 6 :
(4 sc, inc) x 6 (36)
Round 7-12 :
1 sc in each st (36)
Info :
If you want a two-tone belly, change to cream yarn now. Start working belly rounds in cream while continuing main body in variegated yarn; carry unused yarn inside or fasten off and rejoin.
Round 13 :
(4 sc, dec) x 6 (30)
Round 14-20 :
1 sc in each st (30)
Info :
Join the head when body is stuffed enough to accept the head. Stuff the body gradually: bottom firmly so it sits, torso moderately to allow head and limbs to attach smoothly. Leave center opening for sewing the head.
Round 21 :
(3 sc, dec) x 6 (24)
Round 22 :
(2 sc, dec) x 6 (18)
Round 23 :
(1 sc, dec) x 6 (12)
Round 24 :
1 sc in each st (12) - work 2 rounds to make neck opening (24-25) (12)
Round 25 :
Fasten off leaving long tail for sewing head. Do not completely close; the head will be sewn onto this opening.
— Belly Panel (worked separately and sewn on) :
Round 1 :
6 sc in magic ring (6) - use cream yarn (belly)
Round 3 :
(1 sc, inc) x 6 (18)
Round 4 :
(2 sc, inc) x 6 (24)
Round 5-10 :
1 sc in each st (24)
Info :
Belly is worked flat and slightly elongated. After round 10, fasten off leaving a long tail and position on the front center of the body. Sew along edges leaving a little ridge to emulate scalloped belly lines. You can add horizontal ridges by embroidering lines every 4-5 stitches with pale pink yarn.
— Arms (Make 2) :
Round 1 :
6 sc in magic ring (6)
Round 3 :
(1 sc, inc) x 6 (18)
Round 4-5 :
1 sc in each st (18)
Round 6 :
(2 sc, dec) x 4, 2 sc (14) - shape wrist
Round 7-14 :
1 sc in each st (14) - work even to create arm length
Info :
Stuff the hand portion (rounds 1-5) fairly firmly and the arm shaft more lightly. Leave top opening unstuffed until you sew onto the body so you can shape the shoulder seam neatly.
Round 15 :
Decrease for shoulder shaping: (2 sc, dec) x 2, 2 sc (10)
Round 16 :
1 sc in each st (10)
Round 17 :
Fasten off leaving long tail for sewing
Claws (Make 6, 3 per hand) :
Round 1: 4 sc in magic ring (4). Round 2: 4 inc (8). Round 3: 1 sc in each st (8). Round 4: dec x4 (4). Fasten off leaving tail to sew. Sew three small claws to the tip of each arm evenly spaced.
— Legs (Make 2) :
Round 1 :
6 sc in magic ring (6)
Round 3 :
(1 sc, inc) x 6 (18)
Round 4 :
(2 sc, inc) x 6 (24)
Round 5-8 :
1 sc in each st (24)
Round 9 :
(3 sc, inc) x 6 (30)
Round 10-16 :
1 sc in each st (30) - form leg bulk
Info :
Stuff foot firmly for stable sitting. Keep stuffing directed towards the toe and sole area so the leg sits flat. For a flat foot, press stuffing and add a felt sole if desired before closing.
Round 17 :
(3 sc, dec) x 6 (24)
Round 18 :
(2 sc, dec) x 6 (18)
Round 19 :
(1 sc, dec) x 6 (12)
Round 20 :
Fasten off leaving tail for sewing to hips
Toe End (Cream Circle) :
Make a flat circle to sew onto toe: Round1 6 sc in magic ring (6), Round2 6 inc (12), Round3 (1 sc, inc)x6 (18), fasten off and sew centered on foot.
— Wings (Make 2 outer wings and 2 inner membranes) :
Wing Inner Membrane (cream) Round 1 :
6 sc in magic ring (6)
Round 3 :
(1 sc, inc) x 6 (18)
Round 4 :
(2 sc, inc) x 6 (24)
Round 5 :
(3 sc, inc) x 6 (30)
Round 6 :
1 sc in each st (30)
Wing Shaping Rows 7-12 :
Work back-and-forth along a row to create an oval fan: ch1, turn and 1 sc in first 20 sts across, ch1, turn - repeat to build membrane depth (this forms 6 partial rows). Fasten off leaving edge for joining.
Info :
Inner membrane should be slightly smaller than outer shell. Block flat if needed by pinning to surface and lightly dampening then letting dry to keep wings stable. Use cream yarn for a pale contrast with the outer edge.
Wing Outer Shell Round 1 :
6 sc in magic ring (6)
Round 3 :
(1 sc, inc) x 6 (18)
Round 4 :
(2 sc, inc) x 6 (24)
Round 5 :
1 sc in each st (24)
Round 6 :
Start shaping wing edge with BLO ridges: 1 sc in each st BLO (24)
Round 7-12 :
1 sc in each st (24) - shape to forked wing tip by adding extra shells on last two rounds: into last stitch work (sl st, ch2, hdc, dc, ch2, sl st) to create scalloped tip on one side, repeat on opposite side
Info :
Join inner membrane into outer shell using invisible whip stitch along the inner edge. Attach wings centered at back shoulders between rounds 12-15. Pin each wing to check symmetry and angle before sewing. Sew only along top seam to allow slight opening of wing.
— Tail (long curled tail with heart tip) :
Tail Base Round 1 :
6 sc in magic ring (6)
Round 3 :
(1 sc, inc) x 6 (18)
Round 4 :
(2 sc, inc) x 6 (24)
Round 5-8 :
1 sc in each st (24)
Info :
The tail in the photo gradually tapers and thickens near the tip. To reproduce the long curl, work tail as a spiral tube with uniform rounds, stuffing lightly but consistently. Insert flexible wire if you want it poseable, running it inside the tube before final stuffing and closure.
Tail Narrowing Round 9 :
(3 sc, dec) x 6 (18)
Round 10-22 :
1 sc in each st (18) - work rounds to form length (13 rounds)
Tail Taper Round 23 :
(2 sc, dec) x 6 (12)
Tail Taper Round 24-26 :
1 sc in each st (12) - form narrow tail section ready for heart tip
Heart Tip (Make 1) Round 1 :
6 sc in magic ring (6)
Heart Round 2 :
6 inc (12)
Heart Round 3 :
(1 sc, inc) x 6 (18)
Heart Round 4 :
1 sc in each st (18)
Heart Round 5 :
Work increases across two opposing arcs to create lobes: (2 sc, inc)x3, skip center 6 sts and work same on opposite arc (24) - this forms two lobes
Heart Round 6-8 :
1 sc in each st (24) - shape heart by adding small decreases across the center to pull tip in
Heart Round 9 :
(2 sc, dec) x 4, 4 sc (20) - start closing center
Heart Round 10 :
Work decorative surface rows: sl st and ch stitches to create heart creases, fasten off leaving tail
Info :
Sew heart tip to the narrow tail end with the seam centered and make sure the heart orientation sits upward when the tail curls. Add a few mattress stitches across the heart base to anchor it and prevent twisting. If using wire, hide the wire end inside the heart and secure tightly with yarn.
— Tail Spikes (Make 8-10 small spikes) :
Spike Round 1 :
4 sc in magic ring (4)
Spike Round 3 :
1 sc in each st (8)
Spike Round 4 :
dec x4 (4) - fasten off, leave tails
Info :
Sew spikes along the top of the tail leaving spaces of 3-4 stitches between. Make the spikes gradually smaller towards the heart tip by skipping the second round for the last 2-3 spikes.
— Small Decorative Teeth/Scales (Optional many small nodules) :
Round 1 :
3 sc in magic ring (3)
Round 2 :
3 sc in each st (3) - fasten off leaving tail for sewing
Info :
Make 6-8 of these and place along jawline and belly seam for the same textured look as the sample. Sew securely and stuff minimally so they retain a small rounded shape.
— Assembly Notes and Additional Info :
Info :
Before assembly, pin all pieces in place: head to body, arms to sides, legs to bottom, wings to shoulders, tail to back lower center. Use reference photo for spacing: arms align with upper torso at approximately body rounds 8-12; legs attach at the bottom so the dragon sits with knees forward; wings attach between rounds 12-15 centered on back. Use strong nylon or cotton thread and ladder stitch or whip stitch to attach each part invisibly.
Info :
Weave in all ends after sewing pieces. For facial details, embroider small black nostrils and a smiling mouth. Optionally add blush to cheeks using fabric-safe chalk or soft pastel and seal lightly with fabric fixative if desired.
Congratulations — you just finished a truly heartwarming dragon amigurumi! Each carefully crocheted section, from the tiny horned crown to the curled heart tail, comes together to create a lovable companion full of charm. Enjoy the satisfying moment when you stitch the head on and see the character come alive. 🧶💖 Share your finished dragon with friends or gift it to someone special — this little dragon is built to be treasured. Happy stitching! ✨