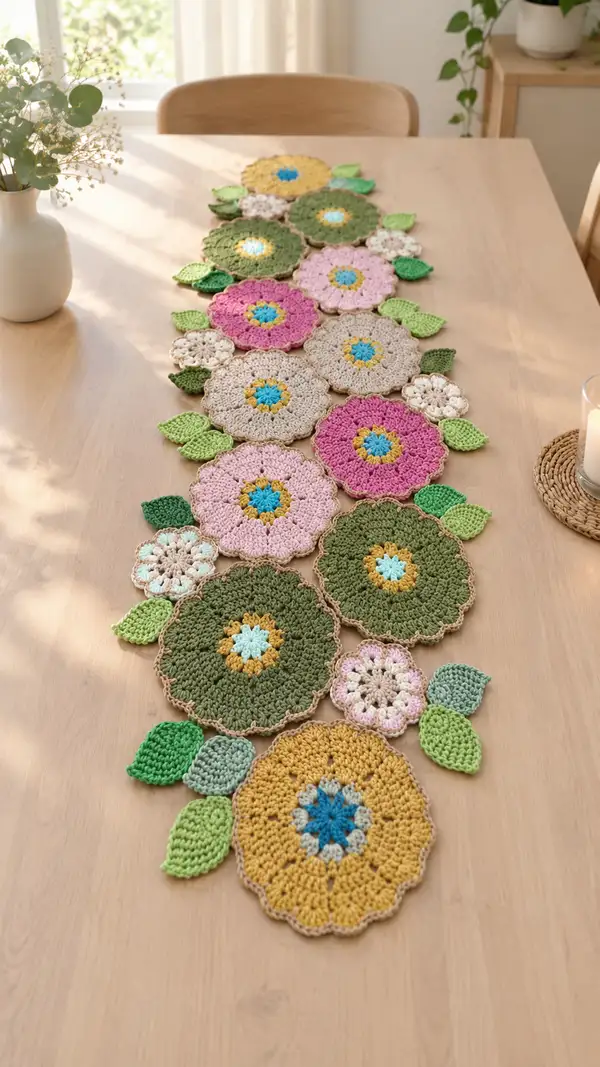
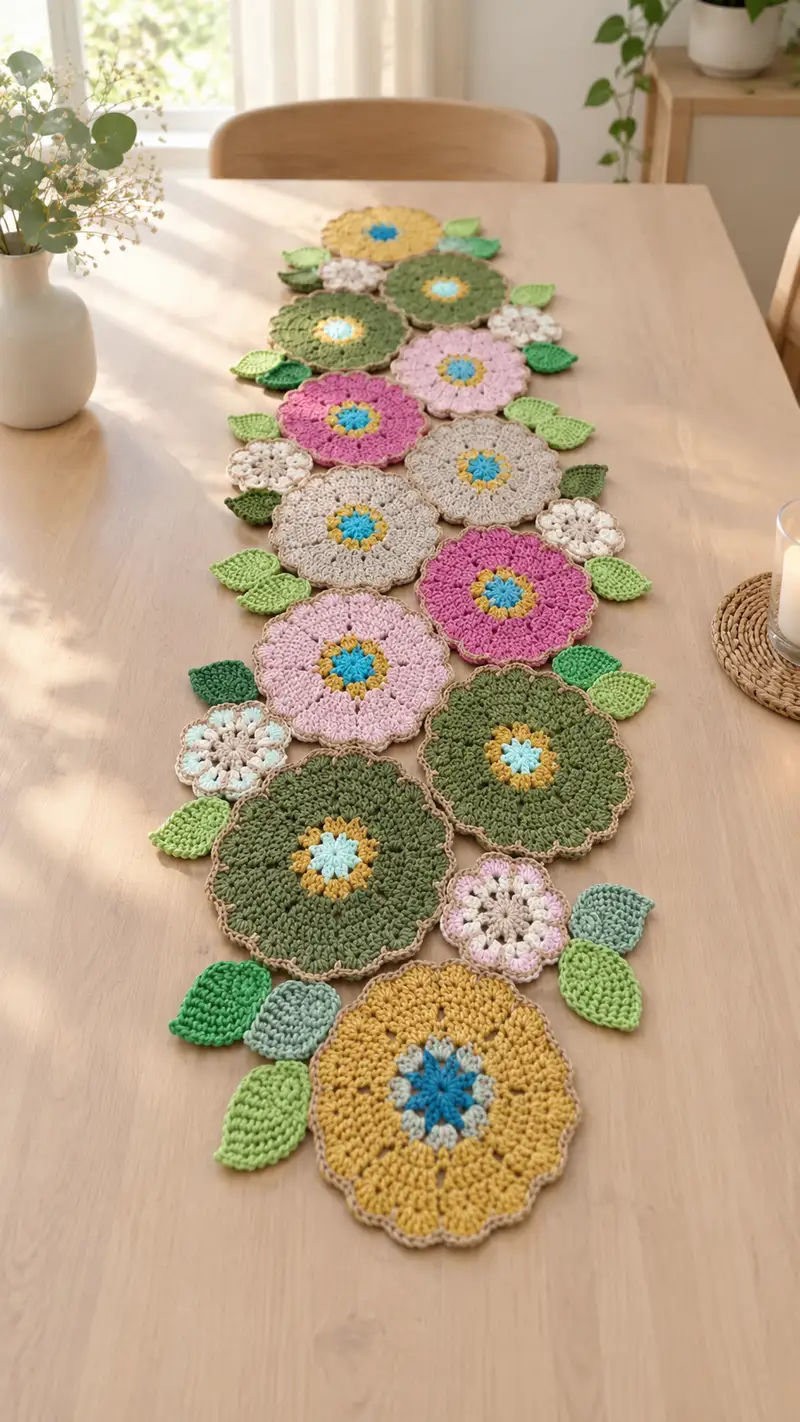
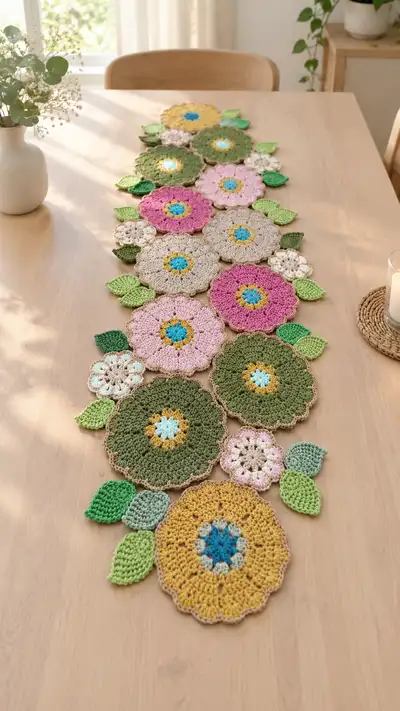
A sunlit floral table runner made of interconnected crochet flower motifs and embroidered leaves. This pattern recreates the layered round flowers, small rosettes, and scalloped edging seen in the photo, arranged in a flowing runner. Uses multiple soft spring colors and a neutral edging to highlight each bloom. Perfect to brighten a dining table or use as a decorative centerpiece.
Progress Tracker
0% Complete
— Overview :
Info :
This runner is made from 4 motif types: Large Scalloped Flower (Make 6), Medium Round Flower (Make 5), Small Rosette (Make 6), Leaves (Make 24). After motifs are made, join using whip/continuous sc joins and work a unifying neutral scalloped border. All motifs are worked flat in rounds. Gauge is not critical for a runner, but keep tension consistent.
— Large Scalloped Flower (Make 6) :
Round 1 :
Work a magic ring, ch3 (counts as dc), 11 dc into ring; join with sl st to top of ch3 (12)
Round 2 :
Ch3, *1 dc in next st, 1 inc (2 dc) in next st* repeat around (18)
Round 3 :
Ch3, *(2 dc in next 2 sts), inc in next st* repeat (24)
Round 4 :
Ch3, *(3 dc in next 3 sts), inc in next st* repeat (30)
Round 5 :
Ch3, *(4 dc in next 4 sts), inc in next st* repeat (36)
Info :
By round 5 you have established a 36-st foundation. Change to your chosen petal color now if you prefer contrasting petals. Carry unused yarn behind if you will work many motifs of same colors to save ends.
Round 6 :
Ch1, sc in same st and in next 2 sts (3 sc), *ch2, sk 1 st, sc in next 3 sts* repeat around to create base points aligning 12 sections (36)
Round 7 :
Change to petal color if not done. Attach in any ch2 sp: *(sc, ch1, 5 dc in ch2 sp, ch1, sc) in each ch2 sp* around - you will make 12 shells anchored into the ch2 spaces. (36 base points unchanged)
Info :
Each shell is worked into the ch2 space and does not change base stitch count. Use a st marker to mark the start of the first shell so you can count petals easily.
Round 8 :
Sl st to center of first shell, ch1, *sc in top of shell, ch3, sc in top of next shell* repeat around to create small picot arches between shells (36)
Round 9 :
Working in FLO of previous round's arches: ch3 (counts dc), *(2 dc, ch2, 3 dc) in ch3 arch, sk to next arch and dc in top of shell* repeat around forming raised petals; total directional stitches anchored to 12 arches (no base count change)
Round 10 :
Ch1, sc evenly in peaks and valleys to tidy petals: sc in each peak and 1 sc in each valley between petals to maintain structure (approx 48 small sc used across surface)
Info :
Begin to shape the flower by pulling the petals slightly outward while working Round 10; this helps keep the motif flat. Block each motif lightly to set the petals if required.
Round 11 :
Change to neutral/beige edging color. Attach with sl st to any sc, ch1, *(sc, ch3, sc) in each petal top to form small scallops* repeat across 12 petals (36)
Round 12 :
Ch1, sc in each sc and in ch3 sp around creating a tidy edging (36)
Round 13 :
Work a decorative picot-round: *(sc, ch3, sl st in 3rd ch) in every 3rd sc* repeat for a delicate scalloped outline (12 small picots)
Round 14 :
Finishing round: sl st to next st, fasten off and weave ends to back. Block motif flat, centering petals evenly.
Info :
Make 6 of these large motifs in various colorways. Keep them consistent in tension and hook to maintain similar diameter - these motifs measure roughly 11-13 cm across with worsted cotton and a 4.0 mm hook depending on tension.
— Medium Round Flower (Make 5) :
Round 1 :
mr, ch2 (counts hdc), 11 hdc in ring; join with sl st to top of ch2 (12)
Round 2 :
Ch2, *hdc in next st, inc in next st* repeat around (18)
Round 3 :
Ch2, *(2 hdc, inc) x6* (24)
Round 4 :
Ch2, *(3 hdc, inc) x6* (30)
Info :
Switch to a color for the visible round that contrasts with the center. This motif uses hdc for a denser, flatter texture than the large flower.
Round 5 :
Ch1, sc in next 2 sts, *ch2, sk next 2 sts, sc in next 3 sts* repeat around creating 10 small base arches (30)
Round 6 :
Attach petal color in any ch2 sp, *(sc, ch1, 3 dc, ch1, sc) in each ch2 sp* repeat making 10 petite petals anchored in arches (30)
Round 7 :
Sl st to top of first petal, ch1, sc in each petal top and 1 sc in each valley to keep motif flat (approx 40 sc)
Round 8 :
Change to neutral edging color. Ch1, *sc in each st around* (maintain base layout) to create clean joinable edge (approx 40)
Round 9 :
Optional decorative last round: *(sc, ch2, sc) over each petal to form trimmed scallops* repeat around (10 scallops)
Round 10 :
Fasten off leaving long tail for joining. Weave in ends or leave for later finishing. Block gently.
Info :
Make 5 of these medium flowers in complementary colors; they sit comfortably between the large scalloped blooms and small rosettes in layout.
— Small Rosette (Make 6) :
Round 1 :
mr, ch3 (counts dc), 11 dc in ring, join (12)
Round 2 :
Ch3, *(dc in next st, inc in next st) x4* adjust so final count (18)
Round 3 :
Ch1, sc in each st around (18)
Round 4 :
Attach accent color in any st, *(ch2, 3 dc cluster in next st, ch2, sl st in next st)* repeat to create 6 tiny petals mounted on top (structure retains 18 base points)
Round 5 :
Sl st to join, ch1 and fasten off leaving long tail for sewing. Block lightly to flatten rosette and open petals slightly.
Info :
These rosettes are decorative fillers between larger motifs. They are intentionally small; if you prefer, add an extra round of sc around to enlarge them slightly to about 6-7 cm across.
— Leaf (Make 24) :
Round 1 :
With leaf color, ch8, sc in 2nd ch from hook, hdc in next, dc in next, tr in next, dc in next, hdc in next, sc in last (7 stitches across chain; leaf shape formed) (7)
Round 2 :
Working back along the other side of foundation chain: sc in base of last, hdc, dc, tr, dc, hdc, sc finishing at the base making a tapered leaf; sl st to starting sc to form closed leaf edge
Round 3 :
Ch1, sc around leaf edge evenly, placing 1 sc in each tip and 2 sc in wider sections to even out (approx 18 sc total)
Round 4 :
Working in BLO only, ch1, sc in each st around to create a subtle raised center ridge (approx 18)
Round 5 :
Optional vein: With contrast green, embroider a central vein using a running stitch with tapestry needle; do not alter base counts
Round 6 :
Sl st, fasten off leaving tail for sewing. Make 24 leaves distributed across three shades of green. Block lightly to flatten.
Info :
Leaves are worked flat and then sewn between motif junctions to form the organic, leafy gaps in the runner. Vary the size slightly by using fewer or more foundation chains if you want more taper.
— Joining Motifs & Layout :
Info :
Lay out all motifs on a large flat surface in the flowing arrangement you like before sewing. The photo shows a central spine of large motifs, medium motifs nested between, and small rosettes and leaves filling edges. Pin motifs securely before joining.
Round 1 :
Use neutral/beige yarn and 4.0 mm hook. With right sides up, place two motifs adjacent and whip-stitch through both outer edge rounds, going through both top loops to create a flat seam. Join motifs in a continuous whip or use invisible whip for neater join.
Info :
When joining, work about 4-6 stitches per 2-3 cm depending on motif size to avoid puckering. Every time you join motifs, check the runner lays flat; if it waves, adjust spacing and add a leaf to fill gaps.
Round 2 :
Continue joining down the runner center, adding medium motifs in the gaps between large motifs using the same whip join. For tucking rosettes into small voids, sew only at 3-4 anchor points to keep them sitting slightly raised for depth.
Round 3 :
Sew leaves into the seams between motifs: place leaf so its tip points outward, tack with 3 discrete stitches at its base and along the central vein to secure. Alternate green shades for visual interest.
Info :
Keep a tape measure handy: maintain a consistent runner width as you join. The sample runner is approximately 30-35 cm wide and 110-120 cm long, depending on motif spacing and number.
Round 4 :
Fill remaining small gaps with rosettes, tacking into place using long tails to weave and hide ends on the back. Trim any long tails after weaving securely.
— Unifying Scalloped Border :
Info :
Once all motifs are joined into a continuous runner, work a single row of sc around the entire outside edge with neutral yarn to create a consistent base for a scalloped trim. Work sl st joins where motifs meet to avoid bulk.
Round 1 :
Attach neutral yarn to any outer edge sc and ch1, sc evenly around the entire runner edge placing more sc in wider spots so runner remains flat. Maintain about 3-4 sc per larger petal section and 1-2 sc in narrow valleys (approx stitch count varies by size).
Round 2 :
To form scallops: *(5 dc in next st, sl st in next st)* repeat around the curved edges where you want prominent scallops. On straighter connecting seams use *(3 dc, sl st) to avoid excessive bulk.*
Round 3 :
Ch1, sc evenly across the tops of created scallops to tidy and add strength, placing 1 sc in each dc and 1 sc in each sl st join. This creates a reinforced border for durability.
Info :
If your runner is long and you want reinforcement, add a second sc round on the underside spaced slightly inward to create a double-thickness join at the motifs' seam line. This adds a professional finish and prevents curling.
Round 4 :
Optional decorative picot: *(sc, ch3, sl st in 3rd ch) in the front of each scallop* repeat for a delicate finished look; fasten off and weave ends.
— Finishing, Blocking & Care :
Info :
Weave all ends to the back so they are invisible from the right side. Block the entire runner: dampen slightly, pin into final running shape on a blocking mat and leave to dry overnight to set petals and scallops. Avoid overstretching while pinning.
Round 1 :
Final inspection: check joins and reinforcement stitches. Add any extra tacking stitches for rosettes or leaves that feel loose. Trim stray fibers and secure ends with a small dab of fabric glue if necessary.
Info :
To launder, hand wash in cool water with mild soap and lay flat to dry. Cotton yarn may shrink slightly if machine-washed; treat with care to maintain shape.
Completing this Blooming Meadow Table Runner brings a bright, handcrafted centerpiece to any table — every motif feels like a small victory. The interplay of colors, scalloped edges, and tiny leaves creates a layered, garden-fresh look that's perfect for seasonal decorating or everyday charm. Enjoy the tactile joy of joining floral motifs and watching the runner bloom under your hands. 🧶🌼✨