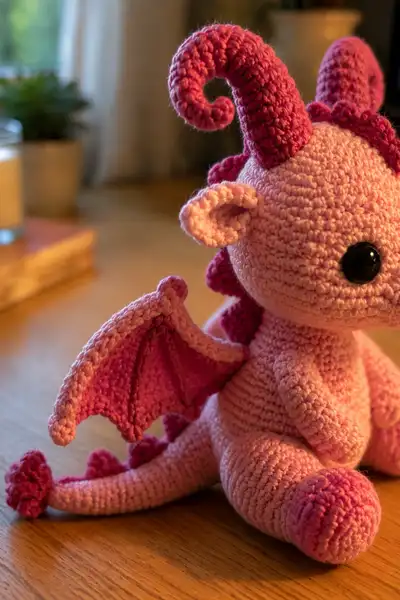
🧶 Beautiful ✨ Detailed 💝 Adorable

Small Pink Demon Dragon with Curled Horns Amigurumi Pattern

Small Pink Demon Dragon with Curled Horns Amigurumi Pattern
4.6★ Rating
5-7 Hours Time Needed
1.4K Made This
✂️

Intermediate Level

Ideal for those with basic crochet experience, featuring slightly more advanced stitches and techniques to expand your skills.

⏱️

Weekend Treat

Takes 5-7 hours, making it an enjoyable project to finish over a couple of days.

🐰

Whimsical Buddy

Playful characters full of personality, designed to spark imagination and become cherished playtime favorites.

🧶 Jump to Pattern ↓

About This Small Pink Demon Dragon with Curled Horns Amigurumi Pattern

This pattern recreates a small pink demon dragon with curled horns and contrasting hot-pink wing membranes. The doll sits upright with jointed-looking arms and chunky rounded feet, a plump belly, and a curled tail tipped with a frill of darker-pink spikes. The horns are sculpted as long spirals and the head sports scalloped ridges along the crown—details that give this little creature lots of character.
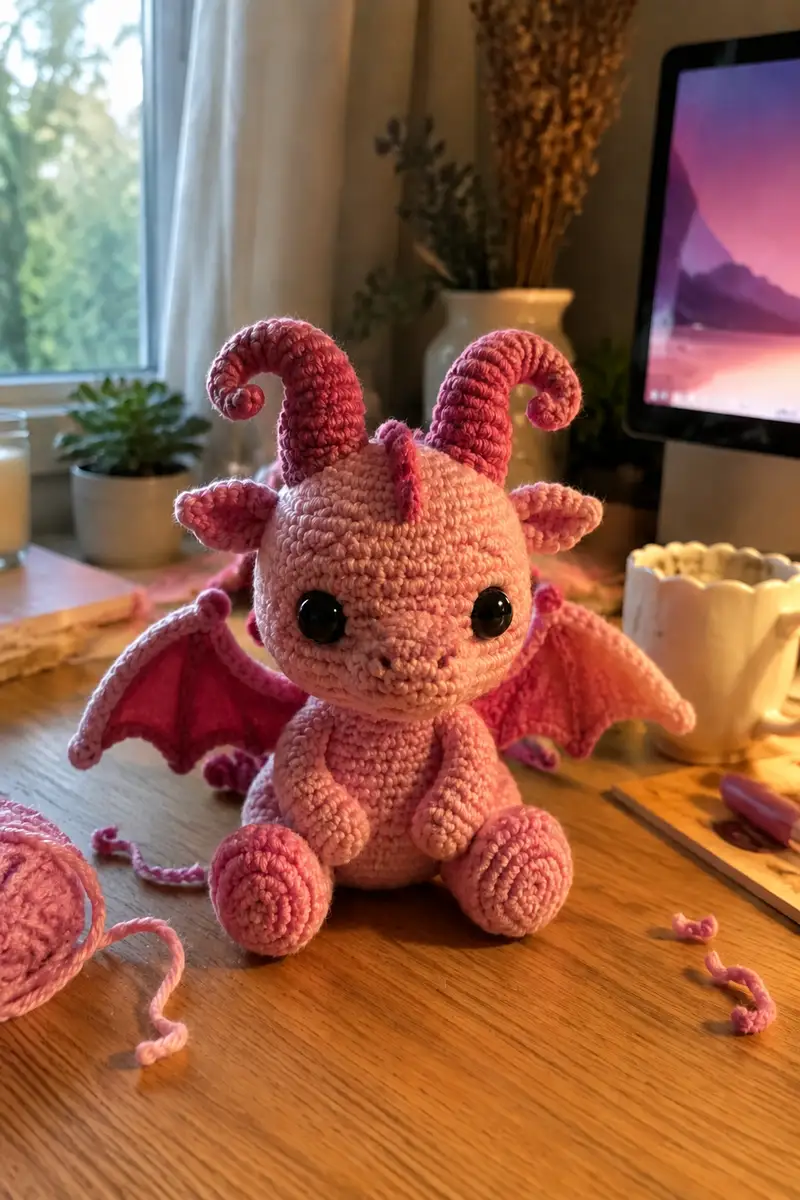
Small Pink Demon Dragon with Curled Horns Amigurumi Pattern crochet pattern - detailed view of completed project

Written with step-by-step rounds for every component: head, body, arms, legs, ears, horns, wings, tail and spikes. Plenty of Info notes guide stuffing, shaping, color changes and assembly to help you achieve a neat, professional finish.

Why You'll Love This Small Pink Demon Dragon with Curled Horns Amigurumi Pattern

I love this pattern because the curled horns and scalloped spine give the little dragon so much personality — it looks playful and slightly mischievous. I also enjoy the two-tone wings which make a bold contrast and the compact, cuddly proportions that make it irresistible to hug. The step-by-step rounds helped me reproduce every curve and spiral cleanly.

Small Pink Demon Dragon with Curled Horns Amigurumi Pattern step 1 - construction progress Small Pink Demon Dragon with Curled Horns Amigurumi Pattern step 2 - assembly progress Small Pink Demon Dragon with Curled Horns Amigurumi Pattern step 3 - details and accessories Small Pink Demon Dragon with Curled Horns Amigurumi Pattern step 4 - final assembly and finishing

Switch Things Up

I absolutely loved working out the curled horn construction and how such a small change in increases and stuffing tightness makes the horns look spiral and expressive. This pattern is a great playground for creativity and color play.

You can customize the look by changing yarn weight or swapping the two pink tones for purple and teal for a totally different mood. Add a metallic thread to the crest or use variegated yarn for a magical effect. You could also make a baby version by using a smaller hook and 10mm eyes for an even more diminutive pal.

I often adjust eye spacing to change expression: wider eyes = cuter, closer eyes = mischievous. Try embroidering tiny brows or teeth for extra personality.

Common Mistakes & How to Fix Them

✗ Skipping stitch markers at the beginning of rounds will cause you to lose track of the first stitch and mis-shape circular pieces; always mark your first stitch. ✗ Stuffing too early or too firmly will make it hard to shape the head and neck; stuff gradually and add fiberfill as you decrease. ✗ Not securing safety eyes before stuffing the head will make repositioning impossible; place and lock eyes before final stuffing. ✗ Working with inconsistent tension between pieces causes uneven seams and lopsided posture; aim for even, slightly firm tension throughout. ✗ Changing colors without securing tails inside can create messy bumps; weave in or carry color neatly and use small knots when needed. ✗ Failing to pin pieces before sewing can result in uneven placement; always pin and adjust placement before stitching permanently.
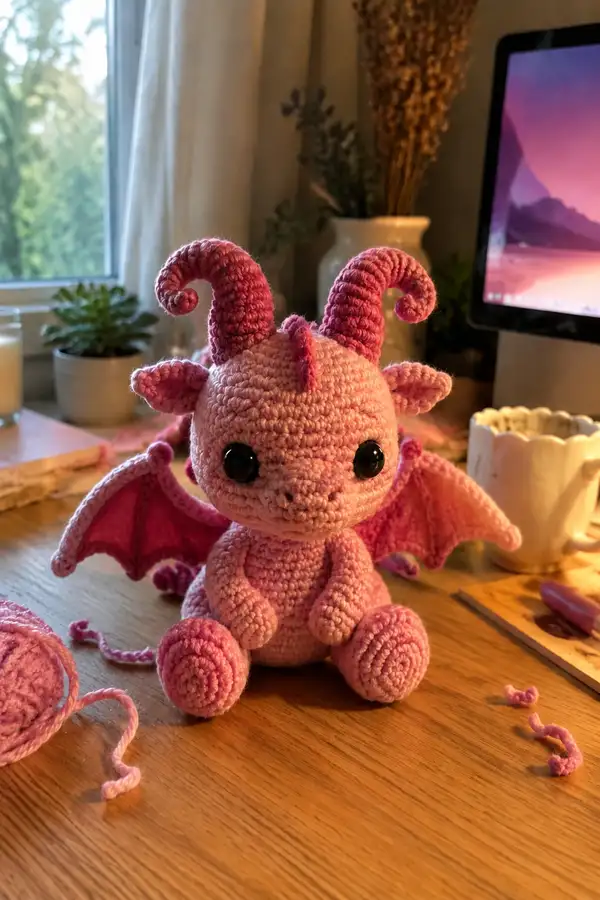
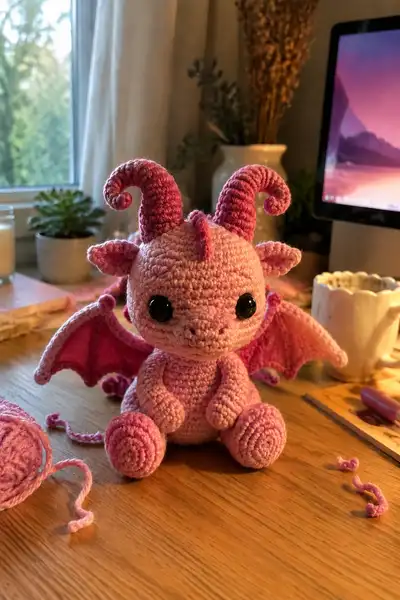
Small Pink Demon Dragon with Curled Horns Amigurumi Pattern

Make an irresistibly cute small pink demon dragon with curled horns, big glossy eyes, scalloped spine and contrasting wing membranes. This amigurumi features two-tone pinks, curled spiral horns, expressive safety eyes and a long tapered tail with frilled spikes—perfect as a tiny whimsical companion or a gift. Written with detailed round-by-round instructions and helpful assembly tips to guide you from first stitch to finished friend.

Intermediate 5-7 Hours

Materials Needed for Small Pink Demon Dragon with Curled Horns Amigurumi Pattern

— Main Fabric

  • 01
    Worsted weight yarn (#4) approximately 140g in light pink (main body color)
  • 02
    60-80g in darker pink (hot pink) for accents: horns, wing membrane, feet tips, tail spikes
  • 03
    20g in very dark pink for inner wing ridge and small detailing
  • 04
    Small amounts (10-15g each) in black for embroidered nostrils or eyebrow details if desired

— Tools Required

  • 01
    3.5mm (E) crochet hook for main work
  • 02
    3.0mm (D) crochet hook for tighter details (optional)
  • 03
    Safety eyes 12mm black (use 10mm for smaller version) - spaced as instructed
  • 04
    Polyester fiberfill stuffing
  • 05
    Yarn needle for sewing pieces together
  • 06
    Stitch markers (at least 4) and a removable marker for row starts
  • 07
    Scissors
  • 08
    Pins for blocking and assembly
  • 09
    Optional: thin floral wire or flexible craft wire for horn shaping
  • 10
    Optional: fabric glue for securing knots on safety eyes

Progress Tracker

0% Complete

— Head :

Round 1 :

6 sc in magic ring (6)

Round 2 :

6 inc (12)

Round 3 :

(1 sc, inc) x 6 (18)

Round 4 :

(2 sc, inc) x 6 (24)

Round 5 :

(3 sc, inc) x 6 (30)

Round 6 :

(4 sc, inc) x 6 (36)

Round 7 :

(5 sc, inc) x 6 (42)

Round 8 :

(6 sc, inc) x 6 (48)

Round 9-12 :

1 sc in each st (48)

Info :

Place safety eyes between rounds 12-13. For this size use 12mm eyes positioned approximately 10 stitches apart (measure visually across the front). Use stitch markers to mark the left-right spacing and to ensure symmetry.

Round 13-16 :

1 sc in each st (48)

Info :

If adding an embroidered eyebrow ridge, plan placement now on round 14-15. Keep the expression soft by keeping the eyes about 7-10 stitches apart depending on how large you placed them.

Round 17 :

(6 sc, dec) x 6 (42)

Round 18 :

(5 sc, dec) x 6 (36)

Round 19 :

(4 sc, dec) x 6 (30)

Info :

Begin stuffing the head moderately at round 18-19. Use small amounts of fiberfill and shape with your fingers for a rounded forehead that tapers slightly toward the snout. Keep stuffing even; do not overfill.

Round 20 :

(3 sc, dec) x 6 (24)

Round 21 :

(2 sc, dec) x 6 (18)

Round 22 :

(1 sc, dec) x 6 (12)

Round 23 :

6 dec (6)

Info :

Fasten off leaving a long tail for sewing the head to the neck opening later. Finish stuffing firm enough to support eye placement but soft enough to shape around the muzzle attachments.

— Snout / Muzzle (Make 1) :

Work separate small muzzle to sew onto the front for defined nose and mouth.

Round 1 :

6 sc in mr (6)

Round 2 :

6 inc (12)

Round 3 :

(1 sc, inc) x 6 (18)

Round 4-5 :

1 sc in each st (18)

Round 6 :

(1 sc, dec) x 6 (12)

Round 7 :

6 dec (6)

Info :

Stuff lightly and flatten slightly so it forms a rounded snout. Sew to front center of head between the eyes, leaving a small gap for mouth embroidery. Use a few ladder stitches for a secure, invisible join.

— Body :

Round 1 :

6 sc in mr (6)

Round 2 :

6 inc (12)

Round 3 :

(1 sc, inc) x 6 (18)

Round 4 :

(2 sc, inc) x 6 (24)

Round 5 :

(3 sc, inc) x 6 (30)

Round 6 :

(4 sc, inc) x 6 (36)

Round 7-10 :

1 sc in each st (36)

Info :

If you prefer a slightly rounder belly, add 2-4 extra increases across rounds 6-8 to reach 40 stitches before working even rounds. For the photographed proportions, keep 36 sts.

Round 11 :

(4 sc, dec) x 6 (30)

Round 12-14 :

1 sc in each st (30)

Round 15 :

(3 sc, dec) x 6 (24)

Info :

Begin stuffing the body from the bottom up around round 11-12. Stuff the base fairly firmly so the dragon sits upright, then stuff the upper body moderately to allow the head to join and maintain shape.

Round 16 :

1 sc in each st (24)

Round 17 :

(2 sc, dec) x 6 (18)

Round 18 :

(1 sc, dec) x 6 (12)

Round 19 :

6 dec (6)

Info :

Leave a long tail and do not fully close; you will sew the head to this neck opening. Ensure the stuffing level in the top of the body is slightly less firm than in the base so the head sits naturally.

— Arms (Make 2) :

Round 1 :

6 sc in mr (6)

Round 2 :

6 inc (12)

Round 3 :

(1 sc, inc) x 6 (18)

Round 4-6 :

1 sc in each st (18)

Info :

These arms are short and rounded; stuff hands firmly at this stage so they keep shape. The photographed arms are slightly curved inward—use stuffing and a few placement stitches to create the bend.

Round 7 :

(2 sc, dec) x 4, 2 sc (14)

Round 8-12 :

1 sc in each st (14)

Round 13 :

(1 sc, dec) x 4, 2 sc (10)

Round 14-16 :

1 sc in each st (10)

Round 17 :

(1 sc, inc) x 5 (15)

Round 18-20 :

1 sc in each st (15)

Info :

Fasten off leaving a long tail. Sew arms to sides of the body between rounds 10-14 of the body, slightly forward so they rest on the belly. Use pins to find a symmetrical placement before sewing.

— Legs & Feet (Make 2) :

Foot Round 1 :

6 sc in mr (6)

Round 2 :

6 inc (12)

Round 3 :

(1 sc, inc) x 6 (18)

Round 4 :

(2 sc, inc) x 6 (24)

Round 5 :

(3 sc, inc) x 6 (30)

Round 6-8 :

1 sc in each st (30)

Info :

To form a rounded foot with a darker toe cap, switch to hot-pink on round 9 for 4 rounds to create the tip. Alternatively, embroider toe lines later.

Round 9 :

Change to darker pink. 1 sc in each st (30)

Round 10-11 :

1 sc in each st (30)

Round 12 :

Change back to main color. (3 sc, dec) x 6 (24)

Round 13 :

(2 sc, dec) x 6 (18)

Round 14 :

(1 sc, dec) x 6 (12)

Round 15 :

6 dec (6)

Info :

Stuff feet firmly, but keep the ankle area less stuffed so you can position legs to the body. Flatten slightly at the back base so the toy sits stably.

Round 16 :

Fasten off leaving long tail for sewing (do not close completely) so you can sew each leg to the base of the body, positioning them about 6-8 stitches apart for balance.

— Ears (Make 2) :

Round 1 :

6 sc in mr (6)

Round 2 :

6 inc (12)

Round 3 :

(1 sc, inc) x 6 (18)

Round 4 :

1 sc in each st (18)

Round 5 :

(2 sc, dec) x 4, 2 sc (14)

Round 6 :

1 sc in each st (14)

Round 7 :

(1 sc, dec) x 4, 2 sc (10)

Round 8 :

Fold ear slightly and sc along outer edge to create a curved shape if desired (10)

Round 9 :

Fasten off leaving long tail for sewing

Info :

Sew ears to top sides of head around rounds 6-8. Curve slightly forward to create a curious expression. Add a lighter inner-ear by sewing a small oval of contrasting hot-pink inside the ear before attaching.

— Horns (Make 2) - Spiraled Curled Horns :

Round 1 :

6 sc in mr (6)

Round 2 :

6 inc (12)

Round 3 :

(1 sc, inc) x 6 (18)

Round 4-6 :

1 sc in each st (18)

Info :

Work the horn in continuous rounds without a join so the spiral shape forms naturally. Optionally insert a thin wire into the horn tube before stuffing for poseable curl—tuck wire ends well into base to avoid poking.

Round 7 :

(2 sc, inc) x 6 (24)

Round 8-12 :

1 sc in each st (24)

Round 13 :

(3 sc, inc) x 6 (30)

Round 14-18 :

1 sc in each st (30)

Round 19 :

(3 sc, dec) x 6 (24)

Round 20 :

(2 sc, dec) x 6 (18)

Round 21 :

(1 sc, dec) x 6 (12)

Round 22 :

6 dec (6)

Info :

Do not fully fasten off. Stuff lightly and then create the final curled tip by crocheting an additional spiral 'trim'—see Spiral Tip steps below. After stuffing, shape the horn into a loose corkscrew curve and whip-stitch the base firmly to the top of the head between rounds 4-6 on the crown.

Spiral Tip (worked after main horn)

Attach yarn to the open end; ch 3, sl st in first ch to make a small ring then 6 sc in ring; continue working 1 sc in each st for 8-12 rounds while pulling the working coil into a tighter curl by wrapping around your finger or using a dowel. Secure and sew into the horn end for a rounded spiral tip.

— Wing Panels (Make 2 panels then assemble) :

Info :

Wings are made of two pieces: a membrane (darker pink) and an outer ridge (lighter pink). Work the membrane flat in rows to create a triangular panel and then add a ridge worked in rounds around the outer edge for structure.

Wing Membrane Row 1 :

Ch 12, sc in 2nd ch from hook and across (11)

Wing Membrane Row 2 :

Ch1, turn, sc across, then sc2tog at last 2 sts to create a slight taper (10)

Wing Membrane Row 3-10 :

Ch1, turn, sc across, ending each odd row with 1 decrease every 2-3 rows to shape triangular membrane until you reach a final row of approximately 5 sc wide.

Info :

Work membrane in hot-pink. The membrane should have three internal ribs: stitch across the panel in FLO to create ridge lines. Use a smaller hook for a dense fabric so the wing holds shape.

Ridge Round 1 :

Attach light pink yarn at the outer edge and work a round of sc around the entire triangular membrane to add structure (work 2 sc in each corner stitch). This creates a raised border.

Ridge Round 2 :

Work 1 sc in each st BLO to form a ridge and then 1 sc in each st (approx 40-50 total depending on panel size)

Info :

To create the folded rib look (as pictured), run a chain of 6 from ridge center back to base and slip stitch into the body base later to anchor; form two or three ribs per wing by sewing short pleats from the membrane into the ridge using matching yarn.

— Tail :

Round 1 :

6 sc in mr (6)

Round 2 :

6 inc (12)

Round 3 :

(1 sc, inc) x 6 (18)

Round 4-8 :

1 sc in each st (18)

Round 9 :

(2 sc, dec) x 4, 2 sc (14)

Round 10-12 :

1 sc in each st (14)

Round 13 :

(1 sc, dec) x 4, 2 sc (10)

Round 14-16 :

1 sc in each st (10)

Info :

The tail is tapered and elongated; leave it slightly flexible for a gentle curve. Add small darker pink bobble spikes by making tiny bobble motifs (see Spike section) and sewing them along the top at regular intervals.

— Spikes / Frill (Make 6-8) :

Spike Round 1 :

4 sc in mr (4)

Spike Round 2 :

1 sc in each st (4)

Spike Round 3 :

(1 sc, inc) x 2 (6)

Spike Round 4 :

sc in each st, finish and leave long tail for sewing

Info :

Sew these spikes along the top of the head and down the tail. Space them evenly — the photographed toy has five small spikes on the back of the head and three larger spikes continuing down the tail toward the tip.

— Tail Tip Pom / Frill :

Round 1 :

6 sc in mr (6)

Round 2 :

(1 sc, inc) x 3 (9)

Round 3 :

Work 1 sc in each st for 2 rounds then fasten off leaving long tail to sew to tail end

Info :

Use darker pink to contrast the tail tip. Sew firmly so it looks like a ruffled flower at the tail end as pictured.

— Decorative Scalloped Crest (Head & Back) :

Row 1 :

Ch 24, sl st into body at crown base leaving small loops approximately 6-8 for the head crest

Row 2 :

For each loop work: (sc, hdc, dc, hdc, sc) then sl st to next loop to form scallops (repeat across loops)

Info :

Use hot-pink for the crest to create contrast. Pin scallops in place along the center of the skull from just behind the horns onto the top of the neck, then sew down firmly.

— Assembly, Finishing & Final Shaping :

Info :

Before any sewing, pin all parts in place to check balance: head centered on top of body; horns equidistant around crown; ears set symmetrically; legs set wide enough for stable sitting (approx 6-8 stitches between leg bases); arms sewn so they rest on the belly. Adjust stuffing levels if needed before final sewing.

Finishing Step 1 :

Sew head to body using whip stitch or mattress stitch through rounds of the neck opening and body. Use even tension and check symmetry often (approx 20-25 stitches securing).

Finishing Step 2 :

Sew legs to bottom of body using the long tails left earlier. Reinforce by stitching through base and then the first 2-3 rounds of the body for stability.

Finishing Step 3 :

Attach arms to sides and sew on horns firmly through the top rounds; if using wire, ensure ends are buried deep into the body and wrapped or padded to avoid poking.

Info :

Weave in all tails neatly into the body and fasten off. Use small backstitches to make mouth/nose details; two small French knots or very short straight stitches create nostrils. Optionally add a tiny line under the snout for a smile.

Final Shaping :

Gently sculpt horns and tail into the desired curls and pose wings. If wings are floppy, add a small length of thin firm fabric or wire along the ridge sewn in place, or work an extra row in tighter tension to stiffen the border.

Info :

For a polished look, trim stray fibers and steam-block lightly from a distance if your yarn allows. Add a dab of fabric glue behind safety eye washers for extra security if desired.

Assembly Instructions

  • Attach head to body by inserting the neck portion into the body opening. Pin in place first, then sew securely using whip stitch or mattress stitch all around, ensuring even attachment and symmetry.
  • Position legs at the bottom of the body about 6-8 stitches apart. Sew through both leg base and the body rounds for a stable seated posture. Reinforce by stitching around the base twice.
  • Position arms on sides of body around body rounds 10-14; pin so they rest forward on the belly, then sew using ladder stitch for an invisible seam and secure with extra stitches at shoulder.
  • Sew horns to the crown of the head between rounds 4-6, keeping them evenly spaced. If using internal wire, ensure ends are wrapped and buried inside the head for safety.
  • Attach wings to the back center around body rounds 6-9; sew along the inner ridge of the wing and secure several stitches into the body to hold the wings out from the shoulders.
  • Sew scalloped crest pieces along the center top of the head and down the neck. Pin each scallop first to check spacing, then tack each to the head and neck with small, neat stitches.
  • Sew tail onto the rear lower body opening, maintaining a smooth join. Reinforce the base with a circle of embroidery stitches so the tail can be posed slightly without detaching.
  • Weave in and hide all yarn tails by threading them through multiple stitches inside each piece and trimming close. Add any embroidered facial details last and secure knots with a dab of fabric glue if needed.

Important Notes

  • 💡Use stitch markers consistently at the beginning of each round to avoid counting errors and maintain proper shaping.
  • 💡Stuff body parts gradually as you work rather than waiting until the end, especially for narrow openings like neck or horns.
  • 💡For safety eyes, position and secure before stuffing head fully - they cannot be repositioned once locked in place.
  • 💡Maintain consistent tension throughout the project; too tight creates stiff, small pieces, too loose creates floppy, holey fabric.
  • 💡When sewing pieces together, use yarn slightly thinner than working yarn or use two passes to create neater, less visible seams.
  • 💡Pin all pieces in position before final sewing to ensure proper placement and symmetry; check from several angles.
  • 💡For horns and wings that need shaping, consider adding thin wire or a small plastic support sewn inside to keep poseable shape.
  • 💡Keep a row counter or notepad to track rounds, especially in long even-stitch sections to prevent accidental miscounts.

This delightful dragon combines classic amigurumi shaping with whimsical sculpted horns and a ruffled crest to create a tiny friend you won't want to put down. Each piece is carefully shaped to create an expressive face, curled horns and charming wings—perfect as a unique gift or a sweet desk companion. 🧶💗 Enjoy every stitch as the parts come together into a cuddly character you’ll be proud to share. Happy crocheting and have fun personalizing your dragon! 🐉✨

You ask,

we answer.

FAQs

What is the finished size of this amigurumi?

Using worsted yarn and a 3.5mm hook this dragon finishes around 9-11 inches tall when sitting (22-28 cm). Changing yarn weight or hook will change final size proportionally.

Can I use different yarn weights for this pattern?

Yes. Use a smaller hook (1-2 sizes down) than recommended for tighter amigurumi fabric. Thicker yarn yields a larger dragon; adjust safety eye size and stuffing accordingly.

Do I need to use safety eyes or can I embroider them?

Both are fine. Safety eyes give a glossy, professional look but are not recommended for toys for small children. Embroidered eyes are safer and allow more expression control.

How much stuffing will I need?

Approximately 70-110 grams of polyester fiberfill depending on how firmly you stuff. The head and feet are stuffed firmer than the body for structure.

Can I make the horns and tail poseable?

Yes. Insert thin floral wire inside the horns and tail before stuffing, folding and wrapping the wire ends into the body interior so they are secure and not sharp.

What if my stitch count is off?

Unravel back to the last round where your count matched. Compensating later often creates visible distortions. Using a stitch marker at round starts helps prevent errors.

How do I prevent holes when stuffing?

Use slightly tighter tension and a hook smaller than the yarn recommendation. Add stuffing in small amounts and push it evenly into corners and small openings with a blunt tool.

Can I customize colors and details?

Absolutely. Swap any of the pink shades for other colorways, add blush to cheeks, or embroider additional facial details to make a unique version or themed variation.