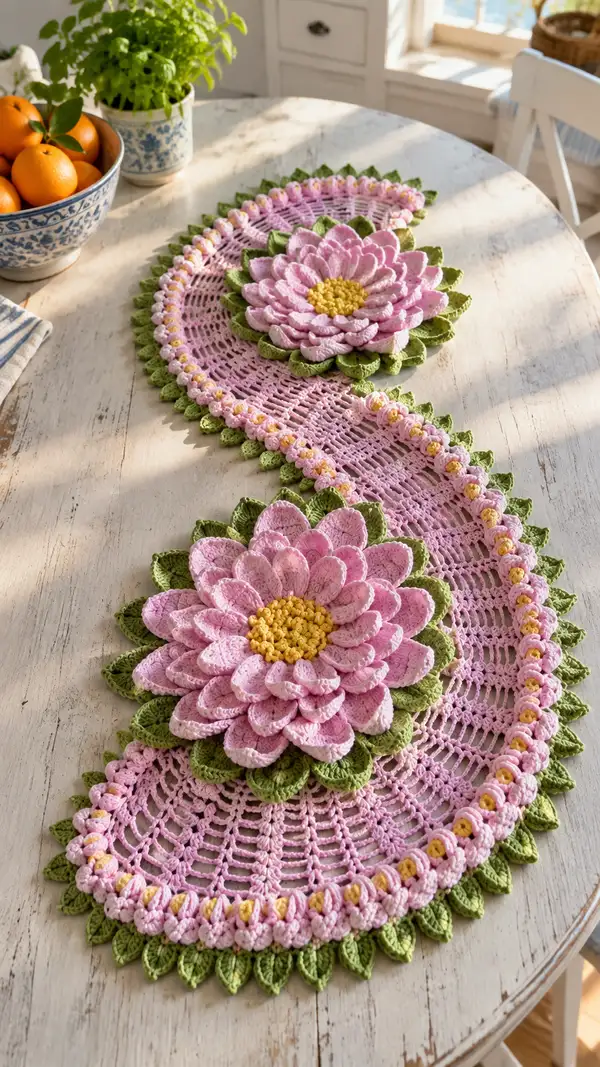
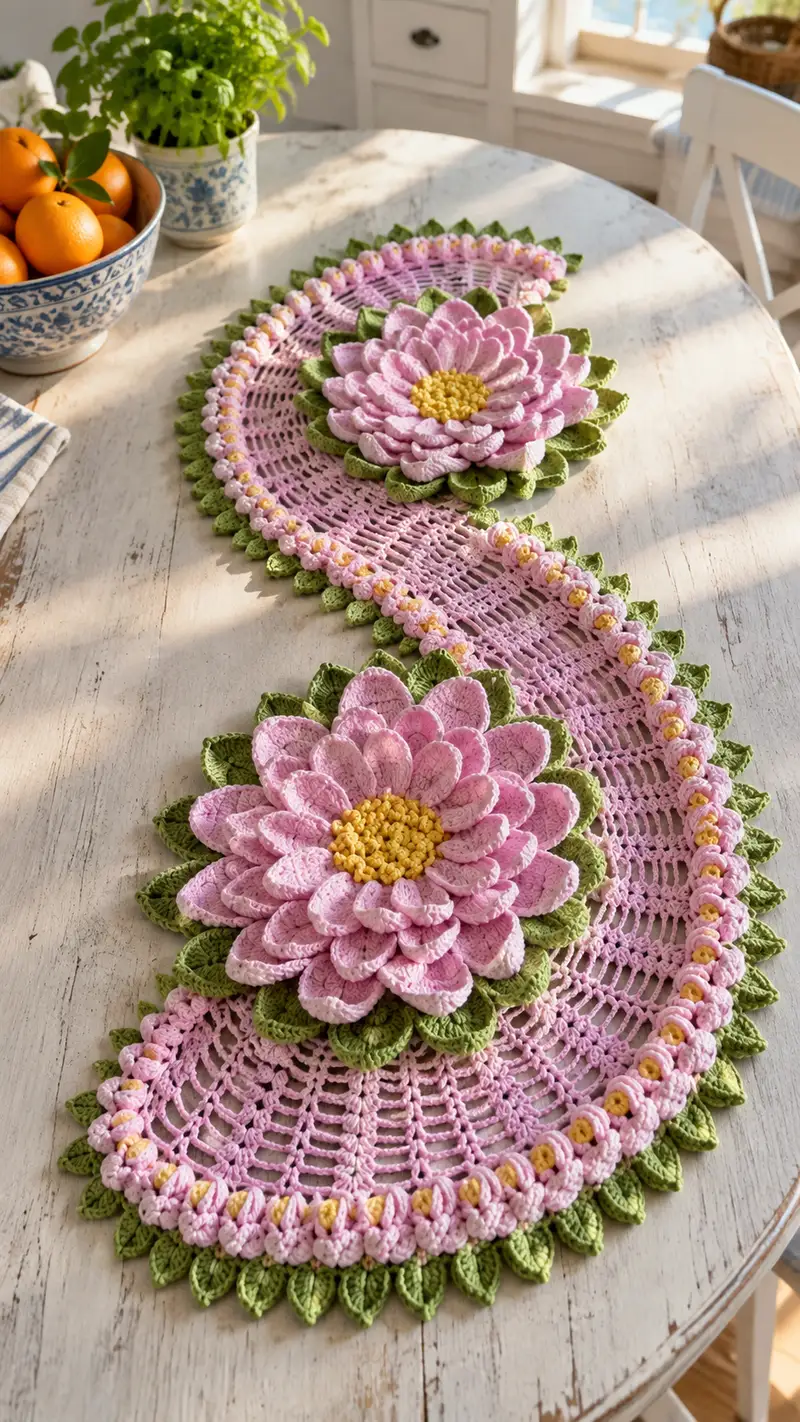
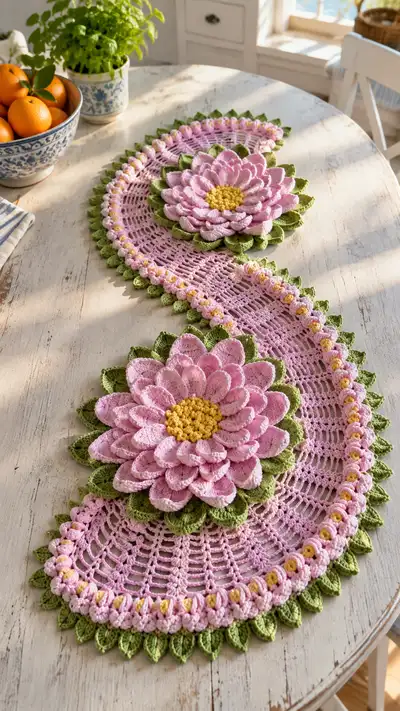
A gorgeous S-shaped table runner featuring two oversized layered floral medallions with textured puff centers, leafy green scalloped edging and delicate lacy mesh panels. Soft pink petals, cheerful yellow centers and fresh green leaves create a romantic, spring-inspired centerpiece for any table. The runner uses cotton yarn for a crisp drape and shows dimensional petals that stack into a full bloom. Detailed instructions guide you through every petal, leaf and mesh row for a polished finished piece.
Progress Tracker
0% Complete
— Flower Center (Make 2 identical centers) :
Round 1 :
Make a magic ring. 6 sc in magic ring (6)
Round 2 :
Inc in each st around (12)
Round 3 :
(1 sc, inc) x 6 (18)
Round 4 :
(2 sc, inc) x 6 (24)
Round 5 :
(3 sc, inc) x 6 (30)
Round 6 :
(4 sc, inc) x 6 (36)
Info :
Change to sunflower yellow. These rounds build a slightly domed base for the textured center. Use DK cotton held single-ply for crisp puffs.
Round 7 :
1 sc in each st around (36)
Round 8 :
*Puff in next st; sl st into next st* repeat 12 times around, ending with sl st to join (12 puff clusters)
Info :
Puff stitch: yarn over, insert hook, yarn over pull up loop (3 times total loops on hook), yarn over and pull through all loops, ch1 to close puff. Make small tight puffs to create pebbled texture.
Round 9 :
Working between puffs, sc into space between clusters all around to stabilize (12) - work 1 sc in each space between puff clusters and 2 sc in any larger gaps to keep round flat (approx. 12-18)
Info :
Stuff center lightly with a small amount of fiberfill if you want a slightly raised center; do not overstuff as petals will sit on top.
Round 10 :
Fasten off leaving long tail for sewing. Weave tail through the back of the round and pull slightly to define dome if desired
— Petal Layer A (Inner small petals) (Make 2 layers per bloom; repeat to build fullness) :
Info :
Join main petal color (soft pink). Attach at the round of sc between puffs with a sl st and work petals around. There are 12 petal anchors evenly spaced around the center.
Round 1 :
Join yarn in a sc between two puff clusters, *ch 8, sc in same st (anchor), sk 2 sc, sl st in next sc to set petal base* repeat 12 times (12 ch-loops)
Round 2 :
Working into each ch8 loop for each petal: (sc, hdc, 4 dc, hdc, sc) across each loop. Fasten off at end of round. (12 petals)
Info :
Petal shaping uses a fan: the center of each petal has the highest number of dc (4 here). Adjust dc number to change petal height. Keep tension consistent for matching petals.
Round 3 :
Make a second round of petals offset between first petals for fullness. Join yarn at midpoint between two existing petals and repeat Round 2 pattern for 12 more petals (24 visible small petals stacked in two staggered tiers)
Info :
Lightly block these inner petals with pins to shape a neat teardrop form before making the larger outer petals.
— Petal Layer B (Middle petals) :
Round 1 :
Join yarn at the base row outside Layer A where there are clear anchor spaces. *Ch10, sl st into next anchor point* repeat 12 times (12 ch-loops) (12)
Round 2 :
Into each ch10 loop work: (sc, hdc, 6 dc, hdc, sc) across each loop. Fasten off. (12 larger petals)
Info :
For a more pronounced 3D petal, make the center dc count odd (6 dc here) so the central peak is in the middle of the petal. Slightly pull each petal forward as you sew to create overlap.
Round 3 :
Optional second row of middle petals: stagger a second set of 12 in between first set by joining between petals and repeating Round 2 (24 middle petals total) to achieve the pictured full bloom.
Info :
Weave in tails from the backside of the petal base to hide joins; do not tighten too much or petals will curl inwards.
— Petal Layer C (Large outer petals) :
Round 1 :
Join yarn at the outermost base of Layer B. *Ch12, sl st into next anchor* repeat 12 times (12 ch-loops) (12)
Round 2 :
Into each ch12 loop work: (sc, hdc, 8 dc, hdc, sc) across each loop. Fasten off. (12 large outer petals)
Info :
To create the delicate veining effect seen in the photo, you can surface embroider a single vertical line down the center of each outer petal with pale blush yarn using back stitch after blocking.
Round 3 :
Make a second offset round of large petals if desired by anchoring in the gaps between first large petals and repeating Round 2 (optional for extra fullness) (12-24 petals depending on choice)
Info :
Each petal layer increases the bloom diameter by about 1"–1.25" depending on tension. Adjust number of petals or their height to reach desired bloom size (photo blooms approximately 7.5"–8" diameter).
— Backing Leaf Ring (Green leaf base under each bloom) :
Round 1 :
With green yarn join behind the bloom at any outer petal anchor. *Ch6, sl st in next anchor* repeat 12 times (12 ch-loops)
Round 2 :
Into each ch6 loop work: (sc, hdc, 3 dc, hdc, sc) to form a leaf shape. Fasten off after completing 12 leaves (12)
Info :
Leaves should slightly peek out under the petals and create the layered green halo seen in the image. Block leaves in a slight curve so they cup under the petals.
Round 3 :
Optional second leaf round: offset and make 12 more leaves between the first 12 for a double-row of leaves (24 leaves total) for a fuller background.
— Single Leaf Motif (Make many for runner edge) :
Round 1 :
Make a magic ring. 6 sc in magic ring (6)
Round 2 :
Inc in each (12)
Round 3 :
(1 sc, inc) x 6 (18)
Round 4 :
Work a single teardrop: ch 6, (sc, hdc, 3 dc, hdc, sc) into the ch6 loop. Fasten off leaving tail for sewing. Make as many leaves as needed to edge the runner (approx. 40–48 for full runner depending on length)
Info :
Sew these leaves individually to the outer edge of the runner base as you complete edging, spacing one leaf per scallop for consistent look.
— Runner Body (Make one long S-shaped panel; foundation is worked flat as rows) :
Info :
The runner body is worked as a long flat panel that will be shaped into an S. The sample uses a foundation chain of 180 chains to give a long, narrow panel that complements two floral medallions. Adjust foundation chain in multiples of 12 to change length.
Round 1 :
Ch180. Row 1: Sc in 2nd ch from hook and in each ch across. (179 sc)
Info :
Chain count here sets the overall length. If you prefer a shorter runner make ch120; for longer make ch220. Keep multiples of 12 for consistent mesh repeats.
Round 2 :
Turn. Ch3 (counts as dc). *Sk 2 sc, dc in next sc, ch3, sk 2 sc, dc in next sc* across to last sc, ending with dc in last st. This creates the first set of open arches. (Approx. 60 dc arches across)
Round 3 :
Turn. Ch1, sc in first dc, *ch4, sk next dc and its ch3 space, sc in next dc* repeat across creating vertical chain spaces (approx. 60 ch4 spaces)
Round 4 :
Turn. Ch3 (counts as dc), dc in each ch4 sp across (work 4 dc into each ch4 sp), dc in top of turning ch. This establishes the tall mesh rib. (Approx. 240 dc)
Info :
Rows 2–4 form the lacy openwork seen between the flowers. These three rows form the repeating mesh pattern; repeat them for the desired length of flat panels between the two flower medallions and the end scallops.
Round 5-20 :
Repeat Rounds 2–4 for 16 more row-sets, or until the mesh reaches the approximate length required between medallions (repeat pattern: Arch row, Space row, Fill row). Maintain counts by keeping ch4 spaces equal across the row.
Info :
When working many repeats, use stitch markers to mark every 12th arch to ensure you haven't gained or lost repeats across long rows.
Round 21 :
Work a transitional row to flare into the medallion area: Ch1, sc in each st across, creating an even base for joining to bloom. (Approx. 179 sc)
Info :
Create two mesh panels: one long panel that will sit between the two medallions and two half-panels shaping the S's curves. The pattern uses strategic increases/decreases in the arch rows to curve the panel—see shaping notes below.
Shaping Info :
To create the S curve: on a few repeats near each medallion, decrease the number of ch4 spaces by 2 every other repeat to draw the edge inward; conversely, increase by adding a ch4 space to flare outward. Keep a written log of increases/decreases to ensure symmetry.
— Joining Flowers to Runner Panel :
Info :
Pin each completed bloom to the mesh panel to match the photo S-shape: one bloom near each end with their backing leaf ring overlapping the outer scallops. When pinned, you should have 3–4 rows of mesh passing under the petal bases to sew into.
Round 1 :
With yarn tail from each flower center or a matching color, whip stitch the bloom’s backing ring to the mesh panel through the sc foundation between petals. Sew through rounds that equal approximately 1/2 of the bloom circumference, anchoring securely (approx. 12–18 sewing points per bloom).
Info :
Sew from the back so visible stitches are minimal; use a matching thread if you want an invisible join. Double stitch each anchor point for durability.
— Raised Bobble Trim (Pink with yellow bobble highlights) :
Round 1 :
With pink yarn join at one curved runner edge point and *ch3, 5 dc cluster (bobble) into base st, ch1, sl st in next base st* repeat evenly along curve to create the raised bobble chain. Create approx. 40–48 bobbles depending on edge length.
Round 2 :
Switch to yellow yarn for accent: make small 3-dc puff into the center of each pink bobble (move along edging and secure each puff with a sl st). Fasten off and weave ends. (40–48 small yellow puffs)
Info :
Yellow puffs are decorative—make them small and tight so they sit inside the pink bobble cups, as pictured.
— Scalloped Leaf Edge (Green) :
Round 1 :
With green yarn join to outermost chain on runner edge. *Ch4, sc in next base st* repeat around entire runner edge to create uniform loop anchors (approx. 40–48 ch4 spaces)
Round 2 :
Into each ch4 loop work: (sc, hdc, 3 dc, hdc, sc) to form leaf scallops. Repeat for each loop to create an edged leaf border. Fasten off. (40–48 leaf scallops)
Info :
Space leaf scallops evenly. If needed, increase or decrease the starting chain count by adding or removing multiples of 12 in the foundation chain until the scallops match the desired number to align with flowers.
— Finishing Rows and Blocking :
Round 1 :
Weave in all remaining tails from petals, leaves and runner using a tapestry needle. Trim excess yarn close to fabric.
Round 2 :
Lightly wet block the runner: pin edges and petals to a blocking mat, shaping petals and leaves so petals overlap naturally. Allow to dry fully (overnight recommended).
Info :
Blocking significantly improves the crispness of cotton and helps petal layers splay like the image. Use a small amount of starch spray for extra stiffness if you want a very sculpted bloom.
— Optional Decorative Embroidery :
Round 1 :
Using pale blush yarn, embroider a single vertical ridge down the center of each outer petal with a simple backstitch to mimic the veining seen in photo. Small symmetrical stitches make the veins subtle and elegant.
Info :
Do this step after blocking so your embroidery follows the final petal curves. Keep stitches short to avoid warping the petal surface.
Finishing this S-shaped table runner is so satisfying — the stacked petals and leafy scallop border create a show-stopping centerpiece that brightens any table. Each bloom is its own little project and together they form a harmonious, botanical composition that invites compliments. Blocking and thoughtful assembly make the difference, so take time to pin and shape the petals for the best results. Enjoy the process and the beautiful, handmade centerpiece you’ve created! 🌸🧶