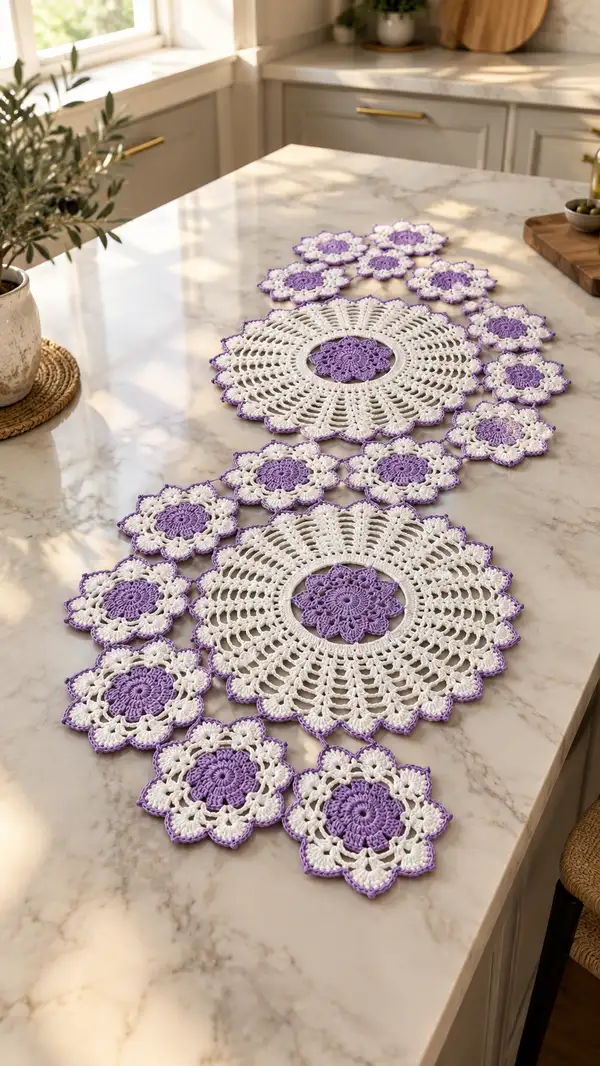
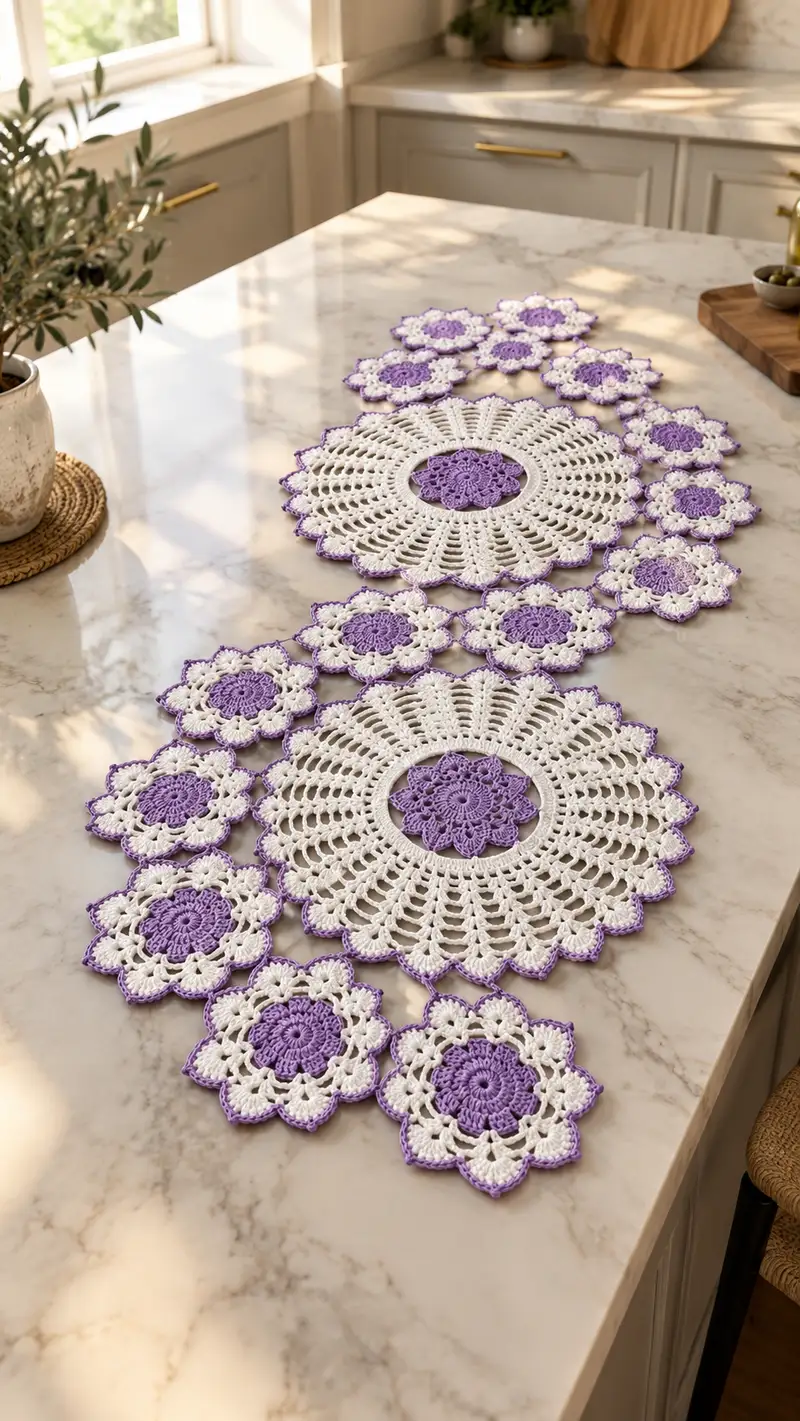
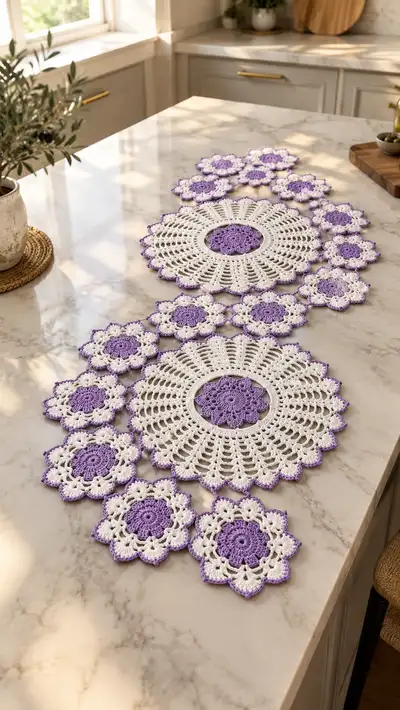
A lacy, floral-inspired crochet table runner made from interconnected medallion and flower motifs. Soft lavender centers contrast with crisp white petals for a fresh, vintage look. The pattern uses modular motifs so you can customize length and arrangement. Perfect for dressing a kitchen island or buffet table with delicate handcrafted charm.
Progress Tracker
0% Complete
— Notes & Gauge :
Info :
Gauge is not critical for this decorative runner, but if you want similar proportions work a 10cm/4in swatch: 14 sc x 8 rows = 10cm in worsted-weight cotton. Adjust hook size to achieve a fairly tight fabric for doily-like structure. Use stitch markers for round starts and when joining motifs for even placement.
Info :
Color notes: lavender = accent center and edging (LAV), white = main petals and body (WHT). Carry color or fasten off and join as you prefer for neatness.
— Large Medallion (Make 2) :
Round 1 :
Make a magic ring. In lavender, work 6 sc into ring. Draw tight. (6)
Round 2 :
Inc in each st around—6 inc. (12)
Round 3 :
(1 sc, inc) x 6 = 18 sts. (18)
Round 4 :
(2 sc, inc) x 6 = 24 sts. (24)
Round 5 :
(3 sc, inc) x 6 = 30 sts. (30)
Round 6 :
(4 sc, inc) x 6 = 36 sts. (36)
Info :
At this point the lavender center is established. Fasten off lavender and join white with a sl st in next stitch, or carry lavender if preferred for fewer tails. We will build the first full ring in white to create the first petal foundation.
Round 7 :
Join WHT in any st. Ch1, 1 sc in same st, *ch3, sk 1 st, 1 sc in next st* around to make 18 ch3 loops. Sl st to first sc to join. (18 ch-3 loops)
Round 8 :
*In each ch-3 loop: (2 dc, ch2, 2 dc) - shell made into ch-3 loop, sl st to next sc* repeat around. You will create 18 shells. (18 shells)
Info :
Check the piece is laying flat; if cupping, work next round with more space, if ruffling tighten by reducing chains between shells. Place a stitch marker at the beginning of this round to track repeats.
Round 9 :
Ch1, 1 sc in first dc of shell, *ch5, 1 sc between next shell and next shell (into top of shell arch)* repeat around to create 18 ch5 loops. Sl st to join. (18 ch-5 loops)
Round 10 :
Into each ch5: (3 dc, ch3, 3 dc). Sl st to join. You now have 18 larger petals forming a strong flower medallion center. (18 petals)
Round 11 :
Ch3 (counts as dc), *sk to center of next petal, work (3 dc, ch2, 3 dc) into ch3 of previous petal* repeat to create 9 shell clusters spaced across the face; sl st to top of ch3. (9 clusters)
Info :
Use this round to visually check symmetry. If a petal seems out of line, unpick to the shell and refit. Blocking after finishing motifs will help perfect the circle.
Round 12 :
Ch1, sc evenly around each cluster top working 2 sc between clusters where necessary to maintain an approximate count of 72 sc. (approx. 72 sc)
Round 13 :
(4 sc, inc) x 12 = 84 sts. Work increases evenly to expand the medallion for the lace rounds to follow. (84)
Round 14 :
1 sc in each st around. (84)
Info :
Change to working a decorative open lace round: in this and following rounds you will create pairs of chain arches and tall stitch groups to emulate the lacy doily look. Keep consistent tension; these rounds define the overall diameter.
Round 16 :
*Ch5, sk 3 sc, sl st into next sc* around to create 21 ch-5 loops. (21 loops)
Round 17 :
Into each ch-5 loop work (1 sc, 4 dc, 1 sc) to form an open fan. Sl st to join. (21 fans)
Round 18 :
Ch1, sc in same st, *ch3, sk fan, sc in the next joining st between fans* repeat around. You will create 21 small ch3 arches. (21 ch-3)
Info :
At this point check diameter frequently so the medallion matches the other one when finished. If necessary add or reduce chain length in next round to balance diameter.
Round 19 :
Into each ch3: (3 dc, ch3, 3 dc). Sl st to join to create pointed petals. (21 petals)
Round 20 :
Ch1, 1 sc in each st and top of each petal across to even out the round—expect about 168 sts (this will depend slightly on tension). (approx. 168 sc)
Round 21 :
(7 sc, inc) x 21 = 189 sts. Increase evenly to prepare for outer shell rows. (189)
Round 22 :
1 sc in each st around. (189)
Round 23 :
*Ch7, skip 5 sc, sl st in next sc* repeat around to form 27 ch-7 loops; sl st to join. (27 loops)
Round 24 :
Into each ch7: (4 dc, ch3, 4 dc) - large scallop shells. Sl st to join. (27 scallops)
Info :
These large scallops create the elegant rim seen in the photo. If shells crowd, reduce ch7 to ch5; if the medallion feels small, increase to ch9 next time.
Round 25 :
Ch1, 1 sc in each dc and across shell tops, placing 2 sc in the ch3 spaces to stabilize the scallops—approx. 270 sc. (approx. 270 sc)
Round 26 :
(8 sc, inc) x 30 = 270 -> Correction: To continue evenly, work 1 sc in each st (approx. 270 sc) and adjust final count by adding 12 evenly spaced increases this round to reach approx. 282 sc. (approx. 282 sc)
Round 27 :
1 sc in each st around to stabilize the round. (approx. 282 sc)
Round 28 :
Edging preparation: *ch3, sk 2 sc, 1 sc in next sc* repeat around to create small arches. Sl st to join. (approx. 94 ch-3 arches)
Round 29 :
Into each ch3: *(Picot edge) 1 sc, ch3, sl st into 3rd ch (picot), 1 sc in same arch* repeat around to give the delicate picot-petal finish. (approx. 94 picoted arches)
Round 30 :
Fasten off leaving a 30cm tail for sewing when joining medallions. Weave in ends but leave the tail ready for assembly. Block flat to finished diameter before joining. (Finish)
Info :
Make two identical large medallions following Rounds 1-30. Block both medallions to the same diameter and shape before joining to ensure a neat, even runner. Slight variations are normal and corrected by blocking and careful joining.
— Small Flower Motif (Make 14 identical) :
Motif 1 - Round 1 :
In lavender, make a magic ring. Work 6 sc into ring. (6)
Motif 1 - Round 2 :
6 inc (12)
Motif 1 - Round 3 :
(1 sc, inc) x 6 (18)
Motif 1 - Round 4 :
Switch to white. Join with a sl st, ch1, 1 sc in same st, *ch3, sk 1 st, 1 sc in next st* around to make 9 ch3 loops. Sl st to join. (9 loops)
Motif 1 - Round 5 :
In each ch3: (2 dc, ch1, 2 dc) to make 9 small petals. Sl st to join. (9 petals)
Motif 1 - Round 6 :
Ch2 (counts as hdc), *hdc in next 2 dc, ch2, sk ch1 space* around to create small arches and stabilize petals. Sl st to join. (approx. 36 hdc)
Motif 1 - Round 7 :
Ch3, (2 dc, ch2, 2 dc) into each small arch to form point petals; sl st to join. (9 larger petals)
Motif 1 - Round 8 :
Ch1, sc in each st and top of each petal across to even out the round—approx. 72 sc. (approx. 72 sc)
Motif 1 - Round 9 :
Edging round: *ch4, sl st in between petals (at top of petal valleys)* repeat around to form ch4 connector loops. (9 ch-4 loops)
Motif 1 - Round 10 :
Into each ch4 loop: (3 dc, ch2, 3 dc). Sl st to join to give rounded petals with small openings between. (9 rounded petals)
Motif 1 - Round 11 :
Ch1, sc evenly around petals placing 2 sc in each ch2 space—approx. 108 sc. (approx. 108 sc)
Motif 1 - Round 12 :
Edging in lavender: Join LAV in any top stitch, *sc, picot (ch3 sl st in 3rd ch), sc* across each petal edge to give a delicate purple outline. Fasten off and leave a 20cm tail for joining. (Finish)
Info :
Make 14 identical small flower motifs following Motif 1 Rounds 1-12. Block each motif gently to open the petals and allow consistent joining. These small motifs form the chain that links the two main medallions.
Motif 2 - Round 1 :
Repeat Motif 1 Rounds 1-12 exactly to create Motif 2. Fasten off and block. (Motif 2 finished)
Motif 3 - Round 1 :
Repeat Motif 1 Rounds 1-12 exactly to create Motif 3. Fasten off and block. (Motif 3 finished)
Motif 4 - Round 1 :
Repeat Motif 1 Rounds 1-12 exactly to create Motif 4. Fasten off and block. (Motif 4 finished)
Motif 5 - Round 1 :
Repeat Motif 1 Rounds 1-12 exactly to create Motif 5. Fasten off and block. (Motif 5 finished)
Motif 6 - Round 1 :
Repeat Motif 1 Rounds 1-12 exactly to create Motif 6. Fasten off and block. (Motif 6 finished)
Motif 7 - Round 1 :
Repeat Motif 1 Rounds 1-12 exactly to create Motif 7. Fasten off and block. (Motif 7 finished)
Motif 8 - Round 1 :
Repeat Motif 1 Rounds 1-12 exactly to create Motif 8. Fasten off and block. (Motif 8 finished)
Motif 9 - Round 1 :
Repeat Motif 1 Rounds 1-12 exactly to create Motif 9. Fasten off and block. (Motif 9 finished)
Motif 10 - Round 1 :
Repeat Motif 1 Rounds 1-12 exactly to create Motif 10. Fasten off and block. (Motif 10 finished)
Motif 11 - Round 1 :
Repeat Motif 1 Rounds 1-12 exactly to create Motif 11. Fasten off and block. (Motif 11 finished)
Motif 12 - Round 1 :
Repeat Motif 1 Rounds 1-12 exactly to create Motif 12. Fasten off and block. (Motif 12 finished)
Motif 13 - Round 1 :
Repeat Motif 1 Rounds 1-12 exactly to create Motif 13. Fasten off and block. (Motif 13 finished)
Motif 14 - Round 1 :
Repeat Motif 1 Rounds 1-12 exactly to create Motif 14. Fasten off and block. (Motif 14 finished)
Info :
Organize motifs on a flat surface following the runner layout: two large medallions spaced about 18-22cm apart center-to-center with a gentle diagonal chain of small flowers linking them as shown in reference photo. Use pins to secure motif placement before permanent joining.
— Joining Motifs & Connecting Chain (Detailed Joining Rounds) :
Join Step 1 - Placement :
Lay medallion A at one end and medallion B at the other. Arrange small flower motifs between them in the desired staggered pattern. Use pins to mark where each small motif will attach to the large medallion edges. Typical layout uses 7-8 small motifs per side and 14 total linking both medallions together in flowing S-shape.
Join Round 1 :
Pick a small flower motif and position it next to the outer scallop of Medallion A. With the lavender tail from small motif, whipstitch the motif to the medallion at 3 evenly spaced points around the contact arc (for stability). Use a yarn needle and secure stitches through the back loop of both motifs to keep the seam less visible. Fasten off and weave tail. Repeat for next small motif aligning petals with adjacent scallops. (Hand-join)
Join Round 2 :
Where two small motifs touch each other, join by slip-stitching through both motif edges using a 3.5mm hook: insert hook through edge stitch of motif A and motif B, yarn over with lavender or white (as preferred) and sl st to join. Join at 2 or 3 points per adjacent petal to maintain flatness. (Sl st joins)
Info :
Keep joins loose enough to avoid puckering but snug enough that motifs don't drift. Pin frequently and join in sections, checking the runner drape on the table as you proceed.
Join Round 3 :
To attach chains that bridge small motifs and medallions, use a simple crochet chain connector: With WHT, join at the anchor point, ch8 (or appropriate length), sl st into corresponding point on next motif. If chain too long/short adjust by adding/removing 1-2 chains. Use two chains in parallel for stronger linkage where motifs are farther apart. (Chain connectors)
Join Round 4 :
For areas where a small motif touches the edge of a medallion scallop, align the ch4 or ch3 connector loops and sl st through both loop and medallion scallop dc to create a neat seam. Work 2-4 sl sts evenly spaced across the contact arc depending on curve. (Edge joins)
Join Round 5 :
After all small motifs are joined to each other and to both medallions, inspect the runner for loose joins and reinforce with an additional running stitch of matching color through several layers where necessary. Ensure runner lays flat and make minor adjustments by unpicking and rejoining if needed. (Reinforcement)
Info :
Joining is the most time-consuming part—work in natural light, take breaks every 30-45 minutes, and keep motifs pinned during joining to retain the intended shape and negative space. The runner should feel connected but still flexible.
— Outer Border & Final Edging (All motifs together) :
Edge Round 1 :
With WHT, join at any visible outer rim stitch. Work 1 sc evenly around the entire runner edge including medallion scallops and small motif points to create a unified edge. This will likely be approx. 1200-1400 sc depending on layout—work evenly and place 1 sc per visible top stitch. (unified sc round)
Info :
Keeping a single sc round unifies the varying motif edges and gives a base for the decorative picot-lace final round. Keep counts even by placing 2 sc in wider gaps and omitting where motifs overlap slightly.
Edge Round 2 :
Ch3, skip 2 sc, sl st in next sc creating small looped arches around the entire runner perimeter—approx. 1 arch per 3-4 sc depending on curvature. Sl st to join. (looped arches)
Edge Round 3 :
Into each loop: (3 dc, ch3, 3 dc). Sl st to join. This creates the large scalloped rim around the entire runner, mirroring the large medallion scallops. (scallop rim)
Info :
If a continuous scalloped rim creates tension at angles where motifs meet, unpick and decrease/increase the number of loops locally so the edge lies flat. Use blocking pins to set shape before final picot round.
Edge Round 4 :
Switch to LAV for final picot trim. Join in any top of scallop, *sc, picot (ch3 sl st in 3rd ch), sc, sl st to next scallop top* around to give the delicate lilac outline that accents the petals and medallions. Fasten off and weave in ends. (final edging)
Edge Round 5 :
Blocking: Soak the entire runner gently in lukewarm water, squeeze out excess water without wringing, lay flat on blocking mat, and pin outer points to achieve the desired measured shape. Let dry completely. This will open and set the lace and ensure medallions align evenly. (blocking)
Info :
After blocking, do a final check on all joins and weave in any remaining tails on the underside with small, neat stitches to avoid visibility.
— Alternative Layout & Extra Small Motifs :
Info :
If you prefer a longer runner, make additional small flower motifs and continue the chain between additional medallions or between a medallion and a simple cluster of small motifs. The modular system allows you to lengthen or shorten without changing the individual motif patterns.
Info :
To create a symmetrical runner, mirror the layout so both medallions are centered with equal numbers of small flowers on either side. For an asymmetrical organic look, vary spacing slightly as in the reference photo.
— Finishing Touches :
Info :
Steam-block lightly if desired for added crispness. Optionally apply a diluted craft stiffener to edges only for a firmer finish. Store flat or rolled gently to preserve blocked shape.
Info :
Troubleshooting: If a medallion or motif has an odd number of stitches or is slightly distorted, carefully unpick the last round and rework the increases or shell counts to balance repetition numbers before moving forward. A consistent repeat count (multiples used above) ensures flat, circular motifs.
Completing this floral table runner is such a joyful stitching journey—each medallion and tiny flower comes together to form an elegant, lacy pathway across your table. The lavender centers pop against crisp white petals, giving a fresh, handcrafted centerpiece you'll be proud to display. Blocking and careful joining transform separate pieces into a cohesive decorative heirloom. 🧶🌸 Enjoy the process, and don't forget to share photos of your finished runner! 🎉