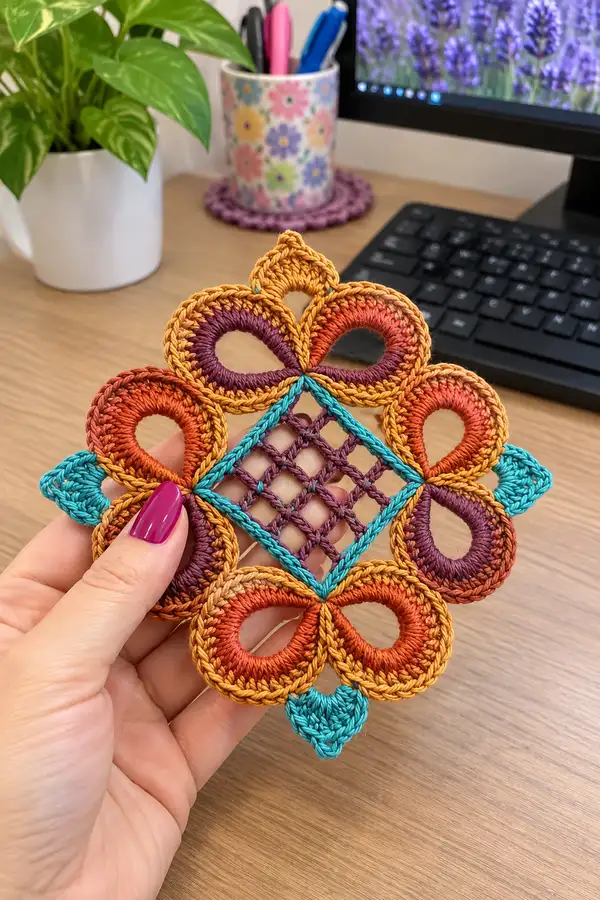
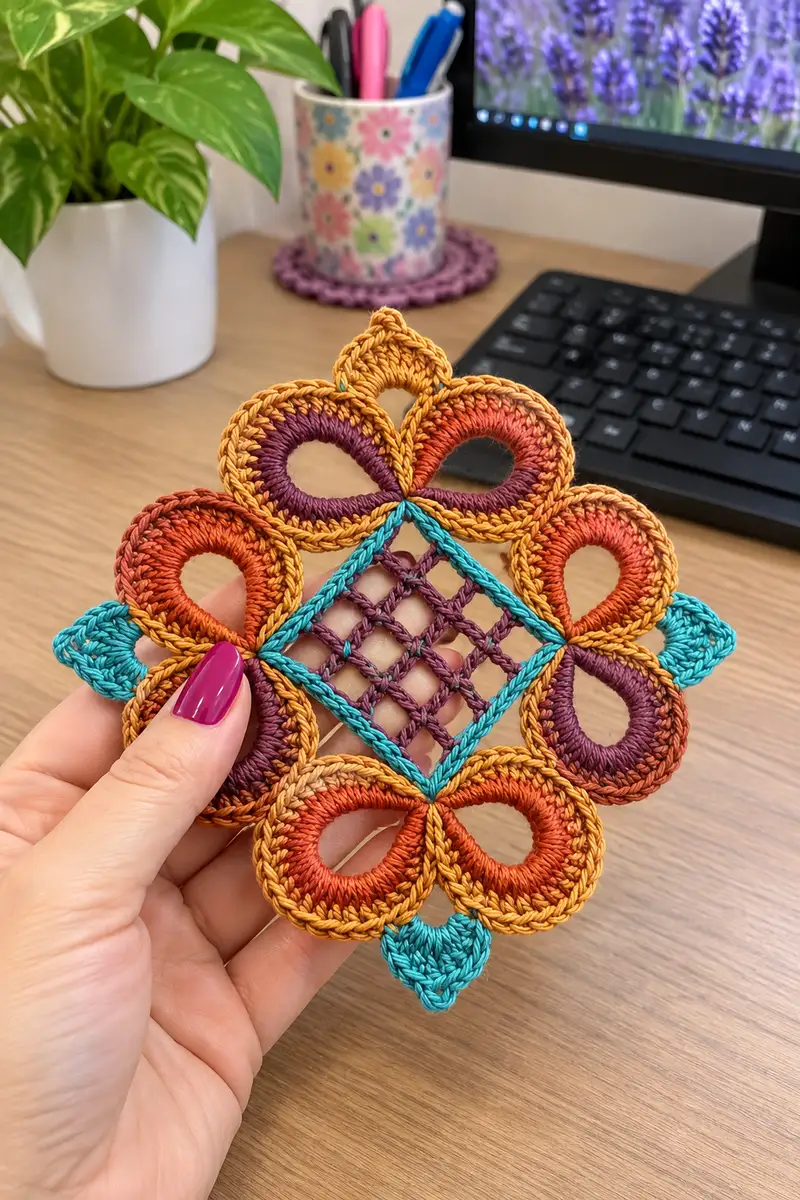
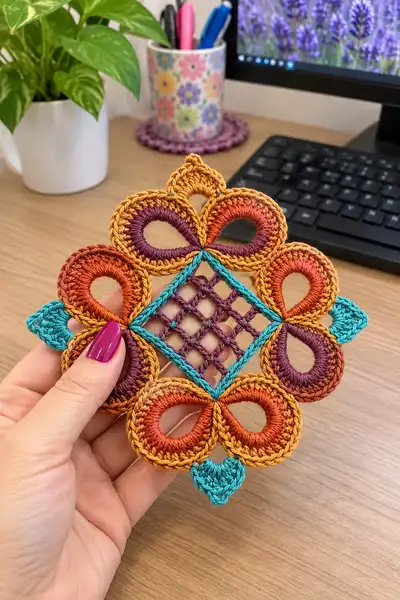
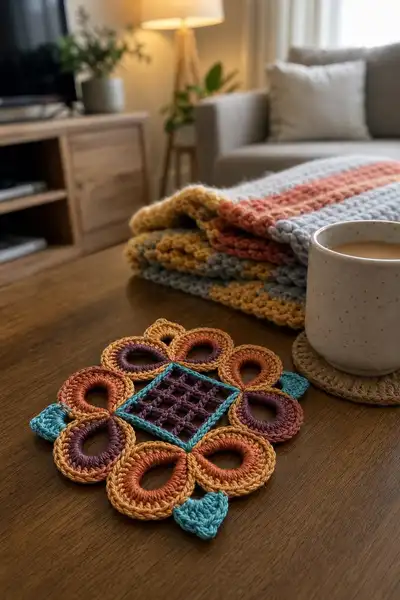
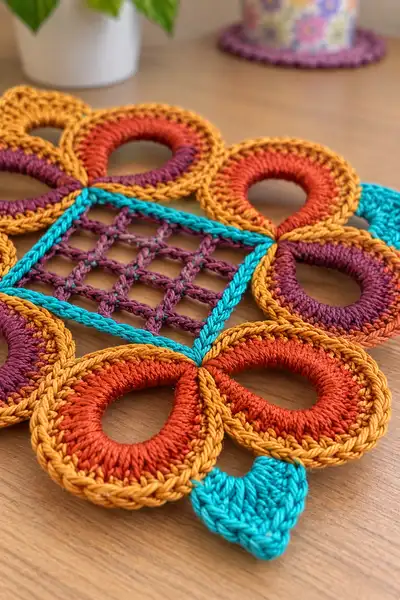
A single boho jewel-style motif inspired by a colorful bedspread—features a lacy central diamond mesh, eight teardrop petals with a double-round rim, and contrasting turquoise corner tabs. Worked in vibrant teal, mustard, rust and purple tones, this motif uses simple shapes and layered rounds to create a dramatic, jewel-like unit ideal for joining into a larger bedspread. Clear step-by-step instructions, color-change tips, and assembly notes included to reproduce the exact look shown.
Progress Tracker
0% Complete
— Materials & Gauge :
Info :
Suggested gauge: one finished motif measures approximately 12.5cm (5in) across corner to corner using DK cotton and a 3.5mm hook. If your gauge differs, adjust hook size. Each motif is worked flat then trimmed and joined.
— Center Diamond Lattice :
Round 1 :
With purple (Color C). Ch 6, sl st to first ch to form a ring (6 ch). Ch 3 (counts as 1 dc), 15 dc into ring, join with sl st to top of ch-3 (16 dc total). Pull ring tight.
Round 2 :
Ch 1, sc in same st, *ch 3, skip 1 dc, sc in next dc; rep from * around, join with sl st to first sc. You will have 8 ch-3 loops spaced evenly (16 sc positions including sc in each loop anchor).
Round 3 :
Change to a smaller hook if desired (3.0mm). Sl st into first ch-3 sp, *(ch 5, sl st into opposite ch-3 sp to create a diagonal bar), sl st into next ch-3 sp; rep 4 times to build a 4x4 interlaced diagonal pattern. End with sl st into starting sp. (This round creates 4 diagonal ch-5 bars crossing the square)
Info :
Keep tension relaxed in the bars to allow mesh to lay flat. If bars are too tight it will pucker the diamond; if too loose it will sag. Aim for a flexible but supportive tension.
Round 4 :
Ch 2 (counts as hdc), hdc into same sp, *hdc into each sl st and ch-5 bar top (2 hdc across bar), hdc into next sc anchor; rep around to form a slim frame of hdc. Join with sl st to top of ch-2. (Approx 32 hdc)
Round 5 :
Ch 1, sc in each hdc around to reinforce frame. Join with sl st (32 sc). This creates a square frame to which the turquoise frame will attach.
Round 6 :
Info : Change to turquoise (Color D) now. Carry or fasten off purple and join turquoise with a sl st to any corner anchor sc.
Round 7 :
With turquoise. Ch 1, sc evenly around the square frame working (3 sc) into each corner point to keep corners crisp. Work 1 sc in each sc along sides. Join with sl st. (Approx 36-40 sc depending on corner counts)
Round 8 :
Ch 2, hdc in same st, *ch 2, skip 1 st, hdc in next st; rep around to make a mesh border, join with sl st. This creates a saddle for connecting the petal rings later.
Round 9 :
Ch 1, sc in each hdc and in each ch-2 sp around to solidify the frame. Join with sl st. (Keeps frame tidy and even.)
Round 10 :
Info : At this stage check that your square is symmetrical. The turquoise frame should be slightly raised above the lattice. If corners pull in, gently stretch and block before continuing.
Round 11 :
Ch 1, *sc 2 in each side anchor, ch 1 between, at corners sc 4, ch1; rep around to create small anchor points at 4 sides and 4 corners for petal joins (approx 40-44 sc). Join with sl st.
Round 12 :
Ch 1, sc in each st around but when you reach a designated side anchor (4 sides and 4 corners) work an extra sc into the anchor to make a defined join point. Join and fasten off purple ends if any remain.
Info :
This center completes the lattice and frame. If you prefer a wider turquoise frame, add one more round of BLO sc now before joining petals. The turquoise frame defines the motif center color contrast.
— Petal Ring (Make 8 identical petals) :
Round 1 :
With inner petal color rust (Color B). Start a magic ring. Ch 1, 6 sc in mr. Pull tight and join with sl st to first sc. (6)
Round 2 :
Ch 1, inc around (12). (inc = 2 sc in same st)
Round 3 :
(1 sc, inc) x6 (18)
Round 4 :
(2 sc, inc) x6 (24)
Round 5 :
(3 sc, inc) x6 (30)
Info :
These early rounds build a compact disc that will become the inside of the teardrop. Keep stitches evenly tensioned so the inner hole will be neat.
Round 6 :
(4 sc, inc) x6 (36)
Round 7 :
Ch 1, sc in each st around (36). Join with sl st. This round will be the anchor for the oval shaping.
Round 8 :
Info : Shift to shaping the teardrop opening. We will create an elongated loop by working chains and slip-stitch bridges across a portion of the round to create an opening on later rounds.
Round 9 :
Ch 1, *sc 6, ch 10, skip 10 sc, sc 6, sc in remaining sts to end; join with sl st. This creates an extended ch-loop that will be worked into to form the petal opening. (Stitch count around still 36 sc positions plus ch-loop)
Round 10 :
Sl st into first ch of the ch-10 loop, ch 1, work 22 sc evenly into the ch-10 loop (add or remove 2 sc to evenly space if needed). Join to next sc anchor on the base with sl st. This forms the inner oval ring. (36 sc base + 22 sc into loop)
Round 11 :
Ch 1, sc in each sc around entire petal (including the newly worked loop sc) to smooth the join and make the inner oval robust. Keep count: approx 58 sc total around (base + loop). Join with sl st.
Round 12 :
Change to mustard/gold (Color A) now for outer rim. Fasten off rust and join mustard at any back-of-loop stitch. Ch 1, sc in same st, *sc in each st around but when you reach the outer-most edge of the oval (the mid-point of the loop) work (1 sc, ch 2, 1 sc) to start giving a scalloped shape; continue around. Join with sl st. (Approx 58 sc, plus 4 small ch-2 decorative points)
Round 13 :
Ch 2, hdc in same st, *(2 hdc, ch1, 2 hdc) into the ch-2 sp from previous round to form a petal peak; continue hdc evenly along rest of oval, placing clusters at two seam points where petal meets neighbor. Join with sl st. (This gives a subtle raised rim.)
Round 14 :
Ch 1, sc evenly around working in FLO for this round to create a defined decorative ridge at the outer rim: 1 sc in each st FLO (58). Join and finish off mustard if you want to leave outer rim separate for later slip-stitch joining.
Round 15 :
Info : Check the shape by holding the petal over the turquoise frame. The oval opening should be about 2.5-3cm tall and the outer rim should sit neatly on the square frame anchors. Adjust by adding or removing a couple of sc in inner loop if necessary before making remaining petals.
Round 16 :
Reverse join technique: with mustard, make one more round of sc through both loops (front and back loops) to bulk the rim: sc in each st around (58). Join and fasten off leaving a 25-30cm tail for joining to the center later.
Round 17 :
Info : Make 8 petals in total. Work the inner rounds in rust (Color B) and finish outer rim in mustard (Color A). Keep tails long for a whip-stitch join; alternatively, join motifs as-you-go using sl st into the center turquoise frame anchors.
Round 18 :
Optional Decorative Round: Rejoin mustard and work a picot edging around the outer rim to add definition: *(sc 5, picot) rep around each scallop section only. Fasten off.
Round 19 :
Info : To create the layered two-tone look visible in the photos, always work the inner portion with the deeper rust/purple and quickly change to mustard for the outer rounds. Weave in inner ends partially before final rim round to stabilize.
Round 20 :
Stitch counts: inner disc built to 36 sc, loop worked to 22 sc, combined smoothing round ~58 sc; outer rim rounds maintain ~58 sc. Keep consistent counts across all 8 petals so the motif assembles evenly.
Round 21 :
Stitch reinforcement: Using a tapestry needle, weave the long tail around the inside base of the petal to flatten any bumps and ensure each petal sits flush against the turquoise frame when joined.
Round 22 :
Make 8 identical petals following Rounds 1-21. Place them around the turquoise frame in sequence: corner, side, corner, side, etc., so color alternation matches the photographed layout.
Round 23 :
Info : For visual reference, orient petals so the teardrop opening faces inward to the center diamond and the wider outer rim faces outward. This orientation provides the jewel-like look.
— Outer Joining & Border :
Round 1 :
With turquoise (Color D). Rejoin to a corner anchor on the square frame where a petal will attach. Ch 1, sc in anchor, then align petal inner base to frame and using long tail, whip-stitch through petal base and turquoise anchor for the first 6-8 stitches to secure. After securing first petal, continue around frame joining each petal in turn with sl st or whip-stitch every 4-6 sts to create tight join. (Anchors used: 8 main anchor points around the frame.)
Round 2 :
Once all 8 petals are anchored, with turquoise ch1 and work sc evenly along entire outer seam capturing both petal rim and square frame edge: sc 3 into each corner join and sc evenly along sides where petal rims meet. Aim for approx 96 sc total along this combined seam. Join with sl st.
Round 3 :
Ch 2, work hdc in same st then *hdc 3, ch1, hdc 3 into next grouped seam to create a small raised cluster at each petal junction to mimic the slightly scalloped seams in the photo. Repeat around and join. (Creates 8 raised clusters)
Round 4 :
Info : Work this round in BLO to create a small ridge between the petal rim and the turquoise seam — it helps give the halo effect. Change to BLO sc for the next round if you want more ridge texture.
Round 5 :
Ch 1, sc in each st BLO around (approx 96). Join and fasten off if you want to register the seam clearly between mustard and turquoise. This is the round that visually separates the petals from the frame.
Round 6 :
Decorative Round: Rejoin mustard at mid-point of any petal and *ch 3, sl st into next st to create a small decorative bridge over each seam; rep around to add delicate chain detail at petal junctions. Join and fasten off secondary color tails.
Round 7 :
Ch 1, sc around entire motif to neaten joins and hide sewing tails: sc 1 in each st around staying even with previous counts. Join and do not fasten off, continue to final border.
Round 8 :
Ch 2, *2 dc, ch 1, 2 dc in next visible gap along outer rim to form a taller scallop outline; repeat around so each petal gets a vertical accent. When you reach the turquoise tabs (to be worked next), leave small gaps to attach tab bases. Join with sl st.
Round 9 :
Info : At this stage your motif should look like the example: a turquoise framed diamond center, ringed by colored teardrops and a subtle scalloped outline. Check symmetry and evenness and block before final tab stitching.
Round 10 :
For extra body to the rim, work one last round of sc in FLO around entire motif to create a crisp outer rope: sc in each st FLO. Fasten off and weave ends neatly. (This round both finishes and strengthens the motif outer edge.)
Round 11 :
Info : If making a bedspread, leave the long joining tails on the outer scallop rounds for as-you-go joining. You can also add small connecting loops at each turquoise tab location to facilitate joining motifs into a blanket.
Round 12 :
Mathematical note: If your sc counts differ by ±4 across motifs, the joining will still be manageable, but aim to keep counts consistent across the set for an even finished grid. Use stitch markers to transfer exact anchor point positions between motifs.
— Turquoise Corner Tabs (Make 4) :
Round 1 :
With turquoise. Ch 6, sl st to first ch forming a small loop, ch 1, 8 sc into loop; join with sl st. (8)
Round 2 :
Ch1, 2 sc in each st around (16). Join. These tabs are the little quatrefoil turquoise accents at four cardinal points.
Round 3 :
Ch1, *sc in next 2 sts, (sc, ch2, sc) in next st to create a small pointed petal; rep around to create 4 neat lobes. Join. Fasten off leaving a 25cm tail for sewing to motif.
Round 4 :
Info : Attach each tab to the midpoint between two petals (one on each side) or use them at the 4 corners of the square frame as pictured. Sew through both tab base and turquoise outer seam with mattress stitch for invisible attachment.
Round 5 :
Optional reinforcement: After attaching, work 1 sc around the base of the tab into the main motif to seal the joint and hide tails. This also helps when motifs will be joined into a bedspread to ensure sturdy connection points.
Round 6 :
Info : Make 4 tabs total. They are small but functional — they create neat join points for joining motifs into larger pieces, and give the jewel detailing seen in the photos.
— Final Edging & Decorative Finishing Rounds :
Round 1 :
With mustard. Rejoin at any outer scallop point. Ch 1, sc in each st around the outer rim but add a slip-stitch picot every 8 sts for a delicate finish: *sc 7, picot (ch3, sl st into 3rd ch), rep around. Join and fasten off.
Round 2 :
Change to deep purple and work a slender rope round along the turquoise frame seam: sc evenly around working into both motif and petal edges where possible to create a neat shadow line. Join and fasten off.
Round 3 :
Info : Weave in all tails: hide ends by sewing them along the backs of rounds through a few stitches then trimming close. Leave no long tails that might show on the right side.
Round 4 :
Blocking: Wet block each motif to exact dimensions. Pin out square center and gently shape petals so they are evenly spaced. Allow to dry fully before assembly. Blocking is essential to get the jewel symmetry and flat lattice.
Round 5 :
Optional surface crochet: If you want a raised outline around the turquoise frame, use surface slip-stitch with contrasting color to trace the frame and highlight the diamond center.
Round 6 :
Info : Final check — the motif should measure roughly 12.5cm (5in) corner-to-corner and the inner openings should be symmetrical. If necessary, add or remove small sc counts at petal inner loops to correct shape before joining motifs.
— Joining Motifs into a Bedspread (Overview) :
Round 1 :
Method A - Join-as-you-go (recommended): When working the final border of a new motif, instead of finishing the round, sl st into corresponding turquoise edge of previous motif at tab and three or four adjacent scs to create a continuous seam. Repeat for each join point so motifs connect at the turquoise tabs and scalloped points.
Round 2 :
Method B - Sew-together: Block all motifs. Using long tails and a tapestry needle, sew motifs together through corresponding seam points (turquoise tabs and scallop valleys) using a mattress stitch or whip-stitch for flat joins. Secure with multiple passes where necessary.
Round 3 :
Edge finishing: After motifs are joined in the required blanket layout, work a continuous border round in turquoise: 2 sc in BLO across the whole joined edge, then 1 round of picots or scallops in mustard for decorative outer trim.
Info :
For a bedspread, plan motif count ahead: motifs pictured use a larger center medallion made of many units; estimate yarn needs accordingly. Seams will be strongest when you join motifs at several stitch anchors rather than a single jump stitch.
Round 4 :
Note on color sequence: To mimic the pictured spread, alternate the rust/purple orientation between neighboring motifs so that the purple inner and rust inner colors create a subtle alternating diamond across the full project.
Round 5 :
Info : Make a swatch of 3x3 motifs to practice joining and blocking before committing to dozens of motifs. This helps tune counts and tension for consistent results over a large bedspread.
Round 6 :
Maintenance: Hand wash finished bedspread gently in cool water to preserve colors and cotton sheen. Re-block after washing if necessary to maintain shape.
This boho jewel motif is a gorgeous way to build a bedspread full of color and texture. Each unit combines airy lattice with sculpted petal rings and jewel-like turquoise accents to create a striking overall design. Working these motifs is meditative and rewarding — the colorful rings progress quickly while the lattice gives the pattern a delicate balance. Enjoy making one motif, then many, and watch a cozy, bohemian bedspread come to life! 🧶💛