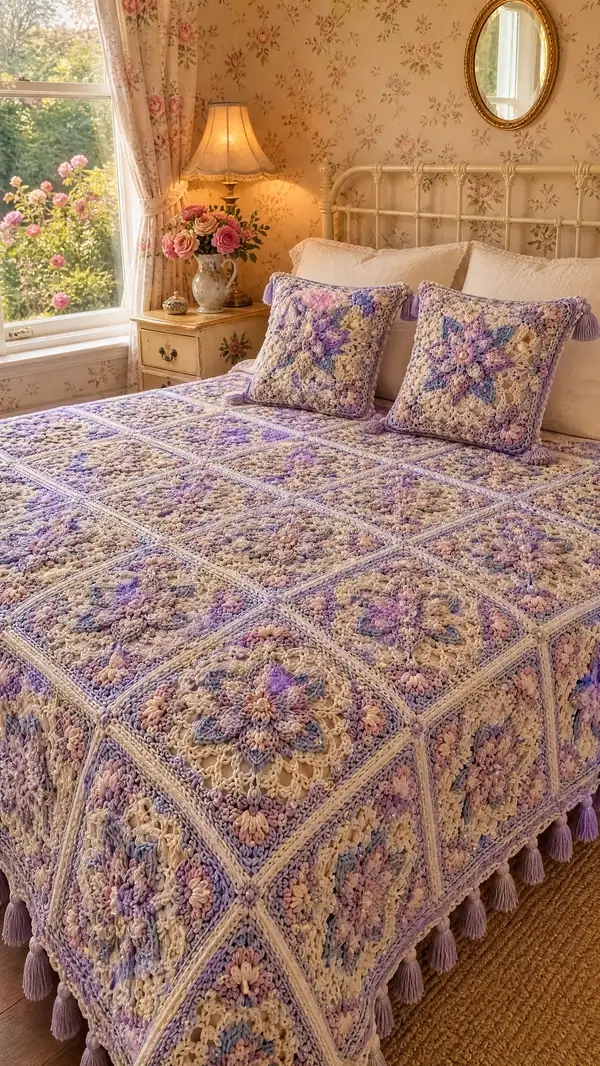
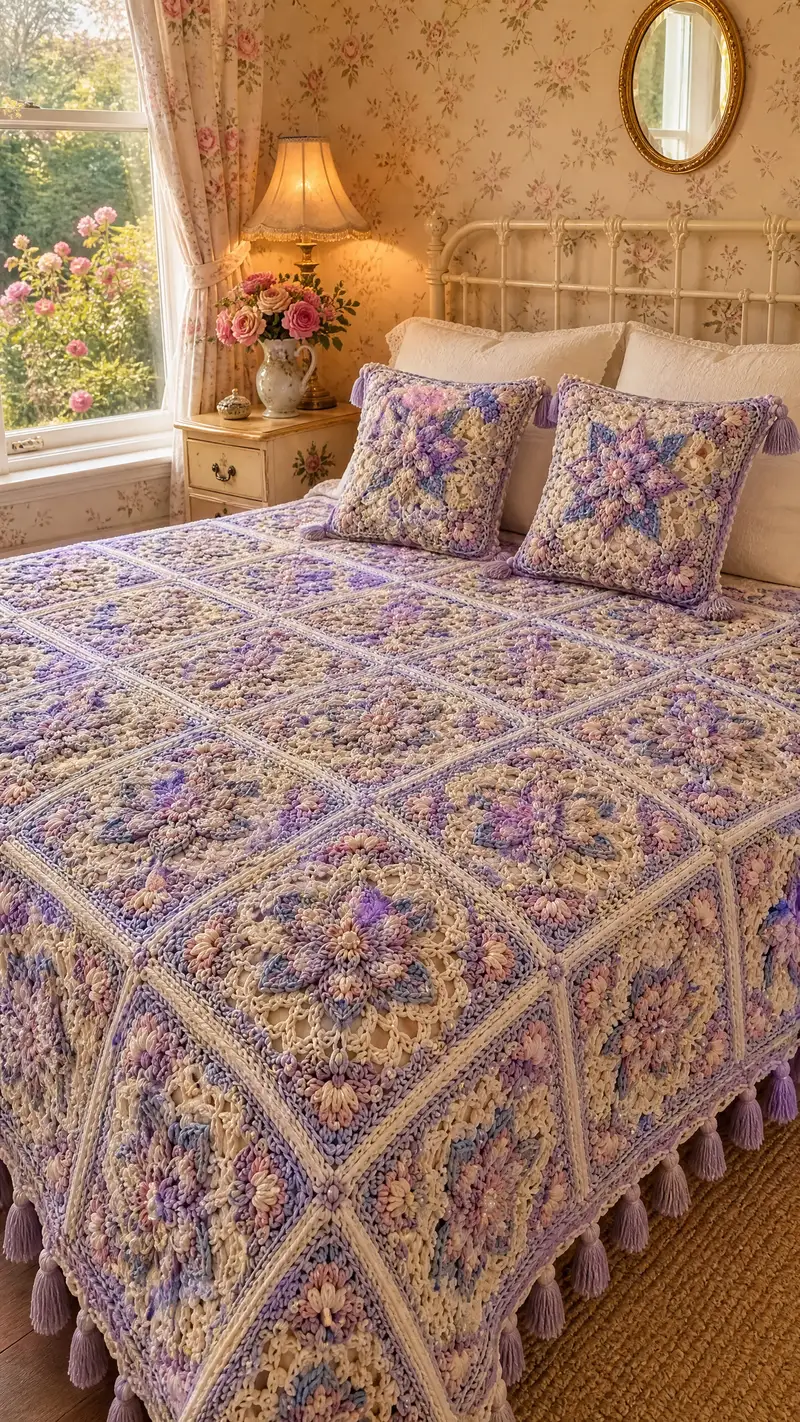
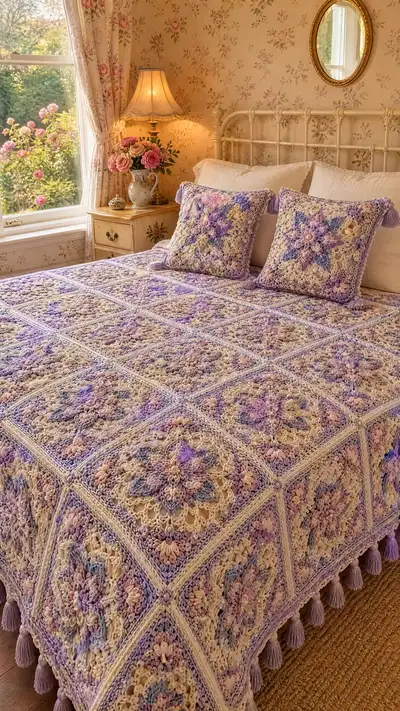
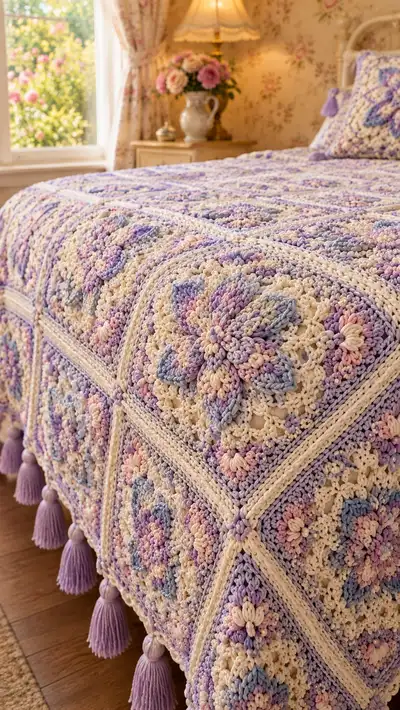
A vintage-inspired pastel star granny square bedspread worked in soft variegated pastels and cream. This pattern recreates layered flower-star motifs joined into a large bedspread with a textured lacy border and tassel trim. The instructions include detailed motif rounds, join-as-you-go options, edging, pillow covers and tassel finishing for a full coordinated set. Perfect for a romantic bedroom or a cozy gift.
Progress Tracker
0% Complete
— Notes & Gauge :
Info :
Gauge is not critical for look but is important for final bedspread size. One finished square = approximately 10.5 in / 26.5 cm blocked. If your squares are significantly different adjust hook by 0.25 - 0.5 mm. Block every square to exact measurements before joining for straight edges and neat joins.
Info :
Throughout this pattern PS (puff stitch) indicates: yarn over, insert hook, yarn over, pull up loop (repeat 3 more times for a 4-loop puff total), yarn over and pull through all loops on hook, ch1 to close puff unless stated otherwise. If you prefer 3-loop puffs reduce repeats accordingly and adjust counts in the Info where required.
— Square Motif (make required number) :
Round 1 :
MR, ch3 (counts as dc), 11 dc into MR, sl st to top of ch3 to join (12 dc total)
Round 2 :
Ch3, dc in same st, *ch2, skip next dc, 2 dc in next st* rep around 6 times making 6 small arches. Sl st to top of ch3 (12 dc, 6 ch2 spaces)
Info :
Change to variegated pastel color A (flower base color) now. Carry cream inside or fasten off as you prefer. Work slightly looser on puff rounds to allow petals to sit up.
Round 3 :
*In each ch2 sp: ch2, (ps) 4, ch2, sl st to base between arches* Repeat x6 forming 6 puff-cluster petals. Fasten off pastel A unless continuing layered petal. (6 petals; base round remains 12 dc between petals)
Info :
We will create secondary petals to form an 8- or 12-point star. Join pastel B (slightly different shade) in the top of a petal and work around petals to add layered points.
Round 4 :
Join color B at top of any petal, ch1, sc around petal top working 3 sc into the ch1 space between puff clusters, *ch3, skip to next petal top, 3 sc into next petal top* rep around to make 6 chain arches between petals. Sl st to first sc. (36 sc over petals, 6 ch3 spaces)
Round 5 :
In each ch3 sp: ch3, (ps) 5, ch2, sl st into next sc to anchor. This creates 6 larger outer petals. Fasten off color B if you like or carry for next round. (6 large petals)
Info :
Rotate the square so petals align as star points. We will now add small clusters between petals to bring the motif to a roughly octagonal shape. Change to cream for contrast.
Round 6 :
Join cream in any space between large petals, ch3 (counts as dc), 2 dc in same sp, *ch2, 3 dc in next space between petals* rep around until you have 12 small 3-dc groups (36 dc; 12 ch2 spaces). Sl st to top of ch3.
Round 7 :
Ch1, sc in same st, *ch3, skip next 3 dc group, sc in next dc group center* rep around to create 12 ch3 loops between 3-dc groups. Sl st to first sc. (12 sc, 12 ch3 spaces)
Info :
Change to pastel A (or variegated main) for round of small puff clusters that form the background blossoms. Puff stitches should sit into ch3 spaces.
Round 8 :
In each ch3 sp: (ps) 3, ch1, sl st into next sc. Rep around making small puff dots between star points. You should have 12 small puffs. Fasten off or carry color.
Round 9 :
Join cream in any puff base, ch3, 2 dc in same st, *ch4, skip to next puff, 3 dc in next puff base* rep around to make 12 three-dc groups separated by ch4 spaces. Sl st to top of ch3. (36 dc, 12 ch4 spaces)
Round 10 :
Ch1, sc in same st, *in ch4 sp work: (2 dc, ch2, 2 dc) to form corner arch, sc in middle of next 3-dc group* rep around forming 12 arches. Sl st to first sc. (12 sc, 12 shell corners)
Info :
We will now expand motif into a square by adding fans and chain arches that build the first square rounds. Keep tension even; if your shells are too loose your square will warp.
Round 11 :
Change to pastel B (or variegated). In each shell: ch3, (2 dc, ch1, 2 dc) in same ch4 space, ch1, sc in next sc (between shells). Rep around to create a ring of shells. Sl st to top of ch3. (Each shell occupies one previous shell space; total shell count = 12)
Round 12 :
Ch1, sc in same st, *ch5, sc in middle of next shell repeat* rep around making 12 ch5 lacy loops. Sl st to first sc. (12 sc, 12 ch5 spaces)
Info :
Add small picot-like puffs in ch5 spaces to bring texture: join pastel A in each ch5 and work (ps) 4, ch1, sl st into sc to anchor. This gives 12 puff clusters creating a rosette effect. Fasten off as preferred.
Round 13 :
In each ch5: (ps)4, ch1, sl st to base sc. Rep around (12 puffs).
Round 14 :
Join cream in any puff base, ch3, 3 dc in same base, *ch2, 4 dc in next puff base* rep around to make 12 4-dc groups with ch2 separation. Sl st to top of ch3. (48 dc total)
Round 15 :
Ch1, sc in same st, *(2 dc, ch3, 2 dc) in next ch2 space (corner shell), sc in middle of next 4-dc group* rep around making 12 corner shells. Sl st to first sc. (12 sc, 12 corner shells)
Info :
From here we move into square-creating rounds. We will lay down increasing chain spaces at four points to form corners so the motif becomes a square rather than circle. Mark four evenly spaced shell groups to become corners (every 3 shells approx.).
Round 16 :
Ch1, sc in same st, *(2 dc, ch4, 2 dc) in corner shell (marked), sc in middle of next shell* rep around making 4 ch4 corner shells and regular shells between. Sl st to join. (Counts vary; shell total stays 12 but corners have extra ch4)
Round 17 :
Ch1, sc into first sc, *in next shell between corners: ch5, skip two shells, sc in next shell center; in corner shell: (2 dc, ch6, 2 dc), sc in next shell center* rep around to form larger chain arches to square the motif. Sl st to first sc.
Info :
At this stage every square is roughly circular but will become square as you add the external rounds. Keep corners the same to produce straight edges when joining squares later.
Round 18 :
Join pastel A in the center of a non-corner shell, ch3, 3 dc in same shell, *ch3, sc in center chain of next corner, ch3, 4 dc in next shell* rep around producing alternating 4-dc clusters and chain links. Sl st to join. (Count approx 48-56 depending on chain designs)
Round 19 :
Ch1, sc in same st, *ch7, sc into next corner center chain to accent corner, ch3, sc into next shell center* rep around making extended arches which will be filled with lace next round. Sl st to join.
Info :
This is a good point to fasten off color changes if desired. Work two more texture rounds to create the cream framing that will be used for joining squares. If you prefer join-as-you-go, stop after Round 22 and follow JAYG instructions below.
Round 20 :
Join cream in any long ch arch, ch1, sc in arch center, *(ch3, 3 dc, ch3, sc) in each large arch* rep around filling arches with small shells. Sl st to join. This adds a lacy filled look and starts the neutral frame.
Round 21 :
Ch1, sc in same st, *ch4, sc in arc between shells* rep around to create uniform ch4 spaces across entire round. Sl st to join. (This sets up 4 turning spaces per side when grouped in square)
Info :
Work one final even round in cream to form the definitive square frame. Use BLO on this round for a neat ridge that makes joins less visible. If you prefer a smoother join, work regular sc instead.
Round 22 :
Ch1, 1 sc in each st BLO around (estimate 84 sc depending on previous counts) to form a neat framed square edge. Sl st to join and fasten off. Block square to 10.5 in / 26.5 cm square.
Info :
Make the number of squares needed for your bed size: examples: twin 5 x 6 = 30 squares, double/full 6 x 7 = 42 squares, queen 7 x 8 = 56 squares, king 8 x 9 = 72 squares. The sample in the photo is approximately 7 x 7 to 7 x 8 squares (queen-sized). Adjust to your desired coverage and overlap for drape.
— Alternate Raised Star Square (Optional Variation) :
Round 1 :
MR, ch4 (counts as tr), 11 tr into MR, sl st to top of ch4 to join (12 tr)
Round 2 :
Ch1, sc in same st, *ch3, skip next tr, sc in next tr* rep around making 12 ch3 loops. Sl st to join. (12 sc, 12 ch3)
Round 3 :
Join pastel A in ch3 loop, *(ps)5, ch1, sl st into next sc* rep around forming 12 pronounced petals. Fasten off. (12 puffs)
Round 4 :
Join cream, ch1, sc in any puff base, *ch5, sc in middle of next puff base* rep around. Sl st to join. (12 sc, 12 ch5)
Round 5 :
Fill ch5 spaces with 3 dc, ch2, 3 dc to form square corners at four evenly spaced points (work corner in every 3rd ch5 to make 4 corners). Continue with rounds of shells and chains as in main motif from Round 11 onwards to square up. Block and frame with 2 rounds cream, one BLO to set join ridge.
Info :
Variation yields a more pronounced star effect with 12 initial puffs; use if you prefer a big raised star instead of 6+ petal flower. Ensure corners placed accurately to form square grid.
— Join-As-You-Go (JAYG) Method for Joining Squares :
Info :
JAYG reduces final sewing and gives a seamless look. Join during the final round of each square (Round 22 in main motif). Place finished squares right sides facing you. Work final framed round and when you reach a side that matches an already-finished square, work the joining steps below instead of regular stitches.
Round (JAYG) :
When you reach a side to join: ch1, sc in next st, *ch1, insert hook through next corresponding stitch of the adjacent square, pull up a loop, yarn over and complete sc in current square (this forms an invisible join), sc in next st of current square* Continue to join across full side. For corner-to-corner joins: work 3 sc into corner ch space and join through corner of adjacent square by inserting hook and working sl st through both corner spaces to secure. Repeat for each side you want to attach.
Info :
When joining multiple rows use blocking pins to line up corners precisely. If you prefer whip stitch joining instead, leave final round unworked on connecting sides and use mattress or whip stitch with matching cream yarn for a slightly raised ridge.
— Alternative Joining with Mattress/Whip Stitch :
Info :
Block all squares to exact size. With right sides up, place two squares side by side and join using whip stitch through outermost loops of both squares using cream. Stitch through every stitch or every other stitch depending on desired look. Pull slightly to flatten seam and maintain a square edge.
— Joining Rows & Layout :
Info :
Plan your layout on the floor and photograph it for reference. For large bedspreads work in manageable sections: join squares into strips (rows) of 6-8 then join rows together. This prevents heavy handling of the whole spread. Use temporary safety pins to hold corners square during joins.
— Border & Edging (multiple rounds for wide border) :
Round 1 :
With the full bedspread assembled and blocked, join cream at any corner between two squares, ch1, sc evenly around entire perimeter working 1 sc in each stitch and 3 sc in each corner space for neat corners. Sl st to join. (This neatens outer edges and evens out counts)
Round 2 :
Ch3 (counts as dc), 1 dc in same st, *ch2, skip 2 stitches, (2 dc, ch2, 2 dc) in next corner point of outer join ridge* continue around creating shell corners separated by 2-dc shell repeats. Sl st to join.
Round 3 :
Ch1, sc in same st, *ch5, sc into middle of next 2-dc shell* rep around to make long chain loops across sides. Sl st to join.
Round 4 :
In each ch5: (ps)4, ch1, sl st to base sc to put puff dots across border. Fasten off puff color if desired. (Puff count equals number of ch5 spaces)
Round 5 :
Join cream, ch2 (counts as hdc), hdc in each stitch around working 2 hdc in each corner space, sl st to join. This round smooths border and creates a base for scallop.
Round 6 :
Ch1, sc in same st, *skip 2 hdc, 5 dc in next st (scallop), skip 2 hdc, sc in next hdc* rep around forming scallops. Sl st to join. Fasten off and weave ends.
Info :
If you want a double border repeat Round 5-6 again for a fuller finish. For a very wide border repeat sets of shell and scallop until desired size is reached. Blocking after each border round helps keep scallops even.
— Decorative Ridge Join (Optional Raised Ridge) :
Round 1 :
To create the raised ridge lines visible between squares, join with cream using 3 rounds: Round A: sc around seams, Round B: 1 sc BLO around to build ridge, Round C: sc in each st FLO to create a smooth raised frame. These rounds are worked after initial joining and are ideal where you use whip stitch initially to hold squares.
Info :
The photo sample uses a raised cream ridge two rounds wide between squares to emphasize the grid. Work these after all squares are attached and block again for crisp ridge lines.
— Pillow Covers (Make 2 matching cushions) :
Info :
Each pillow uses a single large square motif worked to approx 16 in/40 cm by expanding the final rounds. Use same motif technique but add additional lacy rounds to reach desired size. Follow motif rounds 1-22 and then add extra square-expanding rounds below.
Round 23 :
After Round 22, join pastel A, ch3, (2 dc, ch2, 2 dc) into each corner ch space, 1 dc in each side st between corners, repeat to construct an additional layer adding approximately 4 in/10 cm to the square. Sl st to join.
Round 24 :
Ch1, sc in same st, *ch6, sc into middle of each side block to form large chain loops* rep around. Sl st to join.
Round 25 :
In each ch6 space: 7 dc cluster (or (2 dc, ch2, 2 dc) if you prefer shells) to make the pillow face textured and solid. Sl st to join. Fasten off and block to 16 in square.
Round 26 :
Edge the pillow by joining cream and working 3 rounds of sc: Round 1 sc even, Round 2 sc BLO to create ridge, Round 3 sc even. For closure: you can make a back panel of plain sc in cream and whip stitch closed or attach an invisible zipper if desired.
Info :
Add four tassels, one at each pillow corner, or small pom-pom embellishments. The cushions in the photo have tassels at the corners and match the bedspread tassels for cohesion.
— Tassels & Finishing Tassel Trim :
Step 1 :
Cut 100-140 strands of lavender yarn double the desired tassel length plus 2 in for wrapping (for a 4 in tassel cut 10 in strands). Fold in half and loop through a cardboard template to keep lengths consistent.
Step 2 :
Gather the folded strands, tie a small yarn piece about 0.5 in below the fold to create the head, then wrap tightly with matching yarn 1 in below the head to form the neck. Hide wrap tail into tassel and trim ends evenly.
Step 3 :
Attach tassels by inserting hook through final border edge and pulling loop of the tassel head through then closing with a pull-through knot. Secure with a few stitches and weave ends into border. Place tassels at each corner and along the sides every 6-8 in depending on desired fullness. The sample uses a tassel at every square corner along outer perimeter.
Info :
For extra weight and drape you can add a small bead or wrapped yarn core inside the tassel head before knotting. Secure well and hide ends inside tassel body.
— Final Blocking & Care :
Info :
Block the assembled bedspread carefully: pin outer edges to desired measurements on a blocking mat, spray with water or use steam from a distance and allow to dry fully. This evens edges and opens lace. For washing, hand wash gently or machine wash on delicate in a laundry bag and lay flat to dry. Avoid tumble drying to maintain tassel shape.
Info :
Weave in all ends securely. For extra durability, sew a short running stitch across high-stress joins at the corners of the bedspread to prevent seam separation under weight and use of bed daily.
Completing this pastel star bedspread is a truly rewarding journey — each square is a tiny work of art that comes together into a dreamy whole. The layered petals and raised cream grid create a vintage, romantic look that’s both decorative and cozy. Add matching tassels and cushions to make a coordinated bedroom set that feels handmade and luxurious. 🧶💜🥰