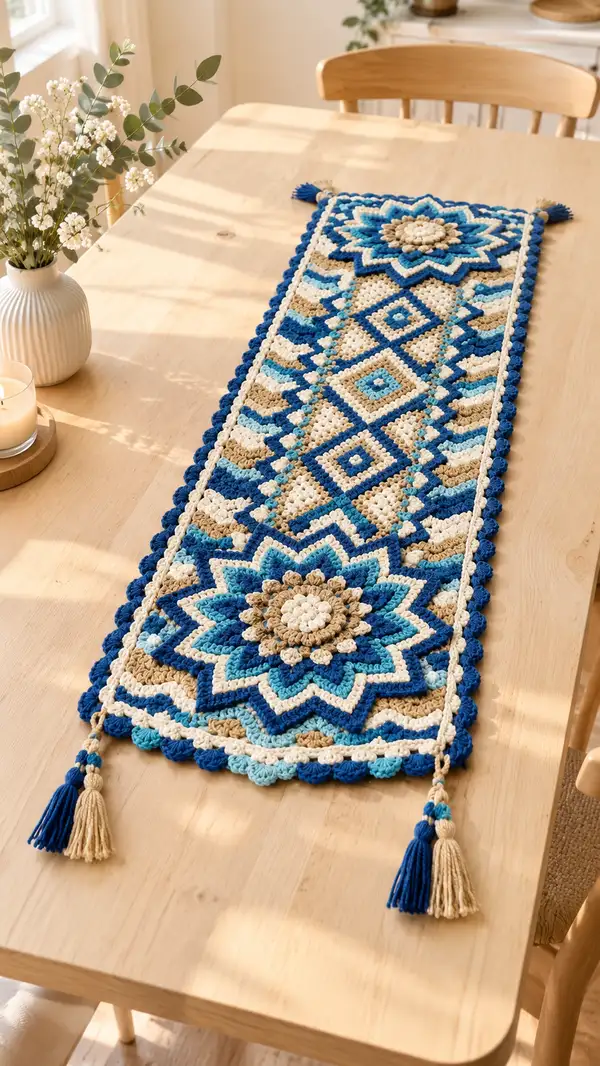
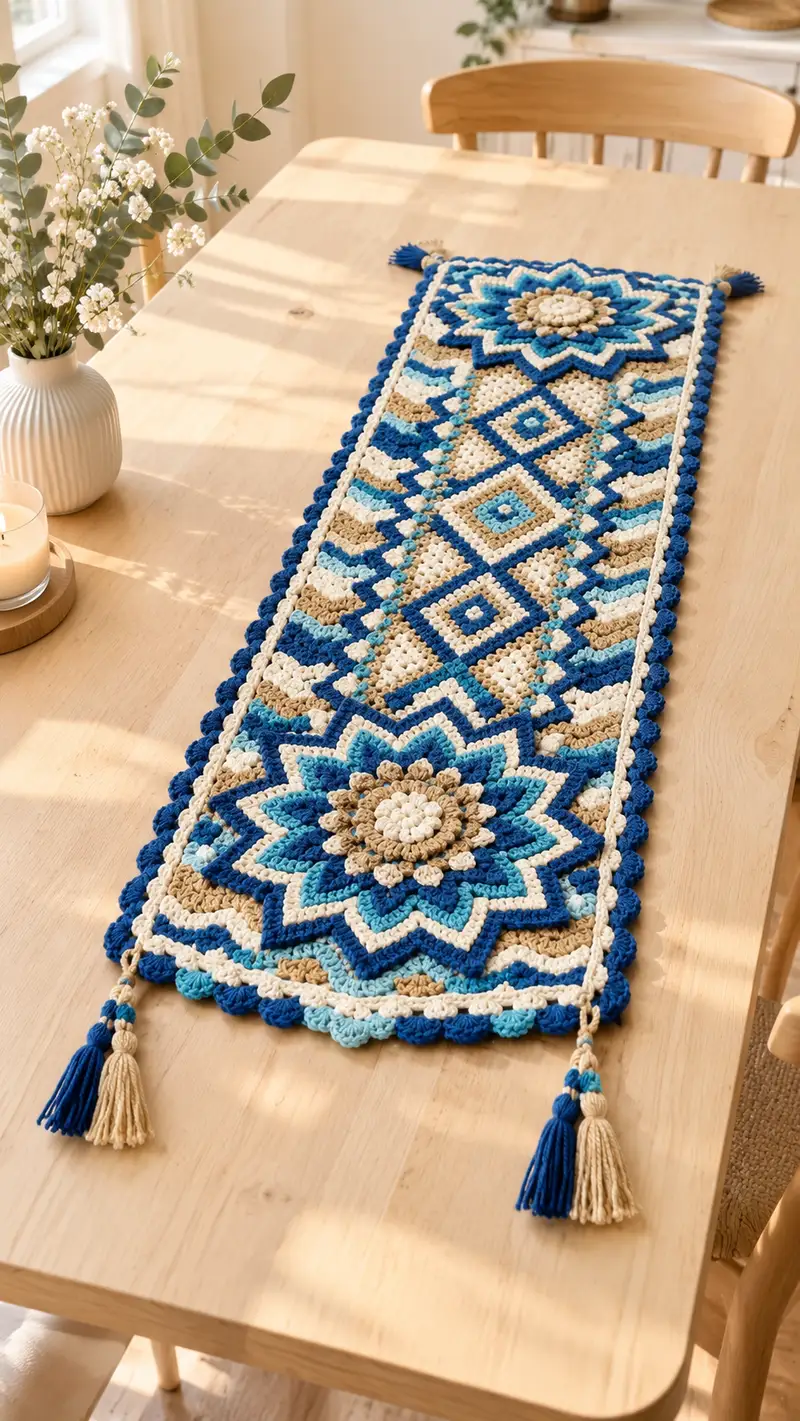
This Boho Star Table Runner features two large floral star mandalas joined by a textured mosaic panel edged with scalloped shell borders and tassels. Worked in cream, sand, deep blue and sky tones, it combines puff, cluster and shell stitches for a rich handmade look. The runner sits beautifully on a dining or console table and is a satisfying intermediate project with lots of color play and texture.
Progress Tracker
0% Complete
— Notes & Techniques :
Info :
This pattern uses worsted weight yarn and a 4.0mm hook for a balance of drape and texture. Work with consistent tension; puff and cluster stitches produce thickness so count carefully. When changing colors, join with a standing stitch or complete last yarn over of previous stitch with new color to create neater joins. Block motifs flat before joining for a professional finish.
Info :
Puff stitch definition used here: Yarn over, insert hook into designated stitch, yarn over and pull up loop (repeat to have 4 loops on hook), yarn over and pull through all loops, ch1 to close puff if specified. Maintain even loop height for consistent puff size. For clarity we will define puff as 'puff (4)' meaning 4-loop puff closed by pulling through all loops and ch1 to stabilize.
— Star Mandala Motif (Make 2 identical) :
Round 1 :
Start with cream. MR, ch1, 6 sc in magic ring (6)
Round 2 :
Inc in each st around (6 inc) (12)
Round 3 :
(1 sc, inc) x 6 (18)
Round 4 :
(2 sc, inc) x 6 (24)
Round 5 :
(3 sc, inc) x 6 (30)
Round 6 :
(4 sc, inc) x 6 (36)
Info :
Change to warm sand for center texture. We will start adding puff clusters to build a textured center. If you prefer, add a small amount of stuffing inside the cream center to give the puffs slight lift before closing the small center ring.
Round 7 :
Change to warm sand. *sc in next st, puff (4) in next st, ch1* rep around finishing sc in last st to maintain shape (36)
Round 8 :
Switch to mid blue. Sc in each st working into sc and ch1 spaces (36)
Round 9 :
(3 sc, puff (4) in next st) x 9 (36) - place puff stitches evenly to form a ring of clusters
Info :
Ensure puffs are consistent; use a small crochet hook to pull loops up uniformly if you find loops uneven. Place stitch marker at the start of each round to keep orientation of petals aligned every round.
Round 10 :
Change to navy. 1 sc in each st (36)
Round 11 :
(2 sc, 1 inc) x 12 (48)
Round 12 :
1 sc in each st around (48)
Round 13 :
Change to sky blue. *ch2, skip 1 st, dc in next st, ch2, sc in next st* work across to form small openwork points; adjust to end with sc so count remains 48 overall (48)
Round 14 :
Switch to mid blue. Working in spaces: (sc, puff (4), sc) in each openwork ch2 space around to create doubled petals (48)
Info :
These rounds begin the star points. If you prefer sharper points, use front post stitches on the next round; for softer petals, continue with puff clusters.
Round 15 :
Change to navy. (4 sc, inc) x 8 (56)
Round 16 :
1 sc in each st around (56)
Round 17 :
Change to cream. *(sc in next 2 st, puff (4) in next st, sc in next 2 st)* rep across to emphasize petal tips (56)
Round 18 :
Switch to navy. 1 sc in each st around (56)
Round 19 :
Change to mid blue. *(sc in next 3 st, inc) x 8* (64)
Round 20 :
1 sc in each st around (64)
Info :
We will now form elongated star points by working shells and tall stitches into marked sections. Mark the start of 8 equal sections (64/8 = 8 sts per section) so you can center shells evenly.
Round 21 :
Change to sky blue. In each marked section: (sc 2, 3 dc shell in next st, sc 3) repeat around (64). Shells create raised points for the star petals.
Round 22 :
Switch to navy. Work 1 sc in each st and in shell spaces (64)
Round 23 :
Change to cream. In each shell: (sc 2, puff (4) in center dc of shell, sc 2) repeat around to add a textured tip (64)
Round 24 :
Switch to warm sand. 1 sc in each st around (64)
Info :
After this round, the motif is about full-size. If you want a slightly larger star, add one more increase round (increase evenly to 80 sts) before creating edge definition. Block motif flat before joining to panel.
Round 25 :
Change to mid blue. *(sc 6, 1 inc) x 8* (72)
Round 26 :
Switch to navy. 1 sc in each st around (72)
Round 27 :
Change to cream. Working in FLO: 1 sc in each st BLO of previous round to create a raised ridge around the star (72)
Round 28 :
Switch to navy. Work crab stitch (reverse sc) around edge to provide a finished look and slight curl resistance. Join and fasten off leaving long tail for joining (72)
Info :
Make two identical motifs. Block both motifs to the same dimensions. If one motif is slightly larger, stretch gently while wet-blocking to match. We will join motifs to a long central panel later with slip stitch join and decorative join rows.
— Central Mosaic Panel (Work one long panel to connect motifs) :
Panel Setup Row :
Using cream. Ch 68 (this will be the working width between star joins; adjust in multiples of 4 to keep diamond motif symmetry). Row counts below reference a width of 68 chains giving 68 base stitches.
Row 1 :
Row 1: sc in 2nd ch from hook and across (67 sc) - foundation row counts will be 67 active stitches across. Place a marker at stitch 34 (center) for alignment.
Row 2 :
Change to warm sand. Ch1, turn. sc in each st across (67)
Row 3 :
Switch to mid blue. Ch2 (counts as hdc), turn. *skip 1, 3 dc cluster over next 3 sts, skip 1, hdc in next* rep across to start a staggered cluster field. End with hdc in final st (67)
Row 4 :
Switch to cream. Ch1, turn. sc in each st and in cluster top spaces across (67)
Row 5 :
Change to navy. Ch2, turn. Work a mosaic diamond foundation: *hdc in next 4 sts, dc2tog over next 2 sts, hdc in next 4* rep across positioning decreases to form narrow diamond edges. Maintain 67 sts.
Row 6 :
Switch to sky blue. Ch1, turn. Sc across smoothing top of mosaic (67)
Info :
The panel uses a repeat of 8-row color motifs to form alternating diamonds and waves. Work carefully tracking center marker to ensure diamonds stack symmetrically under star motifs.
Row 7 :
Change to warm sand. Ch2, turn. *(hdc 2, dc in next st, hdc 2, dc2tog) across center area to form diamond points* - pattern adjusts over 67 sts, keep decreases balanced so stitch count remains 67.
Row 8 :
Switch to cream. Ch1, turn. Sc in each st across (67)
Row 9-12 :
Repeat Rows 3-6 to continue the mosaic diamond repeat (4 rows = one repeat). Keep color sequence: mid blue, cream, navy, sky blue as shown in photo (67)
Info :
At every 8 rows, the diamond motif will shift one half repeat. Work 10 full repeats (40 rows) to reach the approximate length matching the motifs pictured between star ends. You can adjust repeats to desired runner length.
Row 13-52 :
Continue repeating Rows 3-12 five times (totaling 40 rows in addition to initial rows) maintaining color order: warm sand accents within diamonds, mid blue for alternating diamonds, navy for outlines, and cream for background smoothing. Total panel rows after finishing = 52 rows. Stitch count stays consistent at 67 across.
Info :
Use blocking pins to keep panel edges straight and stitches even. Press lightly with steam if necessary but avoid flattening textured clusters.
Row 53 :
Change to cream. Ch1; sc across evenly in each st to prepare edge (67)
Row 54 :
Switch to navy. Ch1; 1 sc in each st BLO across to create a ridge which will accept motif join seams (67)
Info :
Place motifs aligned with panel ends so their inner edge centers coincide with the panel center markers. When joining, use slip stitch or whip stitch through the back loops of the motif ridge and the panel ridge to create a secure but subtle join.
— Joining Motifs to Panel :
Join Prep :
Lay one star motif centered at each short end of the panel with the star 'point' extending outward. Align motif center with panel center. Block and pin in place. Count and mark corresponding stitches around motifs where they meet the panel ridge (use the 72/67 relation; ease fabric slightly if counts differ).
Join Method :
Using cream or matching ridge color, join with slip stitch through motif edge ridge (Round 27/28 area) and panel BLO ridge (Row 54). Work slip stitch evenly - 1 sl st per stitch around the seam, adjusting tension to keep seam flat. Alternatively sew with tapestry needle using mattress stitch for invisible join. Fasten off and weave ends in securely.
Info :
If there is slight mismatch in counts, use small easing stitches or invisible increases/ decreases in the joining rounds to match edges; keep joins flexible to prevent puckering when runner is laid flat.
— Border and Scallop Edge :
Round 1 (Border Foundation) :
With navy, join at seam of motif to panel join. Ch1, sc evenly around entire runner through both layers where possible (approx 2 sc per panel row top/bottom or 1 sc per sc along sides) - count will vary depending on easing; aim for consistent placement and flat seam.
Round 2 :
Switch to cream. 1 sc in each st around, placing 3 sc in corners to help runner lie flat. Keep count even with previous round by making small increases at slight curves (count ~ perimeter stitch number).
Round 3 :
Change to sky blue. *sc 2, skip 1, shell (5 dc) in next st, skip 1* repeat around to create an open scallop pattern (adjust to fit perimeter repeats evenly).
Info :
To ensure scallops meet neatly at corners, mark corner points before beginning Round 3 and adjust shell placement by shifting the repeat by 1 or 2 sts if needed so corner shells are centered.
Round 4 :
Switch to navy. Ch1. Work sc in each st across and sc in top of each shell to anchor them (perimeter count unchanged).
Round 5 :
With cream: *sc in next 2 sts, shell (7 dc) in next st, sc in next 2 sts* repeat around producing a more pronounced scallop. Add 3 sc in each corner for neat turning.
Round 6 :
Switch to navy. Work crab stitch (reverse sc) around entire edge for a tidy finish. This forms the small bead-like edging seen in the photo and gives a crisp frame to the runner.
Info :
You can add an extra decorative scallop in alternating colors before the crab stitch for more depth. The pictured runner uses a three-color scallop: sky blue shell, cream anchor and navy finish.
— Decorative Raised Petal Row (Optional accent around motif edges) :
Round 1 :
With mid blue, join at motif edge and work 1 sc between each outer petal point to create a separate thin ridge (work around motifs only) (approx 72 sts per motif).
Round 2 :
Change to cream. In each sc between petals, work (sc, puff (4), sc) to create small raised petal nubs. Repeat around (72)
Info :
This optional row echoes the textured petal look pictured on the star edges and helps the motif stand away from the panel slightly. Use matching color to tone down or contrasting color to emphasize.
— Tassels and Braided Cord (Make 4) :
Material :
Use navy strands doubled with cream and sky blue accents. Each tassel uses about 12 strands of worsted yarn folded in half for fullness (approx 80-100mm long after trimming).
Step 1 :
Cut 24 lengths of navy yarn at 20cm each (folded length will be 10cm) and 6 lengths of cream and 6 of sky blue for contrast. Fold all strands in half and place under the corner chain loop. Use a small piece of navy to tie and secure at the top, then wrap several times around the knot to create a neat head. Fasten and weave ends in.
Step 2 :
Comb out tassel strands lightly and trim even. For an elongated tassel as pictured, leave fringe long (approx 8-10cm). Create braided cords by making a 3-strand braid with 3 folded groups of colors for each corner; attach tassel to braid end with a sturdy knot and sew the top of the braid to the corner securely.
Info :
Make tassels sturdy by using doubled yarn and reinforcing the top wrap with a drop of fabric glue if desired. Sew braid top through border edge stitches for extra security.
— Finishing Touches :
Weaving :
Weave in all ends through adjacent stitches on the back of the runner. Use a tapestry needle to bury ends at least 5cm into the fabric for durability. Trim any stray fibers.
Blocking :
Wet block or steam block entire runner flat: pin edges and motifs to a blocking mat, allow to dry completely to set stitches and shape motifs so the runner lies flat on the table.
Info :
For heavy use, consider lining the back with a thin fabric adhered with fabric glue or sewn in place to protect table surface and reduce movement. Alternatively add non-slip pads under runner corners when displaying on smooth surfaces.
Care :
Spot clean if necessary or handwash gently in cool water. Reshape and lay flat to dry. Avoid high heat dryers to preserve texture and color.
You've completed a stunning Boho Star Table Runner that combines striking star mandalas, mosaic diamonds and a scalloped border — a perfect blend of color and texture. Each stitch contributes to a cozy, handmade accent that will brighten your table and spark conversation. Enjoy the tactile depth created by the puff and shell stitches, and feel proud that you built this piece start-to-finish. 🧶 Lay it out, add tassels, and celebrate your beautiful craftsmanship! 🌟