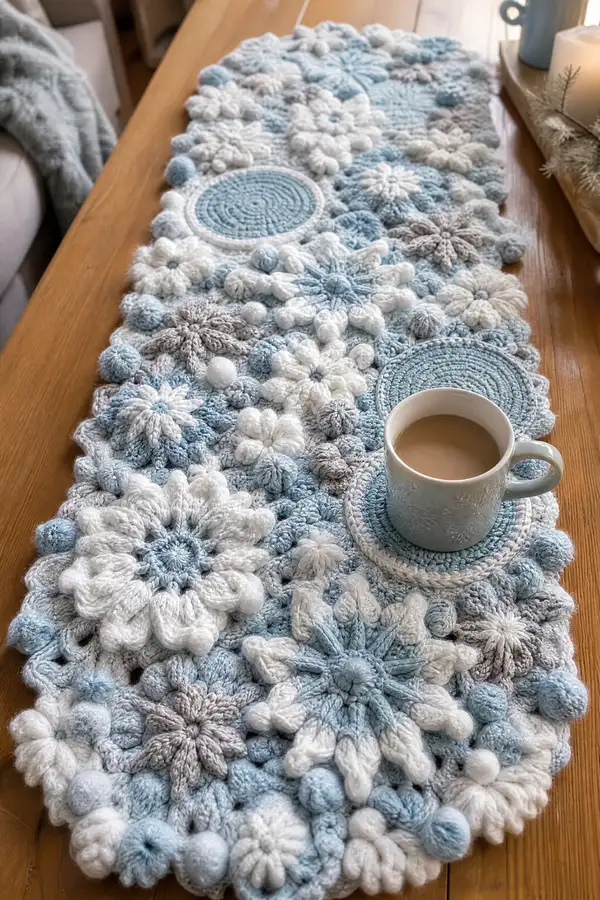
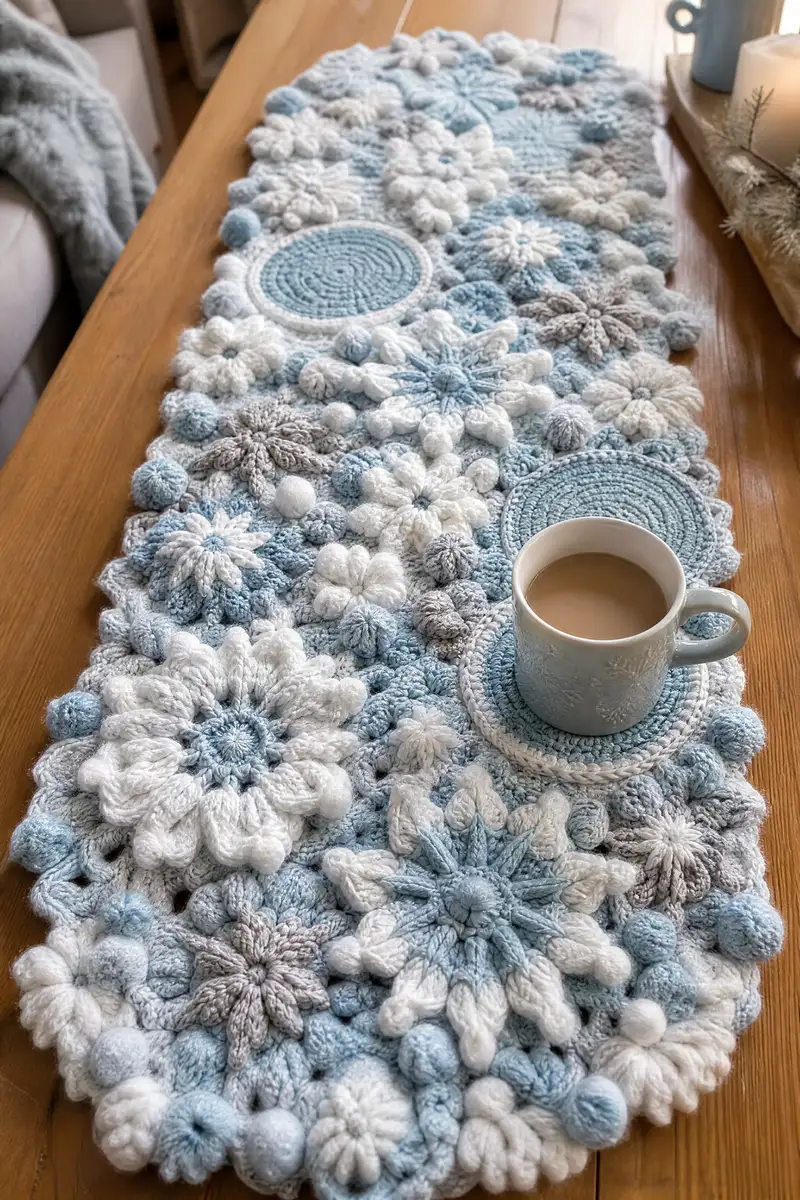
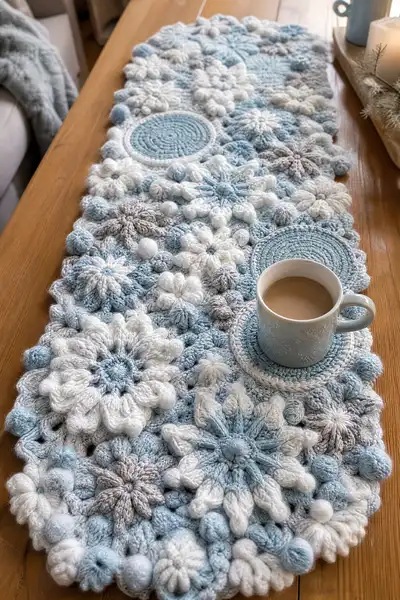
Create a cozy, textured winter table runner made from layered snowflake and floral motifs in soft icy blues, white and dove grey. This assembled motif runner features puff petals, bobbles and round coaster motifs for a sculptural, festive centerpiece. Perfect for holiday decorating or a calming winter table setting with plush texture and delicate scalloped edges.
Progress Tracker
0% Complete
— Materials, Gauge & Notes :
Info :
Gauge is not critical for the mosaic look but try to maintain consistent tension; sample large round (18 rounds) should measure approximately 6.5-7.5 inches across depending on yarn and hook. Use stitch markers at round starts and block each motif flat before joining. Puff and bobble stitches create dimensional texture; work slightly tighter for stability.
Info :
Puff stitch (US): yarn over, insert hook into indicated stitch, yarn over, pull up loop (repeat 3-4 times as instructed), yarn over and pull through all loops on hook, ch1 to secure. Bobble stitch variant: complete 5 partial double crochet pulls, close and ch1. Use smaller hook for puff/bobble if needed to keep shape sturdy.
— Large Circular Coaster Motif (Make 2-3 depending runner length) :
Round 1 :
6 sc in magic ring (6)
Round 3 :
(1 sc, inc) x 6 (18)
Round 4 :
(2 sc, inc) x 6 (24)
Round 5 :
(3 sc, inc) x 6 (30)
Round 6 :
(4 sc, inc) x 6 (36)
Info :
Switch to contrasting white or grey yarn here if you want a ring of color. Carry yarn or fasten off and join new color with sl st in any stitch.
Round 7 :
1 sc in each st (36)
Round 8 :
1 sc in each st (36)
Round 9 :
(4 sc, inc) x 6 (42)
Round 10 :
1 sc in each st (42)
Round 11 :
1 sc in each st (42)
Info :
To make a slightly raised rim, work Round 12 in BLO to create a defined edge before doing final shell. This gives a coaster-like rim for cups in photos.
Round 12 :
1 sc in each st BLO (42)
Round 13 :
(6 sc, inc) x 6 (48)
Round 14 :
1 sc in each st (48)
Round 15 :
Sl st, ch1, repeat *sc, ch2* around to create small picot-like spacing then join (48 small spaces)
Round 16 :
Work shell edging: *skip 2, (5 dc in next st), skip 2, sl st in next* repeat around to create scallops (approx 12 scallops)
Info :
Block flat immediately after finishing to ensure round is even. Use pins to shape scallops gently outward for a tidy cup-resting area.
— Large Layered Snowflake Motif (Make 6-8) :
Round 1 :
6 sc in magic ring (6)
Round 3 :
(1 sc, inc) x 6 (18)
Round 4 :
(2 sc, inc) x 6 (24)
Round 5 :
1 sc in each st (24)
Info :
Change to white yarn for snowflake petals on Round 6 to create high contrast. Fasten off blue if used and join white with sl st.
Round 6 :
*ch3, skip 1, sl st in next* around to create 12 small ch-spaces for petal anchors (12 ch-3 loops)
Round 7 :
In each ch-3 loop: work (ch2, puff x4, ch2) anchored with sl st in same loop to form first layer petal (12 petals)
Round 8 :
Sl st into base of petal, ch1, 1 sc in petal base, *ch4, anchor with sl st between petals* repeat around producing ch-4 spaces (12 spaces)
Round 9 :
For second layer large petals: in each ch-4 space work (ch3, puff x5, ch3) anchored with sl st (12 large puff petals)
Info :
For puff stitches: yarn over, insert, pull up loop; repeat until specified number of loops on hook (4-5), yarn over and pull through all loops, ch1 to secure. Keep loops similar height for neat petals.
Round 10 :
Rotate motif and work a round of sl st between petals to stabilize: sl st into base of each petal and into base of large puff (24 sl st total)
Round 11 :
Switch to pale grey for subtle background texture (optional). Work 1 sc in each st and around petal bases to tidy edges (approx 48 sc)
Round 12 :
Work small bobbles between each large petal: *ch1, make bobble in next available st, sl st into next* repeat 12 bobbles
Round 13 :
Work a round of 1 sc in each stitch (approx 72 sc) to create a backing cushion that sits flush with other motifs
Round 14 :
Work a decorative round: *(sc in next 3, ch2, sc in next 3) x 12* to create spacing for joining points (72 sts)
Round 15 :
Sl st around edges and fasten off leaving long tail for sewing. Block gently to flatten petals and adjust puff height.
Info :
Optional: Add a small embroidered French knot or a tightly woven little puff in center for extra definition. If using fiberfill, put a tiny pinch inside center before closing to slightly lift center without flattening petals.
— Medium Star/Snowflake Motif (Make 8-10) :
Round 1 :
6 sc in magic ring (6)
Round 3 :
(1 sc, inc) x 6 (18)
Round 4 :
1 sc in each st (18)
Round 5 :
*ch8, skip 1, sl st in next* around to create 9 loops
Round 6 :
Working in each loop: (ch2, puff x4, ch2) anchor with sl st to make 9 medium petals
Round 7 :
Sl st around petal bases then work 1 sc in each st between petals to tidy (approx 36 sc)
Round 8 :
Make 9 small bobbles: in next 9 evenly spaced stitches work bobble, ch1 between to separate (9 bobbles)
Round 9 :
Work one round of 1 sc in each st (approx 45 sc). Fasten off and block motif flat.
Info :
Alternate colors white/blue/grey for these medium motifs to create an organic spread. Blocking will open petals and make motifs sit evenly when joined.
— Small Rosette Motif (Make 12-18) :
Round 1 :
6 sc in magic ring (6)
Round 3 :
*ch4, sl st into every 2nd st around* to create 6 little loops (6 ch-4 loops)
Round 4 :
In each loop: (hdc, puff x3, hdc) anchor with sl st to form 6 small petals
Round 5 :
Sl st around base and work 1 sc in each st (approx 24 sc). Fasten off and weave ends.
Info :
These small rosettes fill gaps between larger motifs and can be worked very quickly; use leftover yarn ends to make lots of them without wasting skeins.
— 3D Puff-Bobbles (Make many for mosaic fill) :
Round 1 :
6 sc in magic ring (6)
Round 3 :
1 sc in each st (12)
Round 4 :
Make bobble cluster: *(bobble in next st), sc in next* repeat around (6 bobbles, 6 sc)
Round 5 :
1 sc in each st around to create neat backing (12)
Round 6 :
Fasten off leaving long tail. Add a tiny pinch of fiberfill inside bobble if you want it extra round. Sew base closed and weave tail through several stitches to secure.
Info :
Work many of these small puff-bobbles in alternating colors to fill small holes between petals like pebbles in a mosaic. They add lots of tactile interest.
— Petal Fringe Motif (Make 6-10 small petals clusters) :
Round 1 :
6 sc in magic ring (6)
Round 3 :
*ch6, sl st into next* around to make 6 loops
Round 4 :
In each loop: (sc, puff x3, sc) anchor with sl st. Fasten off (6 petals)
Info :
Use these to fan out near large snowflakes edges; they provide transitional texture between motifs and border.
— Joining & Layout (Large assembly section) :
Info :
Layout all motifs on a large blocking board or table in desired arrangement before joining. Photo shows alternating large round coasters, layered snowflakes and medium stars with small rosettes and puffs filling gaps. Take a phone photo to remember placement. Join using two methods: join-as-you-go (JAYG) for motifs that touch directly, and whip stitch/sewing for small rosettes and puffs for secure 3D texture.
Info :
Recommended arrangement for shown runner: Central spine of large round motifs spaced evenly along runner length. Surround each large round with 3-4 large snowflake motifs and alternate medium stars around edges. Fill gaps with rosettes and bobbles. Leave a 1-2 stitch seam allowance between motifs to avoid bulky overlaps.
Joining Method A (JAYG) - Basic :
Place two motifs wrong sides together where they touch. With right side of motif A facing you and tail from motif B, sl st through edge stitch of motif A then edge stitch of motif B, continue around contact area to create flat seam. Work slowly to maintain petal orientation. Fasten off and weave ends.
Joining Method B - Sewing :
Thread yarn needle with long tail of one motif. From wrong side, ladder/stitch through back loops of both motifs edge stitches (through 2-3 loops for strength). Use small, even stitches and stitch twice over sure seams for the heavy petals. Knot and weave tails into motif backs.
Round 1 :
Begin joining sequence: pick two adjacent motifs with similar edge counts. Align edges and use JAYG sl st every 3rd stitch for an invisible, flexible join. Repeat across length. (No stitch count - join to fit edges)
Info :
Where curved scallops meet puff petals, use whip stitch and a small invisible ladder stitch to hold shape. For 3D bobbles that cross gaps, sew their bases into the backs of two neighboring motifs to anchor firmly.
Round 2 :
Once central motifs are joined, hand-sew smaller rosettes and puff-bobbles into gaps. Thread tapestry needle, position rosette centrally in gap, stitch through petal bases at four compass points to secure. Add 1-2 stitches through bobble bases to anchor.
Info :
Periodically turn runner over to check that joining on wrong side is flat and not bulky. Trim any tails that peek out and weave them well into the backing stitches. Use a very small running stitch to lock seams if you expect heavy use.
— Border & Scalloped Edge :
Round 1 :
Work a round of 1 sc around entire assembled runner edge to tidy joins. Work 2 sc in corner or tight curve spaces to keep the edge even. Stitch count varies with assembled perimeter.
Round 2 :
Work 1 sc in each st producing a neat rim (evening out joins). For interior joins where seams meet, work 1 sc through both seam loops and the motif edge to secure seam.
Round 3 :
*skip 2, (5 dc in next st), skip 2, sl st in next* repeat around to create scallop shells. Where scallops meet petals, reduce or increase stitches to maintain smooth curve. Approximate scallops will be 12-18 depending runner width.
Round 4 :
In each scallop: ch1, sl st in center top of shell to anchor. This creates a soft outer ridge and prevents scallops from flipping up.
Info :
For a lightly raised edge, work Round 3 in FLO to create a subtle ridge on the right side. Block the entire runner after border is complete to set scallops and smooth joins.
Round 5 :
Fasten off and weave all ends through the back into large seams. Use small amount of matching yarn to tack any scallops that feel loose onto adjacent petals to ensure stability during use.
— Optional Surface Embellishment :
Round 1 :
Use a contrasting light grey to add a single strand of surface slipstitch lines radiating from centers of big snowflakes to suggest icy veins: insert hook from RS, sl st in each stitch for 6-8 stitches, fasten off.
Info :
Keep embroidery minimal to retain soft cottage look; a few lines per large motif add vintage charm without overwhelming texture.
— Finishing & Blocking :
Info :
Gently wash runner by hand in lukewarm water with mild soap. Press out excess water without wringing and block on foam mats matching final shape. Pin petals and scallops into place and spray lightly with starch if you want extra stiffness. Let dry overnight.
Round 1 :
After drying, inspect for loose seams and reinforce with hidden whip stitch through seam loops. Trim ends and tuck them into motif backs.
Info :
For machine-washable, choose a washable worsted yarn and skip starching; expect gentle flattening of puffs after washing—re-fluff by hand while damp and re-block.
This winter snowflake table runner brings cozy texture and seasonal charm to any table. The layered puff petals and bobble clusters create a playful, dimensional centerpiece you can be proud of. Make it in your favorite palette for year-round decor or holiday cheer. 🧶❄️ Enjoy the slow, mindful making — each motif is like a small celebration of stitches. Share a photo once finished; it will brighten someone’s feed and your home! 🎁