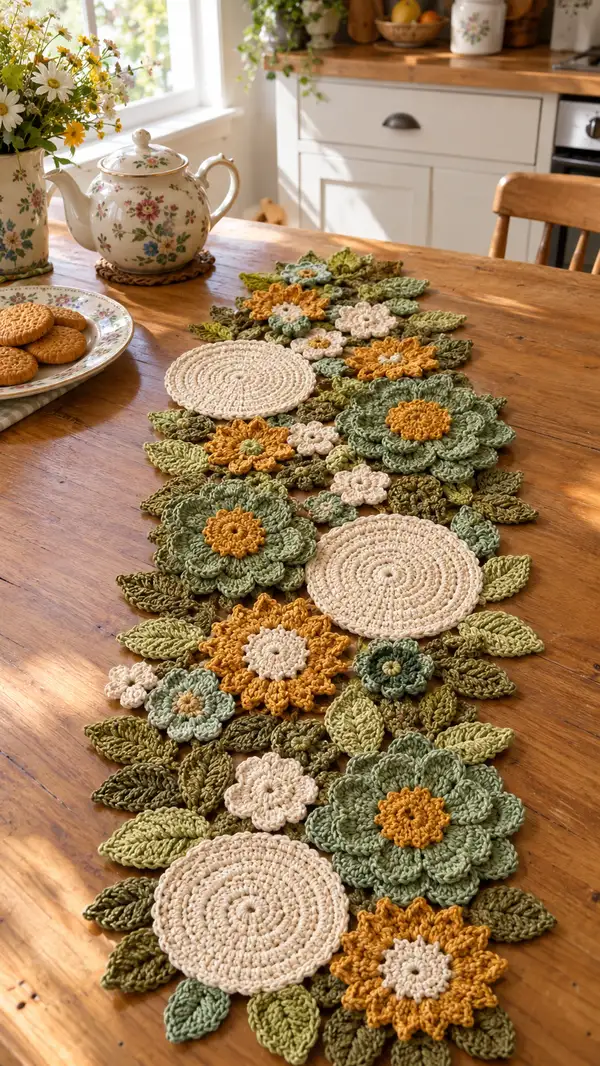
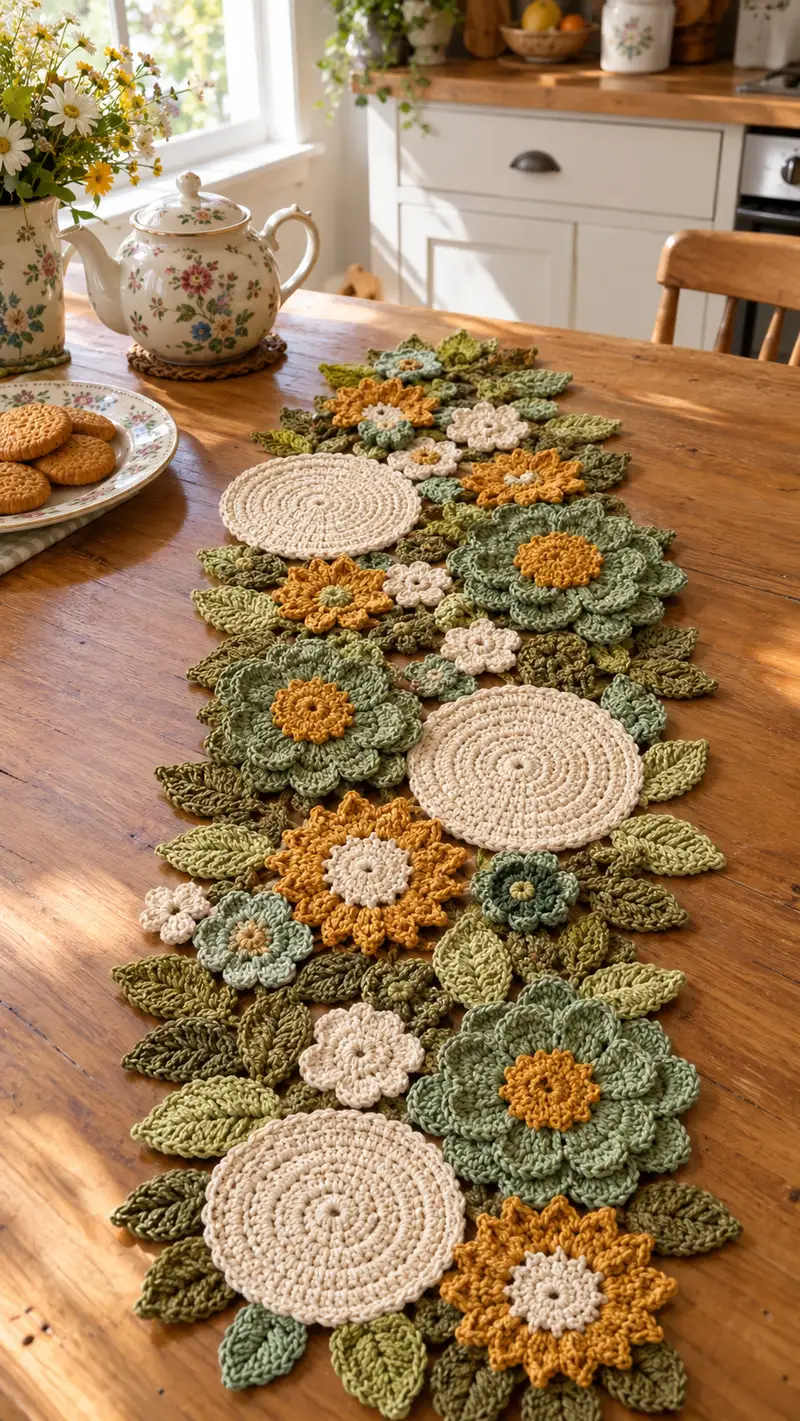
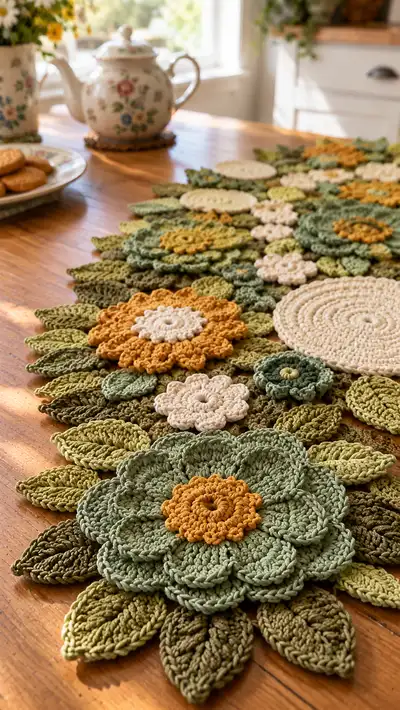
A layered floral table runner made from crochet flowers, leaves and round mats in soft greens, warm mustard and cream. This design features large multi-layered flowers, small blossom clusters, textured leaves, and circular placemat motifs linked into a flowing runner. The finished piece adds a cozy, vintage-inspired touch to a wooden table and can be scaled or customized with color swaps.
Progress Tracker
0% Complete
— Pattern Overview :
Info :
This pattern is modular: you will crochet multiple Large Flowers, Medium Flowers, Small Flowers, Round Mats and Leaves then join them in an organic layout to form a table runner approximately 36-42" long and 10-14" wide as photographed. Adjust motif counts to change overall size.
Gauge :
Large flower (center to outer petal) approx 6.5-7" across using 4.0mm hook and worsted cotton. Leave slight variations for a natural look.
Info :
Work tightly enough that motifs hold shape but not so tight that petals lose elasticity. Use stitch markers for round starts and to mark petal anchor points.
— Large Flower (Make 4-6) :
Round 1 :
mr, 6 sc into ring, pull tight (6)
Round 2 :
inc in each st around (12)
Round 3 :
(1 sc, inc) x6 (18)
Round 4 :
(2 sc, inc) x6 (24)
Round 5 :
(3 sc, inc) x6 (30)
Info :
Center is a dense disc to anchor petals. Change to mustard for a contrasting center before Round 6 if desired.
Round 6 :
Join mustard yarn, ch1, 1 sc in each st around (30)
Round 7 :
(4 sc, inc) x5, 5 sc (35)
Round 8 :
1 sc in each st around (35)
Info :
Begin petal base: switch to main petal color (sage) and work petals into front loops of Round 8 for a subtle ridge.
Round 9 :
*ch3, 3 dc in next st, ch3, sl st into same st (creates petal base), sk 2 sts, sl st into next st* rep around to make 10 petal anchors (10 cluster petals)
Round 10 :
Working into ch3 spaces: *(sc, hdc, 3 dc, hdc, sc) in ch3-sp* around (10 petals)
Round 11 :
Sl st to base between petals to secure, 1 sc in each st around to tidy base (50)
Info :
Check petal count and spacing: you should have 10 full petals. Adjust placements by unpicking the sl st anchors if needed for even spacing.
Round 12 :
Switch to a slightly darker sage for second petal layer. Working behind first petal layer: join in base st, ch2, *(2 dc, ch1, 2 dc) in same st to form v-pearl, sk next petal base, sl st in next base* rep around to form 10 v-clusters (40)
Round 13 :
Into each v-cluster: *(sc, 2 dc, tr, 2 dc, sc) in v-cluster* (10 larger petals)
Round 14 :
1 sc in each stitch around the base to secure petals and even edge (approx 80)
Info :
After Round 14 the large flower should have two distinct petal layers and a tidy sc base. Weave in any mustard tail from center. Block lightly if needed to open petals.
Round 15 :
Optional texture row: FLO 1 sc in each st around to create a scalloped inner ridge (80)
Round 16 :
Optional picot edging: *sc in next 3 sts, (ch3, sl st in last sc) repeat around* (20 picots)
Info :
Fasten off leaving 6-8" tail for joining. Make sure petals are evenly shaped; steam-block petal tips if needed for consistent curves.
— Medium Flower (Make 6-8) :
Round 1 :
mr, 6 sc into ring, pull tight (6)
Round 2 :
inc in each st (12)
Round 3 :
(1 sc, inc) x6 (18)
Round 4 :
1 sc in each st around (18)
Info :
Change to mustard center or a contrasting small color here if desired. This flower uses 9 petals that sit slightly underneath the large flower's second layer.
Round 5 :
*ch3, 5 dc in next st, sl st into same st, sk 1 st, sl st in next st* rep 6 times to make 6 fuller petals (6)
Round 6 :
Into each petal: *(sc, hdc, 3 dc, hdc, sc) in petal center* (6 petals)
Round 7 :
Round of sc around to tidy (approx 54)
Info :
Make a second petal layer by joining darker green behind first layer: join at base, ch2, *(2 dc, ch1, 2 dc) around each petal base* to create 6 v-clusters for a layered look
Round 8 :
Into v-clusters: *(sc, 2 dc, tr, 2 dc, sc) x6* (6 larger petals)
Round 9 :
1 sc in each st around to finish (approx 72)
Info :
Fasten off leaving 6-8" tail for joining. These medium flowers tuck nicely between large flowers to create density.
— Small Flower (Make 10-14) :
Round 1 :
mr, 6 sc into ring (6)
Round 3 :
*ch3, 3 dc in next st, sl st in same st* rep 6 times to form 6 tiny petals (6)
Round 4 :
Slip stitch around base to tidy and finish with a small center knot; fasten off leaving long tail for sewing (12)
Info :
Small flowers are used as filler and are best placed in clusters. Make some in cream and some in light moss green for contrast.
— Round Mat / Circular Motif (Make 3-4) :
Round 1 :
mr, ch1, 6 sc into ring, pull tight (6)
Round 2 :
inc in each st around (12)
Round 3 :
(1 sc, inc) x6 (18)
Round 4 :
(2 sc, inc) x6 (24)
Round 5 :
(3 sc, inc) x6 (30)
Round 6 :
(4 sc, inc) x6 (36)
Round 7 :
1 sc in each st around (36)
Info :
These circular mats act as neutral anchors in cream. If you prefer a tighter spiral, use 3.5mm hook and adjust rounds to maintain flat disc.
Round 8 :
Work in BLO 1 sc in each st around to create a slight ridge (36)
Round 9 :
Optional: *ch2, sk 1 st, sl st* around for a subtle decorative chain edge (18 loops)
Round 10 :
Fasten off leaving 6-8" tail for joining. Block flat to open disc fully if needed.
— Leaf (Small) (Make 24-30) :
Round 1 :
ch6, sc in 2nd ch from hook, hdc, dc, hdc, sc (5 sts across) then work along opposite side of foundation chain: sc, hdc, dc, hdc, sc in corresponding sts; sl st to join to first sc (10)
Round 2 :
Ch1, 1 sc around leaf edge working evenly, add 1 sc in tip to turn, continue back to start (approx 18)
Round 3 :
Working in FLO on both sides, *ch2, sk 1 st, sl st* around to create a textured vein edge (6 small picots)
Info :
Make leaves in several greens for depth. Use BLO or FLO where specified to create a raised central vein when assembled.
Round 4 :
Fasten off leaving tail for joining. Lightly block each leaf to shape the point and curve.
— Leaf (Large) (Make 18-24) :
Round 1 :
ch8, sc in 2nd ch from hook, hdc, dc, tr, dc, hdc, sc across (7 sts across), work down opposite side: sc, hdc, dc, tr, dc, hdc, sc; sl st to join (14)
Round 2 :
Ch1, 1 sc in each st around adding 2 sc in tip to turn, continue returning to starting point (approx 26)
Round 3 :
In center of leaf, working FLO: *1 sc in next 2 sts, hdc in next, 2 dc in center st, hdc, 1 sc, 1 sc* to create a raised central vein (26)
Round 4 :
Optional: picot edge: *sc 2, (ch3, sl st in last sc)* around to give decorative edge (approx 8 picots)
Info :
Large leaves are used to frame large flowers and underlay petal edges. Pin them into place when arranging motifs for a natural sculpted effect.
Round 5 :
Fasten off leaving 8-10" tail for secure joining.
— Filler Leaves and Tiny Foliage (Make 20-30) :
Round 1 :
ch5, sc in 2nd ch from hook, hdc, dc, sc, sl st to first sc to create a tiny leaf (5)
Round 2 :
Fasten off leaving tail for sewing. These are great to tuck between petals and around circular mats.
Info :
Make many small fillers in varying greens to create the lush look. Vary orientation and depth when sewing to give a layered finish.
— Joining Motifs & Layout :
Info :
Arrange motifs on a blocking board or table in an organic layout similar to photo: place circular mats as anchors, large flowers spaced along runner, medium flowers and small flowers filling gaps, leaves fanning out from edges. Pin everything in place before joining.
Round 1 :
Join-as-you-go method: with right sides up on motif being attached, use long tail from motif to whip stitch into adjacent motif’s outer sc rounds. Work evenly along shared edges with small mattress stitch to create an invisible seam.
Round 2 :
Where two petals overlap, secure by sewing through the back loop of the petal base and the front loop of the adjacent motif to lock layers (use 6-8 secure stitches per overlap).
Round 3 :
When joining a large flower to 3-4 leaves: place leaves so they radiate from under petals, then anchor with 10 evenly spaced whip stitches around the flower base.
Info :
Take photographs of your layout before sewing permanently. Joining loosely first allows adjustments. Work from center outward, attaching motifs to multiple neighbors for stability.
Round 4 :
For circular mats, sew leaves and small blossoms around the perimeter first to create a natural halo, then attach the halo to the main runner by sewing through inner sc rounds at 8-10 even anchor points.
Round 5 :
Reinforce high-stress points (where runner will be handled) with a few extra passes of thread or yarn on the underside to prevent loosening over time.
— Edging & Final Border :
Round 1 :
Once motifs are joined, work an optional picot or sc border around the entire runner: attach cream yarn at one edge, ch1, sc evenly around edges and into gaps; place 2 sc in corners to prevent curling (work until you reach the end; stitch count varies by layout)
Round 2 :
Optional scallop: *5 dc in next gap, sl st in next st* around entire perimeter to create a sunlit wavy edge.
Info :
Edge reinforcement: use a 3.5mm hook for the border if you'd like a tighter trim. Block entire runner flat and steam lightly for finished look.
Round 3 :
Weave in all tails on wrong side with yarn needle. Trim ends and give a final light steam block to soften yarn and set shape.
Round 4 :
Optional: stitch small snaps or non-slip pads to underside if using under hot items; however cotton will handle warm teapots but not prolonged very hot cookware.
Info :
Care instructions: hand wash or gentle machine wash in cold water and lay flat to dry. Re-block after washing if necessary to restore shape.
This botanical runner combines classic crochet stitches with layered florals to bring a touch of handmade warmth to your table. Each motif is designed to interlock and create a luxe, cottage-garden feel that looks beautiful in any home. Enjoy the slow, satisfying process of making petals, leaves and little blossoms, and watch them bloom into a lovely, functional centerpiece. 🧶🌿 Happy stitching — I can't wait to see how yours turns out! ✨