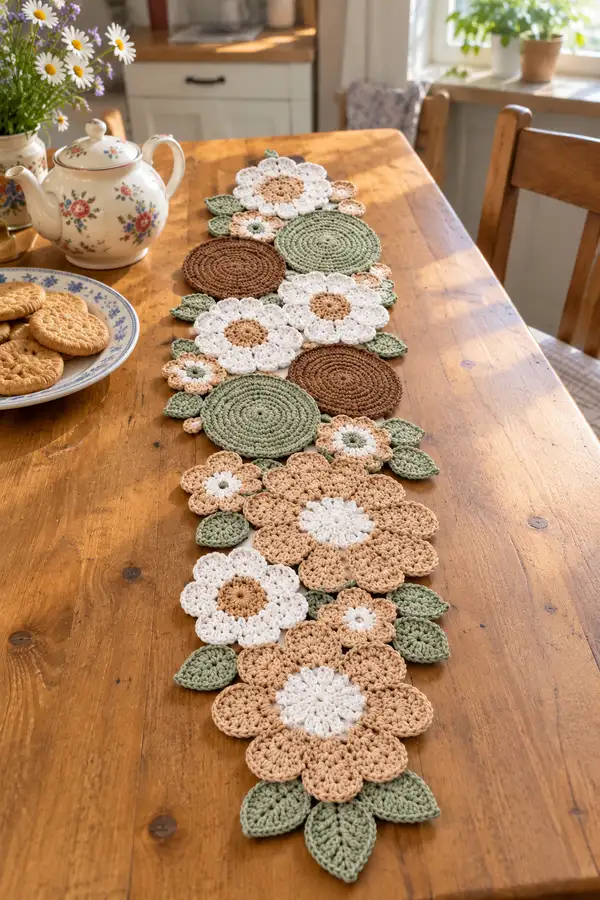
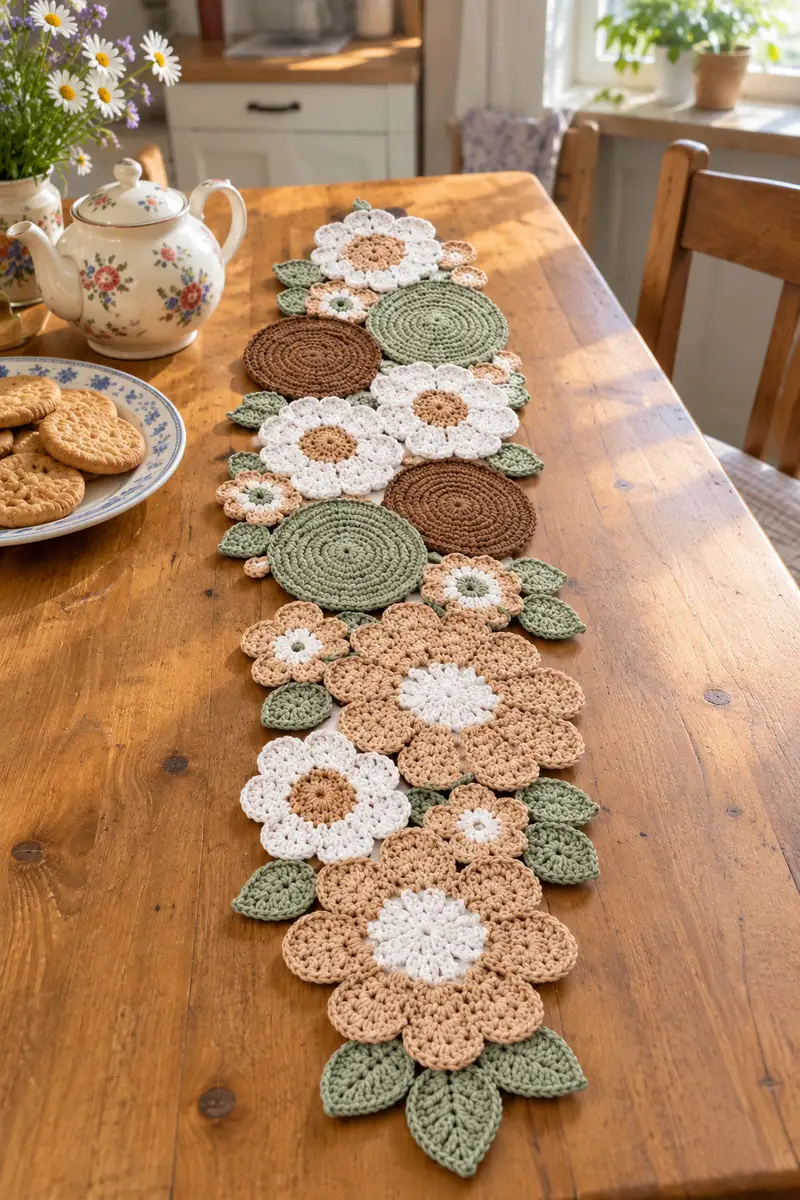
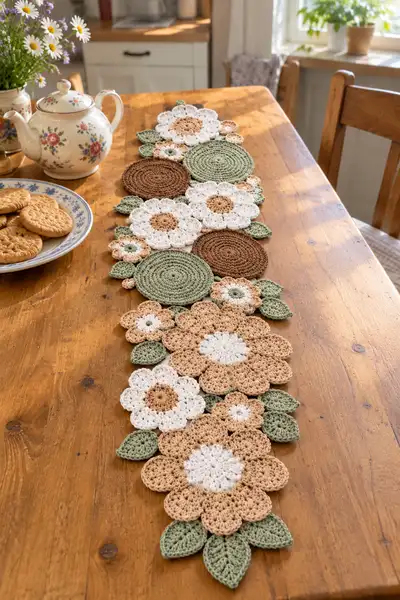
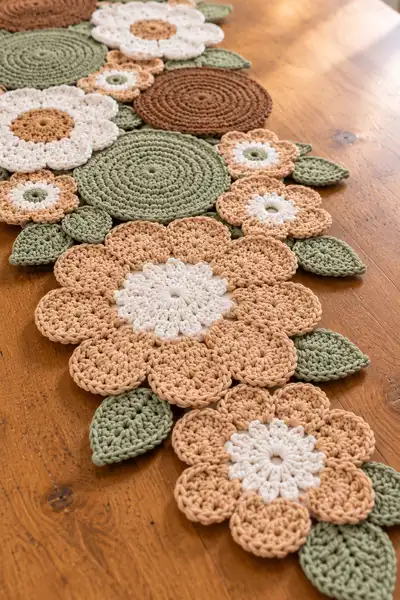
This charming floral table runner is made from crocheted discs, layered flowers and leafy motifs in a soft neutral palette. The runner features large scalloped blossoms, textured circular mats and delicate leaves joined into an organic cluster that flows down the table. Designed to look great alone or layered under a vase or teapot, this pattern uses worsted-weight cotton for a sturdy, washable finish.
Progress Tracker
0% Complete
— Large Round Motif (Disc) :
Round 3 :
(1 sc, inc) x 6 (18)
Round 4 :
(2 sc, inc) x 6 (24)
Round 5 :
(3 sc, inc) x 6 (30)
Info :
These discs are the circular bases seen in sage and brown. Work tightly but not so tight the disc curls. Use a stitch marker at first stitch and move it each round.
Round 6 :
(4 sc, inc) x 6 (36)
Round 7 :
(5 sc, inc) x 6 (42)
Round 8 :
(6 sc, inc) x 6 (48)
Info :
At round 8 the disc will be roughly 9-10cm across using worsted cotton. If your disc is cupping, add an extra even round of sc (1 sc in each st) until it lies flat.
Round 9 :
1 sc in each st around (48)
Round 10 :
1 sc in each st around (48)
Round 11 :
1 sc in each st around (48)
Info :
Work rounds 9-11 as flat even rounds to build body of the disc for a substantial base. If you prefer a narrower disc, stop at round 10.
Round 12 :
1 sc in each st BLO (48)
Info :
Worked in BLO to create a subtle ridge at the edge. Fasten off and weave in ends. Make 4 large discs: two in sage, two in brown (or arrange to taste).
— Big Scalloped Flower (Large Petal Flower) :
Round 1 :
ch 4, join with sl st to form ring, ch 2 (counts as hdc), 11 hdc into ring, join (12 hdc)
Round 2 :
ch 2, 1 hdc in same st, 2 hdc in each st around, join (24 hdc)
Round 3 :
ch 1, sc in same st, (ch 3, skip 1, sc) around to create 12 ch-3 loops, join with sl st
Info :
These ch-3 loops are the foundation for petals. Keep loop spacing even so petals are nice and rounded. Use cream or white for inner center if following the photo.
Round 4 :
Join petal color in any ch-3 sp, *(dc, tr, dc) in ch-3 sp, sl st in next ch-3 sp; rep from * around to make 6 tall petals (each petal uses 1 ch-3 sp) (6 petals)
Round 5 :
ch 1, sc in first petal base, *5-dc shell across next petal (dc, dc, tr, dc, dc) in center of petal, sc in sl st between petals; rep around (6 shells)
Round 6 :
ch 2, work (hdc, dc, hdc) across each shell center to round out petal edges, join (6 petals)
Info :
Petal shaping uses clusters and shells to give the puffy scalloped look seen in the large flowers. Keep tension moderate so petals sit slightly raised from the table.
Round 7 :
Work 1 sc between petals in the sl st spaces and 2 sc evenly along the outer edges of each petal to fill gaps and make a smooth outer edge (approx 36 sc total)
Round 8 :
1 sc in each st around to tidy edge (approx 36 sc)
Info :
Fasten off and weave ends. Make 3–4 large scalloped flowers; use tan petals with white centers for the look in the photo. Block lightly to set petals in place.
— Medium Flower (Round Center with Petals) :
Round 3 :
(1 sc, inc) x 6 (18)
Round 4 :
1 sc in each st around (18)
Info :
This small round becomes the flower center. Use tan or cream as center color. Change color for petals in the next round.
Round 5 :
Change to petal color. *ch 3, sl st in next st; rep from * around to make 9 ch-3 loops, join (9 loops)
Round 6 :
In each ch-3 loop: (sc, hdc, 3 dc, hdc, sc) to form puffed petal; rep around (9 petals)
Round 7 :
1 sc around across petals to secure and tidy edge (approx 54 sc)
Info :
Make 4–5 of this medium flower in alternate colors (white/tan or tan/white). Vary the number of petals (8–10) by adjusting ch loops if you want a slightly different look.
— Small Flower (Tiny Accent) :
Round 3 :
*ch 2, sl st in next st; rep from * around to create 6 ch-2 loops, join (6 loops)
Round 4 :
In each ch-2 loop: (sc, 3 dc, sc) to form small petals (6 petals), join and fasten off
Info :
These are the little daisies scattered across the runner. Make 8–12 in various color combinations for visual interest.
— Leaf (Make Many) :
Round 2 :
sc in 2nd ch from hook, hdc in next, dc in next 3 ch, hdc in next, sc in last ch, continue working on opposite side of foundation chain: sc in first ch, hdc, dc in next 3, hdc, sc in final ch; sl st to first sc (14 sts total)
Round 3 :
ch 1, 1 sc in same st, *(sc, hdc, 3 dc, hdc, sc) across leaf center evenly to deepen curve; rep for second side as needed, sl st to join
Info :
Leaves are worked flat and symmetrical. Use FLO for a subtle ridge down the center if desired: in the final round work sc in each st FLO to create a veined look.
Round 4 :
1 sc around in FLO to create vein effect (14)
Info :
Make many leaves (about 18–26) depending on runner length and how much green edging you want. Leaves are typically 3–4cm long in worsted cotton with a 4.0mm hook.
— Large Circular Flower Center (Solid Disc Center) :
Round 3 :
(1 sc, inc) x 6 (18)
Round 4 :
(2 sc, inc) x 6 (24)
Round 5 :
(3 sc, inc) x 6 (30)
Round 6 :
(4 sc, inc) x 6 (36)
Round 7 :
1 sc in each st around (36)
Info :
These smaller solid discs can be used as inner centers for the large scalloped flowers or as connecting mats between motifs. Make 3–6 in sage or brown to echo the large discs.
— Alternative Petal Variation (Dense Puff Petals) :
Round 1 :
Make a 6-sc mr, then round 2: 6 inc (12)
Round 2 :
*(ch 2, 3-tr cluster, ch 2, sl st in next st); rep around for 6 puff petals, join
Round 3 :
sc around in-between petals to tidy edge (approx 36 sc)
Info :
This petal style is used on the larger peach-colored blooms for a fuller, textured petal. Choose which petal style you prefer for each large flower.
— Making Multiple Motifs & Adjusting Size :
Info :
Decide your runner length: the sample shown uses roughly 9 large/medium flowers + 4 discs + 6 small flowers + many leaves for a runner approximately 110–120cm long. Add or remove motifs to scale.
Tip :
Make motifs in batches of the same type for consistent tension. Block several motifs at once to match shape and size prior to joining.
— Joining Motifs (Slip-Stitch Join & Whip Stitch Finishes) :
Info :
Lay out your motifs on a flat surface following an arrangement you like. The visual in the photo has large scalloped flowers alternating with discs and small flowers to create a flowing diagonal layout. Pin pieces down if needed.
Step 1 :
Start joining the motifs using a whip stitch with matching yarn for an invisible seam: place two motifs right sides up overlapping edges slightly (approx 4–6 stitches overlap). Using a yarn needle and a length of yarn, insert needle through the back loop only of motif A and then back through the corresponding back loop of motif B; pull snug but not tight. Repeat along overlap to secure.
Info :
For lighter visible joins, use a slip-stitch join in the back loops: hold motifs wrong sides together and sl st through back loop of both motifs spaced every 2–3 sts for a stronger seam that reads as a thin ridge on the wrong side.
Step 2 :
When joining round discs to flower edges, align disc edge with the base of petals so the disc sits nestled between flowers. Secure with 6–10 whip stitches around the shared edge for stability.
Info :
If you prefer a decorative visible seam, use contrasting yarn and blanket stitch around overlapping edges to give a stitched look. Keep tension even to avoid puckering.
— Edge Fillers & Small Connectors :
Round 1 :
Make tiny rounds as spacers: 6 sc in mr, join and fasten off (6)
Round 2 :
Or make mini flowers: ch 4 join to ring, 8 dc in ring, sl st, fasten off (8 dc petals)
Info :
Use these tiny motifs to fill gaps and keep the runner edges organic rather than strictly linear. Place them between larger motifs and stitch in place.
— Border & Final Touches :
Step 1 :
Once all motifs are joined and runner length is correct, add a light crochet border if desired: attach yarn at an outer edge and work 1 sc in each exposed stitch around entire runner, working small picots (ch 2, sl st in same st) every 6–8 sts for a subtle decorative edge.
Info :
Alternatively leave motifs raw for a more relaxed look as in the photos. Light blocking after joining helps the runner lie flat and look cohesive.
Step 2 :
Weave in all ends at least 5 cm into motifs and trim close. If any motifs are slightly wavy along an edge, damp-block and pin flat overnight to set shape.
— Tips for Success :
Info :
Always make a small sample motif and block it to confirm the finished size before committing to many motifs. Adjust hook size if discs or petals are too small or large for the intended layout.
Info :
Keep a layout photo or sketch of your arrangement and label motifs if you plan a repeating pattern; this makes joining systematic and faster.
Info :
If pieces puff too much, steam block lightly or press under a towel with a warm iron on cotton setting to flatten without distorting stitches.
Info :
For washable table linens use mercerized cotton; if you want a softer drape, blend with a cotton-acrylic blend yarn but test for colorfastness before laundering.
This botanical runner brings such a cozy, handmade charm to a dining table — a soft cascade of discs, blooms and leaves that feels like a slow morning in a cottage. The modular motifs let you design a runner to your preferred length and color story, and sewing the pieces together becomes a satisfying, meditative finish. Make this for a loved one or keep it for your own kitchen table — it will warm up any surface with gentle texture and color. 🧶🌿