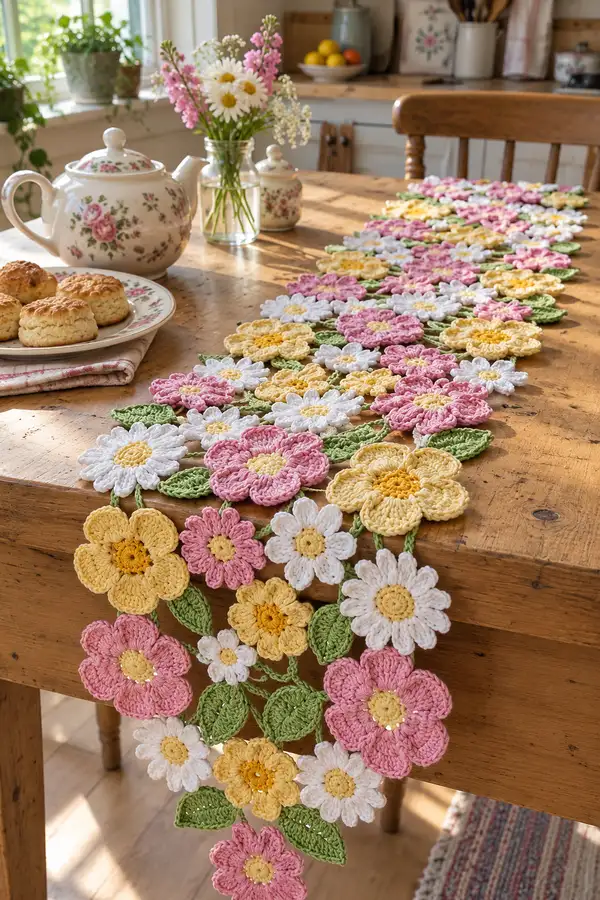
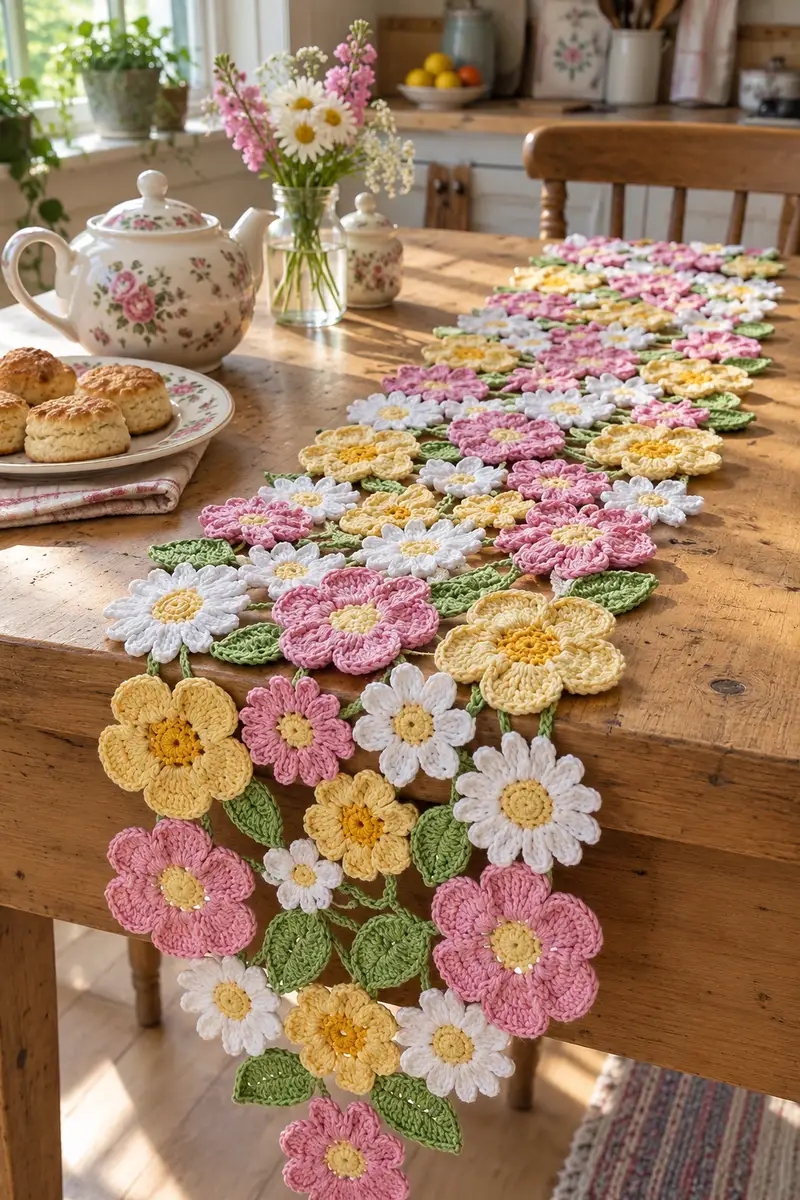
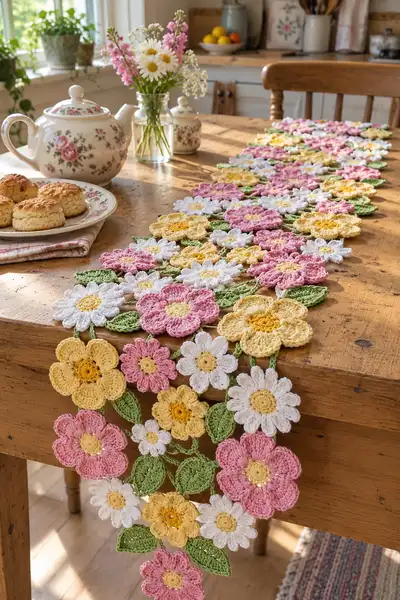
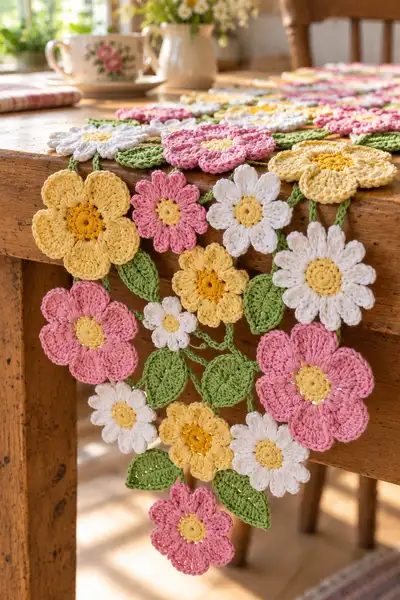
Create a delicate, romantic floral table runner made from joined crochet flowers, daisies and leaves in soft pastel pinks, buttery yellow, fresh white and leaf green. This modular design is built from three flower sizes, flat leaves and chain stems joined as you go to form a flowing garland runner. The finished piece in the photo is lightweight, drapey and perfect for spring tables or dresser toppers.
Progress Tracker
0% Complete
— Overview :
Info :
This runner is built from three main flower motifs, leaves and chain stems joined-as-you-go. Make as many motifs as required to reach desired length; the sample in the photo measures approximately 90cm/35in long and uses about 38 large blooms, 50 medium daisies, 30 small fillers and 70 leaves arranged closely. Work motifs flat and join with chained stems and slip-stitch joins for a flexible runner.
Info :
Gauge is not critical for this decorative item, but using a consistent hook and yarn will produce even motifs. Sample photographed uses worsted-weight cotton yarn and a 3.5mm hook.
— Large 6-Petal Flower (Make multiple in pink and yellow) :
Round 1 :
mr, 6 sc into ring (6)
Round 3 :
(1 sc, inc) x 6 (18)
Round 4 :
(2 sc, inc) x 6 (24)
Round 5 :
(3 sc, inc) x 6 (30)
Info :
At this point you have 30 sts; these rounds create a flat central disk that will become the base for six petals. If you prefer a denser center, use a smaller hook for rounds 1-5.
Round 6 :
(4 sc, inc) x 6 (36)
Round 7 :
1 sc in each st (36)
Info :
We will form 6 petals: with 36 sts the petals will be placed every 6th stitch (36/6=6). To form a neat petal, you'll work a cluster into a single stitch then slip into the following five stitches to travel to the next petal base. This keeps the stitch count mathematically consistent (36 total).
Round 8 :
*In next st work petal cluster: (sc, hdc, 3 dc, hdc, sc) all worked into the same stitch; sl st into next 5 sts to reach the next petal base* - repeat from * to * x6 around (36 total stitches counted: 6 cluster bases + 30 sl sts = 36)
Info :
Work the clusters gently; do not pull loops too tight so petals sit softly. The cluster stitch sequence creates a generous rounded petal. If you prefer a shorter petal, substitute 2 dc instead of 3 dc at the center of the cluster.
Round 9 :
Turn flower to work into top of each petal: *ch1, sc into first dc of the petal cluster, hdc into next, dc into center dc, hdc into next, sc into last dc, sl st into sl st below (the travel sl st)* repeat x6 (36)
Round 10 :
*(ch2, 3 dc in same stitch, ch2, sl st in next sl st across petal) make a picot-arched edge on each petal* x6 (36)
Round 11 :
1 sc in each st around working into base round and top edging where comfortable (36)
Info :
Optional decorative round: use FLO or BLO to create a scalloped ridge at the base of petals. Example: Round 12 (optional) 1 sc in each st BLO (36) - this draws the petals slightly forward and adds texture.
Round 12 :
Fasten off and weave ends. If planning to join this flower to others, leave a long tail for sewing or joining by chains.
— Medium Daisy (Make multiple in white with yellow centers) :
Round 1 :
mr, 6 sc into ring (6)
Round 3 :
(1 sc, inc) x 6 (18)
Round 4 :
1 sc in each st (18)
Info :
For a daisy look we will work a round of small loops that become the base for many narrow petals — this produces the classic thin, radiating daisy petals in the photo.
Round 5 :
*ch6, sl st into next st to form a loop* repeat from * to * around 18 loops (each loop counts as a pair of sts for counting purposes; mathematical stitch count is kept by including sl sts) (18 loops)
Round 6 :
Working into each ch6 loop: start in base where loop is anchored: (sc, hdc, 4 dc, hdc, sc) into loop, sl st into next base st to move to next loop - repeat around (18 petals)
Round 7 :
Once petals are complete, turn and sc around the base of petals to tidy: 1 sc in each base st and sl st across joining points (18 st-equivalents)
Round 8 :
*Optional decorative eye*: With yellow, embroider or sew a small ring over the center by stitching through the central 12 base stitches to create a neat yellow disc. Alternatively, change color before Round 5 and work Round 5-6 in yellow for true center color.
Info :
For the smallest daisy petals in the photo, chain lengths of 5-7 work well depending on yarn thickness — shorter chains give tighter petals; longer chains give a fuller frilly petal.
— Small 5-Petal Filler Flower (Make many in mixed colors) :
Round 1 :
mr, 5 sc into ring (5)
Round 3 :
(1 sc, inc) x 5 (15)
Round 4 :
*ch4, sl st back into same stitch to form 5 looped petals* repeat around 5 petals
Round 5 :
Into each ch4 loop work (sc, hdc, 3 dc, hdc, sc) to form small rounded petals; sl st into next base stitch to move around (15 stitch-equivalents)
Round 6 :
Fasten off with a tail for joining. These tiny blooms work beautifully as filler to soften gaps between larger motifs.
Info :
Small 5-petal flowers are quick (about 6 rounds) and add charm. Use contrast color for center for extra interest.
— Leaf (Make many in leaf green) :
Round 1 :
ch8, sc in 2nd ch from hook and across (7 sc) - this starts a flat oval leaf (7)
Round 2 :
ch1, turn, (sc, hdc, 3 dc, hdc, sc) across working increases at ends to shape tip (7 st-equivalents)
Round 3 :
Work along opposite side of chain foundation: (sc, hdc, dc, dc, hdc, sc) - join with sl st to starting sc (14)
Info :
To create the midrib, use a separate round with BLO or surface slip stitch. Working a slip stitch spine through the center will make the leaf read more like the photo (prominent veining).
Round 4 :
Surface rib: with RS facing, insert hook into center top of leaf and work a chain or surface sl st from tip to base to create raised midrib. Secure and fasten off (leaf remains flat).
Info :
Leaves in the photo are slightly elongated; to lengthen, start with ch10 or ch12 and increase proportionally. Keep stitch count balanced so leaves look uniform when joined.
— Long Chain Stem (Connector) :
Round 1 :
With leaf/flower color, ch40 (or length desired for spacing) - this forms a flexible cord stem (40 ch)
Round 2 :
Option A: For a flat braided stem, sc in 2nd ch from hook and in each ch across (39 sc)
Round 3 :
Option B: For a thin rope-like stem, chain desired length and work 1 sl st into each chain back along (creates twisted cord) - totally flexible
Info :
Use longer chain stems to create a drape and trailing effect. The pictured runner uses variable lengths (12-40 chains) to give staggered, cascading blossoms.
— Join-As-You-Go Connection Method (Core to runner assembly) :
Info :
Motifs in this runner are connected using a join-as-you-go (JAYG) system made from the chain stems and a slip-stitch joining round. You will layout motifs then work the connecting chains between petal bases and leaf tips, anchoring with slip stitches to the neighboring motif bases for a secure but flexible join.
Step 1 :
Lay out your motifs flat in the desired arrangement. Plan which petals or center stitches will be connected to adjacent petals or leaves; mark anchor points with pins.
Step 2 :
Identify anchor stitches: typical anchors are the back-of-petal sl st bases (for the large 6-petal flower these are the sl sts placed in Round 8) or the base sl st of daisy loops (Round 5). You will slip stitch into these locations to join.
Step 3 :
To join two motifs: attach yarn at anchor point on motif A with sl st, ch desired number (stem length), insert hook into anchor point on motif B and sl st to join. Fasten off and weave ends. For multiple connections, chain from motif A to motif B, then continue chain to motif C and anchor there, forming a branching stem.
Info :
Mathematically note: each sl st counts as a stitch but does not change counts of the motifs. Plan 2-3 anchor points per large bloom to secure it to the runner; smaller blooms may need only 1 anchor point.
— Decorative Joining Round (Stabilizes connection and adds texture) :
Round 1 :
With green, work a slip-stitch round over the chains and neighboring motif perimeters to flatten and stabilize: *sl st into chain spaces and through the base foundation of petal sl sts* continue around entire assembled section (st count varies by assembled section)
Info :
This round is worked across the assembled runner and evens spacing. You may choose to add additional decorative sc clusters to make the runner denser where motifs sit close together.
— Edge Finishing and Scalloped Border :
Round 1 :
Once motifs are joined to desired length, use green to single crochet around the outer edge following the silhouette of petals and leaves to tidy the runner: 1 sc in each visible stitch around (count varies)
Round 2 :
Scallop round: *skip 2 sts, 5 dc in next st, skip 2 sts, sl st in next* repeat along edges to create decorative scallops. Keep spacing consistent to maintain a regular scallop size.
Info :
For a lighter look, omit heavy scallops and instead work a simple sl st finish or a single crochet edge in same green to keep runner airy.
— Embellishments & Beading (Optional) :
Info :
To mimic the tiny seed-bead highlights seen in the photo centers, use a few French knots in matching embroidery thread or attach 2-3 small glass seed beads to flower centers using beading thread. Sew securely through center stitches and anchor carefully to avoid catching on linens.
Round 1 :
Small bead cluster: Thread a small seed bead onto a length of floss, insert needle through flower center and stitch bead in place with 2-3 passes, knot and weave tails invisibly through center stitches.
— Blocking & Final Press :
Info :
Lightly wet-block or steam-block your motifs before final joining to flatten and ensure consistent petal shapes. Pin petals and leaves to a flat blocking board to gentle shape. Cotton responds well to steam; press gently if necessary.
Info :
After all joins and edging, give one final light block so motifs sit flush and the runner drapes beautifully on the table edge as in the photo.
— Suggested Make Plan (How many to make for a runner similar to photo) :
Info :
Sample photographed runner (approx 90cm/35in): Make approx 36 large 6-petal flowers, 48 medium daisies, 28 small filler flowers and approx 70 leaves. Space and overlap motifs so they nestle closely for a full look. Adjust motif counts for longer or shorter runners.
— Colour & Layout Tips :
Info :
Arrange color clusters (pink, yellow, white) in repeating sequences so the runner reads balanced: e.g. Pink-Large, White-Daisy, Yellow-Large, small filler between, and leaves scattered to break lines. Try to avoid clustering all like-colored motifs together unless you want a block of color.
Info :
If you want a more sparse, airy runner, increase chain stem lengths between motifs so motifs trail rather than sit densely. For a denser table-length runner like the photo, keep stems short and motifs overlapping slightly.
— Troubleshooting & Notes :
Info :
If petals look uneven, block the motif flat, then re-position petal stitches by gentle stretching and re-tacking with blocking pins. To fix a counting or join error, unpick the relevant chains and re-join keeping counts consistent.
Info :
When weaving in ends, work tails back through a few central stitches and knot off on the back of petals to keep the right side clean. Hide tails inside the petal clusters or under surface slip stitches used in joining rounds.
This floral table runner pattern turns simple crochet motifs into a flowing meadow of petals and leaves — a true showpiece for spring tables and special gatherings. The modular approach makes it easy to customize length, colors and density to suit your home, and the join-as-you-go method keeps the runner flexible and lightweight. 🧶 I hope you enjoy arranging your petals as much as I do — it’s a little like composing a bouquet that stays beautiful forever. Happy stitching and don’t forget to share your finished runner! 🌸✨