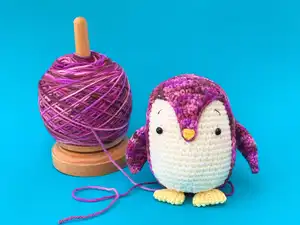
Make your own charming Brian the Penguin amigurumi with clear beginner-friendly instructions. This pattern uses DK weight yarn and a 2.5mm hook to create a cuddly 5-inch penguin with a removable coat and embroidered details. Follow step-by-step rounds for the coat, beak, body, flippers and feet, plus assembly guidance to finish a polished handmade toy you will love to gift or keep.
Progress Tracker
0% Complete
— The Coat :
Round 1 :
Work this round in BLO, Sc in 2nd Ch from your hook, Sc x 10, (Sc x 3) in the last Ch. Now work down the other side of your foundation chain. Sc x 10, Sc inc (26)
Round 2 :
Sc inc, Sc x 10, Sc inc x 3, Sc x 10, Sc inc x 2 (32)
Round 3 :
Sc, Sc inc, Sc x 10, (Sc, Sc inc) x 3, Sc x 10, (Sc, Sc inc) x 2 (38)
Round 4 :
Sc x 2, Sc inc, Sc x 10, (Sc x 2, Sc inc) x 3, Sc x 10, (Sc x 2, Sc inc) x 2 (44)
Round 5 :
Sc x 3, Sc inc, Sc x 10, (Sc x 3, Sc inc) x 3, Sc x 10, (Sc x 3, Sc inc) x 2 (50)
Round 6 :
Sc x 4, Sc inc, Sc x 10, (Sc x 4, Sc inc) x 3, Sc x 10, (Sc x 4, Sc inc) x 2 (56)
Round 7 :
Sc inc, Sc x 15, (Sc inc, Sc x 5) x 3, Sc x 10, (Sc inc, Sc x 5) x 2 (62)
Round 8-16 :
Sc x 62 (62) 9 rounds
Round 17 :
Sc x 8, Sc dec, Sc x 10, Sc dec, Sc x 2, Sc x 5, Sc dec, Sc x 8, Sc dec, Sc x 10, Sc dec, Sc x 7, Sc dec (56)
Info :
Mark the stitch just made with a stitch marker.
Info :
SS, break yarn & pull through. Leave a long tail for sewing later.
— The Beak :
Info :
Ch 1. Your first Sc will be made in the same St where you have just joined your yarn
Round 2 :
Sc dec, Sc x 10, Sc dec (12)
Round 3 :
Sc dec, Sc x 8, Sc dec (10)
Round 4 :
Sc dec, Sc x 6, Sc dec (8)
Round 5 :
Sc dec, Sc x 4, Sc dec (6)
Round 7 :
Sc dec, Sc x 2, Sc dec (4)
Round 12 :
Sc x 1 (1) Do not Ch 1 & turn here
Info :
Break yarn & pull through. Weave in the loose end.
Info :
We will now Sc around the edge of the beak: Join yarn A where your stitch marker is now placed (this should be one stitch back from where you joined your yarn to start the beak). Ch 1 and SS on to the side of the beak. Sc up the edge until you reach the point of the beak.
Info :
Make 3 Sc in the final St from row 12 of the beak. This should give you a nice point. Sc back down the other side of the beak. SS back on to the next stitch on the coat. Break yarn and pull through. Weave in the loose end. With yellow thread embroider a small triangle on the tip of the beak.
— The Body :
Info :
Use yarn B and work in continuous rounds.
Round 1 :
Sc x 6 in to a MR (6)
Round 3 :
(Sc, sc inc) x 6 (18)
Round 4 :
(Sc x 2, sc inc) x 6 (24)
Round 5 :
(Sc x 3, sc inc) x 6 (30)
Round 6 :
(Sc x 4, sc inc) x 6 (36)
Round 7 :
(Sc x 5, sc inc) x 6 (42)
Round 8-25 :
Sc x 42 (42) - 18 rounds
Info :
Insert the safety eyes between rounds 14 -15. There should be a 9 stitch gap between the eyes.
Info :
Stuff the body. Continue to stuff the remainder as you go.
Info :
To check you are happy with the position of your safety eyes and the amount you are stuffing you can try the coat on the body now and then. The eyes should be about level with the yellow embroidery on the beak and about half way between this and the sides of the coat.
Round 26 :
(Sc x 5, sc dec) x 6 (36)
Round 27 :
(Sc x 4, sc dec) x 6 (30)
Round 28 :
(Sc x 3, sc dec) x 6 (24)
Round 29 :
(Sc x 2, sc dec) x 6 (18)
Round 30 :
(Sc, sc dec) x 6 (12)
Info :
SS in to the next stitch, break yarn & pull through. Try the coat on the body again. Ensure you have placed enough stuffing. Weave the loose end through the FLO of the final row of the body to close off the end.
Info :
Optional detail: With a strand of black thread embroider the eyebrows 3 rounds above the eyes over r 10-11. Use a small amount of blush to create rosy cheeks on the lower border of the eyes.
— The Flippers :
Info :
Use yarn A & make 2. Work in continuous rounds.
Round 1 :
Sc x 4 in to a MR (4)
Round 2 :
(Sc, Sc inc) x 2 (6)
Round 3 :
(Sc x 2, Sc inc) x 2 (8)
Round 4 :
(Sc x 3, Sc inc) x 2 (10)
Round 5 :
(Sc x 4, Sc inc) x 2 (12)
Round 6 :
(Sc x 5, Sc inc) x 2 (14)
Round 7 :
(Sc x 6, Sc inc) x 2 (16)
Round 8 :
(Sc x 7, Sc inc) x 2 (18)
Round 10 :
(Sc x 7, Sc dec) x 2 (16)
Round 12 :
(Sc x 6, Sc dec) x 2 (14)
Info :
Break yarn & pull through. Leave a long length for sewing. Fold the flipper flat and sew the top closed prior to attaching.
— The Feet :
Info :
Use yarn C and make 2. Ch 7.
Round 1 :
In BLO, Sc in the 2nd Ch from your hook, Sc x 4, (3 Sc) in the last Ch. Now work down the other side of your foundation chain. Sc x 4, Sc inc (14)
Round 2 :
Sc inc, Sc x 4, Sc inc x 3, Sc x 4, Sc inc x 2 (20)
Round 3 :
Sc, Sc inc, Sc x 4, (Sc, Sc inc) x 3, Sc x 4, (Sc, Sc inc) x 2 (26)
Info :
SS, break yarn & pull through. Leave a long tail for sewing. Fold the foot in half. Sew around the edges to secure this.
— Construction :
Info :
Place the coat on the body. The little yellow beak should sit equal distance between the eyes. Pin in place and sew the coat to the body. You can use either a whip stitch or a mattress stitch for this.
Info :
Sew the feet to the body. The flat end of the feet should point outward. Sew the top of the curved section to the base of the coat.
Info :
Sew the flippers to the sides of the coat. The top of the flipper is about level with the eyes.
Info :
Congratulations your MBP Penguin is complete!!
This sweet Brian the Penguin pattern is a joyful, compact amigurumi that's great for gifting or keeping as a cute shelf friend. The removable coat and tiny embroidered beak add personality and charm to every penguin you make. Happy crocheting and enjoy creating colourful companions! 🧶🐧