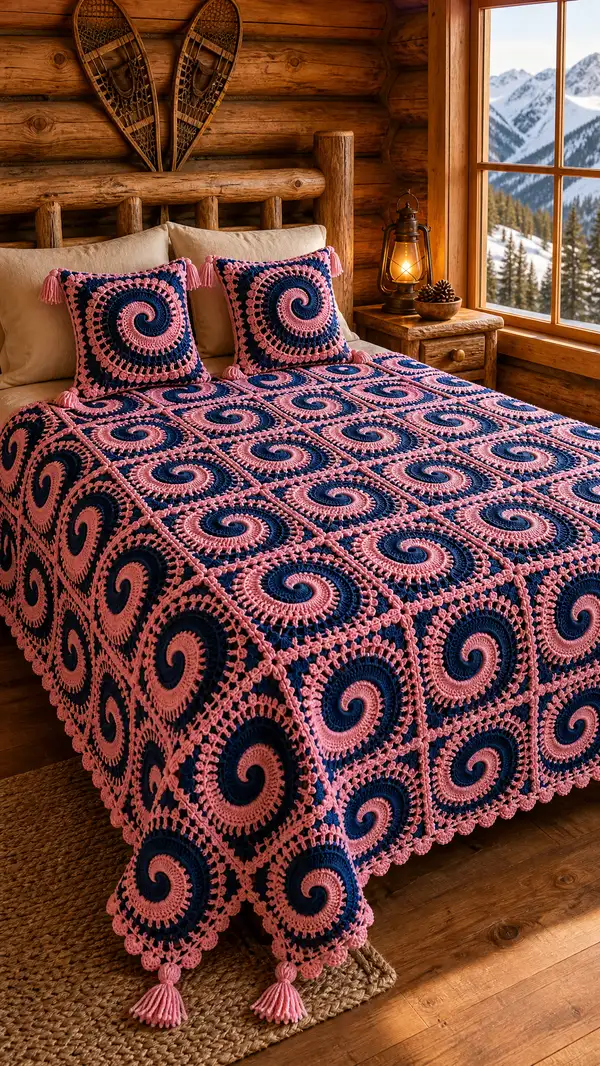
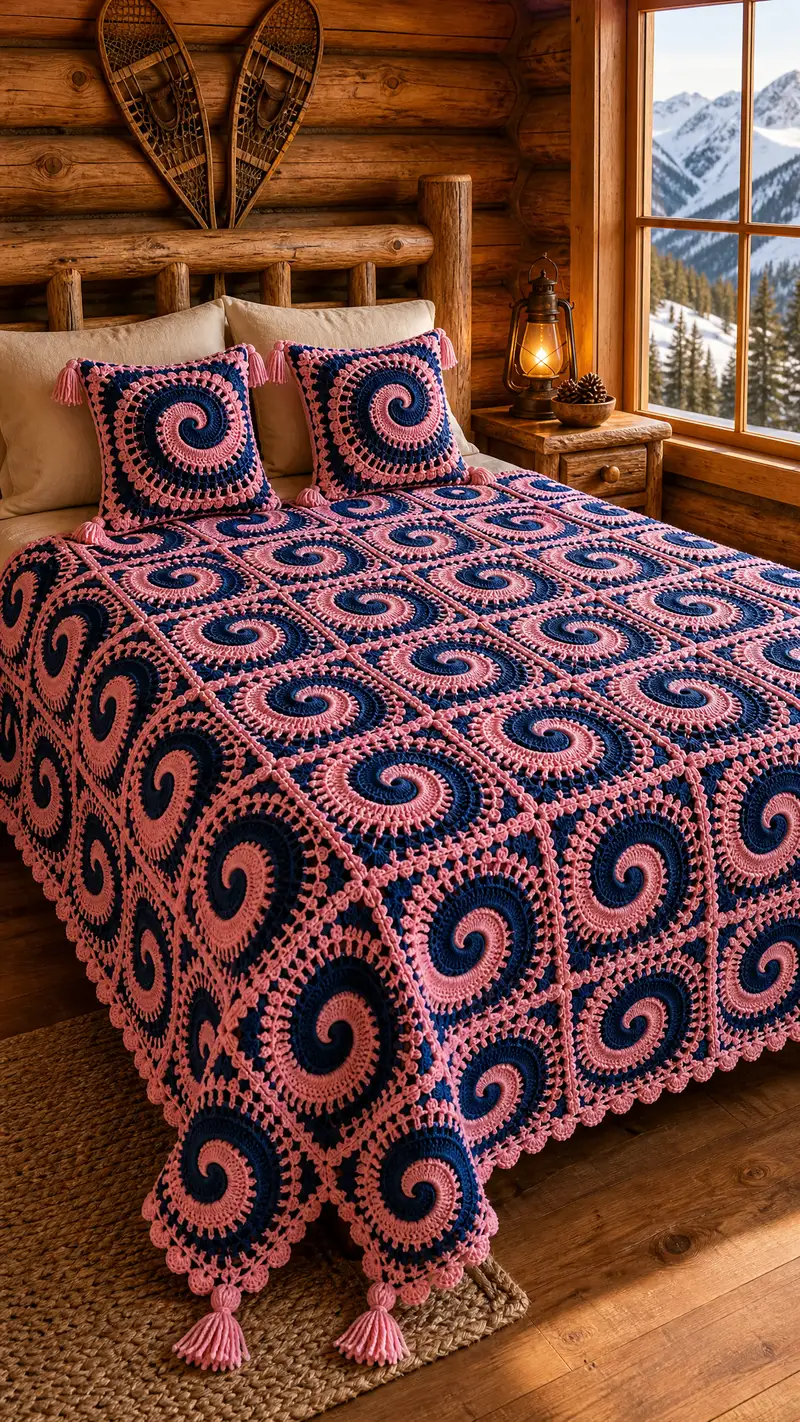
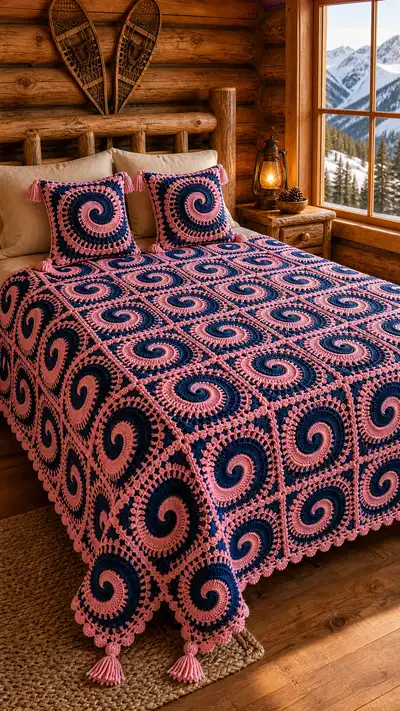
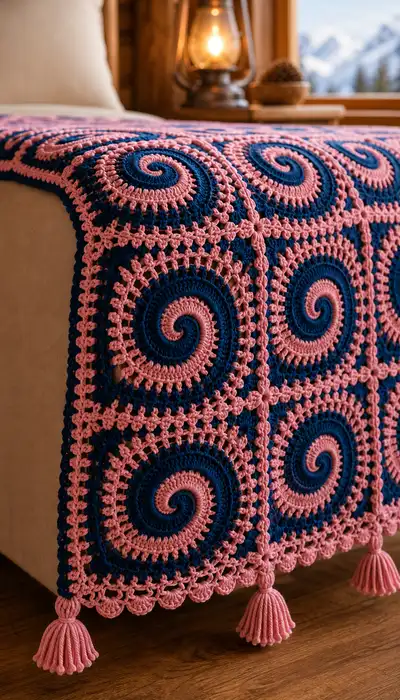
This bedspread features striking bubblegum pink and deep navy spiral granny squares assembled into a dramatic, retro-inspired covering. Each square begins as a tight spiral circle that blossoms into a square with decorative openwork and a scalloped border. The finished spread is edged with scallops and tasseled corners for a cozy, handmade finish that adds bold color to any bedroom.
Progress Tracker
0% Complete
— Notes & Gauge :
Info :
This bedspread is constructed from spiral granny squares worked in worsted weight yarn. Using the recommended 4.5mm hook, one finished motif measures approximately 12in (30cm) square after blocking. Gauge for motif center rounds (example): 12 rounds = 4in in diameter when worked as instructed; blocking will increase diameter slightly. Layout used for photos: 6 motifs across x 6 motifs down (36 motifs total) to cover a queen/throw bed. Adjust the number of motifs to suit your bed size.
Info :
Colors: This pattern alternates bubblegum pink (B) and navy (N). You will change color each round according to the instructions; carry the unused color behind work loosely or fasten off and weave tails. I recommend carrying when only two colors are used to keep joins neat.
— Motif (Make 36 for a 6 x 6 bedspread — adjust quantity as needed) :
Round 1 :
With B, 6 sc in mr (6)
Round 2 :
Inc in each st around (12)
Round 3 :
(1 sc, inc) x 6 (18)
Round 4 :
(2 sc, inc) x 6 (24)
Round 5 :
(3 sc, inc) x 6 (30)
Info :
These first five rounds build a compact spiral center. Keep tension even and place a stitch marker at the first stitch of each round to help maintain your spiral alignment.
Round 6 :
(4 sc, inc) x 6 (36)
Round 7 :
(5 sc, inc) x 6 (42)
Round 8 :
(6 sc, inc) x 6 (48)
Info :
Switch to continuous rounds (do not join) from Round 9 to create the visible unbroken spiral. If you prefer tidy round joins, join with sl st and ch1 at the start of each round — the spiral effect will be slightly altered.
Round 9 :
1 sc in each st around (48) — maintain continuous spiral
Round 10 :
1 sc in each st around (48)
Info :
At this point the round fabric is still circular. To introduce the high-relief spiral ribbing seen in the photos, we will work a combination of FPdc and regular dc in the next rounds, and change to N for contrast on the first textured round.
Round 11 :
Change to N. *FPdc around next st, dc in next st; rep from * around (48)
Round 12 :
With N, *dc in FPdc from previous round (this creates a raised ridge), dc in next dc; rep around (48)
Round 13 :
With N, 1 sc in each st around (48)
Info :
These alternating FPdc/dc and sc rounds produce the visible raised spiral ridges. The trick to the spiral look is working the textured stitches offset from the previous rounds so the raised ridge follows the rotation. Continue to work continuous rounds without joining to maintain the swirl.
Round 14 :
Change to B. 1 sc in each st around (48)
Round 15 :
With B, (3 sc, inc) x 12 (60)
Round 16 :
With B, 1 sc in each st around (60)
Info :
Round 15 begins the gentle outward expansion that will allow the circle to become large enough to be reshaped into a square. Increase rounds are placed evenly so the final stitch counts remain mathematically consistent for subsequent square conversion.
Round 17 :
Change to N. 1 sc in each st around (60)
Round 18 :
With N, (4 sc, inc) x 12 (72)
Round 19 :
With N, 1 sc in each st around (72)
Round 20 :
Change to B. 1 sc in each st around (72)
Info :
We will now begin to introduce corner clusters to transition from a round to a square. Place four stitch markers equidistantly around the motif at the quarter points to mark where corners will form (every 18 sts with current count 72).
Round 21 :
With B, *sc in next 8 sts, (2 dc, ch 2, 2 dc) in next st (corner cluster), rep from * 3 more times, sc in remaining sts (total remains 72 but corners are formed)
Info :
Corner cluster placement: because we have 72 sts, do corners after each group of 18 sts — this creates four evenly spaced corners. The ch2 between corner dc clusters provides the square’s turning space.
Round 22 :
With B, 1 sc in each sc and 2 sc in each corner ch-2 space (adds 8 sts total) — new count = 80
Round 23 :
Change to N. 1 sc in each st around (80)
Info :
Round 22 increases the stitch count to better square off the motif. The motif is still fairly round; additional rounds of corner-focused increases will flatten the sides into a square shape.
Round 24 :
With N, *sc in next 9 sts, (2 dc, ch 2, 2 dc) in corner ch-2 space; rep from * 3 times (80)
Round 25 :
With N, 1 sc in each st around (80)
Round 26 :
Change to B. *sc in next 10 sts, (3 dc, ch 2, 3 dc) in corner ch-2 space; rep 3 times, sc in remaining sts (adds 8 sts) — new count = 88
Info :
As corner clusters grow (3 dc on each side of the ch2), they push the work into a more square silhouette. Adjust counts above by distributing sc evenly between corners if you prefer the motifs slightly larger or smaller.
Round 27 :
With B, 1 sc in each st around (88)
Round 28 :
Change to N. *sc in next 11 sts, (3 dc, ch 3, 3 dc) in corner ch-2 space; rep 3 times, sc remaining sts (88)
Round 29 :
With N, 1 sc in each st around (88)
Info :
Round 28 stretches the corner chain from ch-2 to ch-3 to give a slightly larger corner and more square geometry. If you prefer a sharper square corner reduce to ch-1; ch-3 gives a softer corner like in the pictured pattern.
Round 30 :
Change to B. Work in this round in BLO: 1 sc in each st BLO around (88) — this creates a subtle ridge that highlights the square edge
Round 31 :
With B, *ch 3, skip 2 sts, sc in next st; rep across side until corner, in corner work (sc, ch 3, sc) into corner ch-3 sp; repeat for 4 sides — creates openwork arches around square (approx 22 arches per side depending on spacing)
Info :
This arch round is the decorative open motif row seen between the spiral center and the outer square frame. Work the ch-3 arches evenly across each side; if counts differ slightly, adjust spacing by changing the number of skipped sts between arches.
Round 32 :
Change to N. Into each ch-3 sp: (sc, 3 dc, sc) — create a shell in each arch. In corner ch-3 spaces work (sc, 5 dc, sc) to accent corner shells. Maintain stitch count by placing 1 sc in each sc between shells (approx 88)
Round 33 :
With N, 1 sc in each st around (approx 88)
Info :
At this stage the motif is square with a strong spiral center and lacy outer shells. Work neatly and block each motif to the same size before joining — blocking aligns shell points and evens motif dimensions for a flat join.
Round 34 :
Change to B. *ch 1, sc in next st; at corner, ch 3 and (sc, ch 3, sc) in corner top; rep around to create a neat joining ridge (approx total remains similar)
Round 35 :
With B, work decorative picot-and-loop round: *sc, ch 3, sl st back into ch-3 to form a loop, sc in next st; rep around to give the slightly lacy outer edge seen in the photos (final motif edge is neat and ready to join)
Info :
Fasten off leaving a long tail for blocking and if you will use a whip stitch to join instead of join-as-you-go. Make the required number of motifs (sample uses 36). Keep motifs blocked and flat to ensure consistent seam length when joining.
— How Many Motifs & Layout :
Info :
Sample layout (shown): 6 motifs across x 6 motifs down = 36 motifs. When using the finished motif size of approx 12in, this yields an approximate spread of 72in x 72in (before border). Adjust motif count to match bed size: queen may use 7 x 7 (49 motifs) for more coverage. For a twin throw, 4 x 5 (20 motifs) works well.
— Join-As-You-Go Joining (Preferred) :
Info :
Join-as-you-go (JAYG) as you complete the last shell/picot round of each motif. Join new motif to the previous motif(s) along two sides: align edges, and work sl sts through both motif loops at the shell points to secure. See step-by-step below.
Round 36 :
When completing the final round of a motif and the last shell is reached, align the new motif to the previously made motif and instead of finishing the last sl st, insert hook through corresponding st in the adjacent motif and sl st through both loops — continue to finish the rest of the round joining at each shell point (this creates a flat seam)
Info :
For the first motif in a row, join only to the motif below (if applicable). Always block motifs before joining for even edges. Use contrasting join color (B in photo) to accent seams or use background color (N) for invisible joins.
Round 37 :
If using whip stitch instead: place motifs RS together, align shells and with B yarn whip stitch through outer loops only following the shell/spaced stitches. Work a neat seam taking identical stitches through both pieces for an invisible join. Fasten off and weave tails.
Info :
Joining method will influence the final look. JAYG creates a continuous crochet edge, while whip stitch gives a slightly raised seam. Choose based on preference and photo reference — pictured bedspread uses JAYG with B accent.
— Joining Sequence (for a 6 x 6 layout) :
Info :
Work the first motif fully. Make the second motif and JAYG along the first side to the first motif. Continue across the first row. Start the second row motif, join to the motif above, then join to motif to the left when both sides exist. Continue in this manner until the grid is complete. Use pins to keep tallies of position.
Round 38 :
As you approach the final rounds of the entire spread, add a final uniform joining round in B: With RS facing, join B at any outer shell and sc evenly around the entire outside edge of the assembled bedspread, working 3 sc into each corner to maintain square shape — this creates a tidy base for the outer border.
Info :
Sc around count will equal total number of visible outer shells plus sc between shells. It should come out even; do not be alarmed if you need to adjust by +-2 sts. The outer sc round becomes the anchor for the border rounds that follow.
— Outer Border (Scalloped & Picot Border) :
Round 39 :
With B, 1 sc in each st around the entire blanket edge (work 3 sc into each corner) — this evens the edge (count varies by motif number and spacing)
Round 40 :
Change to N. *ch 3, skip 2, sc in next st; rep around to form an openwork row (use corners to place ch-3 sp in each corner)
Round 41 :
With N, into each ch-3 sp work (sc, 5 dc, sc) — create scallop shells along the border. In corner ch-3 spaces work (sc, 7 dc, sc) for a larger corner shell
Info :
This shell round provides the lacey scallop edge seen in the photo. You may increase shell dc counts for a bolder scallop or decrease for a flatter finish. Keep shells evenly spaced for consistent scallops.
Round 42 :
Change to B. Work picot round: *sc in top of shell, ch 3, sl st back into ch-3 to form picot, sc in next st; rep around to give the delicate loop-picot texture shown.
Round 43 :
With B, finish with one round of sc in BLO around the entire piece to give a corded look and a neat finish. Fasten off and weave in ends.
Info :
Block the entire bedspread gently to smooth joins and shells. Pin scallops into shape while damp and allow to dry. This elevates the finished appearance considerably.
— Tassels (Make 4 large corner tassels) :
Info :
Measure a cardboard template equal to the desired tassel length (photo tassels are approx 4in length excluding knot). Use thick bundled strands of B yarn for full tassels.
Round 44 :
Wrap yarn around template 40–60 times depending on desired fullness. Remove bundle, tie a 6in length tightly around top to form the head. Fold and trim ends evenly. Join tassel to corner by threading the tying tail through corner shell and knotting securely on the reverse. Repeat for all corners.
Info :
For extra polish, wrap a 6–8in piece of yarn around the top tail multiple times to form the tassel neck before trimming ends. Secure with glue or a small knot on the reverse if needed.
— Optional Pillow Covers (Make 2 matching square pillow covers) :
Round 1 :
Make 1 motif as instructed above for the front panel (complete motifs will be worked identically to bedspread motifs). For a 2-sided cushion, make 2 motifs and seam together around 3 sides leaving 1 side open for inserting cushion or work 1 motif and a plain crocheted back.
Round 2 :
For a zippered back, create a matching motif for the back and leave a 12in opening at the top; sew in zipper or overlap back panels.
Info :
Attach tassels to cushion corners for coordinated styling. Pillow inserts should match motif size after blocking — trim or adjust motif count if necessary to fit commercially available insert sizes.
— Finishing & Weaving In Ends :
Info :
Weave all ends into the backs of motifs using a yarn needle. For carried colour tails that were left inside motifs, either weave in as you go or bury tails into the next few rounds of the carried yarn so they are hidden. Trim ends close after securely weaving through several strands to prevent unravelling.
Round 45 :
Final tidy: go around the bedspread edge with a few slip stitches where needed to even scallops and secure any join gaps. Clip surplus yarn and check all tassels and corners for secure attachment.
Info :
Press the bedspread lightly with a damp cloth if desired; use a low heat iron or steam-block if your yarn fiber allows (check manufacturer's care recommendations). Preferably lay flat to dry for best results.
— Tips & Troubleshooting :
Info :
If motifs grow unevenly, block them to size and use a slightly smaller hook for subsequent motifs until sizes match. Keep stitch markers at quarter points to help maintain corner placement. If joining shows gaps, add a small whip-stitch reinforcing the JAYG join through the reverse loops to secure.
This Spiral Granny Bedspread is a joyful mix of vintage and modern — bold spiral centers meeting classic granny geometry for a handmade masterpiece you’ll treasure. Each motif is a little meditation in color and texture that comes together into a striking whole. Add tassels for movement and personality, and enjoy the compliments when it’s on your bed. 🧶✨ This is a project that rewards patience with show-stopping results — happy stitching! 🌙