๐Ÿงถ Beautiful โœจ Detailed ๐Ÿ’ Adorable

Bull Amigurumi Pattern

Bull Amigurumi Pattern
4.6โ˜… Rating
5-7 Hours Time Needed
3.8K Made This
โœ‚๏ธ

Intermediate Level

Ideal for those with basic crochet experience, featuring slightly more advanced stitches and techniques to expand your skills.

โฑ๏ธ

Weekend Treat

Takes 5-7 hours, making it an enjoyable project to finish over a couple of days.

๐Ÿฅ

Charming Critter

Delightful animal designs with sweet details that capture the essence of your favorite woodland and farmyard friends.

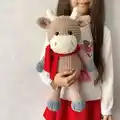
About This Bull Amigurumi Pattern

This pattern guides you through crocheting a soft Bull amigurumi with a rounded head, muzzle, horns and hooved limbs. You will work mostly in spiral rounds and create each part separately before assembling. The toy uses plush Alize Softy yarn for a cuddly texture and clear stitch counts for each round. Photos accompany the instructions to help with placement and finishing.

Bull Amigurumi Pattern crochet pattern - detailed view of completed project

Perfect as a handmade gift or decorative toy, the finished bull stands about 39 cm tall using the recommended yarn and hook. The pattern includes tips for stuffing, sewing parts, and creating a tail tassel.

Why You'll Love This Bull Amigurumi Pattern

I absolutely love this pattern because it combines simple amigurumi shaping with a very cuddly plush texture that feels wonderful to hold. I enjoy how each piece is compact and fast to crochet, yet when assembled the toy has a lot of personality. Sewing the muzzle, ears and horns in place brings the character to life and always makes me smile. The pattern is versatile so I often adapt colors and make tiny accessories to personalize each bull.

Bull Amigurumi Pattern step 1 - construction progress Bull Amigurumi Pattern step 2 - assembly progress Bull Amigurumi Pattern step 3 - details and accessories Bull Amigurumi Pattern step 4 - final assembly and finishing

Switch Things Up

I love changing up colors to create different looks; try pastel tones for a softer, nursery-friendly bull or high contrast colors for a playful twist.

You can easily make a mini version by using thinner yarn and a smaller hook, creating a keychain-sized friend perfect for gifts.

I often swap the plush yarn for a smooth cotton to give the toy a cleaner, more defined stitch look โ€” the shape will remain the same but texture changes dramatically.

Try adding tiny crocheted scarves, bows, or a little vest to turn your bull into a seasonal or personalized gift.

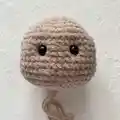
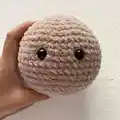
I sometimes embroider different facial expressions by changing eye placement or mouth stitches to give each bull a unique personality.

Want it more posable? Insert thin wire in the limbs before stuffing to allow gentle posing of the arms and legs.

For a sturdier toy for small children, replace safety eyes with embroidered eyes to eliminate small parts.

I like to use gradient or variegated yarn for the hooves or muzzle to create subtle color interest without extra sewing.

Make matching sets by crocheting several bulls in different colorways and arranging them as nursery decor or gift bundles.

When adjusting size, remember to keep proportions similar: if you increase body circumference, scale up limbs and muzzle accordingly for a balanced finished toy.

Common Mistakes & How to Fix Them

โœ— Skipping stitch markers while working in spiral rounds leads to losing the start of the round; place a marker at the first stitch of every round and move it up as you go. โœ— Failing to stuff as you go causes gaps and lumps when finishing; stuff gradually and evenly, especially in the head and body, to maintain smooth shape. โœ— Not counting stitches after increases or decreases results in incorrect stitch counts later; count stitches at the end of each round and correct mistakes immediately. โœ— Changing colors without securing yarn tails can cause loose ends and unraveling; fasten off or weave in ends securely and leave long sewing tails where instructed. โœ— Sewing parts without pinning makes placement uneven and asymmetrical; pin or use stitch markers to position muzzle, eyes, ears and limbs before sewing them on. โœ— Overstuffing limbs and body makes shaping difficult and hard to close neatly; stuff firmly but leave room to shape and sew, adding small amounts until you reach desired firmness.

Bull Amigurumi Pattern

Create a charming handmade bull amigurumi using soft, plush yarn and clear step-by-step instructions. This pattern includes every piece: head, muzzle, horns, ears, arms, legs, tail and assembly notes so you can finish a cuddly toy with confidence. Suitable for crocheters who know basic increases and decreases and want a satisfying weekend project. Follow the detailed rounds and tips to get a professional finish on your plush bull.

Intermediate 5-7 Hours

Materials Needed for Bull Amigurumi Pattern

โ€” Main Fabric

  • 01
    Alize Softy (115m/50g) - 3 skeins color 617 (beige)
  • 02
    Alize Softy (115m/50g) - less than half skein color 62 (cream) for muzzle and horns
  • 03
    Alize Softy (115m/50g) - less than half skein color 119 (gray) for hooves and accents
  • 04
    Yarn worked in two strands for details as indicated in pattern

โ€” Tools Required

  • 01
    Crochet hook size 4.5 mm
  • 02
    Safety eyes 12 mm (2 pieces)
  • 03
    Filler for toys - holofiber (polyester stuffing)
  • 04
    Wide-eye needle for sewing parts
  • 05
    Scissors
  • 06
    Stitch markers
  • 07
    Yarn needle for weaving in ends
  • 08
    Pins for assembly (optional)

Progress Tracker

0% Complete

Infos :

Crochet all the details of the toy with yarn in two strands. Important! Work in spiral rounds. Beginning of each round mark with marker or contrast color thread.

โ€” Head :

Round 1 :

6 sc in mr

Round 2 :

6 inc (12)

Round 3 :

(1 sc, inc)*6 (18)

Round 4 :

(2 sc, inc)*6 (24)

Round 5 :

(3 sc, inc)*6 (30)

Round 6 :

(4 sc, inc)*6 (36)

Round 7 :

(5 sc, inc)*6 (42)

Round 8 :

(6 sc, inc)*6 (48)

Round 9-16 :

48 sc in each row

Round 17 :

(6 sc, dec)*6 (42)

Round 18 :

(5 sc, dec)*6 (36)

Round 19 :

(4 sc, dec)*6 (30)

Round 20 :

(3 sc, dec)*6 (24)

Info :

Finish crocheting. Leave a long thread for sewing the head to the body later.

Info :

Attach safe eyes between 11 and 12 rows, the distance between the eyes is 4 sc. Stuff head tight with holofiber.

โ€” Muzzle :

Info :

Cream color. Crochet 9 ch, from the second loop from the hook:

Round 1 :

7 sc, 3 sc in one loop, 6 sc, inc (18)

Round 2 :

inc, 6 sc, 3 inc, 6 sc, 2 inc (24)

Round 3 :

1 sc, inc, 6 sc, (1 sc, inc)*3, 6 sc, (1 sc, inc)*2 (30)

Round 4-6 :

30 sc in each row

Info :

Finish crocheting. Leave a long thread for sewing to the head later.

โ€” Horns :

Info :

Cream color

Round 1 :

4 sc in mr

Round 2 :

4 sc

Round 3 :

(1 sc, inc)*2 (6)

Round 4 :

6 sc

Round 5 :

5 sc, inc (7)

Round 6 :

6 sc, inc (8)

Info :

1 sl st and finish crocheting. Leave a long thread for sewing to the head.

โ€” Ears :

Info :

Beige color

Round 1 :

4 sc in mr

Round 2 :

4 inc (8)

Round 3 :

(3 sc, inc)*2 (10)

Round 4 :

(4 sc, inc)*2 (12)

Round 5 :

(5 sc, inc)*2 (14)

Round 6 :

14 sc

Info :

Fold in half and crochet 7 sc. Leave a long thread for sewing to the head.

โ€” Arms :

Info :

First. Start gray yarn

Round 1 :

7 sc in mr

Round 2 :

7 inc (14)

Round 3-5 :

14 sc in each row

Round 6 :

2 sc, dec, 10 sc (13)

Round 7 :

2 sc, dec, 9 sc (12)

Info :

change color to beige

Round 8-18 :

12 sc in each row

Info :

2 sc, then fold in half and crochet 6 sc. Leave a long thread for sewing to the body. Stuff arm to half.

Info :

Second. Start gray yarn

Round 1 :

7 sc in mr

Round 2 :

7 inc (14)

Round 3-5 :

14 sc in each row

Round 6 :

6 sc, dec, 6 sc (13)

Round 7 :

6 sc, dec, 5 sc (12)

Info :

change color to beige

Round 8-18 :

12 sc in each row

Info :

1 sc, then fold in half and crochet 6 sc. Leave a long thread for sewing to the body. Stuff arm to half.

โ€” Legs :

Info :

Start gray yarn

Round 1 :

6 sc in mr

Round 2 :

6 inc (12)

Round 3 :

(1 sc, inc)*6 (18)

Round 4 :

(2 sc, inc)*6 (24)

Round 5-7 :

24 sc in each row

Round 8 :

4 sc, 6 dec, 6 sc, change color to beige and crochet 2 sc (18)

Round 9 :

5 sc, 2 dec, 9 sc (16)

Round 10 :

5 sc, dec, 9 sc (15)

Round 11 :

3 sc, 2 dec, 8 sc (13)

Round 12 :

3 sc, dec, 8 sc (12)

Round 13-23 :

12 sc in each row

Info :

1 sc, fold in half and crochet 6 sc. Leave a long thread for sewing to the body.

Info :

In the second leg after the 23 row, crochet 2 sc, fold in half and crochet 6 sc. Leave a long thread for sewing to the body. Add stuffing.

Info :

Embroider imitation hooves.

โ€” Tail :

Info :

Beige color

Round 1 :

Crochet 11 ch, from the second loop from the hook crochet 10 sc. Finish crocheting. Leave a long thread for sewing to the body.

Item Name (Tail tip P1) :

Tail tip in the form of a brush: 1. cut the gray yarn into pieces of about 8-10 cm. 2. fold these pieces in half and pull out with a hook at the end of the tail, forming a loop. 3. pull all the ends into the resulting loop.

โ€” Body :

Info :

Beige color

Round 1 :

6 sc in mr

Round 2 :

6 inc (12)

Round 3 :

(1 sc, inc)*6 (18)

Round 4 :

(2 sc, inc)*6 (24)

Round 5 :

(3 sc, inc)*6 (30)

Round 6 :

(4 sc, inc)*6 (36)

Round 7 :

(5 sc, inc)*6 (42)

Round 8 :

(6 sc, inc)*6 (48)

Round 9-14 :

48 sc in each row

Round 15 :

(6 sc, dec)*6 (42)

Round 16-17 :

42 sc in each row

Round 18 :

(5 sc, dec)*6 (36)

Round 19-20 :

36 sc in each row

Round 21 :

(4 sc, dec)*6 (30)

Round 22 :

30 sc

Round 21 :

(3 sc, dec)*6 (24)

Info :

Finish crocheting. Cut off the tip, fasten inside. Add stuffing.

โ€” Assembly :

Info :

Stuff muzzle tight with holofiber. Sew a muzzle, ears (fold in half and sew), horns. Embroider nostrils.

Info :

Sew head to body.

Info :

Then sew arms and legs.

Info :

And sew the tail.

Assembly Instructions

  • Stuff the muzzle tightly with holofiber and sew it centered on the front of the head, securing through a few passes to keep it flat and even.
  • Fold the ears in half and sew them to the top sides of the head, then sew the horns between and slightly behind the ears for natural placement.
  • Sew the head to the body using the long thread left on the head, aligning the edge and closing the opening securely with ladder stitch.
  • Position the arms on either side of the body and sew them in place using the long tail, then sew the legs to the bottom of the body, spacing them evenly for stability.
  • Attach the tail at the lower back with the long thread, then create the tassel tip by looping and securing cut gray yarn pieces and trimming even.
  • Embroider nostrils under the muzzle and weave in all ends securely; pin parts before sewing to check placement and symmetry.

Important Notes

  • ๐Ÿ’กWork in spiral rounds and mark the beginning of each round with a marker or contrast thread to avoid losing your place.
  • ๐Ÿ’กCrochet the details of the toy with yarn held in two strands where indicated for a plush, dense texture.
  • ๐Ÿ’กStuff firmly but not overstuffed; add stuffing gradually to shape head and body for a smooth finish.
  • ๐Ÿ’กAttach safety eyes between the specified rows (between rows 11 and 12 on the head) with the recommended spacing of 4 sc.
  • ๐Ÿ’กFold ears before sewing and pin all parts in place prior to stitching to ensure correct alignment.

This Bull amigurumi pattern brings a cuddly bovine friend to life with soft Alize Softy yarn and easy shaping. Whether you customize colors or add accessories, this plush toy makes a wonderful handmade gift and keepsake. Enjoy crocheting and sharing your finished bull with loved ones! ๐Ÿงถ๐Ÿฎ

You ask,

we answer.

FAQs

What size will the finished piece be?

The finished amigurumi measures approximately 39 cm tall when using Alize Softy yarn held in two strands and a 4.5 mm hook, as specified in the pattern.

Can I use different yarn weights for this pattern?

Yes, you can use different yarn weights but the final size will change; use an appropriate hook for your chosen yarn and expect differences in texture and size.

Do I need prior crochet experience for this pattern?

This pattern is rated intermediate, so basic knowledge of single crochet, increases, decreases, and working in the round is recommended for best results.

How long does this project typically take to complete?

Most crocheters complete this project in 5-7 hours, depending on experience, stuffing and assembly time.

Where do I place the safety eyes?

Attach safety eyes between rows 11 and 12 of the head with a spacing of 4 single crochet stitches between the eyes, as stated in the head instructions.