About This Bumble Blossom Amigurumi Pattern
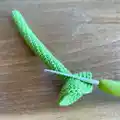
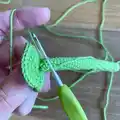
This pattern creates a delightful potted flower amigurumi with six petals, a textured center, a sturdy stem, two leaves, and a tiny bumblebee. You will crochet each piece in the round and assemble everything for a stable display-ready piece. Techniques include working in spiral rounds, BLO/FLO shaping, picot details, and optional wire reinforcement for the stem.
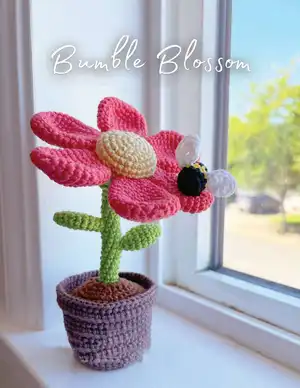
Perfect for gifting or brightening a windowsill, the finished project stands approximately 12cm tall by 8.5cm wide. The pattern is written in US terms and includes step-by-step assembly guidance and helpful pictures.
Why You'll Love This Bumble Blossom Amigurumi Pattern
I absolutely love this pattern because it combines simple amigurumi shaping with playful details like the picot sepal and tiny bumblebee. I enjoy how the layered petals create a full, cheerful bloom that looks great from every angle. Sewing the pieces together is satisfying and the finished flower makes a lovely handmade gift or decor piece. I also appreciate that the stem can be reinforced with wire, giving the project a practical option for durability and display.
Switch Things Up
I love how easy it is to customize the Bumble Blossom by changing colors — try pastel petals for a soft spring look or bright neons for a bold statement.
You can make the project larger or smaller by switching yarn weight and hook size; bulky yarn with a larger hook gives a chunky bloom while fine yarn makes a tiny version.
I often add wire to the stem to make it poseable; inserting a thin floral wire as you stuff gives wonderful stability and allows gentle shaping.
Try varying the petal shape by adding or subtracting rounds to make long spade petals or short rounded ones for a different silhouette.
Instead of crocheting the center, you can embroider french knots or sew on a button for a different texture and focal point.
Make a set of three in graduated sizes and place them in a tray for a charming table display that showcases color gradients.
I sometimes replace the cardboard base with a felt circle for a softer interior, or use a heavier chipboard for extra stability if the pot needs weight.
You can stitch on tiny beads or seed beads to mimic pollen on the center or add sparkle to the petals for a decorative version.
If you prefer, create removable outfits for the bee — a tiny scarf or hat crocheted in leftover yarn adds personality and playfulness.
I recommend trying different sepal picot sizes or counts to change the back-of-flower detail; it’s a small tweak with a noticeable difference.
Common Mistakes & How to Fix Them
✗ Skipping stitch markers during the stem and round sequences can make counting rounds difficult; use a marker at the start of each round to keep accurate stitch counts.
✗ Stuffing too lightly in the stem and center causes the flower to flop; stuff firmly and evenly as you add stuffing while crocheting to ensure the flower stands upright.
✗ Not inserting your hook correctly when re-attaching yarn for the dirt top can show the wrong side of stitches; follow the instruction to insert the hook from inside the hole so the wrong side ends up on the bottom.
✗ Forgetting to work in BLO or FLO where specified will change the finished shape; always check and work into back or front loops only when the pattern indicates BLO or FLO.
✗ Closing pieces without adding cardboard to the pot base can make the pot unstable; cut and insert a circle of cardboard before attaching the dirt to reinforce the pot's bottom.
✗ Changing color transitions carelessly on the bumblebee can create uneven striping; switch yarns at the end of a round and weave in tails neatly to keep tidy color bands.