🧢 Beautiful ✨ Detailed πŸ’ Adorable

Bunny Amigurumi Pattern

Bunny Amigurumi Pattern
4.0β˜… Rating
5-7 Hours Time Needed
2.7K Made This
βœ‚οΈ

Intermediate Level

Ideal for those with basic crochet experience, featuring slightly more advanced stitches and techniques to expand your skills.

⏱️

Weekend Treat

Takes 5-7 hours, making it an enjoyable project to finish over a couple of days.

🧸

Cute Companion

An adorable friend to cherish, handcrafted with love to bring comfort and joy for years to come.

About This Bunny Amigurumi Pattern

This pattern creates a sweet, teardrop-shaped bunny with long posable ears. You will crochet two ears, join the second ear to start the body, then shape and close the body before attaching a crocheted bottom. It uses continuous rounds and includes clear, round-by-round instructions, finishing tips and placement notes for safety eyes and wire.

Bunny Amigurumi Pattern crochet pattern - detailed view of completed project

Suitable for medium sized bunnies using chunky yarn and a 4 mm hook, the pattern also explains how to adapt sizes. Techniques include continuous rounds, simple increases and decreases, and light embroidery for the mouth.

Why You'll Love This Bunny Amigurumi Pattern

I absolutely love this pattern because it creates a charming, expressive little bunny with very simple stitches. I enjoy how the design uses the second ear yarn to seamlessly start the body β€” it feels clever and neat when it comes together. The posable ears with wire add personality and make each bunny feel unique. I also love that it is easy to scale the size by changing yarn and hook, so you can make a whole family of bunnies.

Bunny Amigurumi Pattern step 1 - construction progress Bunny Amigurumi Pattern step 2 - assembly progress Bunny Amigurumi Pattern step 3 - details and accessories Bunny Amigurumi Pattern step 4 - final assembly and finishing

Switch Things Up

I love how easy it is to customize the bunny by changing yarn weight and hook size to make a family of different sized bunnies.

You can try pastel palette colors for a soft nursery set, or bright rainbow stripes for a playful look.

If you want a pocket-sized charm, use thin yarn and a 3 mm hook to create a tiny mini bunny for keychains.

For a large cuddly version, hold four strands of DK yarn together and use a 6 mm hook for a big, squishy bunny.

I often embroider different mouth shapes or add tiny felt blush details to change personality and expression.

Try using glass or safety eyes in different sizes to alter the look; larger eyes give a cuter, more doll-like face.

Consider making removable accessories like scarves, bows or tiny crocheted carrots to give each bunny character.

You can also stitch different ear positions before inserting wire to create perky or relaxed ear styles.

For a textured finish try using boucle or chenille yarn for a soft, fluffy surfaceβ€”adjust stuffing and wire as needed.

I like to add a little bell or jingle bead inside the base for a playful touch when gifting to children (secure all small parts safely).

Common Mistakes & How to Fix Them

βœ— Not working in continuous rounds can create visible seams and misaligned stitches; always work in continuous rounds and mark the first stitch of each round. βœ— Forgetting to mark the first stitch makes counting rounds confusing; use a stitch marker at the start of every round to keep track and avoid mistakes. βœ— Stuffing the ears or overstuffing the body will change the intended shape and stiffness; do not stuff ears and stuff the body tightly but gradually to maintain shape. βœ— Skipping the long tail when finishing the bottom prevents neat sewing; leave a long end on the bottom piece for sewing the bottom to the body securely. βœ— Incorrect placement of safety eyes will affect facial expression; insert safety eyes 3 stitches apart between rounds 27-28 as instructed before finishing stuffing. βœ— Not folding and shaping the wire properly can make ears unstable; fold the wire in half and bend the ends as shown, then insert inside each ear carefully.

Bunny Amigurumi Pattern

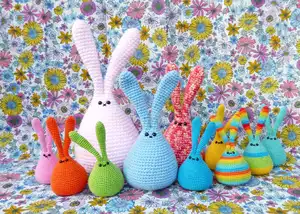
Make a delightful handmade bunny with this friendly intermediate amigurumi pattern. You will crochet ears, body and a neat bottom piece, then finish with wire for posable ears and embroidered details. The pattern includes full round-by-round instructions, materials list and helpful finishing notes so you can create a charming keepsake bunny for gifts or decoration. Perfect for crafters who enjoy detailed, small-to-medium amigurumi projects.

Intermediate 5-7 Hours

Materials Needed for Bunny Amigurumi Pattern

β€” Main Fabric

  • 01
    Stylecraft Special Chunky (Chunky/Bulky), Cloud Blue 1019 - 65 g (for medium bunny)
  • 02
    Black DK yarn - a small amount to embroider the mouth (optional)
  • 03
    Polyester fiberfill stuffing - approximately 60 g
  • 04
    DMC Petra No.3 (fine) - used for the smallest bunny when using 3 mm hook (optional)
  • 05
    DK weight yarn (4 strands held together) - used for the biggest bunny when using a 6 mm hook (optional)
  • 06
    Iron wire 12 inches long (30 cm), 18 gauge (1.25 mm thick) - for ear posability

β€” Tools Required

  • 01
    Crochet hook size 4.00 mm (US: G/6, UK: 8) - main for medium bunny
  • 02
    Crochet hook size 3.00 mm - for smallest bunny using DMC Petra No.3 (optional)
  • 03
    Crochet hook size 6.00 mm - for biggest bunny when crocheting 4 strands of DK together (optional)
  • 04
    One pair of 9 mm safety eyes
  • 05
    Tapestry needle for sewing and weaving ends
  • 06
    Polyester stuffing (approx. 60 g)
  • 07
    Iron wire 12 inches (30 cm), 18 gauge (1.25 mm) for ear posability
  • 08
    Scissors
  • 09
    Stitch marker to mark first stitch of rounds

Progress Tracker

0% Complete

β€” Abbreviations :

Info :

US Crochet Abbreviations. ch = chain sc = single crochet st = stitch sl = slip rnd = round tog = together

Info :

For this project you work in continuous rounds, do not join or turn unless otherwise stated. Mark first stitch of each round.

β€” Materials :

Info :

For medium bunny: Chunky, Bulky yarn, brand : Stylecraft Special Chunky, color : Cloud Blue 1019 = 65 g. A little bit of Black DK yarn to embroider the mouth (optional). 4.00 mm hook (US: G/6, UK: 8). Tapestry needle. Polyester fiberfill = 60 g. One pair of 9 mm safety eyes. Iron wire:12 inches long (30 cm), 18 gauge (1.25 mm thick).

β€” Size :

Info :

The blue, medium sized bunny is 10.3 inches tall (26 cm).

β€” Ear :

Info :

Make 2.

Round 1 :

With Cloud Blue 1019 and 4 mm hook, 6 sc in a magic ring. (6)

Round 2 :

(Sc in next st, 2 sc in next st) around. (9)

Round 3 :

(2 sc in next st, sc in next 2 sts) around. (12)

Round 4-10 :

Sc in each st around. (12)

Round 11 :

Sc next 2 sts tog, sc in next 10 sts. (11)

Round 12 :

Sc in each st around. (11)

Round 13 :

Sc in next 5 sts, sc next 2 sts tog, sc in next 4 sts. (10)

Round 14 :

Sc in each st around. (10)

Round 15 :

Sc next 2 sts tog, sc in next 8 sts. (9)

Round 16 :

Sc in each st around. (9)

Round 17 :

Sc in next 4 sts, sc next 2 sts tog, sc in next 3 sts. (8)

Round 18 :

Sc in each st around. (8)

Round 19 :

Sc next 2 sts tog, sc in next 6 sts. (7)

Round 20 :

Sc in each st around. (7)

Round 21 :

Sc in next 3 sts, sc next 2 sts tog, sc in next 2 sts. (6)

Round 22-23 :

Sc in each st around. (6)

Round 24 :

Sc in each st around. (6)

Info :

For the first ear, join with sl st in first st. Fasten off. For the second ear, do not sl st in first st. Do not fasten off.

β€” Body :

Info :

The yarn of the second ear is used to start the body.

Round 1 :

Sc in the stitch on rnd 24 of the first ear (mark first st), sc in next 5 sts on first ear, sc in next 6 sts on second ear. (12)

Round 2 :

(Sc in next st, 2 sc in next st) around. (18)

Round 3 :

Sc in each st around. (18)

Round 4 :

(2 sc in next st, sc in next 2 sts) around. (24)

Round 5 :

Sc in each st around. (24)

Round 6 :

(Sc in next 3 sts, 2 sc in next st) around. (30)

Round 7 :

Sc in each st around. (30)

Round 8 :

Sc in next 2 sts, 2 sc in next st, (sc in next 4 sts, 2 sc in next st) 5 times, sc in next 2 sts. (36)

Round 9 :

Sc in each st around. (36)

Round 10 :

(Sc in next 5 sts, 2 sc in next st) around. (42)

Round 11 :

Sc in each st around. (42)

Round 12 :

Sc in next 3 sts, 2 sc in next st, (sc in next 6 sts, 2 sc in next st) 5 times, sc in next 3 sts. (48)

Round 13 :

Sc in each st around. (48)

Round 14 :

(Sc in next 7 sts, 2 sc in next st) around. (54)

Round 15 :

Sc in each st around. (54)

Round 16 :

Sc in next 4 sts, 2 sc in next st, (sc in next 8 sts, 2 sc in next st) 5 times, sc in next 4 sts. (60)

Round 17-22 :

Sc in each st around. (60)

Round 23 :

Sc in next 4 sts, sc next 2 sts tog, (sc in next 8 sts, sc next 2 sts tog) 5 times, sc in next 4 sts. (54)

Round 24 :

(Sc in next 7 sts, sc next 2 sts tog) around. (48)

Round 25 :

Sc in next 3 sts, sc next 2 sts tog, (sc in next 6 sts, sc next 2 sts tog) 5 times, sc in next 3 sts. (42)

Round 26 :

(Sc in next 5 sts, sc next 2 sts tog) around. (36)

Round 27 :

Sc in next 2 sts, sc next 2 sts tog, (sc in next 4 sts, sc next 2 sts tog) 5 times, sc in next 2 sts, sl st in first st, fasten off. (30)
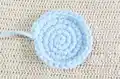
β€” Bottom :

Info :

With Chunky yarn and 4 mm hook.

Round 1 :

With Cloud Blue 1019, 6 sc in a magic ring. (6)

Round 2 :

2 sc in each st around. (12)

Round 3 :

(Sc in next st, 2 sc in next st) around. (18)

Round 4 :

(2 sc in next st, sc in next 2 sts) around. (24)

Round 5 :

(Sc in next 3 sts, 2 sc in next st) around, join with sl st in first st, leave long end for sewing, fasten off. (30)

Info :

Insert safety eyes 3 sts apart between rnds 27-28.

Info :

Do not stuff ears. Stuff body tightly then sew the bottom piece to the last round of the body.

β€” Finishing :

Info :

Fold the wire in half and make it as long as the ear by folding the ends of wire, see picture below. Insert the wire inside ears.

Info :

With Black DK yarn embroider a little x-cross between the eyes on rnd 28.

Assembly Instructions

  • Insert safety eyes 3 stitches apart between rounds 27-28 of the body before finishing stuffing.
  • Do not stuff the ears; fold the iron wire in half and insert the wire inside each ear for posability, then close the ear opening as directed.
  • Stuff the body tightly and sew the crocheted bottom piece to the last round of the body using the long tail left from the bottom (whipstitch or invisible stitch for a neat join).
  • For the first ear, join with a slip stitch in the first stitch and fasten off; for the second ear, do not slip stitch or fasten off because its yarn is used to start the body.
  • Embroider a small x-cross mouth between the eyes on round 28 with black DK yarn for the facial detail.

Important Notes

  • πŸ’‘Work in continuous rounds and do not join or turn unless the pattern explicitly tells you to join.
  • πŸ’‘Mark the first stitch of each round with a stitch marker to keep track of rounds and shaping.
  • πŸ’‘Do not stuff the ears; only stuff the body tightly and attach the bottom piece securely to maintain shape.
  • πŸ’‘Insert safety eyes before finishing stuffing and close the opening; place them 3 stitches apart between rounds 27-28.
  • πŸ’‘Leave a long tail on the bottom piece when finishing so you can sew it to the body neatly.

This sweet bunny pattern makes a lovely little companion you can personalize with color and size choices. Create a whole family of bunnies for gifts, nurseries, or seasonal decor. Have fun stitching and giving handmade smiles! 🐰🧢

You ask,

we answer.

FAQs

What size will the finished piece be?

The blue, medium sized bunny measures approximately 10.3 inches tall (26 cm) when using the recommended chunky yarn and 4 mm hook.

Can I make different sizes with this pattern?

Yes. The smallest bunny can be made with DMC Petra No.3 and a 3 mm hook; the biggest bunny can be made by crocheting 4 strands of DK yarn together using a 6 mm hook.

Do I need to stuff the ears?

No, do not stuff the ears. Instead, insert folded iron wire inside each ear for posability and shape.

Where should I place the safety eyes?

Insert the safety eyes 3 stitches apart between rounds 27-28 of the body, before finishing final stuffing and closing.

Is this pattern suitable for beginners?

This pattern is rated intermediate due to continuous rounds, shaping by increases and decreases, and finishing with wire; basic crochet experience is recommended.