About This Bunny Hand Puppet Amigurumi Pattern
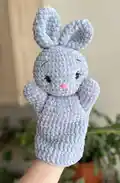
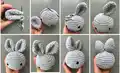
This pattern creates a soft Bunny Hand Puppet using super bulky plush yarn for a plush, tactile finish. You will crochet separate pieces — head, ears, arms and body — then assemble them into a charming hand puppet. Techniques include working in rounds, decreasing, simple embroidery and joining pieces. Clear step-by-step rounds and helpful notes make assembly straightforward.
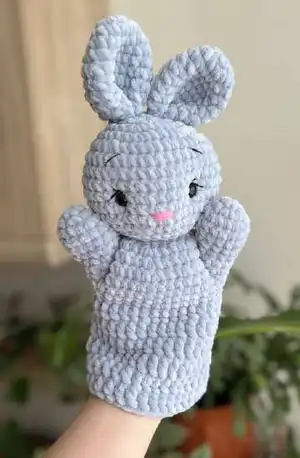
Perfect for gifting or puppet play, the finished puppet measures about 28 cm (11") tall. The pattern includes material lists, abbreviations and helpful tips for shaping and finishing.
Why You'll Love This Bunny Hand Puppet Amigurumi Pattern
I absolutely love this pattern because it combines simple amigurumi techniques with a plush yarn that makes the puppet incredibly soft and tactile. I enjoy how quickly the head and body take shape, making it a satisfying weekend project. The design is playful and customizable, so I often change colors or add little embroidered details for personality. Sewing the ears and indenting the eyes always brings the bunny to life, and I love that moment when the face becomes expressive. This pattern is a joy to make and always makes a sweet handmade gift.
Switch Things Up
I love customizing this bunny by changing yarn colors; try pastel tones for a nursery-friendly version or bright hues for a playful toy.
You can make the puppet larger by using a thicker plush yarn and a larger hook, or smaller by switching to thinner yarn and a smaller hook.
I often swap safety eyes for embroidered eyes to make the puppet baby-safe and give a softer look.
Try adding tiny crocheted accessories like a scarf, bow or hat to give your bunny personality and seasonal flair.
For a more poseable puppet, I sometimes add a thin wire to the ears so they can be shaped and positioned.
I recommend experimenting with facial placement — moving the eyes or changing the nose position subtly alters the expression and character.
Make matching sets in different sizes to create a family of bunnies perfect for playsets or gifts.
You could also use fuzzy eyelash yarn for extra dramatic eyelashes or metallic thread for a little sparkle on accessories.
If you want stitched details, try backstitch embroidery for eyebrows or a satin stitch for a plush nose finish.
I sometimes shorten the body by a couple of rounds for a more compact puppet, which is great if you want a finger puppet-style version.
Common Mistakes & How to Fix Them
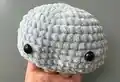
✗ Placing safety eyes too high or low will change the face expression; check placement between rounds 10 and 11 and count 9 single crochets between eyes before fixing them.
✗ Overstuffing the head causes a misshapen form and difficulty closing the hole; stuff gradually and firmly but leave room to pull the yarn through final loops when closing.
✗ Forgetting to leave long tails for sewing ears and body leads to short ends during assembly; always leave the sewing tail as instructed and secure it before cutting.
✗ Skipping stitch counts after increases or decreases results in uneven shaping; count stitches at the end of each round, especially after inc/dec rounds, to maintain symmetry.
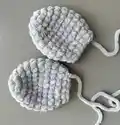
✗ Sewing ears without folding and positioning leads to uneven placement; fold each ear in half then quadruple as directed and pin 1-2 cm apart before sewing to the head.
✗ Not tightening the indent eye threads enough will leave shallow eyes; when indenting, pull both threads firmly so the eyes sink evenly, tie a secure knot and hide the tail.